Digitalocean
DigitalOcean is one of the most popular cloud service providers today. DigitalOcean was one of the first companies to make cloud servers easier for everyone. With DigitalOcean, you get a full package with specific RAM, CPU, bandwidth, and storage with a specific price tag. It is easier to understand for people who do not have any experience in the field.
DigitalOcean integration will help you automate the droplet creation and deletion process. It will eliminate the process of going to DigitalOcean, creating a droplet, waiting for credentials, and submitting those credentials to ServerAvatar for configuration. You also do not have to worry about all the options that ServerAvatar requires you to select, like the operating system.
With DigitalOcean integration, you can easily create and connect the server in one step. In this tutorial, I will show you how to integrate your DigitalOcean account with your ServerAvatar account.
Step 1: First, log in to the ServerAvatar Account.
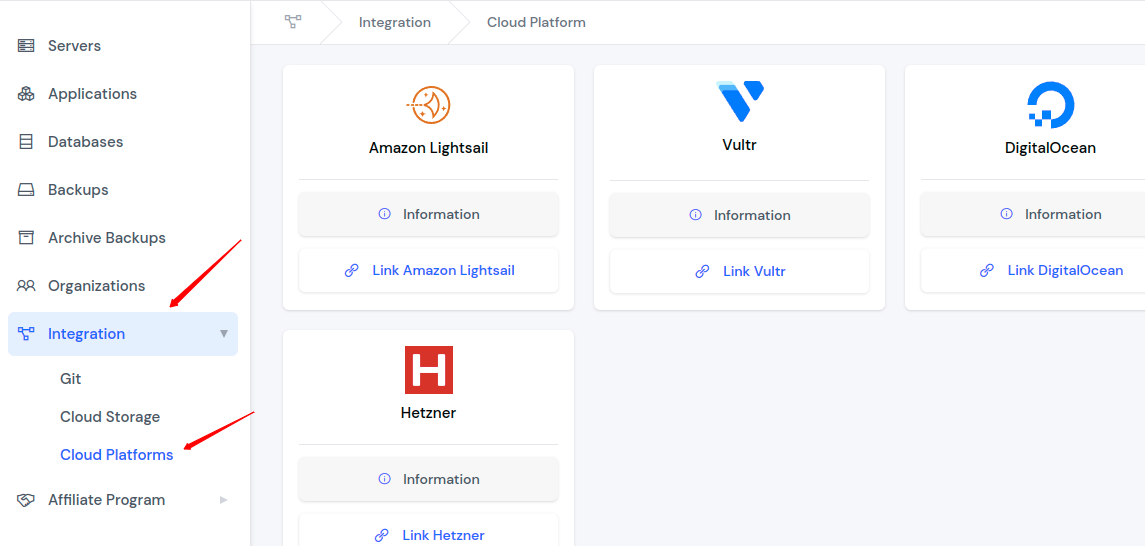
Step 2: Now, you will see the option Integration on the left-hand sidebar of the ServerAvatar dashboard. Click on Integration, then select Cloud Platforms.
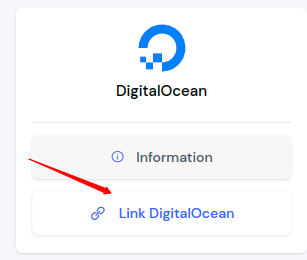
Step 3: You need to click Link DigitalOcean.
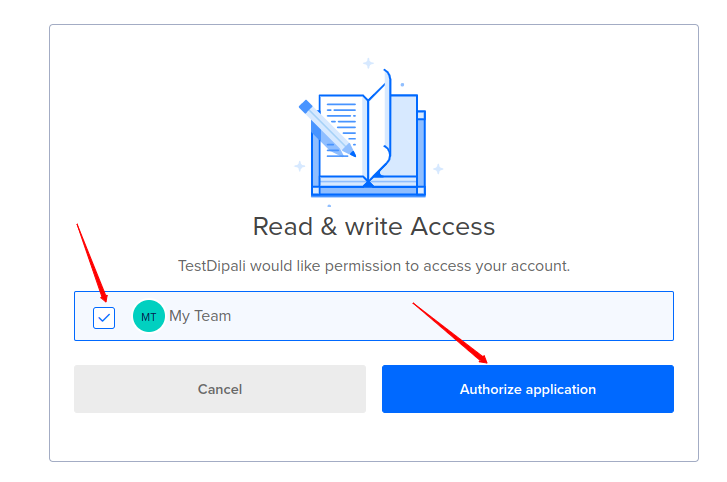
Step 4: If you are not logged in to your Digitalocean Account, It will first ask you to log in to your Account. Once you are in, You will see a screen like the following image. Select the Account and click on the Authorize application button. It will authorize ServerAvatar to create and delete servers in your Digitalocean Account.
Now your Digitalocean Account is connected with ServerAvatar.