Manage Roles and Permissions in an Organization
Manage Roles and Permissions in Organization
Roles and permissions are essential for managing users' access and permissions in an organization. ServerAvatar provides an easy-to-use interface to create and manage roles and permissions in an organization.
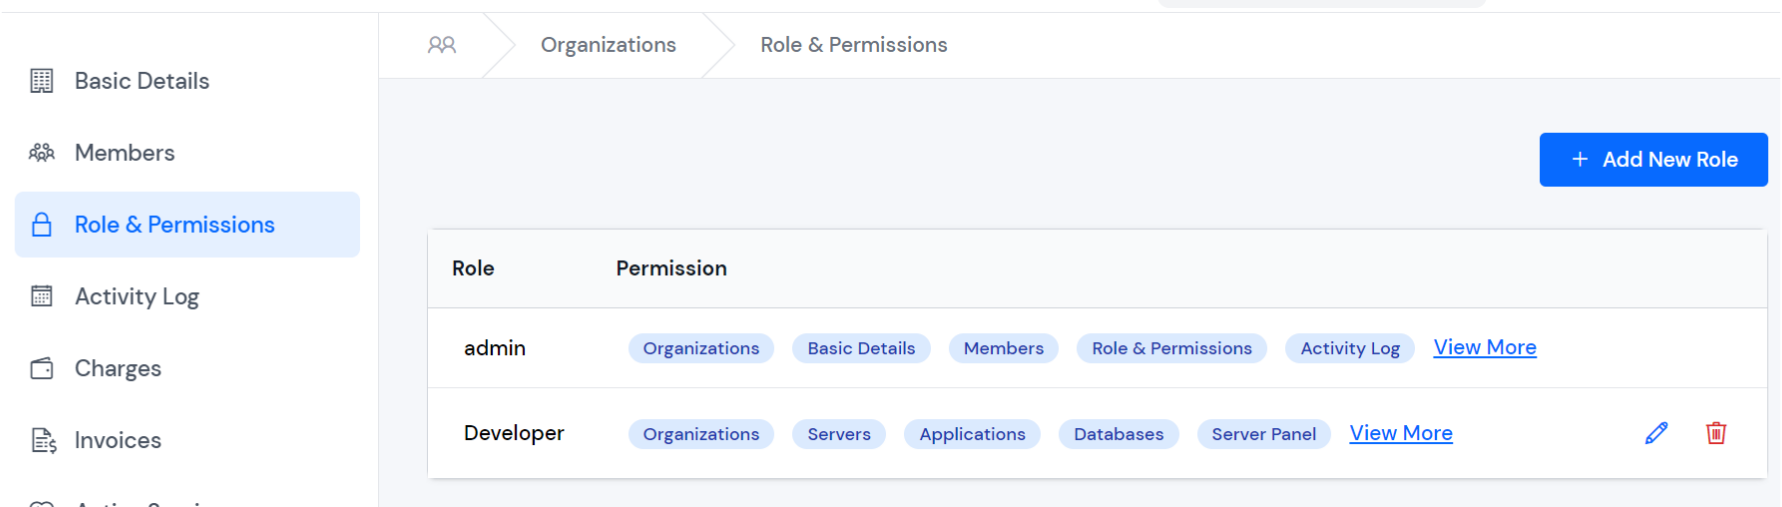
Add New Role
Step 1. Login to your ServerAvatar account and navigate to your organization.
Step 2. Click on the Roles & Permissions tab in the organization dashboard.
Step 3. Click on the Add New Role button.
Step 4. Enter a name for the new role in the Role Name field.
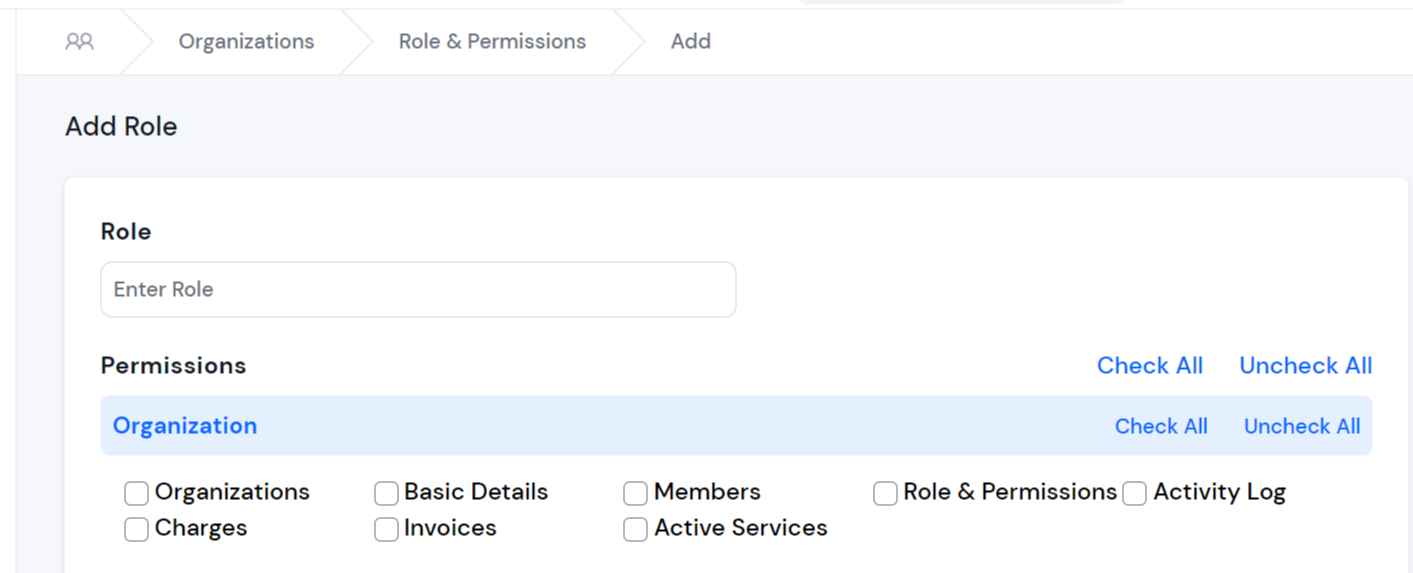
Step 5. Choose the permissions for the role from the list of available permissions.
Step 6. Click on the Save button to create the new role.
Edit Role
Step 1. Login to your ServerAvatar account and navigate to your organization.
Step 2. Click on the Roles & Permissions tab in the organization dashboard.
Step 3. Click on the Edit button next to the role you want to modify.
Step 4. Modify the role name and/or permissions as required.
Step 5. Click on the Save button to update the role.
Delete Role
Step 1. Login to your ServerAvatar account and navigate to your organization.
Step 2. Click on the Roles & Permissions tab in the organization dashboard.
Step 3. Click on the Delete icon button next to the role you want to delete.
Step 4. Confirm the deletion by clicking on the Delete button again in the confirmation prompt.
Assign Roles to Members
Step 1. Login to your ServerAvatar account and navigate to your organization.
Step 2. Click on the Members tab in the organization dashboard.
Step 3. Click on the Edit button next to the member you want to assign a role to.
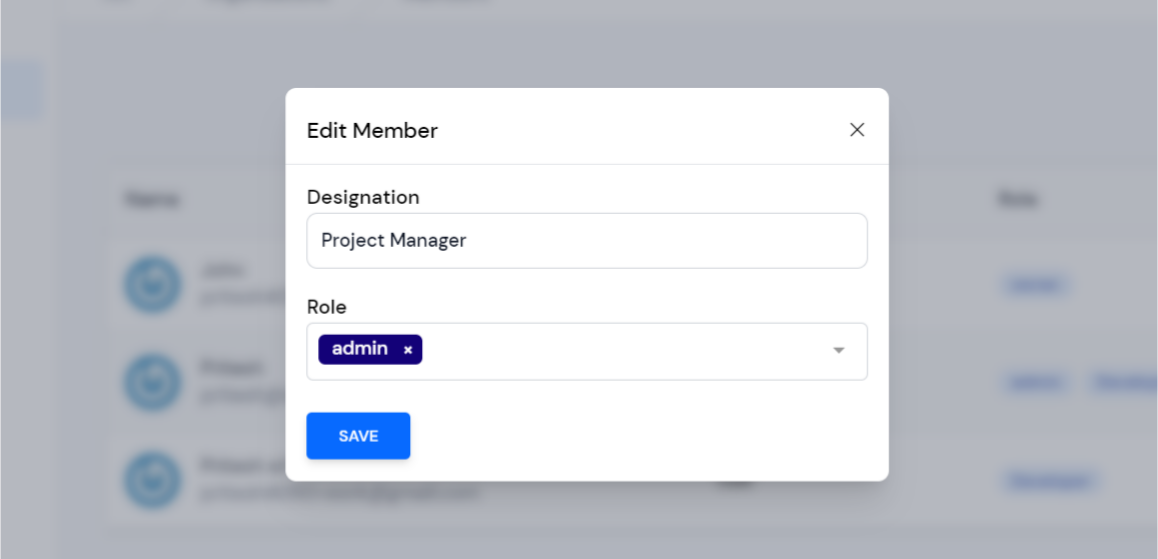
Step 4. Select the role from the Role drop-down list.
Step 5. Click on the Save button to update the member's role assignment.