Site Migration
The “Site migration” option on the server panel allows you to migrate sites among the servers managed with ServerAvatar. It means that if you want to migrate a site from one server to another, You have to select the site and the destination server.
The Server to Server migration is completely automatic!
Once the site is migrated, You have to update the IP address of your domain in the DNS zone file, and your site is ready to be served from the new Server!
Let’s see how to migrate a site in ServerAvatar.
Step 1: First, Log in to the ServerAvatar Account.
Step 2: Click on the Server Dashboard button.
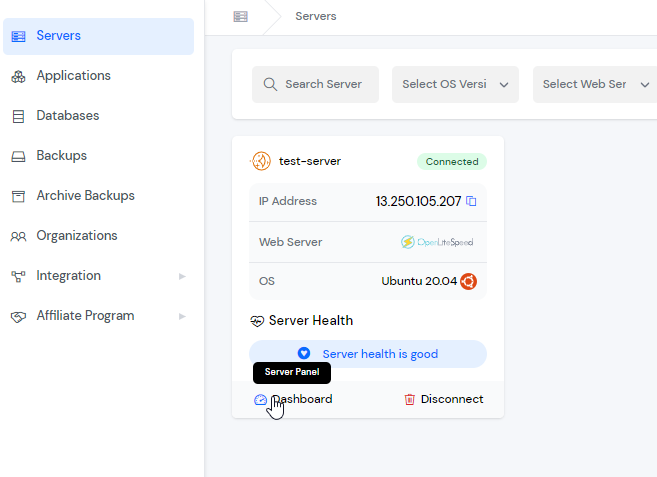
Step 3: You will see the option Site Migration on the left-hand sidebar of the Server Panel. Click on “Site Migration”.

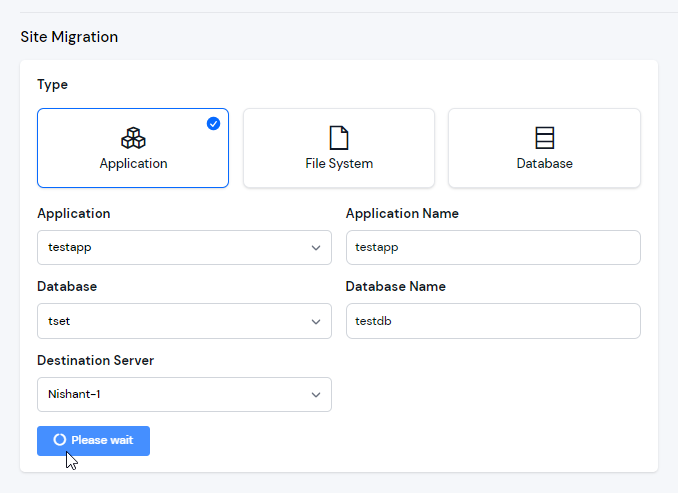
Step 4: You will see the Site Migration form like the below image.

Step 5: You can select Type, Application, Database, and Destination Server for site migration. Then click on the “Migrate” button.
Now, you can see your site migration record like the below image.

After that, check your clone application in the destination Server.