Adminer is an open-source database management tool known for its comprehensive functionality and ease of use. It allows organizations to effectively manage and administer various database systems with features for querying, data manipulation, and user management. With its user-friendly interface and flexible capabilities, Adminer enables effective database management without needing extensive technical knowledge. When considering hosting Adminer DB, deploying it on Hetzner is a dependable choice due to its scalable infrastructure and user-friendly deployment solutions. ServerAvatar assists with Hetzner VPS and simplifies the deployment of the Adminer DB on the Hetzner platform through easy steps.
Create a Server in Hetzner
Getting Started with Hetzner:
Hetzner provides a range of services like dedicated hosting, virtual private servers, colocation services, and domain registration. Hetzner is known for having reliable systems and competitive prices in web hosting. Its services work well for both individual users and businesses that need strong hosting options.
Step 1: Login to Hetzner Cloud Console
- Go to the Hetzner Cloud website and sign in using your credentials.
Step 2: Create a New Project (Optional)
- If you don't have an existing project, create a new one by clicking on the New Project button.
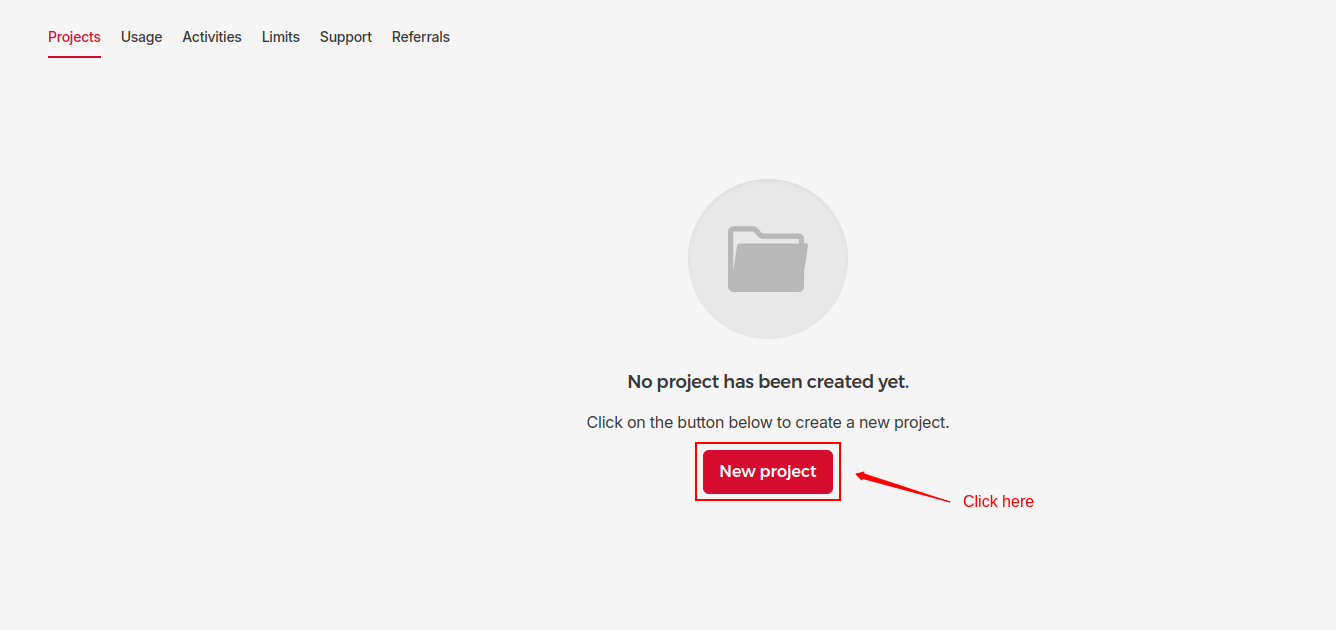
- Enter a name for your project and click Add Project.

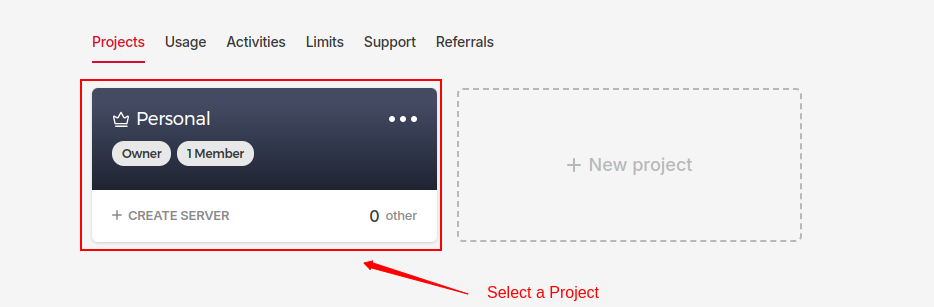
Step 3: Select a Project
- Select the project in which you wish to create your server.
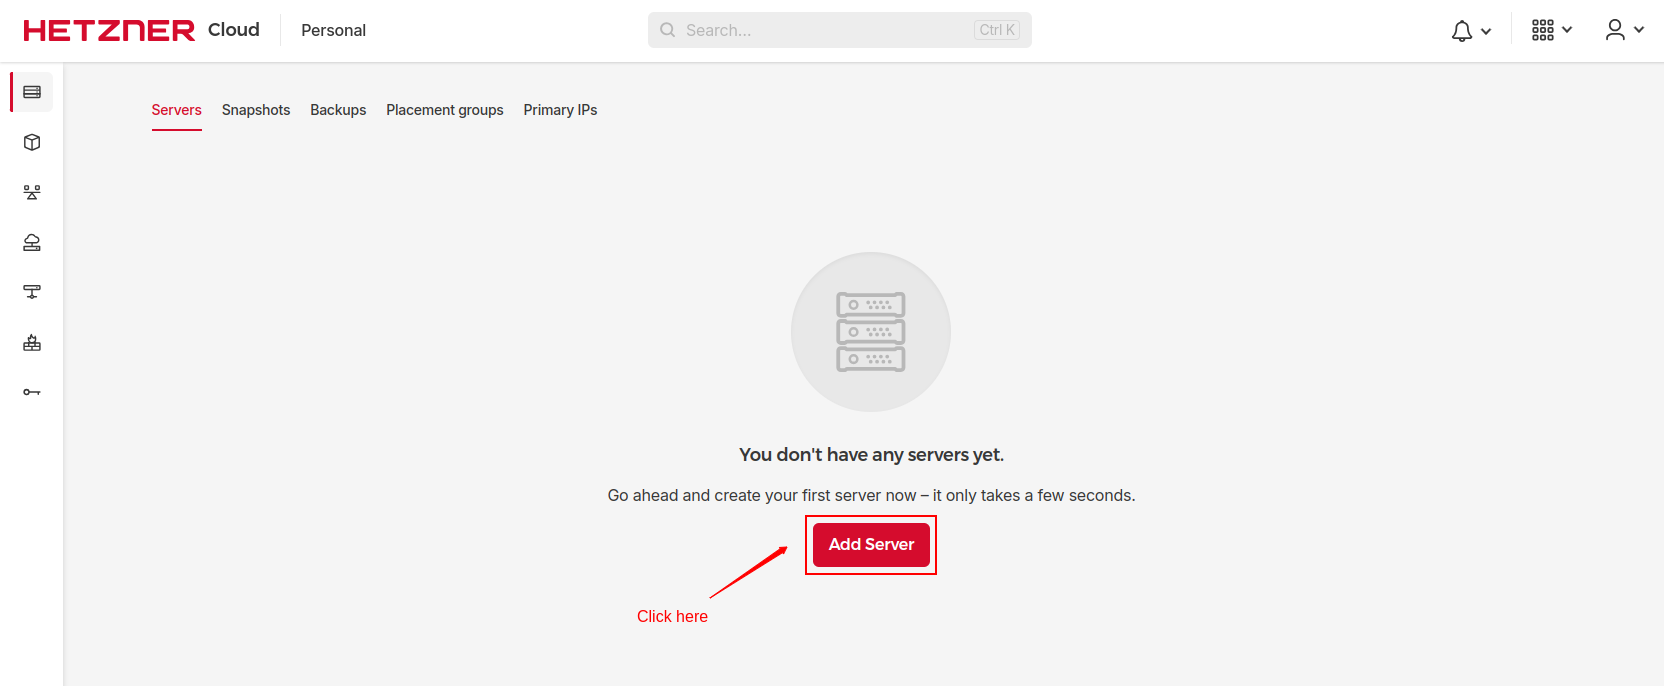
Step 4: Create a New Hetzner Cloud Server
- Navigate to the Servers sub-menu and click on Add Server to begin creating your server.
Step 5: Configure your server
-
Select a Location: Select the data center location where you want to deploy your server. Choose the region that is closest to your target audience for better performance.

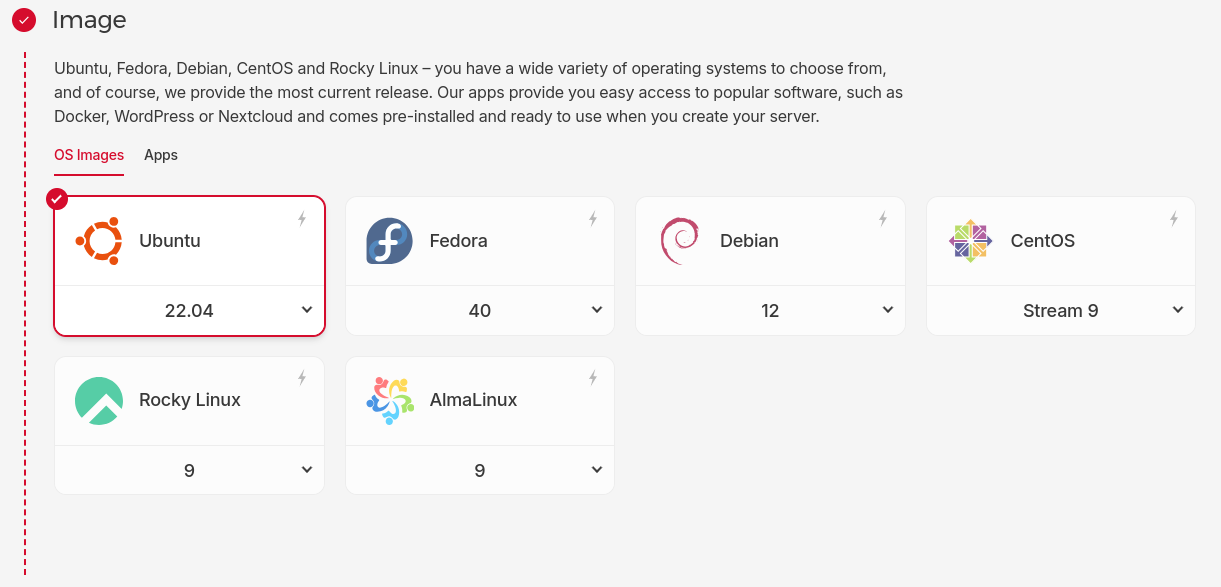
-
Select an Image: Generally, the Adminer DB requires Ubuntu 18.04 LTS or a later version for compatibility and support.ServerAvatar supports both Ubuntu 20.04 LTS and Ubuntu 22.04 LTS. Therefore, choose one of these supported operating systems.
-
Select a Server Type: Hetzner provides various plans with different configurations of CPU, RAM, and storage. Select the server type based on your requirements.
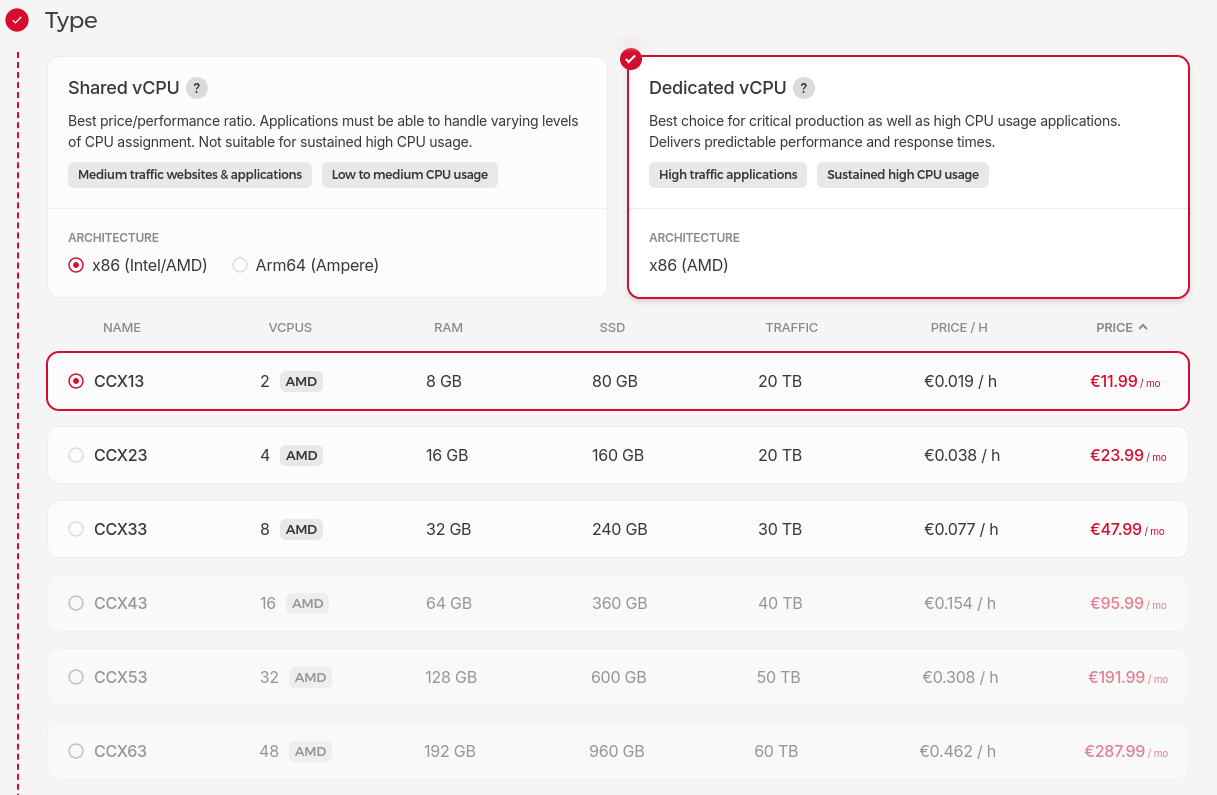
-
Select Networking: Select from three networking options for your server. Private networks allow you to securely connect servers within the same data center without going over the public internet.
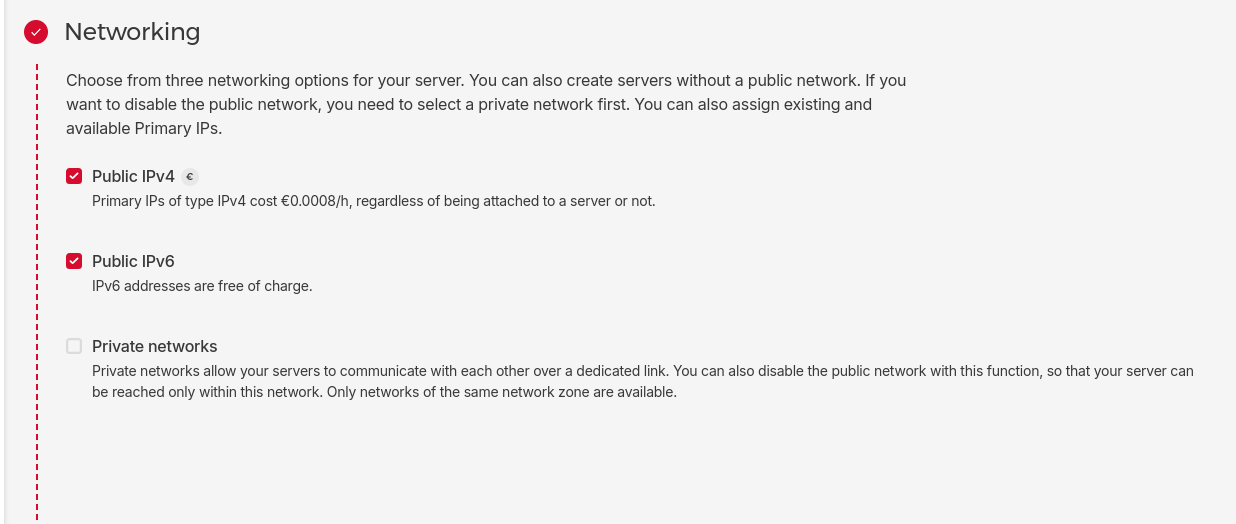
-
SSH Key or Root Password: Select an SSH Key if you want to authenticate with an SSH key. This method is recommended over using a root password for enhanced security. If you choose SSH key authentication, Hetzner will disable password-based authentication by default. Otherwise, you will receive the root password via email.
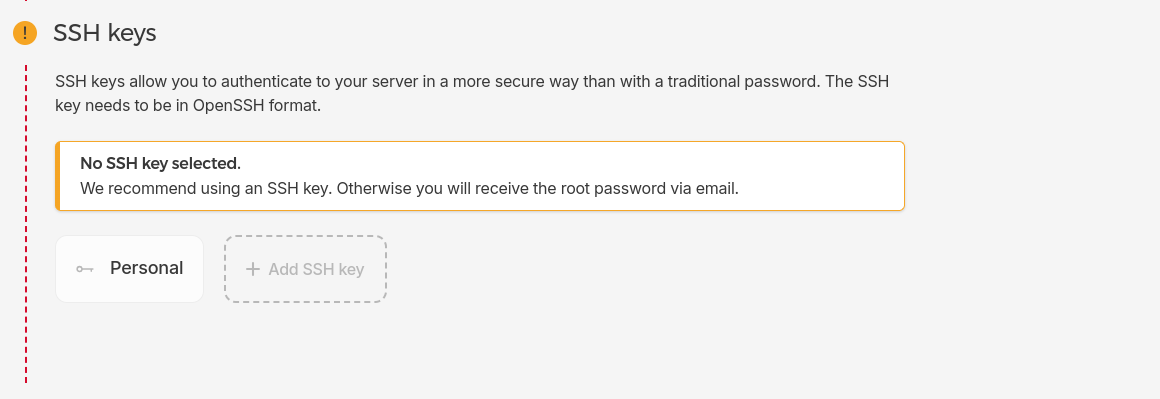
-
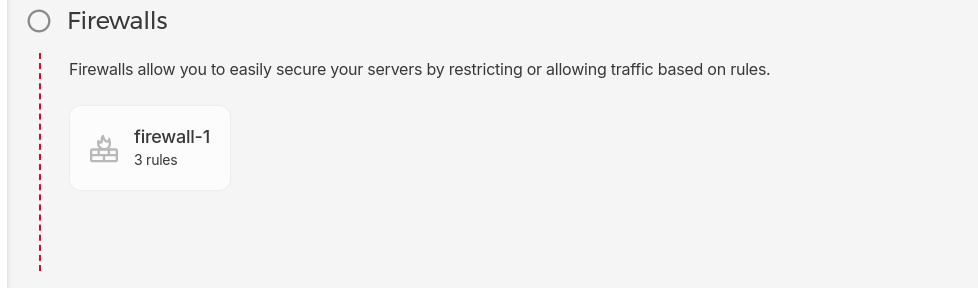
Add a Firewall Rule: Configure firewall rules to control incoming and outgoing traffic based on IP addresses, ports, and protocols for improved security.
- Additional Options (Optional): Configure additional options such as Backups, Placement Groups, Volumes, Labels, and Cloud Config as per your Requirements.
-
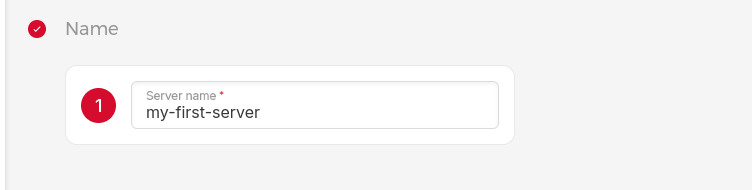
Give a Server Name: Enter a server name for easy identification.
-
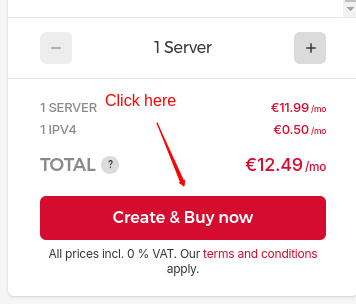
Finalize and Create: Review your configuration settings to ensure that everything is configured correctly. Click on the Create & Buy Now button.9. Finalize and Create: Review your configuration settings to ensure that everything is configured correctly. Click on the Create & Buy Now button.
Step 6: Access Your Server
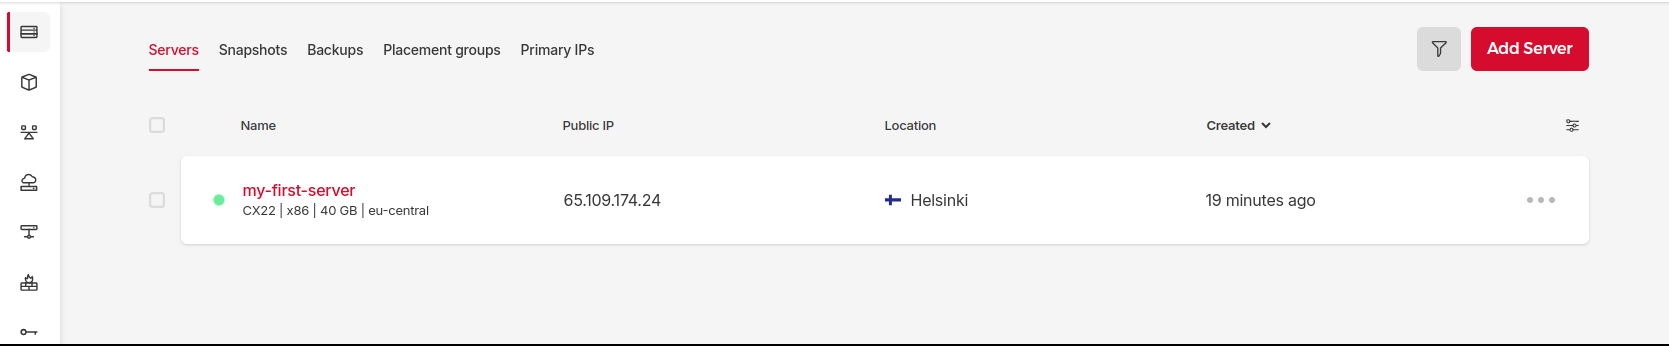
- Once the server is deployed, it will appear on your Hetzner Cloud dashboard. Use the provided IP address and SSH key (if configured) to access your server via SSH. Now, You can connect your Server with ServerAvatar for Server management.
Initial Server Configuration
The Initial server configuration includes the installation and configuration of various packages required to host your website. Usually, You have to write commands and modify configuration files. Luckily, With ServerAvatar, Your full server configuration and optimization can be automated.
Here are the three ways to automatically configure your server with ServerAvatar.
Connect a server using a direct method
- Login/Register to ServerAvatar account, click the Create button from the right side of the screen, and select Server from the dropdown.
- Select Direct Method in the serve connecting method section.
- Type the Server Name as per your choice.
- Select a Tech Stack as per your need. You can either select Apache, Nginx, OpenLiteSpeed or Node Stack.
- Select a Database: MySQL, MariaDB or MongoDB.
- Enable the toggle if you want to install the latest LTS version of node.js on your server.
- Select a Management plan and click the Connect Now button.
- You’ll see the command on your screen. Login to your server using an ssh connection and execute that command as a root user.
- The server connection process will be started on your ServerAvatar account after executing the command.
Connect a server using integration
- Login/Register to your ServerAvatar account, navigate to the Integration tab from the sidebar of the panel, and access Cloud Platform from the dropdown.
- Now Select a cloud platform you want to link with ServerAvatar.
- The popup form will appear on your screen. Enter details to link your cloud provider account. The integration method is different based on the cloud provider you select.
- You can integrate five different cloud provider platforms with ServerAvatar, which is-
Check the above link of cloud platforms to know more about integrating cloud platforms with ServeAvatar.
Connect a server using commands
Step 1. Login to your server using root user
Once you create a server as per your requirements, connect to your server using an ssh connection and execute the below three commands as a root user in your server console area.
wget https://srvr.so/install
chmod +x install
./install
Step 2. Select a web server
It will ask you which web server you would like to install on your server: Apache, Nginx, OpenLiteSpeed or Node Stack. Type anyone that you would like to install on your server and hit the enter button.
Step 3. Claim your server
Completing the process will give you a link to claim your server.
Open the link on your browser to access the ServerAvatar server panel.
Install and Setup Adminer DB on Cloud using ServerAvatar
Adminer - Database management using Adminer With ServerAvatar
What Is Adminer?
Adminer is a PHP-based, Free, and Open Source Database Management Tool. It is very simple to deploy on your server and easy to use. Here, you only need to upload a single PHP file, point your browser to it, and simply click the login button.
Requirements:
- PHP: Ensure you have a PHP 5 or higher version installed.
Use Cases:
You can easily create, edit, and delete databases, tables, and rows, as well as execute SQL queries and view results in a clear and concise format. Adminer supports a wide range of database systems, including MySQL, MariaDB, PostgreSQL, SQLite, MS SQL, Oracle, etc.
Step-by-Step Installation Guide:
Let’s Configure Adminer with ServerAvatar.
First, you have to go to the following URL.
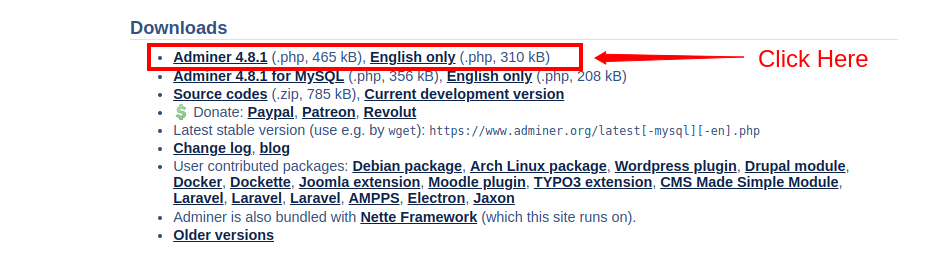
Step 1: Download the Adminer
Clicking on the link will take you to the official site of Adminer. Navigate to Downloads section and click on the version of Adminer according to your need.
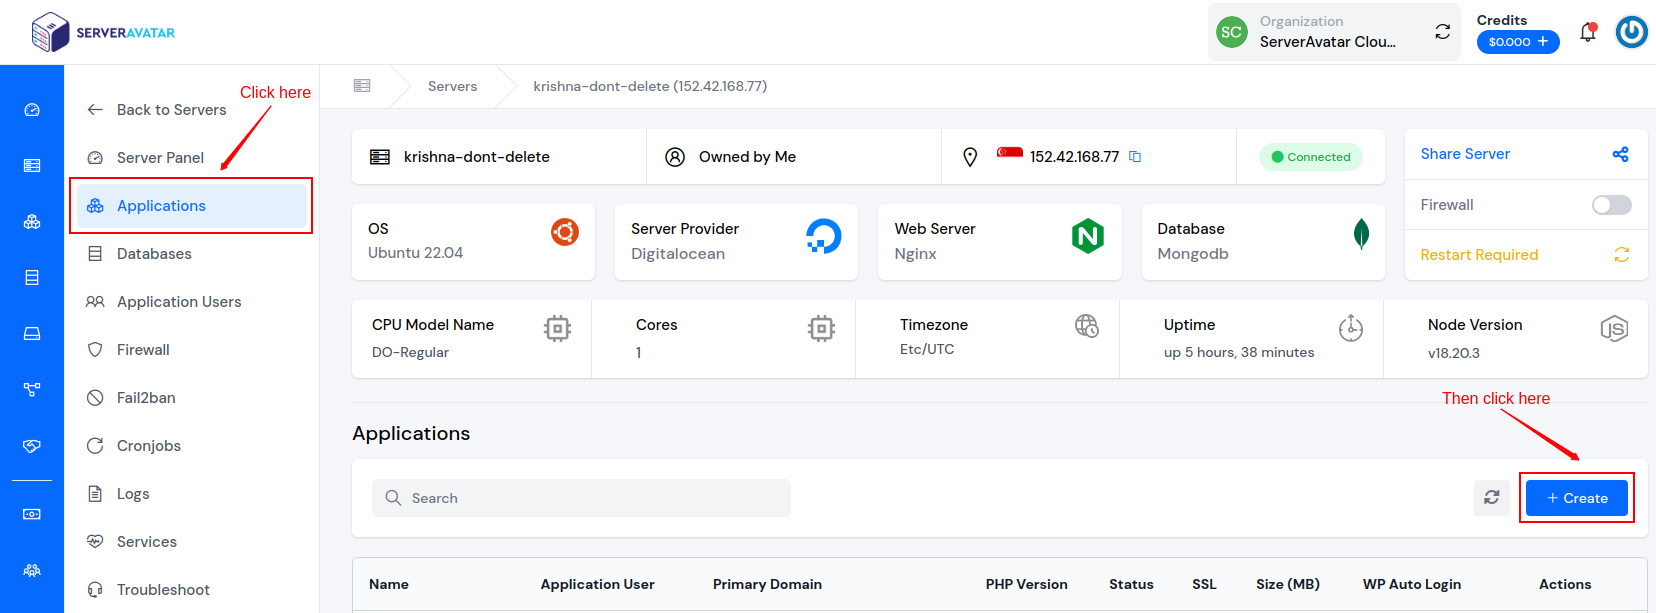
Step 2: Create a GitHub application
Start by creating a GitHub application using ServerAvatar. Go to the Applications tab on the server panel and click on the Create button as shown in the image below.
To proceed with the installation and deployment of Adminer, ensure you have met the prerequisites.
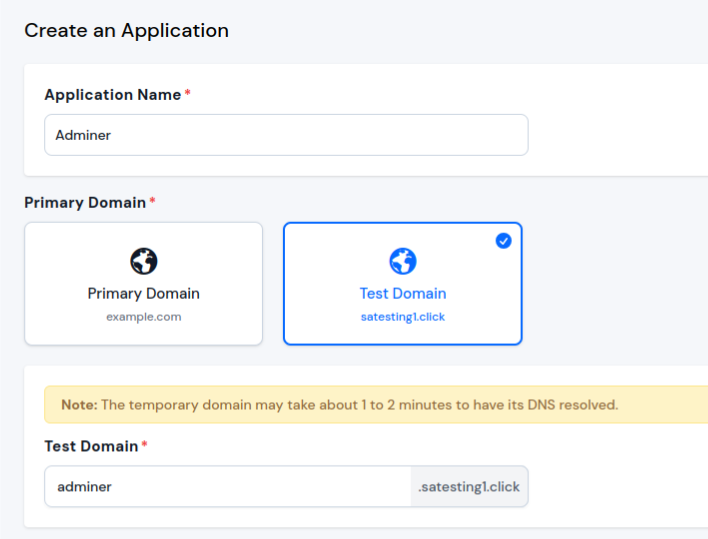
- Enter an Application Name of your choice.
- Specify a Domain (choose between a Test Domain or a Primary Domain).
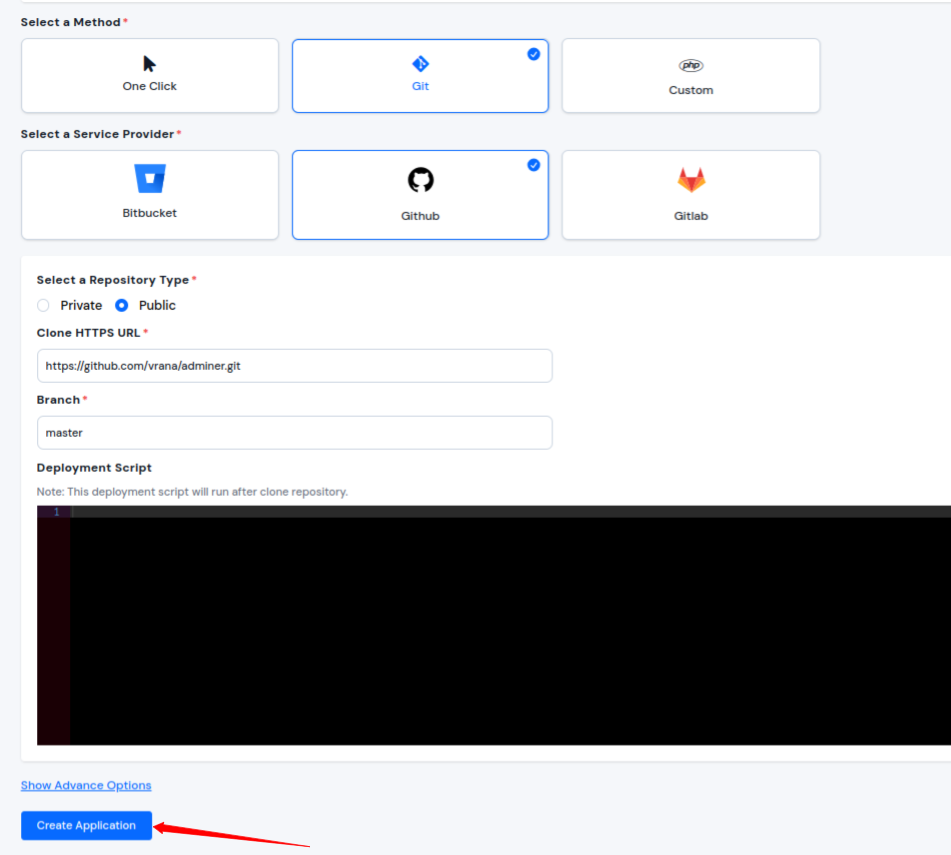
Now, Clone Adminer from the available public repository in Github. and then click on the Create Application button.
- Method: Git
- Service Provider: Github
- Repository Type: Public
- Clone HTTPS URL: https://github.com/vrana/adminer.git
-
Branch:
master
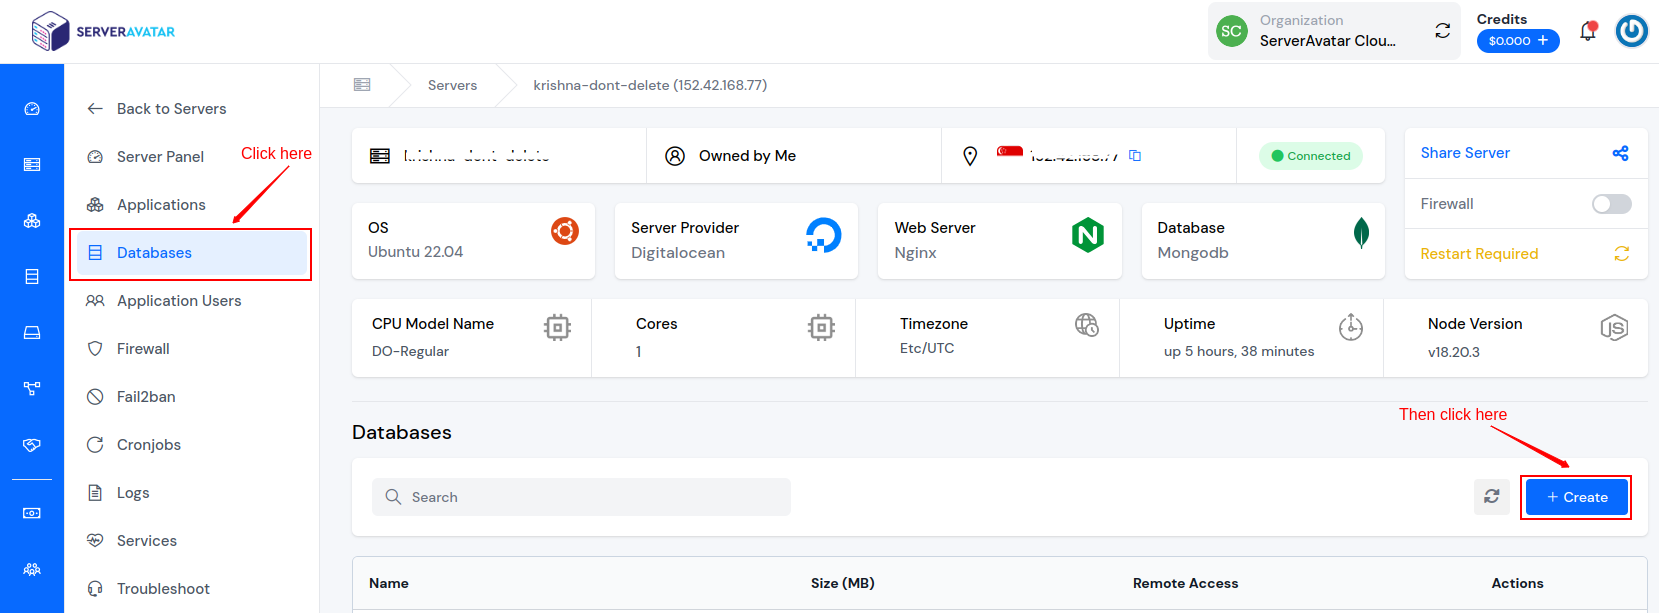
Step 3: Create Adminer Database
Go to the server panel, navigate to the Databases tab, and click on the Create button as shown in the following image.
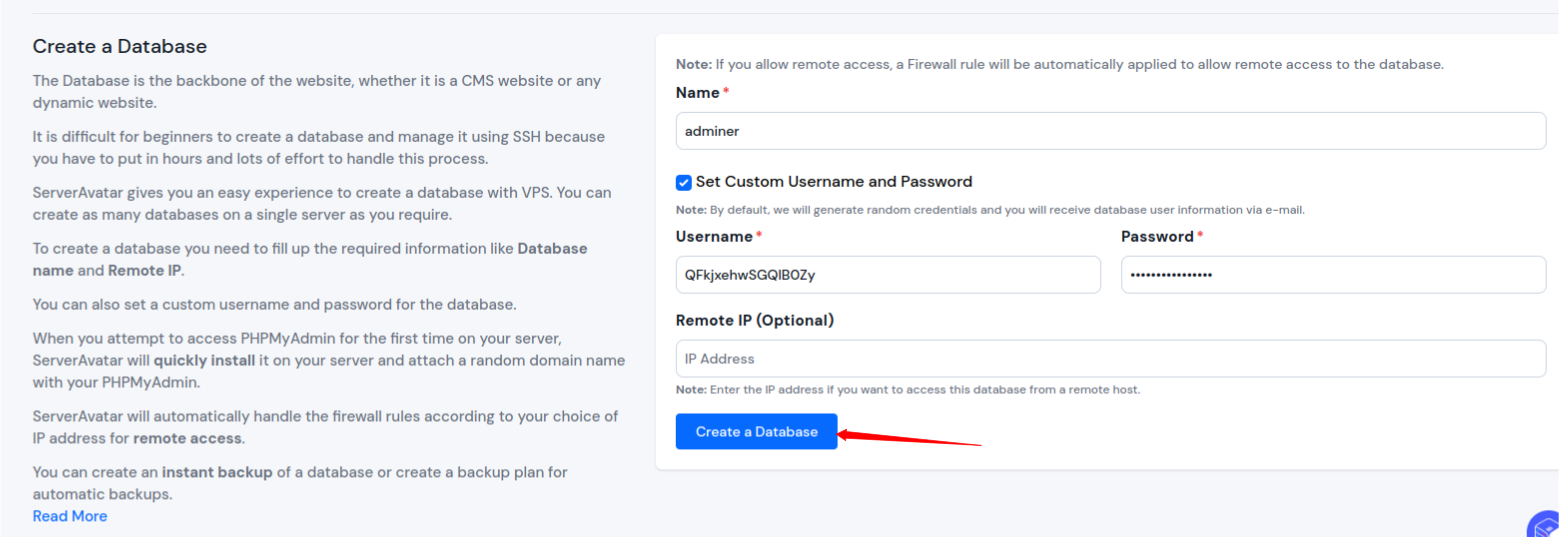
On the following screen, complete the database details, including:
- Database Name
- Database Username
- Database Password
Step 4: Upload Adminer File
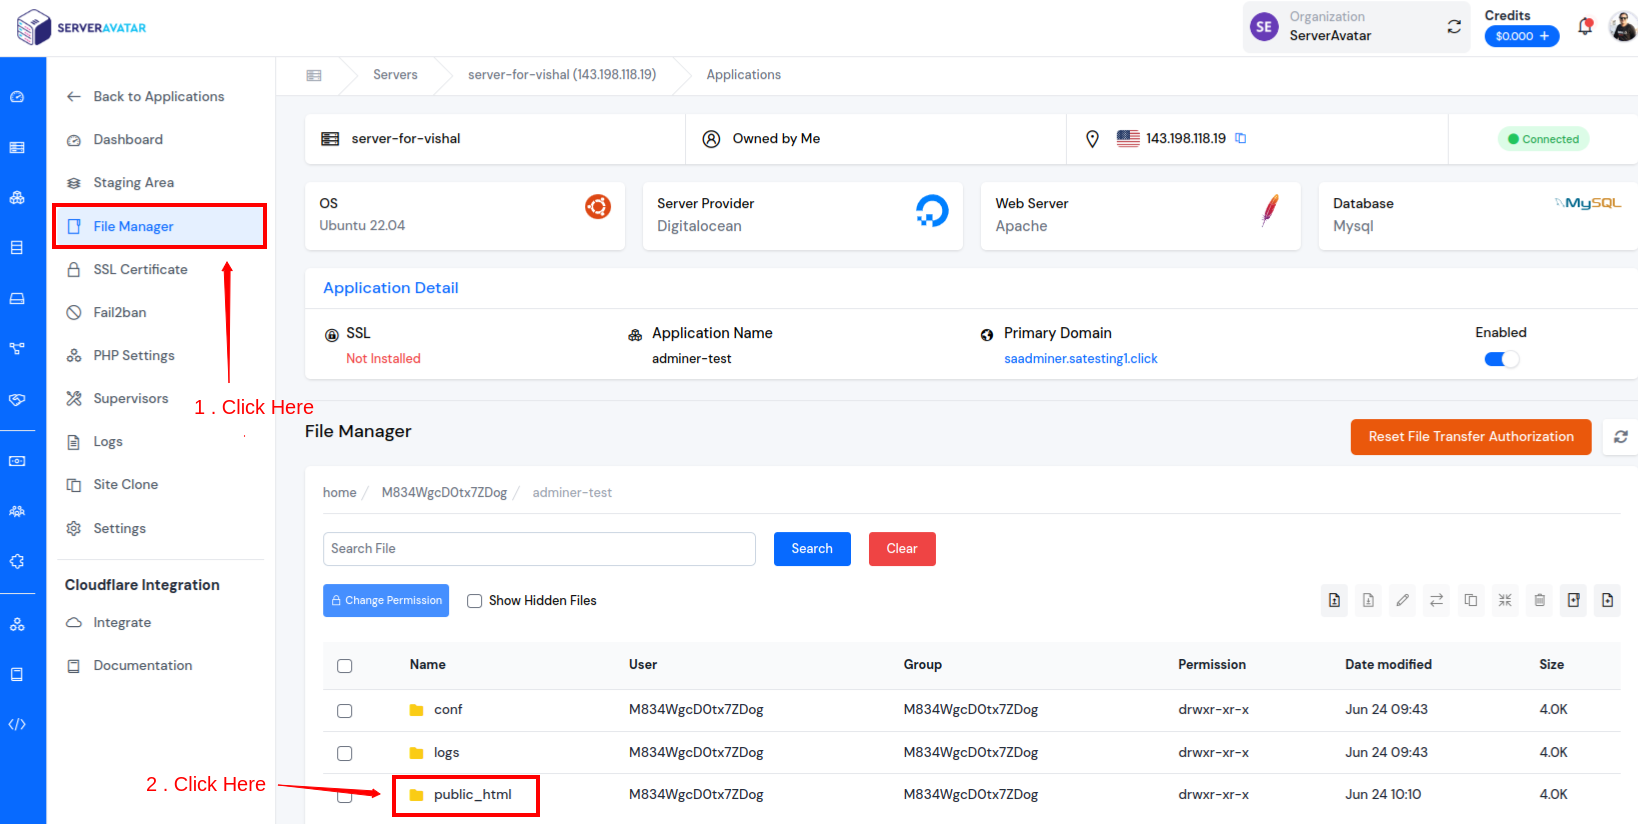
- Navigate to the Application Panel tab by clicking on the icon next to the application as shown in the below image.

- Now, go to the FIle Manager option and open the public_html folder.
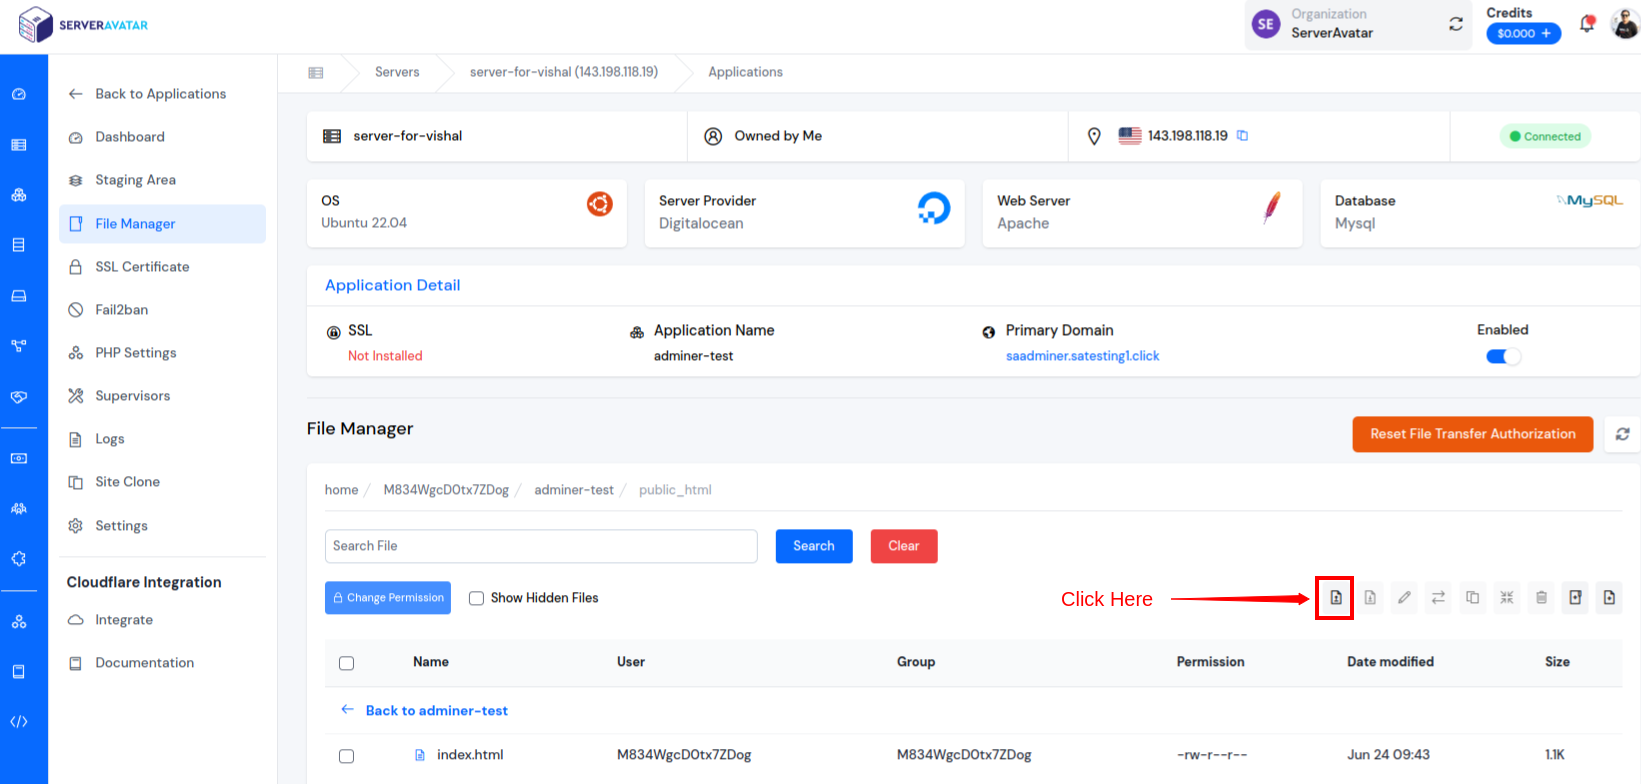
- Click the Upload icon and choose the previously downloaded Adminer file to upload it into the public_html folder.
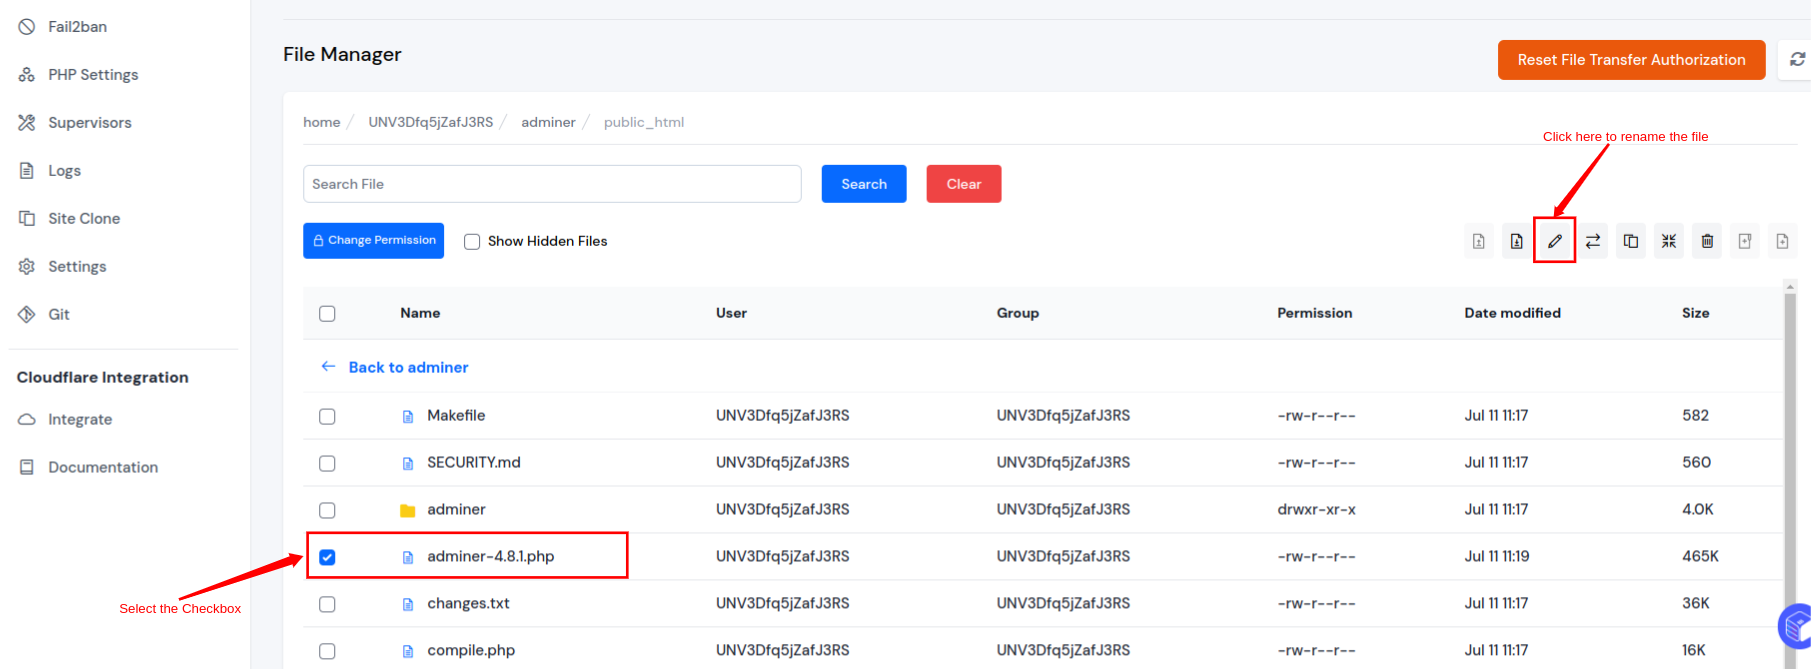
- You can see the Adminer file that you uploaded in the public_html directory as shown in the image below.
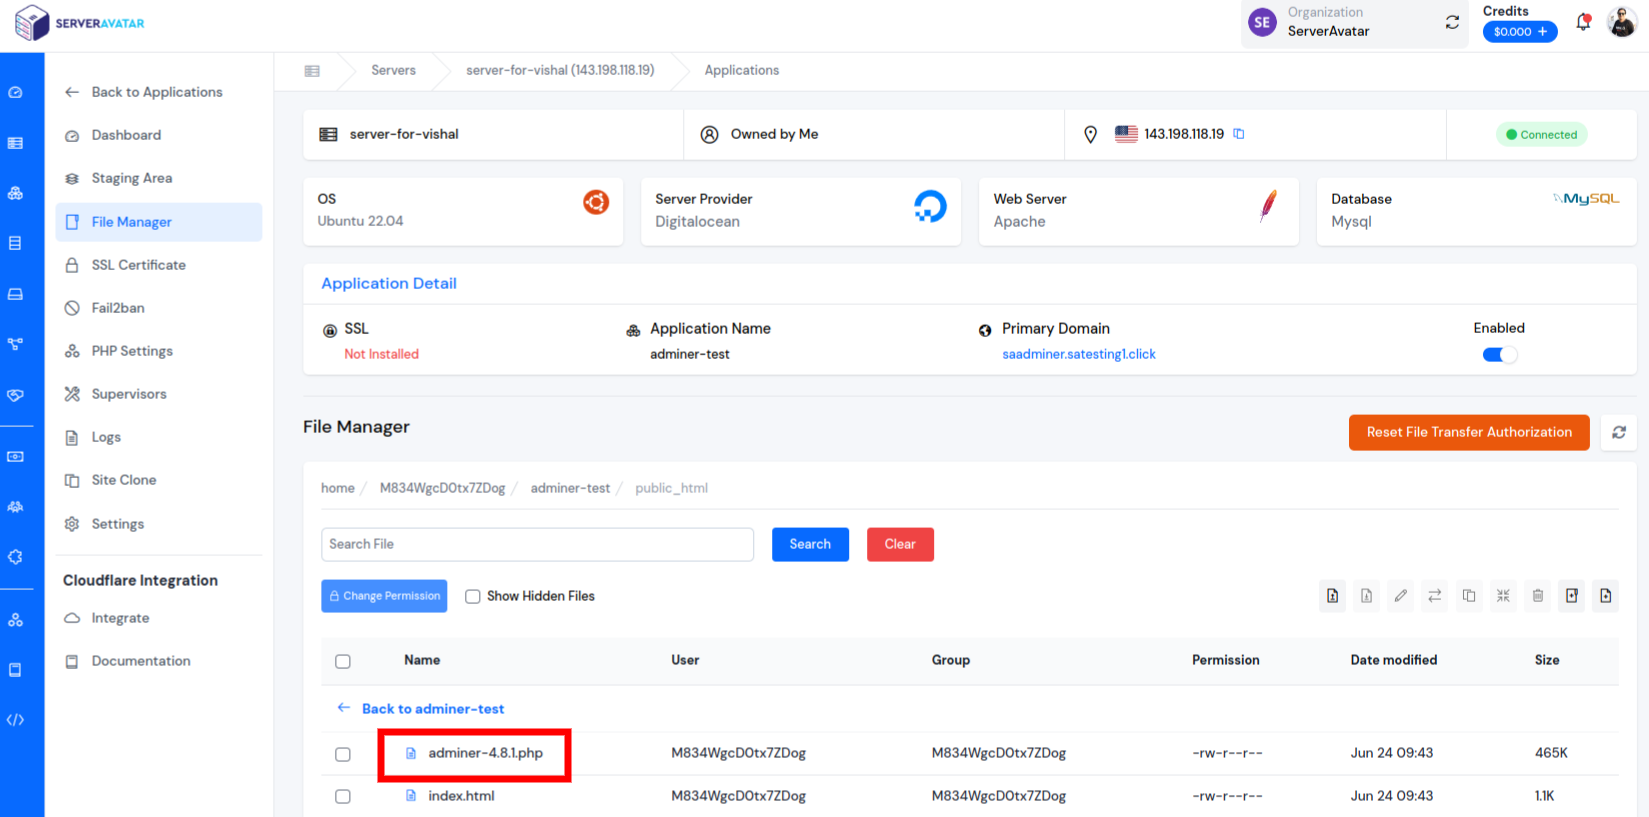
- Now, we need to rename the Adminer file that we uploaded. Select the checkbox next to the file and click on the rename icon, as shown in the image below. Rename the file to index.php.
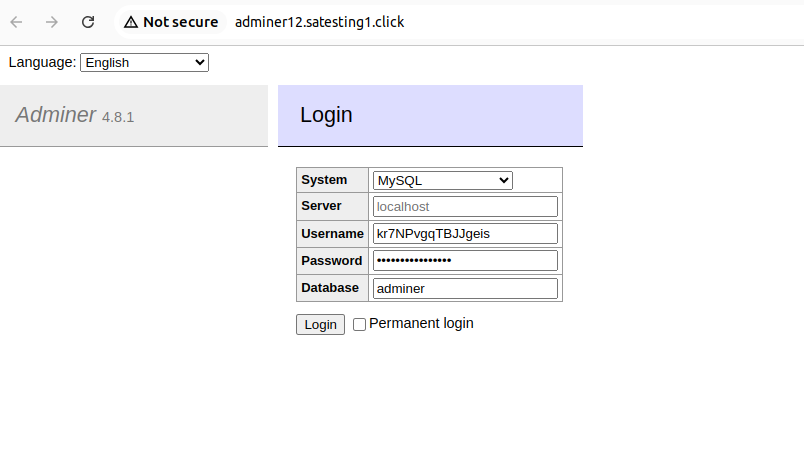
Step 5: Accessing the Adminer Database Homepage
- Now, to access the Adminer Database Homepage, open your application.
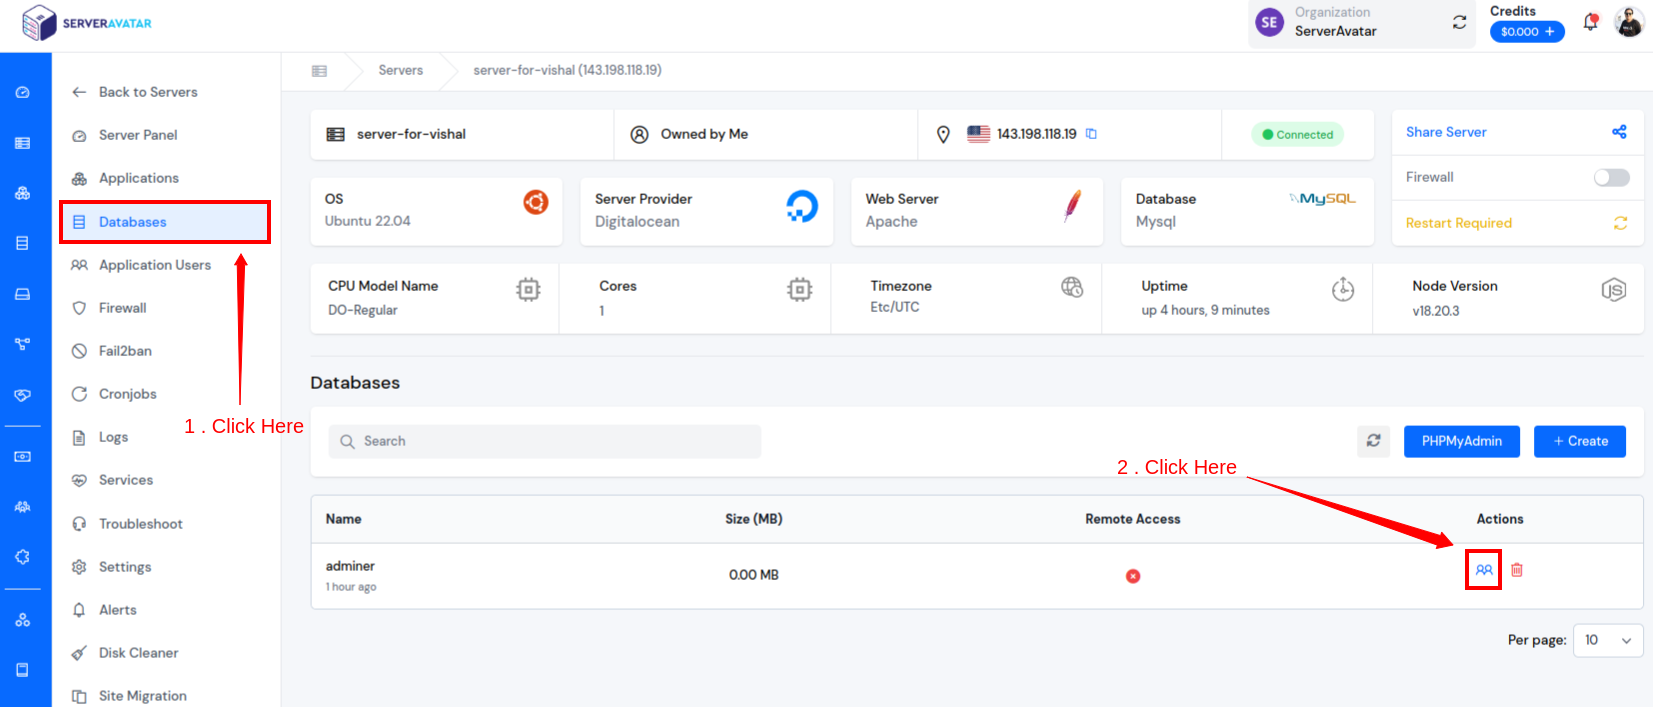
- To log in to your Adminer’s Database Homepage, you need to have your database Username and Password. Navigate to the Application Dashboard and click on the Databases option to get the database credentials.
- After navigating to the Databases Section, you have to click on the users icon as highlighted in the below image.
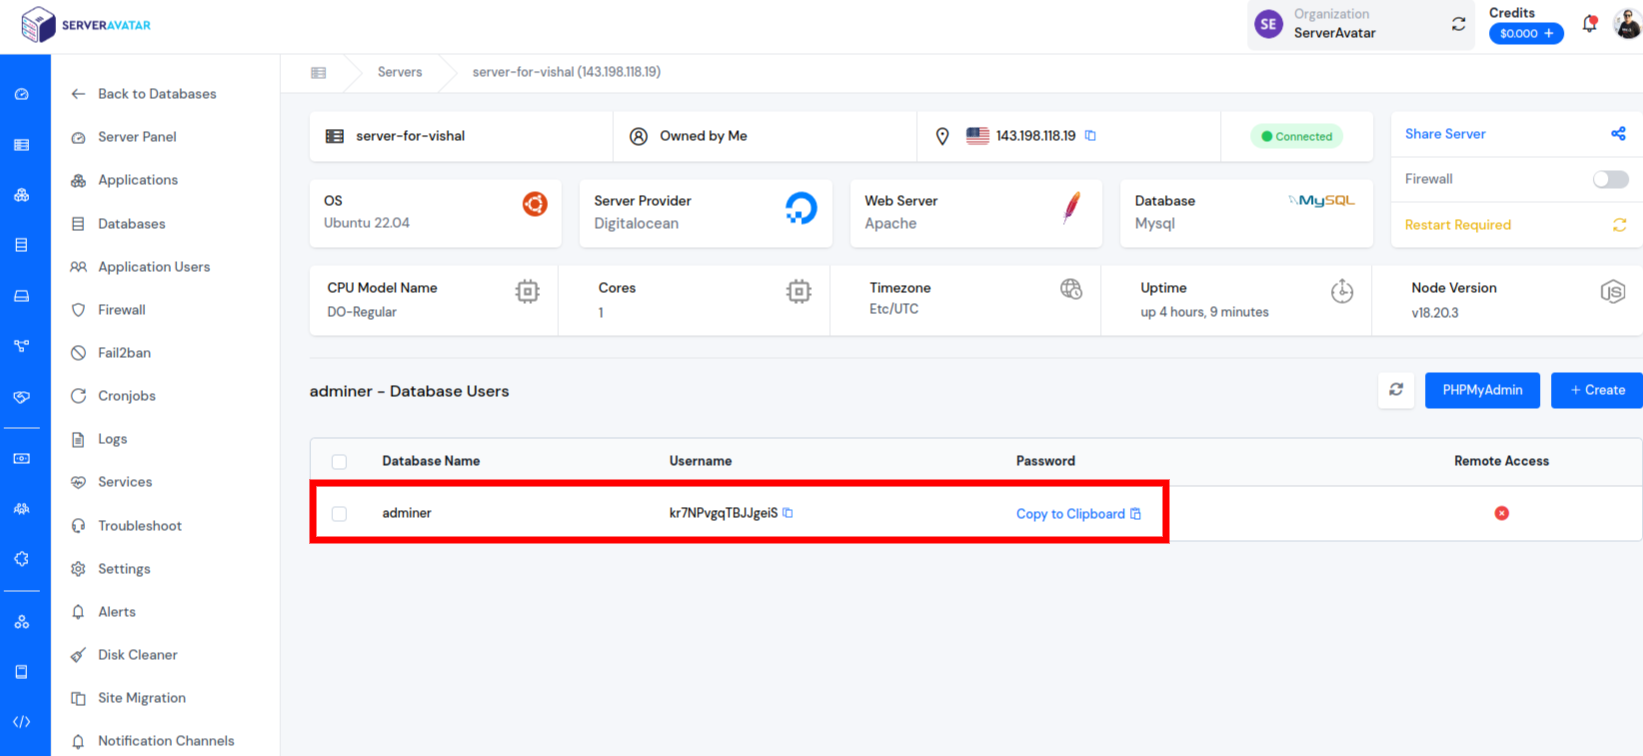
- After clicking on the user's icon, you will navigate to the database users page. You will get the database credentials from there.
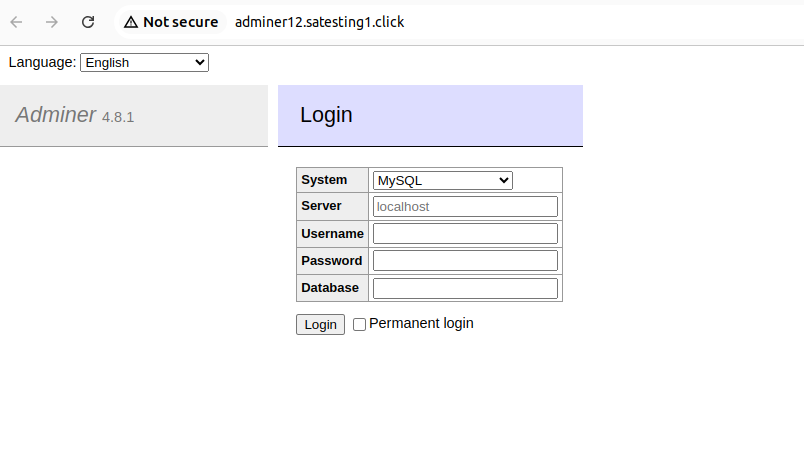
- Fill in the database information such as Database Name, Username, and Password on the login page of your Adminer as shown in the below image. After filling in the details click on the Login button.
- After successfully logging in, you will be able to see the dashboard.
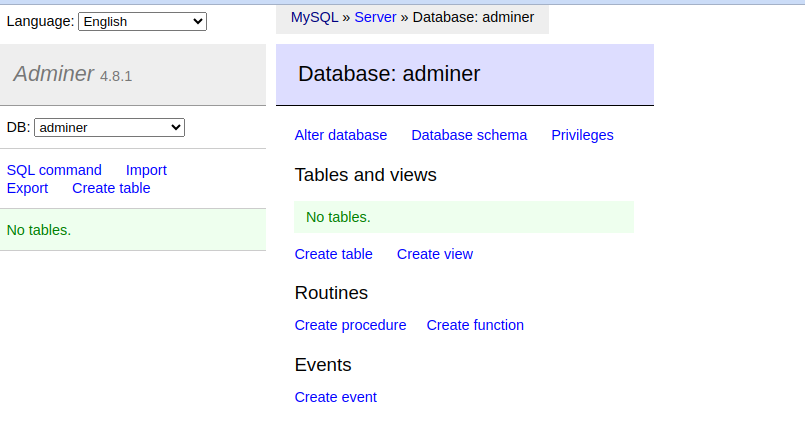
- Now you can perform various tasks such as creating tables, altering tables, dropping tables, inserting values into tables, updating values, and deleting values.
Conclusion:
- Adminer is a powerful, lightweight, and user-friendly database management tool that offers a wide range of features in a single PHP file.
- Its simplicity, efficiency, and support for multiple database systems make it an excellent choice for developers and administrators looking for an alternative to more complex tools.
- Whether managing a small personal project or a large enterprise database, Adminer offers extensive functionalities. By using Adminer you can experience the benefits of efficient database management.