Node-RED is a widely used open-source platform for building and managing complex automation workflows effortlessly. It allows users to visually create and coordinate flows for integrating various services and devices, making it suitable for applications from IoT to data processing tasks. Hosting Node-RED on SSD Nodes provides a dependable and scalable solution. SSD Nodes provide a wide range of instance types and configurations to match various performances with flexible deployment options. ServerAvatar simplifies the process by providing a clear, step-by-step guide to setting up your Node-RED on SSD Nodes VPS.
Create a Server in SSD Nodes
Getting started with SSD Nodes:
Discover how to create an account and set up a cloud VPS on SSDNodes, a top hosting provider. Follow our simple, step-by-step guide to get your account up and running quickly and easily, so you can start managing your hosting services today.
SSDNodes offers dependable and scalable hosting solutions to individuals and corporations because of its speed and affordability. They provide an infrastructure to host webpages, software, and other internet services effectively.
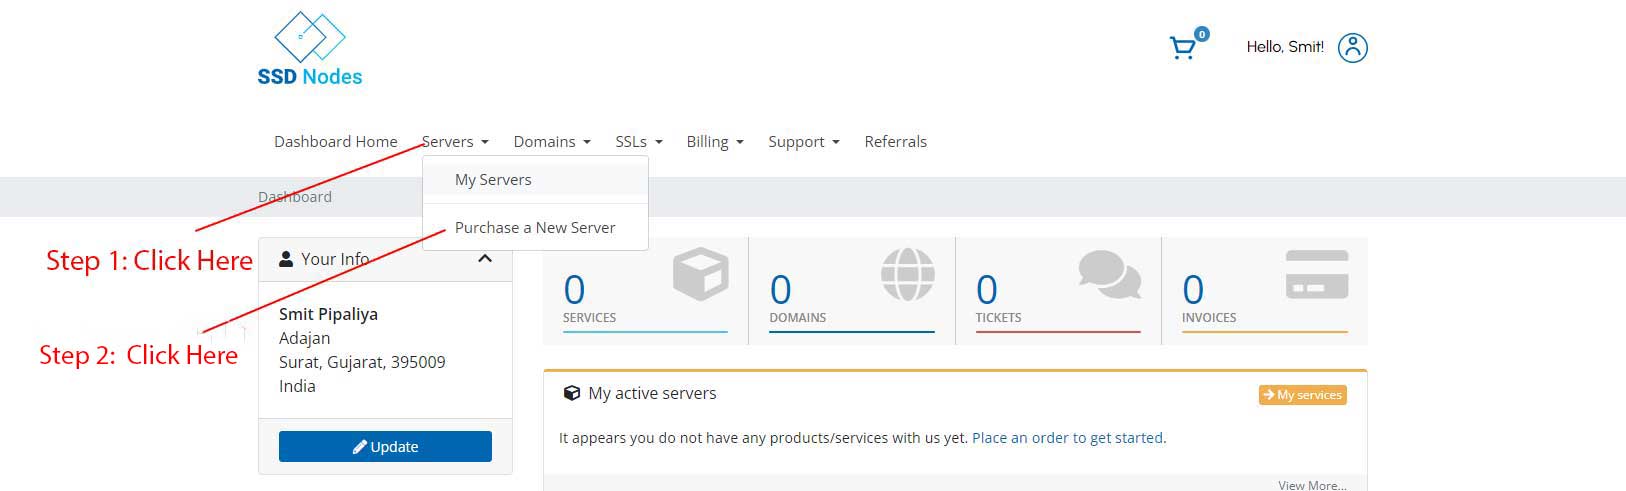
Step 1: Setup Cloud VPS with SSD Nodes
- First, log in to your SSD Nodes account and navigate to the Servers option. Next, click on Purchase a New Server from the dropdown menu.
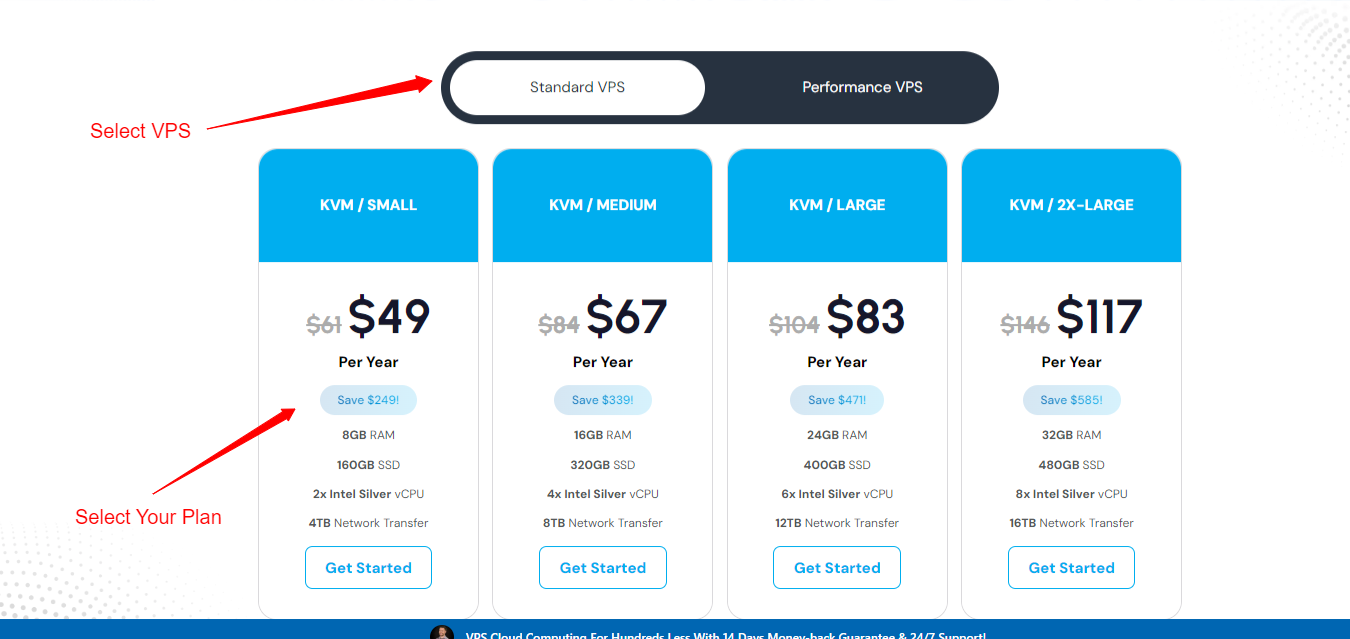
Step 2: Select the plan
- SSD Nodes Offer two Different VPS plans:
- Standard VPS
- Performance VPS
- You have to select a Plan according to your needs. After selecting your plan just click on Get Started.
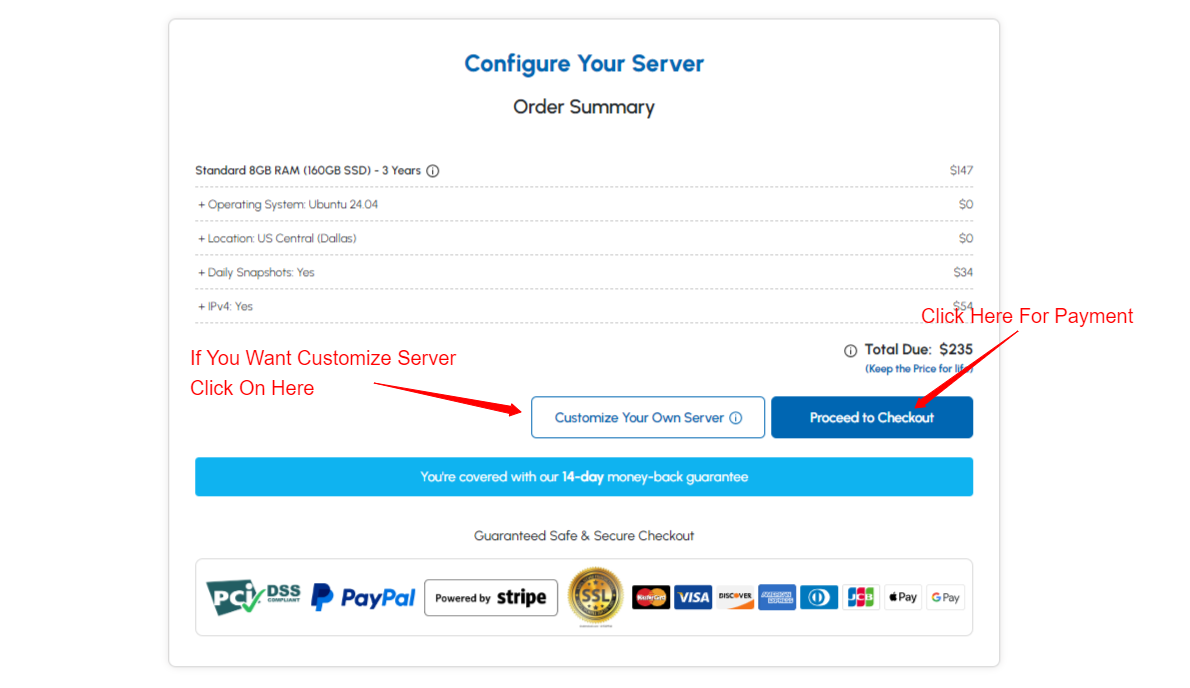
Step 3: Finalizing Your VPS Selection
- In the following step, You will see the summary of your selected VPS Plan. Click Proceed to Checkout if you are satisfied with the plan you have chosen, or select Customize Your Own Server to modify your VPS server according to your requirements.
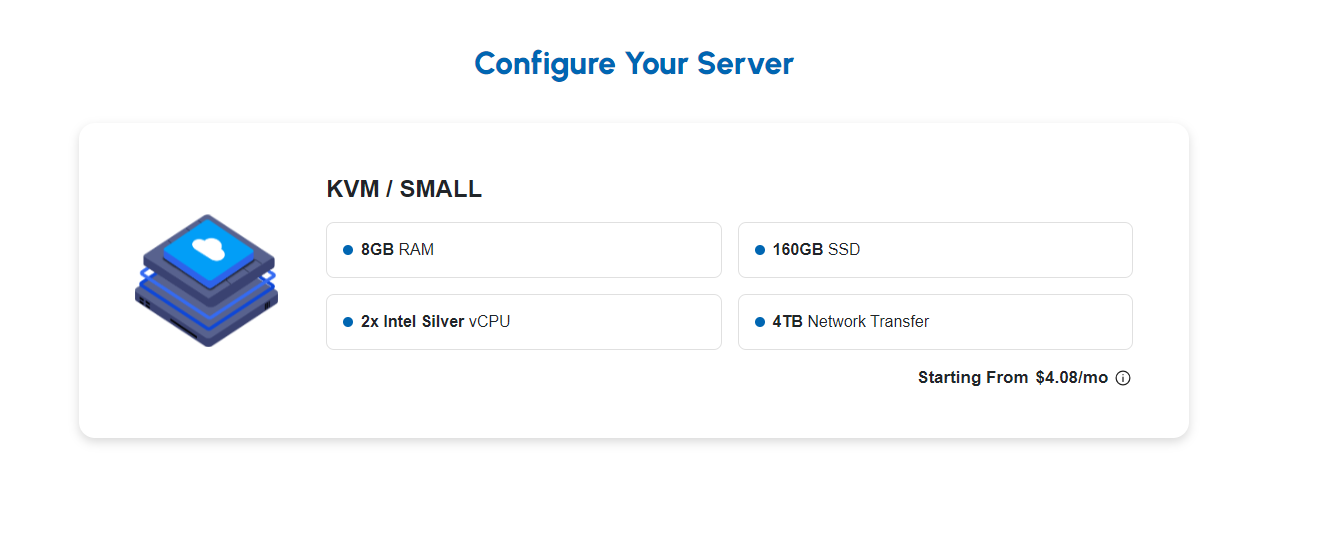
Step 4: Customizing the VPS Configuration
- You can see your selected plan as shown in the below image.
- You can select the billing cycle based on your requirements.

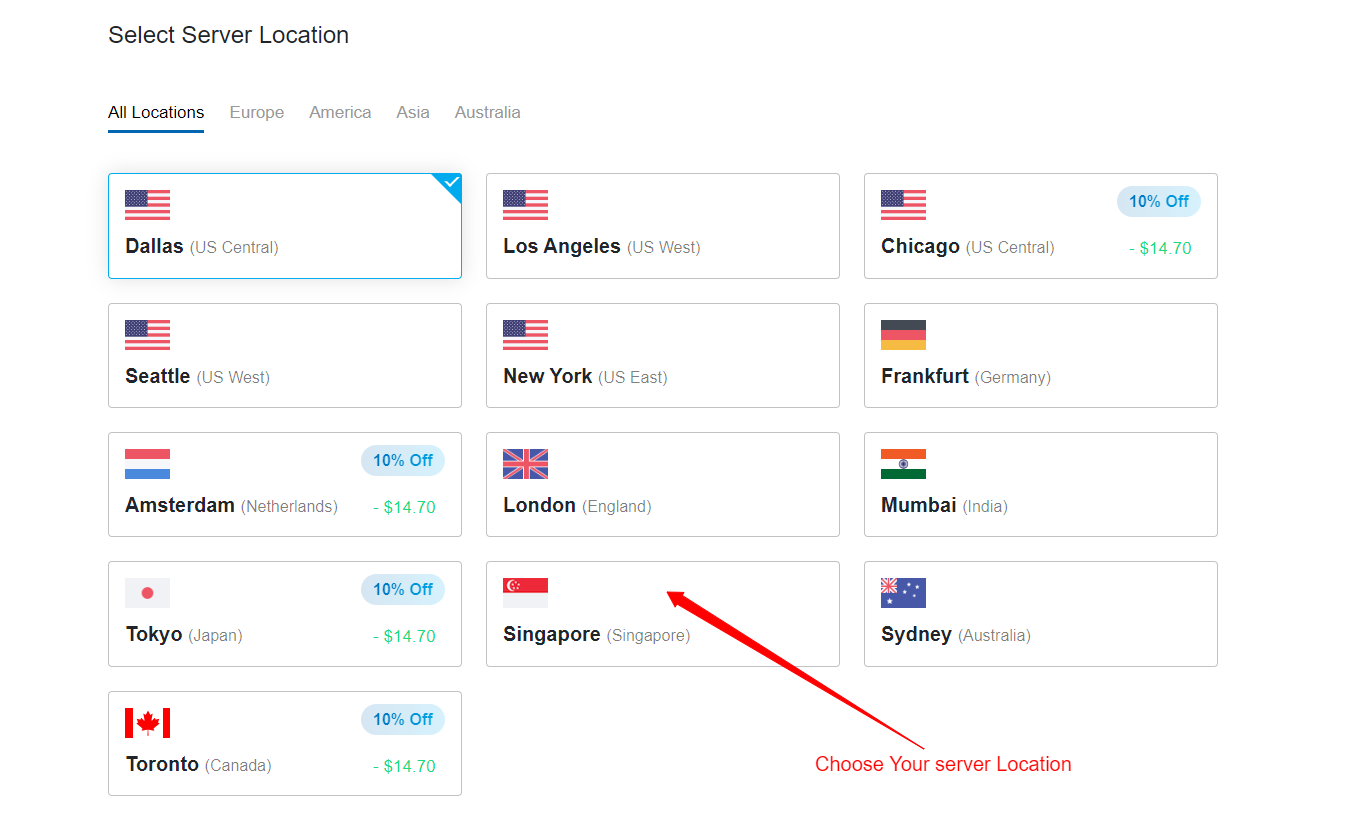
- You have the option to select a server location that is more convenient for you. It is recommended to select the location that is closest to your audience. It means that for the majority of your audience, Your sites will load faster due to lower latency.
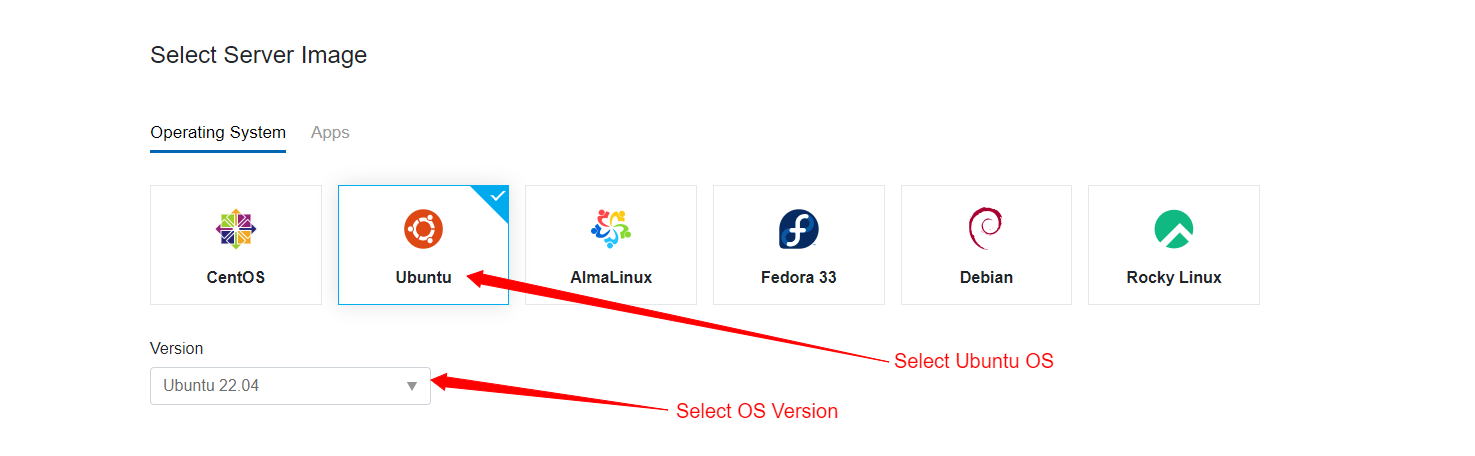
- In this step, you need to select your server operating system. The Node-RED generally requires Ubuntu 20.04 LTS or a later version for compatibility and support. We recommend selecting Ubuntu 20.04 64-bit or Ubuntu 22.04 64-bit. If you are using ServerAvatar to manage your servers, these operating systems are required.
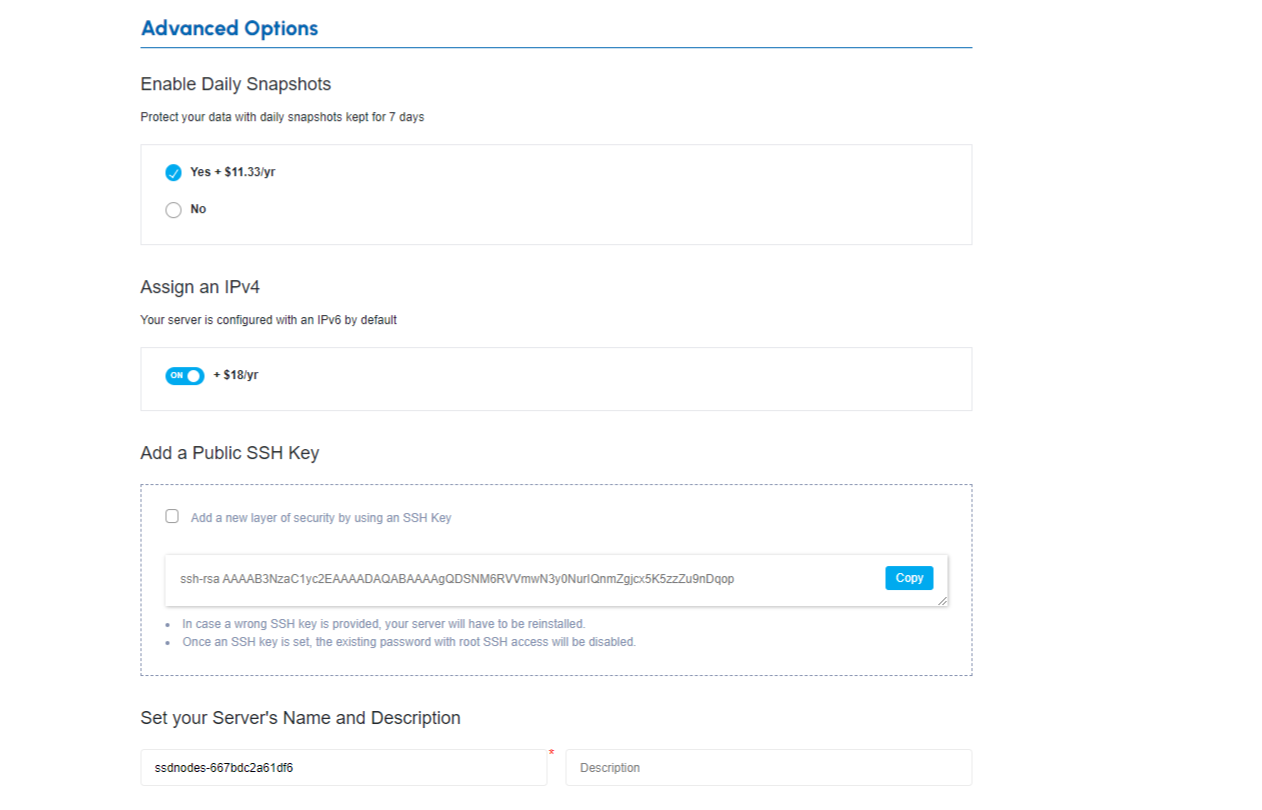
- Now, there is an Advance Options section where you can configure settings according to your requirements. Additionally, you can add a Public SSH Key and specify the Server's Name and Description. Once you've set up your Advanced Options, proceed to the payment checkout.
- Review and confirm all the choices you've made for your VPS and Click on the Proceed to Checkout option.
Step 5: Finalizing Your Order and VPS Deployment
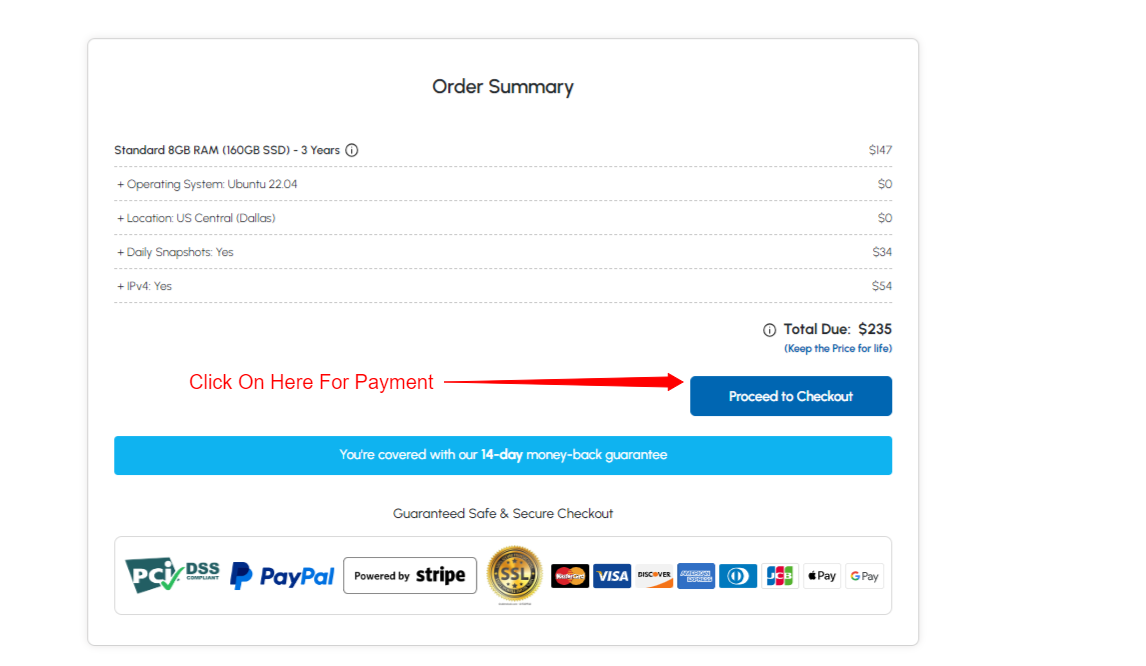
- Now, you need to confirm and complete the payment, also you can review the Order Summary on the same page as shown in the image below. After you've completed the payment process, your VPS will be set up quickly and will be ready for use in a minimum amount of time.
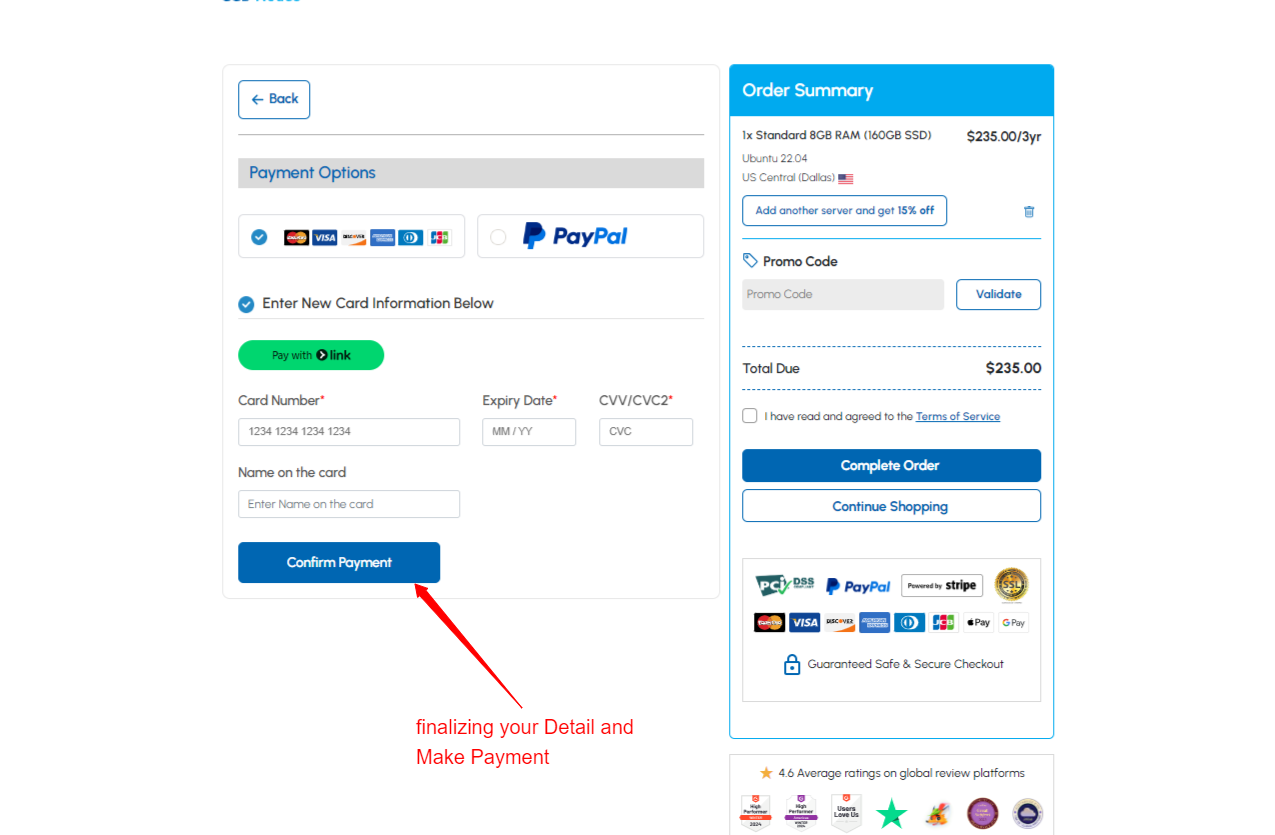
- Congratulations! You have successfully created your SSD Nodes VPS, which is now ready to connect with ServerAvatar.
Initial Server Configuration
The Initial server configuration includes the installation and configuration of various packages required to host your website. Usually, You have to write commands and modify configuration files. Luckily, With ServerAvatar, Your full server configuration and optimization can be automated.
Here are the three ways to automatically configure your server with ServerAvatar.
Connect a server using a direct method
- Login/Register to ServerAvatar account, click the Create button from the right side of the screen, and select Server from the dropdown.
- Select Direct Method in the serve connecting method section.
- Type the Server Name as per your choice.
- Select a Tech Stack as per your need. You can either select Apache, Nginx, OpenLiteSpeed or Node Stack.
- Select a Database: MySQL, MariaDB or MongoDB.
- Enable the toggle if you want to install the latest LTS version of node.js on your server.
- Select a Management plan and click the Connect Now button.
- You’ll see the command on your screen. Login to your server using an ssh connection and execute that command as a root user.
- The server connection process will be started on your ServerAvatar account after executing the command.
Connect a server using integration
- Login/Register to your ServerAvatar account, navigate to the Integration tab from the sidebar of the panel, and access Cloud Platform from the dropdown.
- Now Select a cloud platform you want to link with ServerAvatar.
- The popup form will appear on your screen. Enter details to link your cloud provider account. The integration method is different based on the cloud provider you select.
- You can integrate five different cloud provider platforms with ServerAvatar, which is-
Check the above link of cloud platforms to know more about integrating cloud platforms with ServeAvatar.
Connect a server using commands
Step 1. Login to your server using root user
Once you create a server as per your requirements, connect to your server using an ssh connection and execute the below three commands as a root user in your server console area.
wget https://srvr.so/install
chmod +x install
./install
Step 2. Select a web server
It will ask you which web server you would like to install on your server: Apache, Nginx, OpenLiteSpeed or Node Stack. Type anyone that you would like to install on your server and hit the enter button.
Step 3. Claim your server
Completing the process will give you a link to claim your server.
Open the link on your browser to access the ServerAvatar server panel.
Install and Setup Node-RED on Cloud using ServerAvatar
Getting Started With Node-RED:
Node-RED is a flow-based development tool that utilizes visual programming, developed by IBM. It provides a web-based interface enabling users to integrate hardware devices, APIs, and online services creatively.
Node-RED supports the development of custom nodes using JavaScript, following developers to extend its capabilities and seamlessly integrate with proprietary systems. Its efficient runtime and compatibility with Docker containers ensure easy deployment, whether on cloud platforms or local servers.
Key Features:
- Visual Programming: Node-RED uses a visual programming model, which makes the creation and visualization of complex workflows easier.
- Web-Based Interface: Node-RED offers a web-based interface that is accessible from anywhere, making it convenient for remote development and monitoring.
- Open Source: Node-RED is open-source software, that promotes transparency, collaboration, and innovation within the developers.
- Real-Time Processing: Node-RED enables real-time data processing and supports event-driven applications, making it suitable for IoT and automation projects.
Let's begin by creating the application.
Step 1: Create a Node-RED application
- Log in to your ServerAvatar account and navigate to the Application tab from the server panel. click on the Create button.
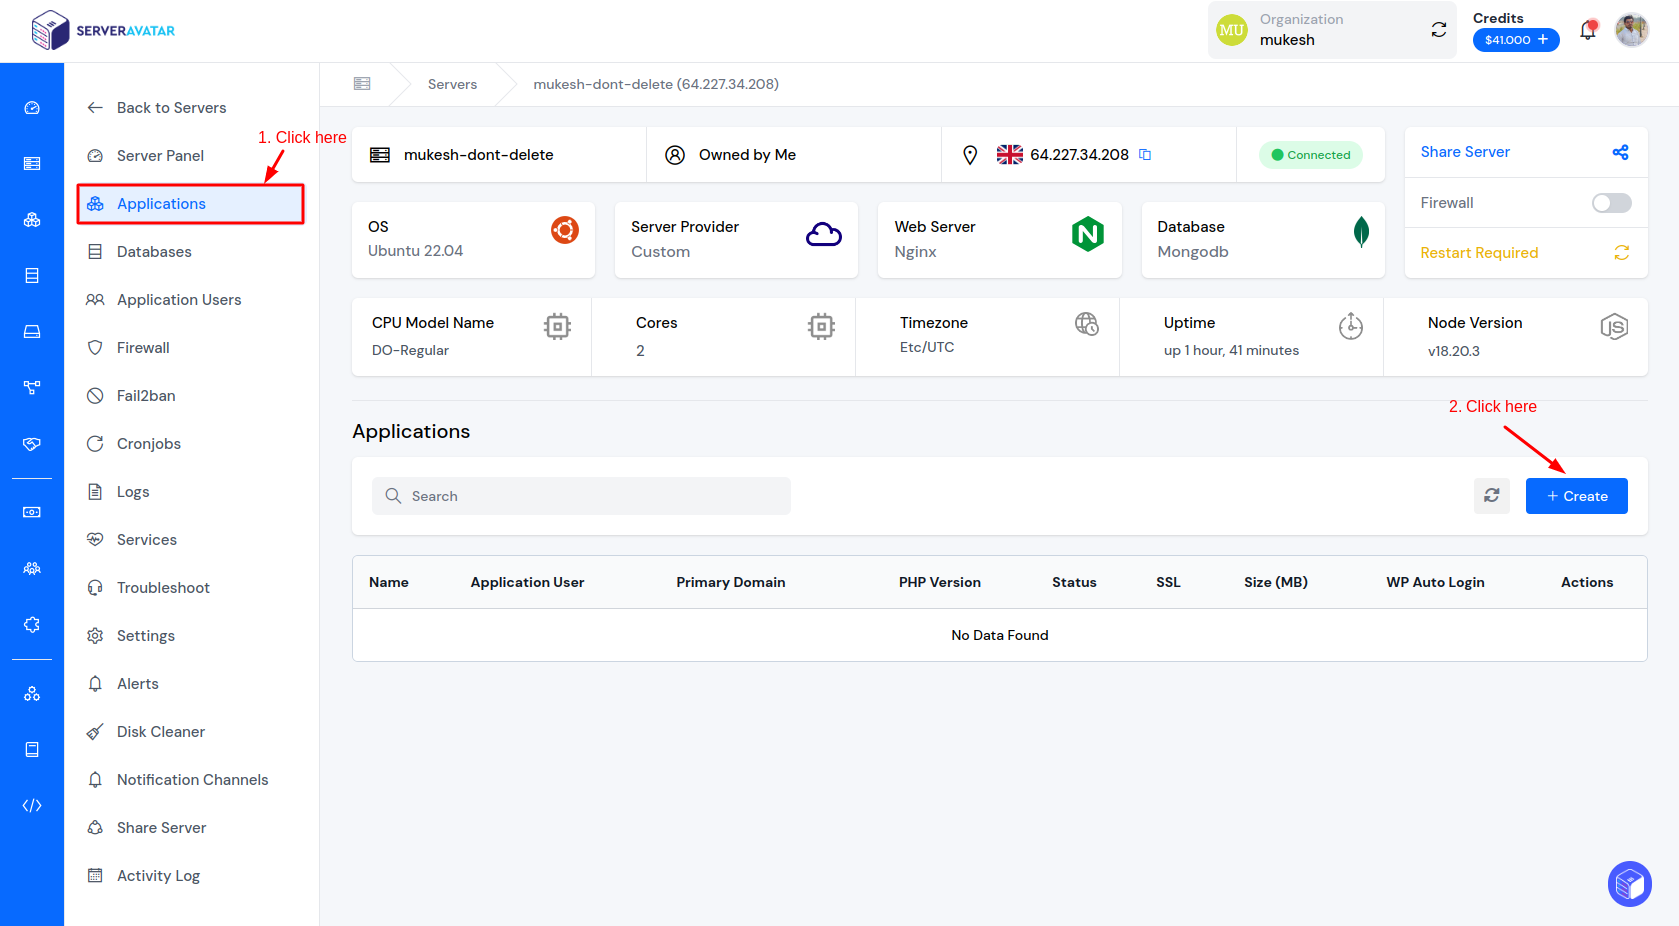
-
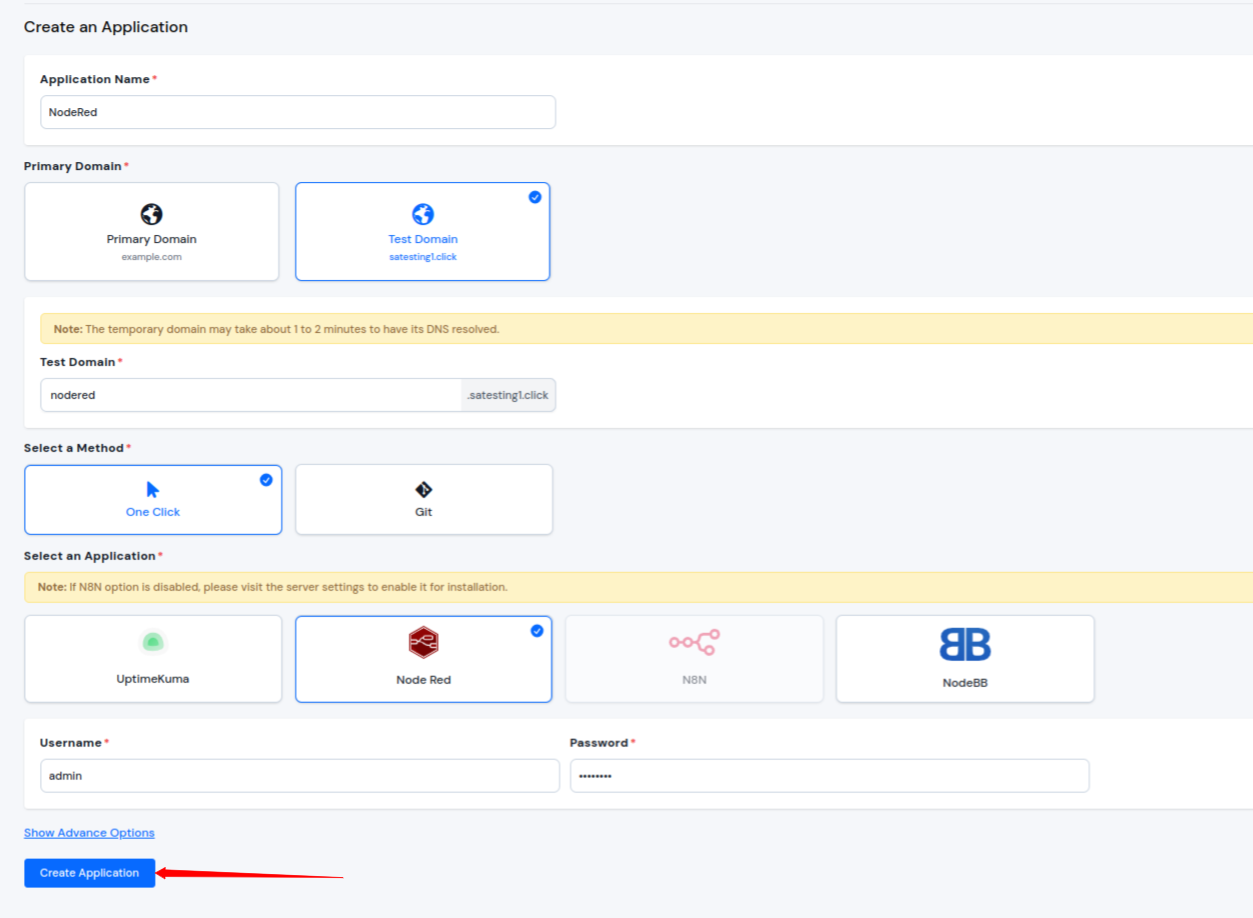
On the following screen, fill in the Application details, including:
- Application Name: Enter your Application Name.
- Select Domain: Select between a Test Domain or a Primary Domain as per your requirements.
- Enter Domain: Enter your Application Domain.
- Method: Select One Click as your application method.
- Select Application: Select Node RED as an Application.
- Username: Enter your application Username.
- Password: Enter the Password for your application.
-
After Filling up the details, click on the Create Application button.
Note: If the Node-RED option is disabled and you are unable to select it, you will need to follow additional provided steps.
- Navigate to the Server Settings option and click on the Install button next to the Node Red option.
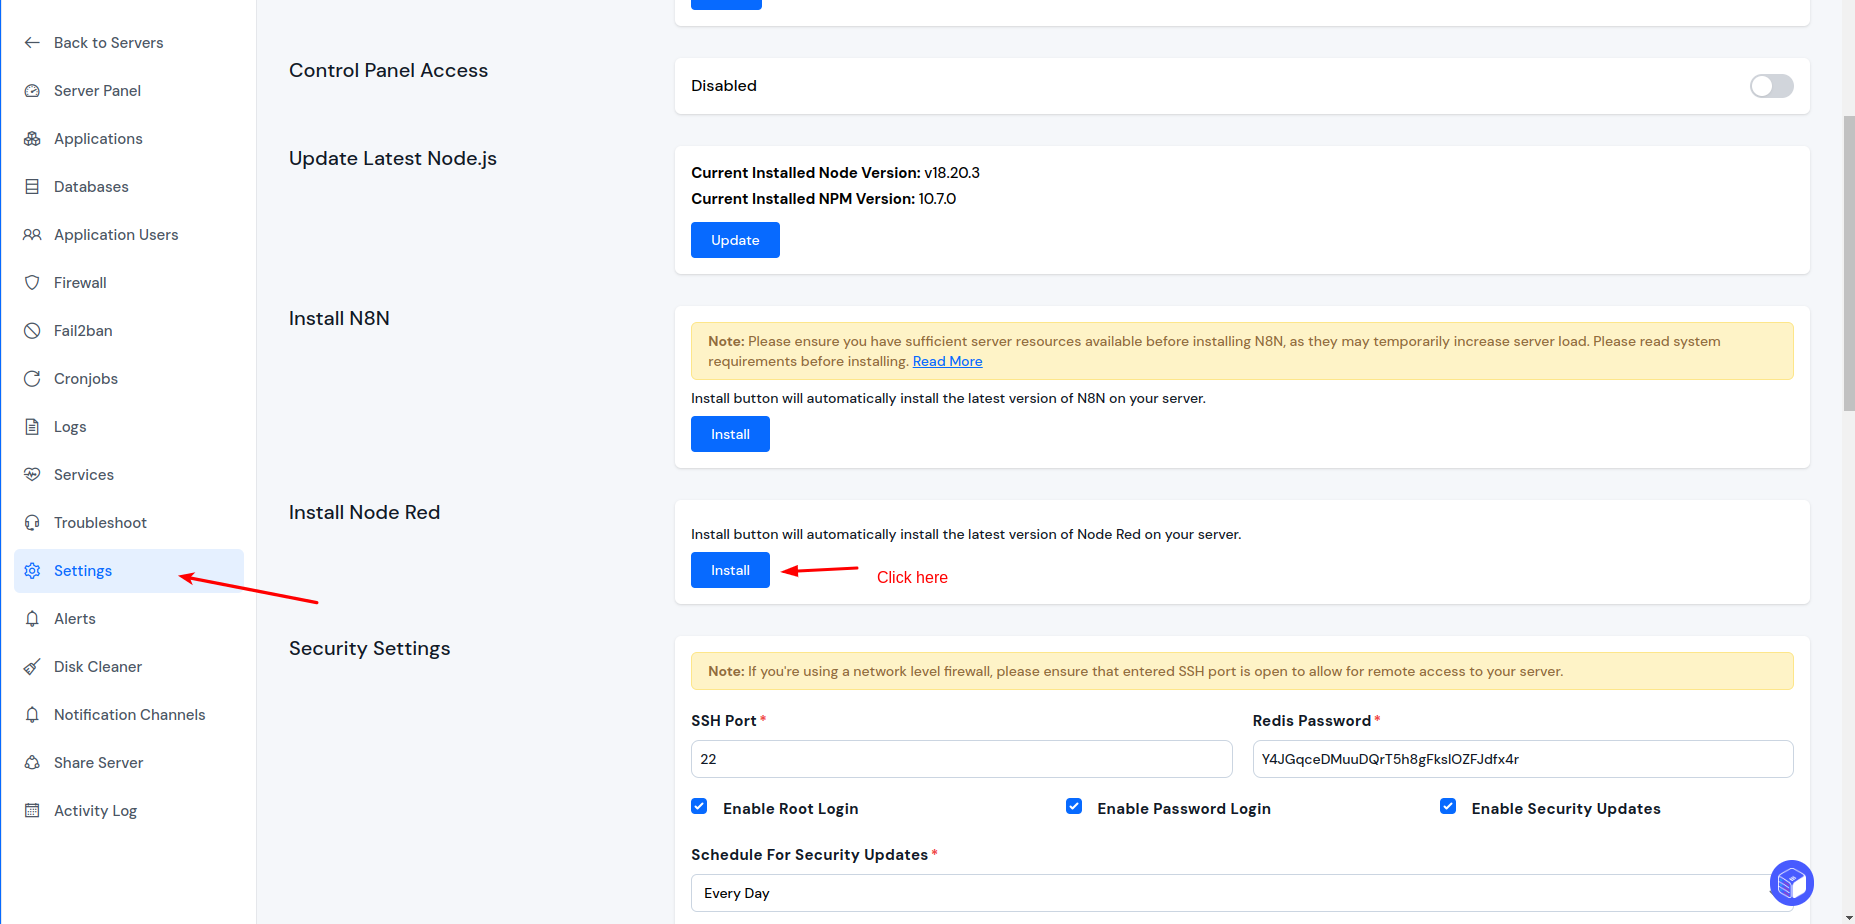
- After completing the installation process of Node-RED, you can proceed with creating the Node-RED application.
Step 2: Access Node-RED
- Once the Node-RED Application is created, click on the domain link of your Node-RED application.

-
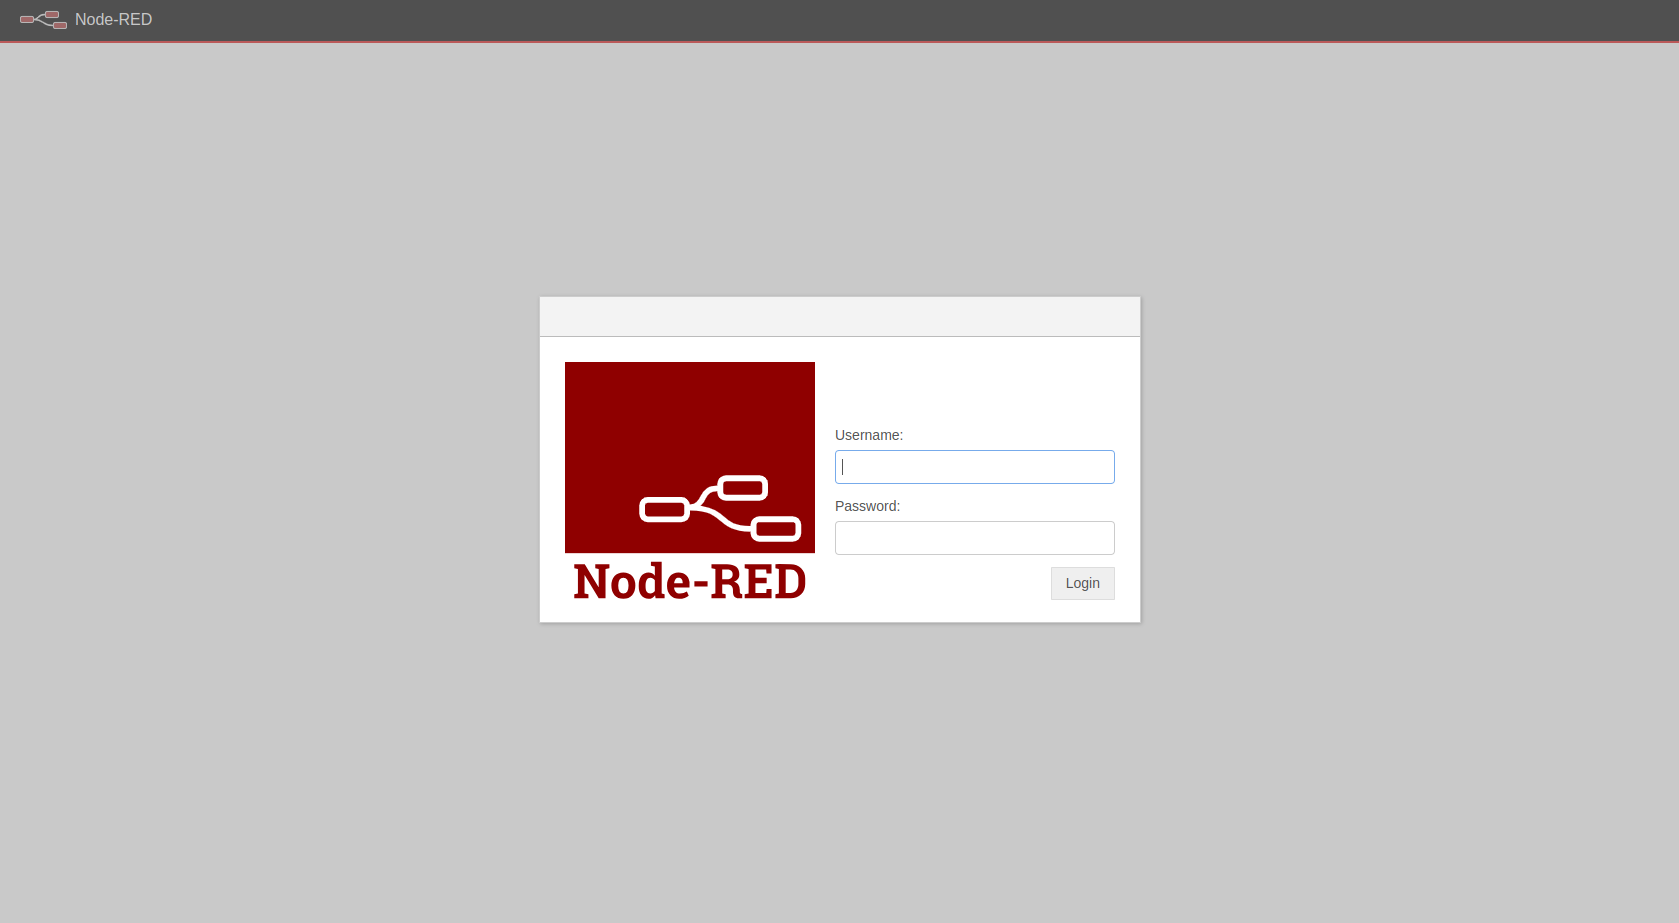
The Node-RED interface will open, showing that the installation and setup have been completed successfully.
- Enter your Username and Password.
- Click the Login button.
- Congratulations! You've successfully set up a fully functional Node-RED application using ServerAvatar.