Uptime Kuma stands out as an open-source monitoring platform known for its extensive capabilities and flexibility. It empowers organizations to effectively monitor and optimize website uptime, performance metrics, and server health. With a range of customizable features and integrations, Uptime Kuma supports customized monitoring solutions without requiring advanced technical expertise. AWS EC2 is a dependable hosting option for Uptime Kuma, providing scalable infrastructure and simple deployment solutions. ServerAvatar makes it easy and user-friendly to deploy the Uptime Kuma application on the AWS EC2 platform.
Create an AWS EC2 Instance
Getting Started with AWS EC2:
In the dynamic landscape of cloud computing, Amazon EC2 (Elastic Compute Cloud) stands as a cornerstone service provided by Amazon Web Services (AWS), offering a flexible and scalable solution for hosting virtual servers in the cloud. Designed to cater to a diverse range of computing needs, EC2 allows businesses and developers to deploy virtual machines quickly and securely, enabling them to run various applications and manage workloads with ease.
From startups seeking cost-effective computing power to enterprises requiring robust, scalable infrastructure, EC2 provides a vast array of instance types optimized for different use cases. These instances offer customizable configurations, including computing power, memory, storage, and networking capabilities, empowering users to tailor their virtual environments precisely to their application requirements.
Whether it's launching a single instance for a small-scale project or orchestrating a complex network of instances across multiple regions, EC2 simplifies the process with its intuitive management console and comprehensive APIs. This versatility makes it a preferred choice for businesses looking to leverage the scalability and reliability of cloud computing without the overhead of managing physical hardware.
Using AWS EC2 instances offers a multitude of benefits that cater to diverse business needs and technical requirements. Here are some key advantages:
- Scalability: EC2 enables swift adjustments to your computing capacity according to demand, offering elasticity that efficiently manages fluctuating workloads for businesses, preventing resource over-provisioning.
- Cost-Effectiveness: With EC2, you pay only for the compute capacity you use. This pay-as-you-go pricing model eliminates the need for upfront investments in hardware and allows for cost optimization by scaling resources as needed.
- Flexibility: EC2 provides a diverse range of instance types tailored for various use cases, including compute-optimized, memory-optimized, storage-optimized, and GPU instances. This versatility allows you to select the ideal instance type that best suits your specific application needs.
- Security: AWS offers a secure environment for hosting EC2 instances, incorporating features such as security groups, network access control lists (ACLs), and Virtual Private Clouds (VPCs) to manage network access effectively. Integration with other AWS services, such as AWS Identity and Access Management (IAM), further enhances security by providing detailed access control capabilities.
- Ease of Use: EC2 instances can be easily launched, managed, and configured using the AWS Management Console, Command Line Interface (CLI), or SDKs/APIs. Automation tools like AWS CloudFormation and AWS Elastic Beanstalk further simplify deployment and management tasks.
- Reliability: AWS ensures a high level of reliability for EC2 instances with SLAs that guarantee a specific level of uptime. Additionally, EC2 instances can be configured to automatically recover from failures using features like Auto Scaling and Amazon Elastic Block Store (EBS) snapshots.
Let’s Get started with Creating a Virtual Machine on AWS EC2:
To create a server in Amazon. First log in to Amazon web service. Once you are there, Follow the steps given below.
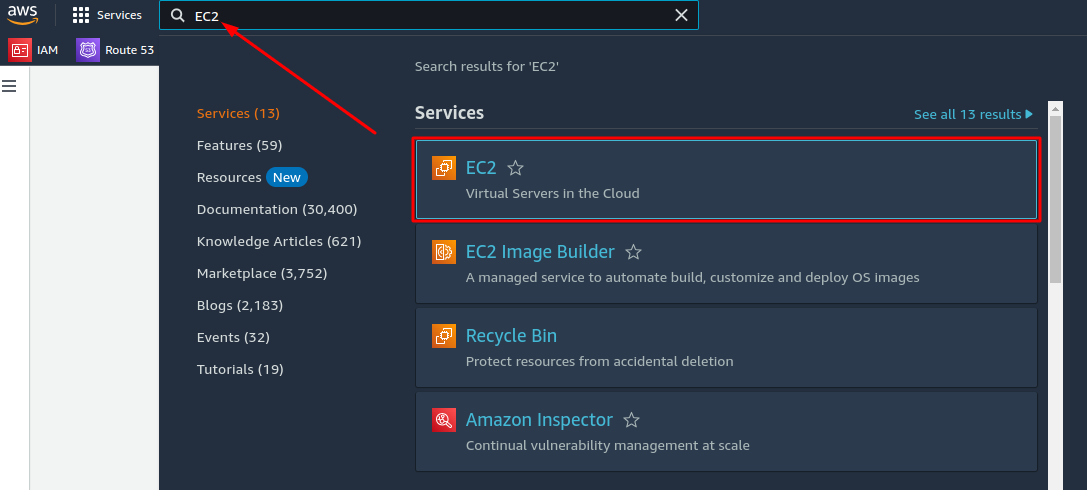
Step 1: Search for the EC2 service in the AWS search bar
- The first step is to search for EC2 services, as Amazon provides multiple web services. Then click on the EC2 with virtual servers in the cloud option which is shown in the image below.
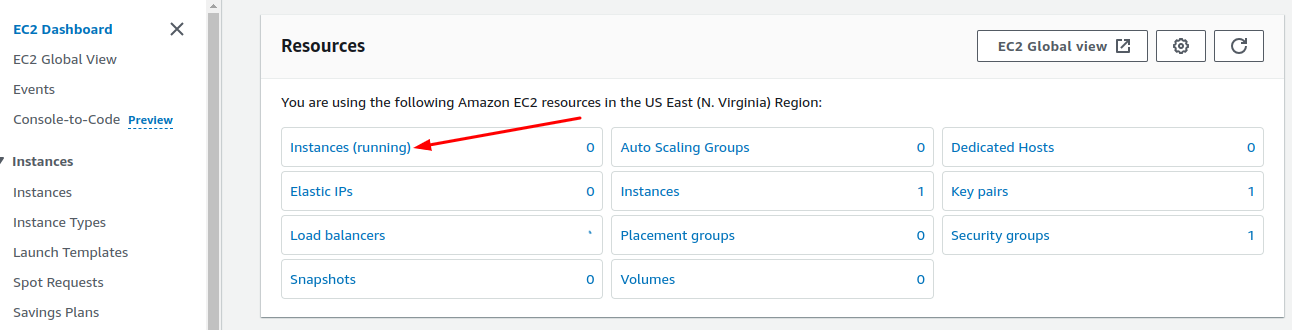
Step 2: Launching Instances from the EC2 Dashboard
- Now you are in the EC2 Dashboard, navigate to the running instances section. After that new tab for instances will be displayed there you have to click on the Launch Instances button as shown in the images below.

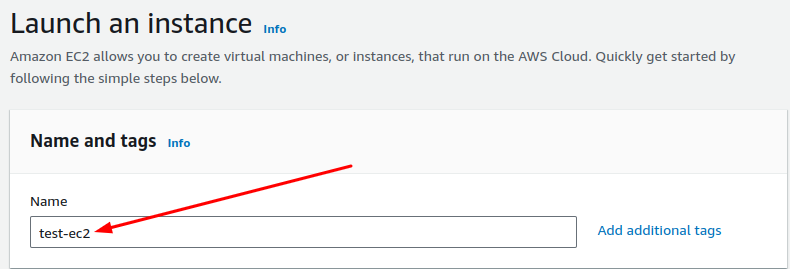
Step 3: Naming and Tagging Your EC2 Instance
- The next step is to name the instance of your choice and you can also add tags to your instance which can help organize, manage, and track resources.
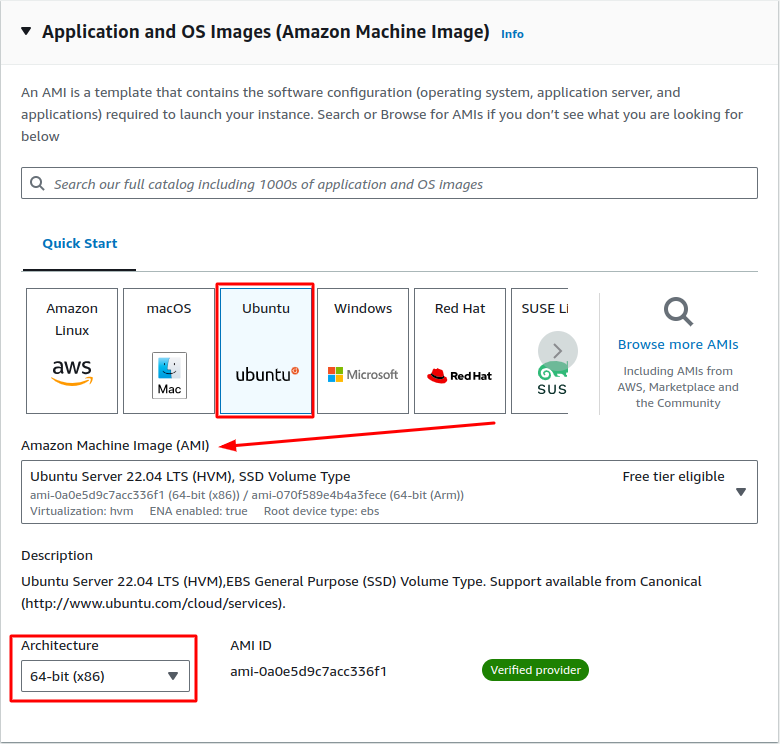
Step 4: Select the OS for your Instance
- After following the steps, proceed to select the operating system for your instance. In this case, First, click on Ubuntu and then select the Amazon Machine Image of Ubuntu Server 22.04 LTS as an operating system. In addition to this, select the architecture to 64-bit(x64/86) as shown in the image below.
Step 5: Select the Instance type
- In this step, select the size of your VM instance. AWS EC2 provides lots of different options when it comes to plans and pricing. The selection of instances completely depends on the requirements. So, select the instance based on the complexity and traffic of your sites.

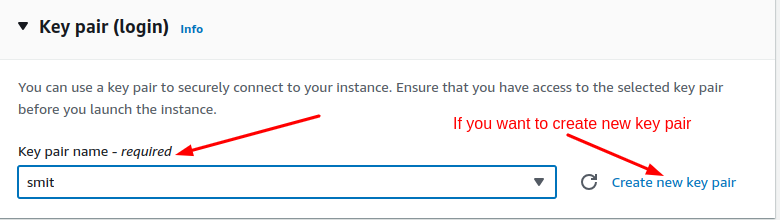
Step 6: Select SSH Key pair or create one
- Here you can select the Key pair name for SSH. If you don't have any key pair stored, you can also create a new key pair by clicking on the Create new key pair option as shown in the following image.
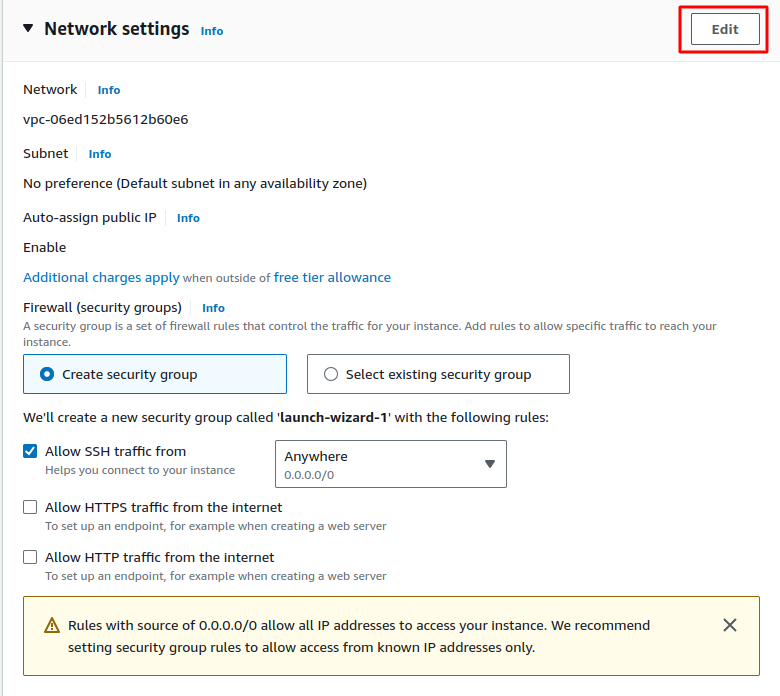
Step 7: Configuring Network Settings
- In this step, you have to configure the network by simply clicking on the Edit button as shown in the following image.
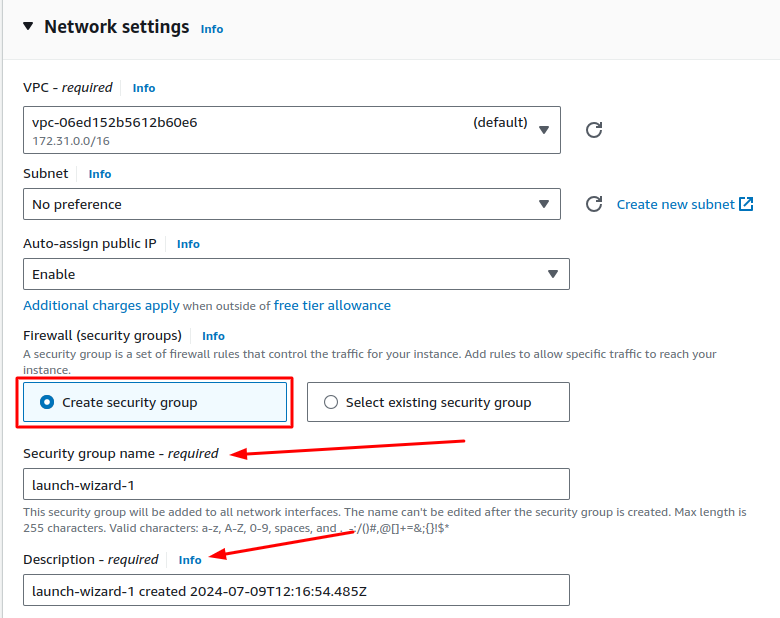
- Then you have to create a new security group by selecting the create security group radio button. You can enter the security group name of your choice and can also add a description for your security group for that you can refer to the image below.
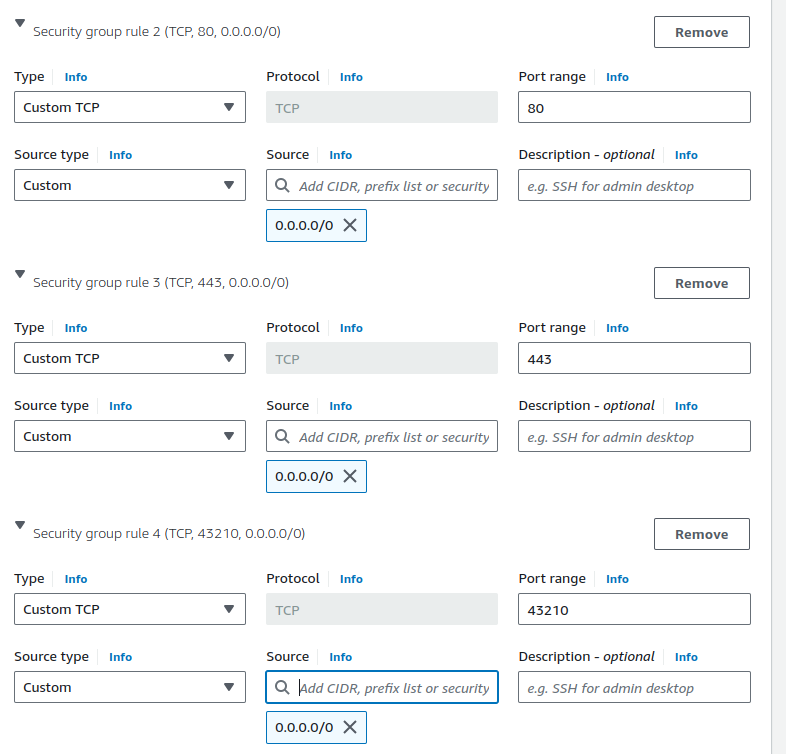
Step 8: Add Inbound Security Group Rules
- The next step is to add inbound security group rules which are necessary to configure for connecting your instance to ServerAvatar. Click on the button shown in the image below to add security group rules.
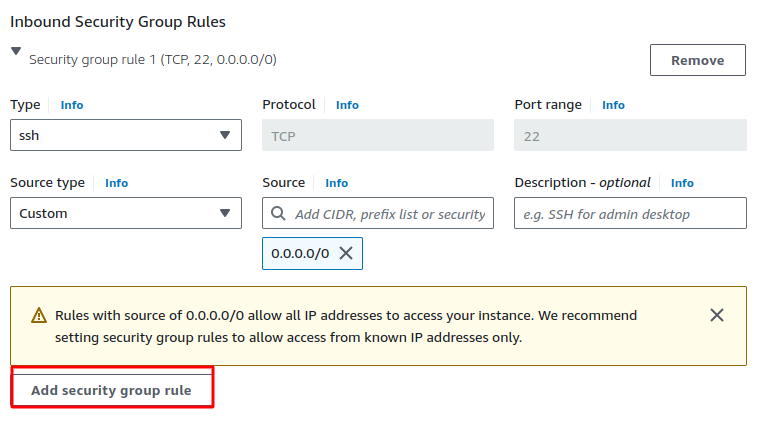
- ServerAvatar requires 43210 port to be open. In total, You need to keep the following ports open on the instance.
- 22 (SSH): To access your server via SSH
- 80 (HTTP): To access your sites on HTTP
- 443 (HTTPS): To access your sites on HTTPS
- 43210 (ServerAvatar): To allow communication between ServerAvatar and your instance
- To understand and proceed further, please take the reference of the image depicted below.
Step 9: Configure the storage for your instance
- The final step is to configure the storage. You can select the size of the storage according to your needs. However, it is recommended to select at least 25GB disk volume, and in AWS EC2 there is also an option to select the root volume which you can choose as per your requirements. Now click on the Launch Instance button, as shown in the image below.
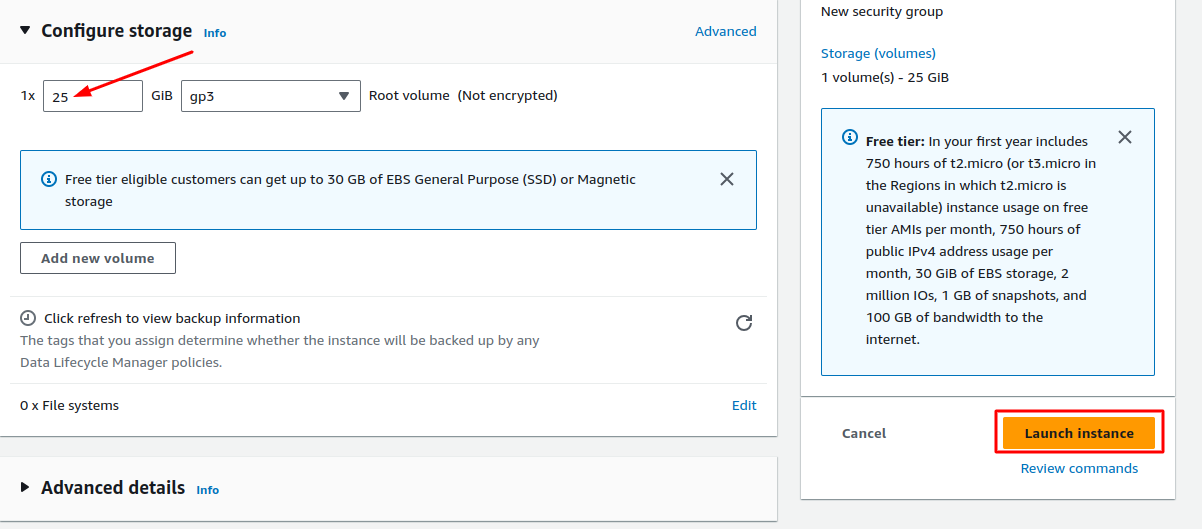
- Congratulations! You have successfully created your AWS EC2 Instance which is now ready to connect with ServerAvatar.
Initial Server Configuration
The Initial server configuration includes the installation and configuration of various packages required to host your website. Usually, You have to write commands and modify configuration files. Luckily, With ServerAvatar, Your full server configuration and optimization can be automated.
Here are the three ways to automatically configure your server with ServerAvatar.
Connect a server using a direct method
- Login/Register to ServerAvatar account, click the Create button from the right side of the screen, and select Server from the dropdown.
- Select Direct Method in the serve connecting method section.
- Type the Server Name as per your choice.
- Select a Tech Stack as per your need. You can either select Apache, Nginx, OpenLiteSpeed or Node Stack.
- Select a Database: MySQL, MariaDB or MongoDB.
- Enable the toggle if you want to install the latest LTS version of node.js on your server.
- Select a Management plan and click the Connect Now button.
- You’ll see the command on your screen. Login to your server using an ssh connection and execute that command as a root user.
- The server connection process will be started on your ServerAvatar account after executing the command.
Connect a server using integration
- Login/Register to your ServerAvatar account, navigate to the Integration tab from the sidebar of the panel, and access Cloud Platform from the dropdown.
- Now Select a cloud platform you want to link with ServerAvatar.
- The popup form will appear on your screen. Enter details to link your cloud provider account. The integration method is different based on the cloud provider you select.
- You can integrate five different cloud provider platforms with ServerAvatar, which is-
Check the above link of cloud platforms to know more about integrating cloud platforms with ServeAvatar.
Connect a server using commands
Step 1. Login to your server using root user
Once you create a server as per your requirements, connect to your server using an ssh connection and execute the below three commands as a root user in your server console area.
wget https://srvr.so/install
chmod +x install
./install
Step 2. Select a web server
It will ask you which web server you would like to install on your server: Apache, Nginx, OpenLiteSpeed or Node Stack. Type anyone that you would like to install on your server and hit the enter button.
Step 3. Claim your server
Completing the process will give you a link to claim your server.
Open the link on your browser to access the ServerAvatar server panel.
Deploy Self-Hosted Monitoring Tool Uptime Kuma on Cloud using ServerAvatar
Note: You must have a Server connected in Node Stack.
What is Uptime Kuma?
Uptime Kuma is a tool that helps you keep track of whether your websites or servers are up and running smoothly. It's free and can be hosted on your own servers or in the cloud. With Uptime Kuma, you can monitor things like website responses, specific keywords on pages, or basic network services. If something goes wrong, it can alert you through different channels. In simple terms, it's like having a personal watchdog for your online presence.
This guide will walk you through how to install the self-hosted monitoring tool UptimeKuma with ServerAvatar.
Features Of Uptime Kuma
- Monitoring uptime for HTTP(s) / TCP / HTTP(s) Keyword / HTTP(s) Json Query / Ping / DNS Record / Push / Steam Game Server / Docker Containers
- Fancy, Reactive, Fast UI/UX
- Notifications via Telegram, Discord, Gotify, Slack, Pushover, Email (SMTP), and 90+ notification services, click here for the full list
- 20-second intervals
- Multi Languages
- Multiple status pages
- Map status pages to specific domains
- Ping chart
- Certificate info
- Proxy support
- 2FA support
Prerequisites
- Node.js (v18 / v20.4)
- NPM (v9)
- Pm2
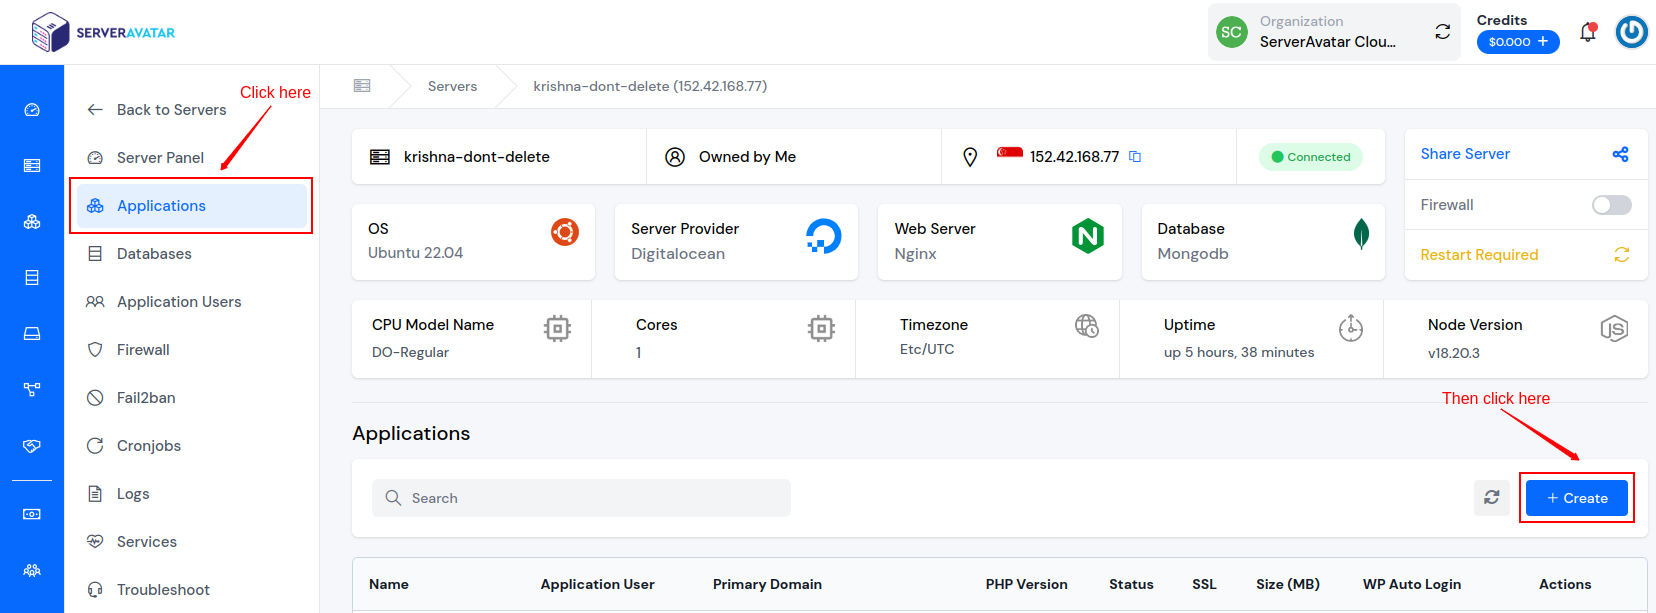
Step 1: Create An Application
On the ServerAvatar server panel, navigate to the Applications tab and click the Create button like the following image.
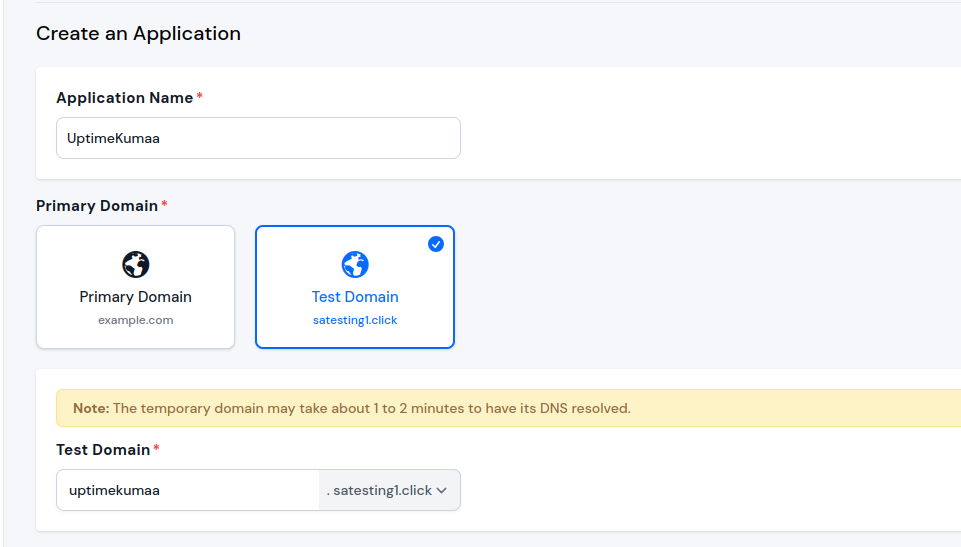
To proceed with the installation and deployment of UptimeKuma, ensure you have met the prerequisites.
- Enter an Application Name of your choice.
- Specify a Domain (choose between a Test Domain or a Primary Domain).
Note: If hosting Uptime Kuma on your own domain, ensure your domain points to your server's current IP address.
Select the following options:
Method: One Click Application: UptimeKuma
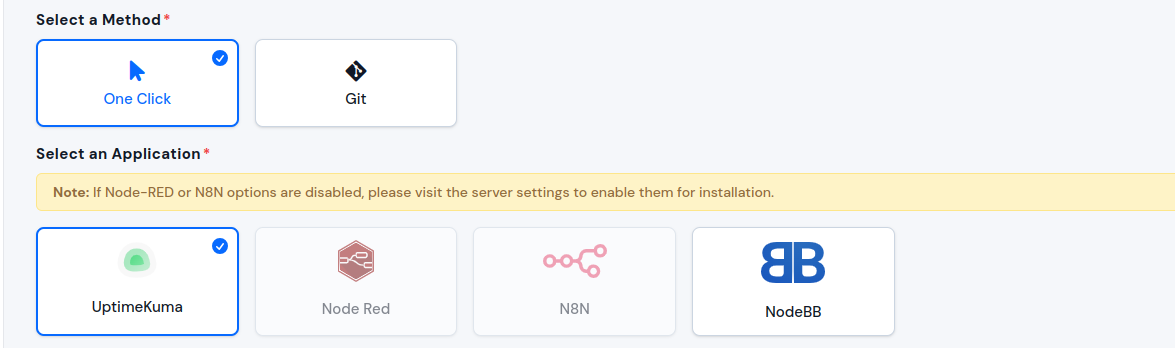
Now, click on Show Advanced Options to create a new system user or select an existing one based on your needs.
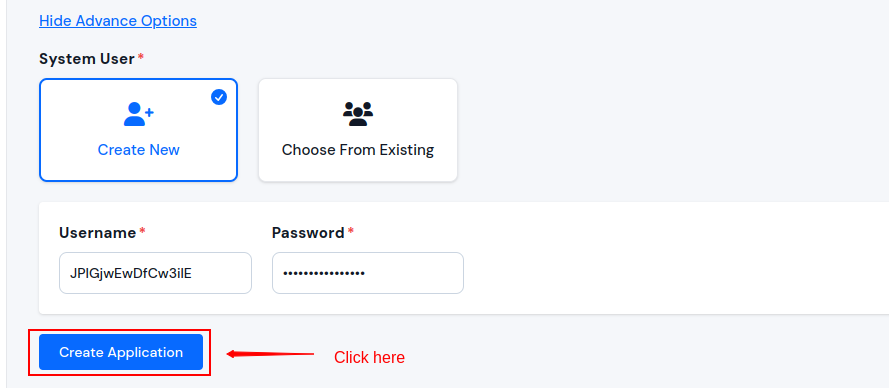
Click on the Create Application button. You will be redirected to the Application Installation Status page where you can monitor the installation process and view command outputs.
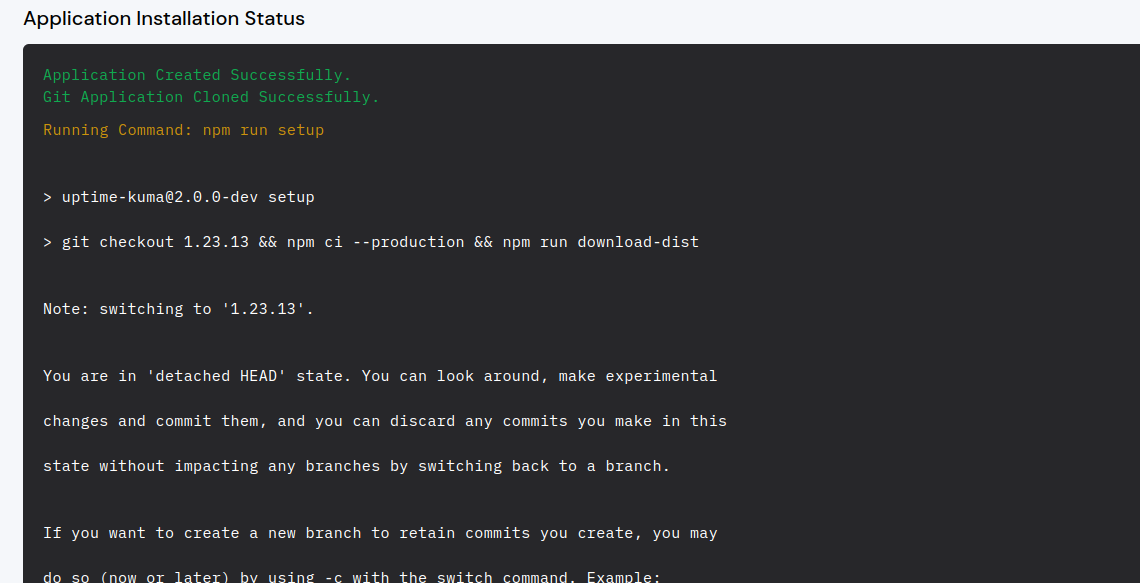
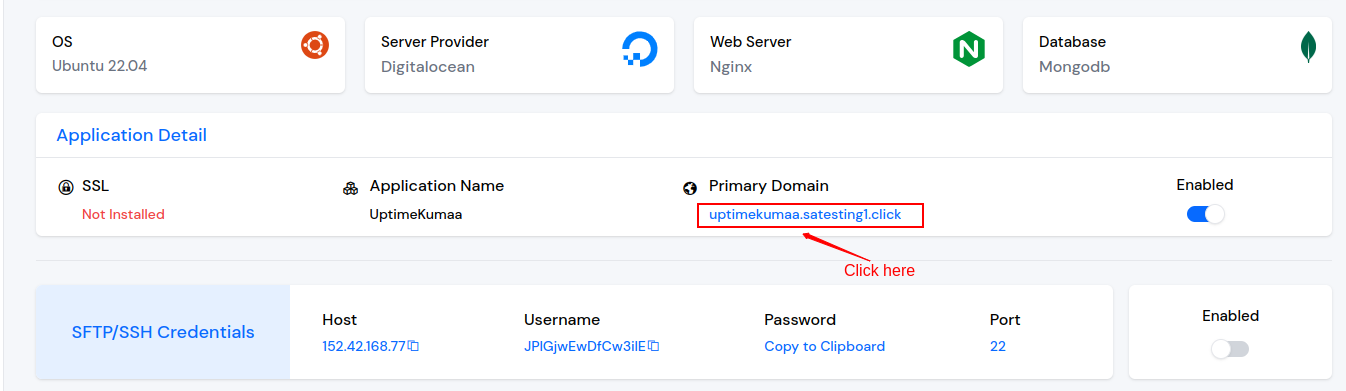
Once all commands run successfully you will redirect to the Application Dashboard.
Visit your domain to access your Uptime Kuma application.
Now, create your admin account for Uptime Kuma.

Congratulations! You have successfully installed and deployed Uptime Kuma through ServerAvatar.