Cachet is an open-source status page system designed to help you efficiently create status pages. It is built to be responsive and works seamlessly across different devices. It includes essential tools for maintaining and communicating service statuses and ensuring accessibility for administrators and users alike. Hosting Cachet on Vultr offers a dependable and scalable solution, with a range of instance options and straightforward deployment features. ServerAvatar makes it easy and user-friendly to deploy the Cachet application on the Vultr platform.
Create a Cloud Instance in Vultr
To create a server in Vultr, follow the below-given steps. If you want to learn How to use Vultr to manage your infrastructure in Vultr, You can refer to our Vultr cloud guide.
Step 1: Go to the Instance Creation Page
Vultr provides different types of cloud instances. From the server creation page, you can create cloud instances such as Regular VMs, Dedicated, Bare Metal, Cloud GPUs, and some managed services.
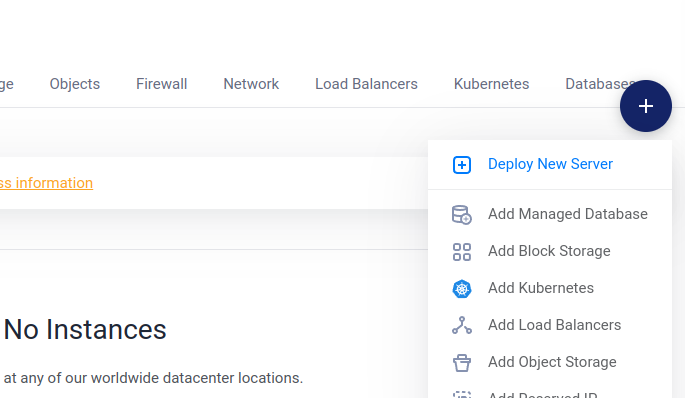
To access the server creation page, log in to your Vultr account and click on the Deploy New Server option from the + button given on the dashboard.
Step 2: Choose the Server
You can create 4 different types of cloud instances which includes Optimised Cloud Compute, Cloud Compute, Cloud GPU, and Bare Metal. Select the one that fits your requirements.

Step 3: Choose Server Type
Based on your selection of the server in the second step, You will have to select a specific type of server. If you have selected the Optimised Cloud Compute instance, You will see the options like this as shown in the image below:

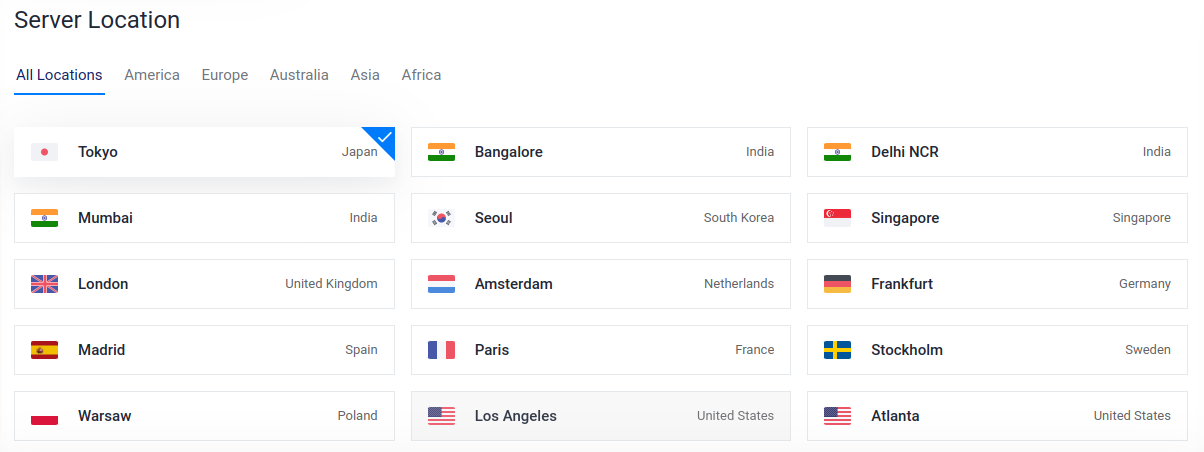
Step 4: Select Server Location
Location is a very important option. Make sure to select a server location closest to your major traffic source demographically. You can select locations in 5 different continents.
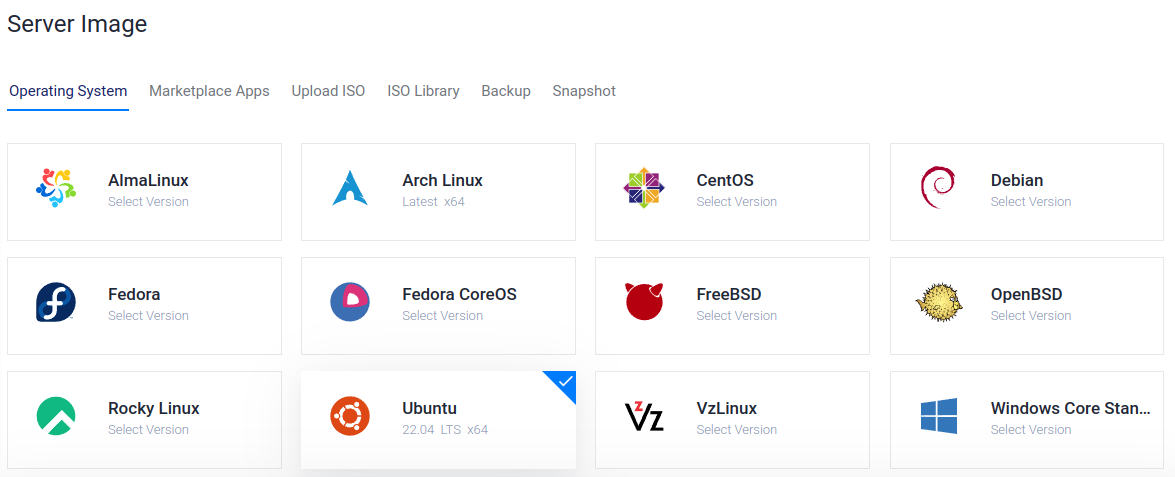
Step 5: Select Server Image
In simple terms, a Server image is an operating system running on the server. So here, You have to select an OS for your server.
If you are managing your servers with ServerAvatar, Select Ubuntu 20.04 or Ubuntu 22.04.
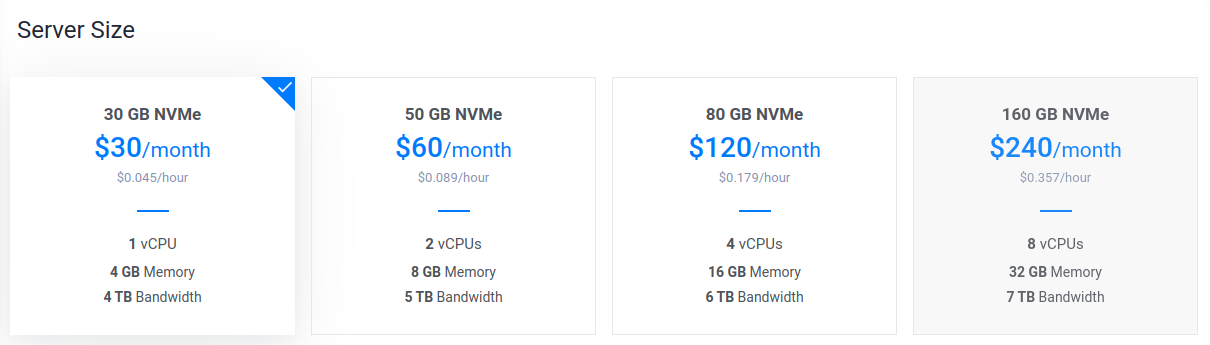
Step 6: Select Server Size
Here, Select a server size according to your requirements. If you are just getting started with the project, You can start with a small configuration and then upgrade it according to future requirements.
The minimum requirements for hosting Cachet are 2GB or more of RAM, but for larger deployments or heavy traffic, 4GB or more is advisable depending on your traffic, and configurations. Also, Minimum of 1GB of free disk space for the Cachet application and additional space for data, logs, and backups. The exact amount will depend on your usage and data storage needs.
Step 7: Add Auto Backups and Additional Features
We recommend you to enable auto backups for important websites or apps. If you are creating a temporary server, You can skip the auto backups.
In addition to this feature, You can enable DDOS Protection and other options according to your requirements.
Do not enable the "No Public IPv4 Address" option. It will create the server without IPv4, which is impossible to connect with ServerAvatar.
Step 8: Select an SSH Key
If you use an SSH key to authenticate with the server, Select an SSH key in this section. If you haven't uploaded your key yet, You can do it by clicking on the Add New option.
SSH key is not mandatory. If you don’t want to use SSH keys, Ignore this option. You can still connect to your server by using the password.

Step 9: Firewall Group
If you are using the Vultr firewall, You can select the firewall group from here.
If you do not have the 43210 port enabled in your firewall group, you need to configure it to connect a server with ServerAvatar.

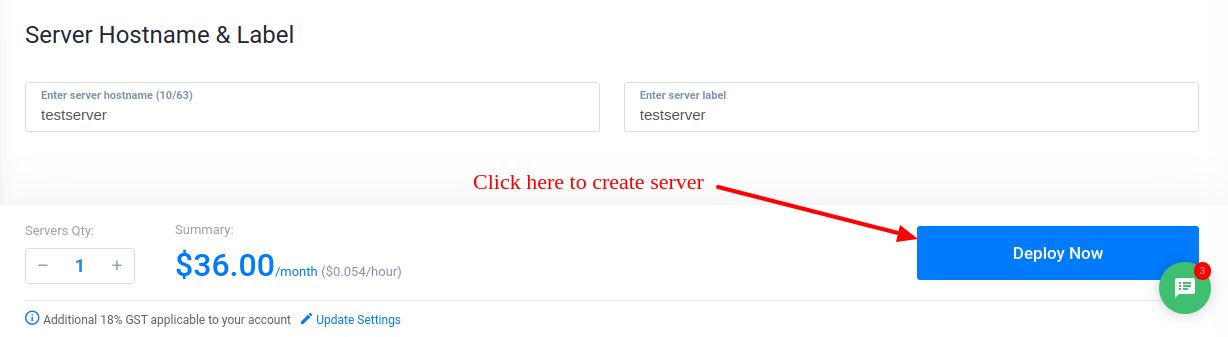
Step 10: Server Hostname and Label
In this step, you have to choose the hostname and the label for the server. You can set the same hostname and label. They are used for identification purposes only.

Step 11: Deploy Now!
Finally, click on the Deploy Now button to create a server. It might take a minute or two to fully boot up your server. Once it is ready, You will see it in the Products section in Vultr.
Initial Server Configuration
The Initial server configuration includes the installation and configuration of various packages required to host your website. Usually, You have to write commands and modify configuration files. Luckily, With ServerAvatar, Your full server configuration and optimization can be automated.
Here are the three ways to automatically configure your server with ServerAvatar.
Connect a server using a direct method
- Login/Register to ServerAvatar account, click the Create button from the right side of the screen, and select Server from the dropdown.
- Select Direct Method in the serve connecting method section.
- Type the Server Name as per your choice.
- Select a Tech Stack as per your need. You can either select Apache, Nginx, OpenLiteSpeed or Node Stack.
- Select a Database: MySQL, MariaDB or MongoDB.
- Enable the toggle if you want to install the latest LTS version of node.js on your server.
- Select a Management plan and click the Connect Now button.
- You’ll see the command on your screen. Login to your server using an ssh connection and execute that command as a root user.
- The server connection process will be started on your ServerAvatar account after executing the command.
Connect a server using integration
- Login/Register to your ServerAvatar account, navigate to the Integration tab from the sidebar of the panel, and access Cloud Platform from the dropdown.
- Now Select a cloud platform you want to link with ServerAvatar.
- The popup form will appear on your screen. Enter details to link your cloud provider account. The integration method is different based on the cloud provider you select.
- You can integrate five different cloud provider platforms with ServerAvatar, which is-
Check the above link of cloud platforms to know more about integrating cloud platforms with ServeAvatar.
Connect a server using commands
Step 1. Login to your server using root user
Once you create a server as per your requirements, connect to your server using an ssh connection and execute the below three commands as a root user in your server console area.
wget https://srvr.so/install
chmod +x install
./install
Step 2. Select a web server
It will ask you which web server you would like to install on your server: Apache, Nginx, OpenLiteSpeed or Node Stack. Type anyone that you would like to install on your server and hit the enter button.
Step 3. Claim your server
Completing the process will give you a link to claim your server.
Open the link on your browser to access the ServerAvatar server panel.
Install and setup the Cachet status page system with ServerAvatar
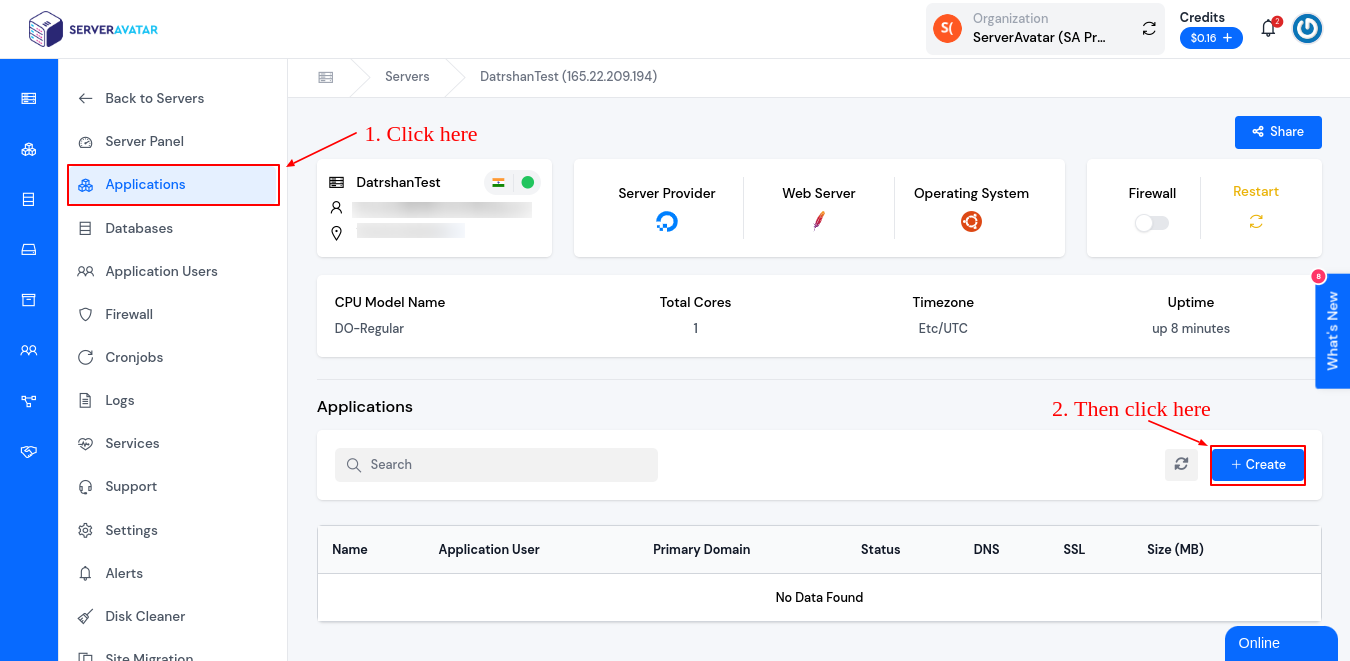
Step 1: Create a PHP application
To create an application, go to the ServerAvatar server panel, navigate to the Applications tab, and click the Create button like the following image.
1. Fill in basic detail
In the first step, fill in the basic details, including the Application Name, select the Domain type, and type the Primary Domain/Test Domain Name.
Note that:
If you want to host Joomla CMS on your domain, then make sure to point your domain to the current IP address of your server, and for that:
- Log in to your hosting provider site, where you buy your domain. You can check your domain information with one click.
- Access DNS Manager to edit your DNS records(contact the support team if you don’t find them)
- Change the IP address of A Record of your website to the current server’s IP address.
Note that:
For accessing Cachet on the subdomain, you need to add your subdomain on A Record that points to the current IP address of your server. To point to an IPV6 address, you would need to use an AAAA record
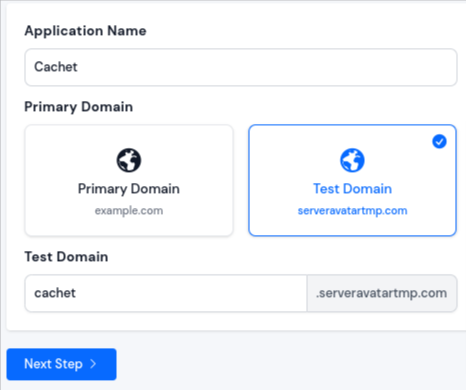
Click the Next Step to continue.
2. Select the application creation method
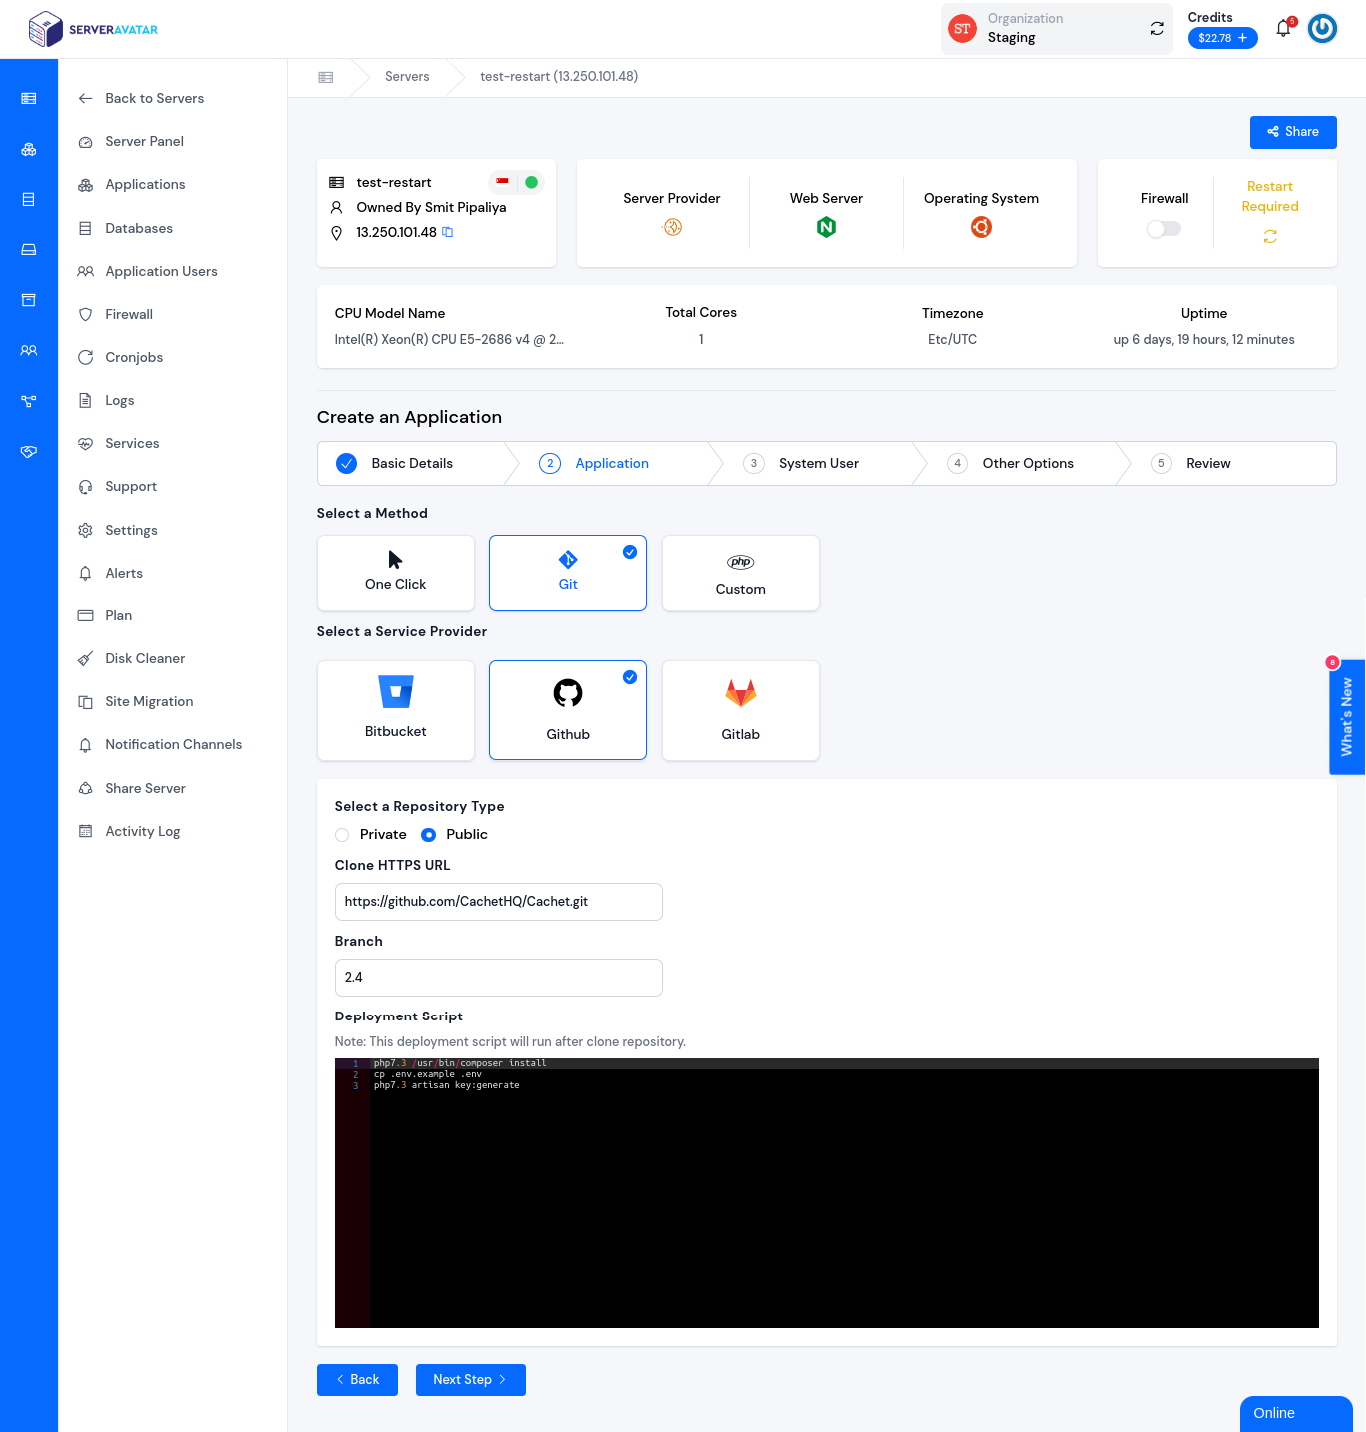
Here you can fill in the required details. It includes-
- Select the Git method and GitHub as a service provider so we can deploy an application from Git public repository.
- Mark on Public Repository.
- Type/Paste the GitHub project URL. You’ll find the link on GitHub in the image below.
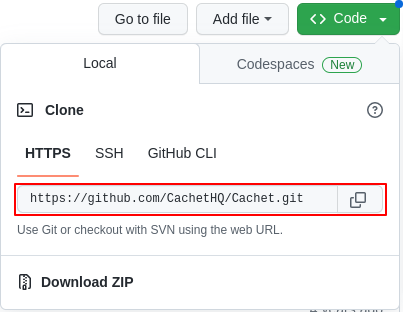
- Type the Branch of the GitHub project.

- Type the below commands in the deployment script.
php7.3 /usr/bin/composer install cp .env.example .env php7.3 artisan key:generate
Note that:
Note that: Cachet supports PHP7.1 To 7.3, we need to specify the version in the command in the deployments script.
3. Allocate system user
System users manage the resources of the application. You can create a new application user or give permission to the existing user.
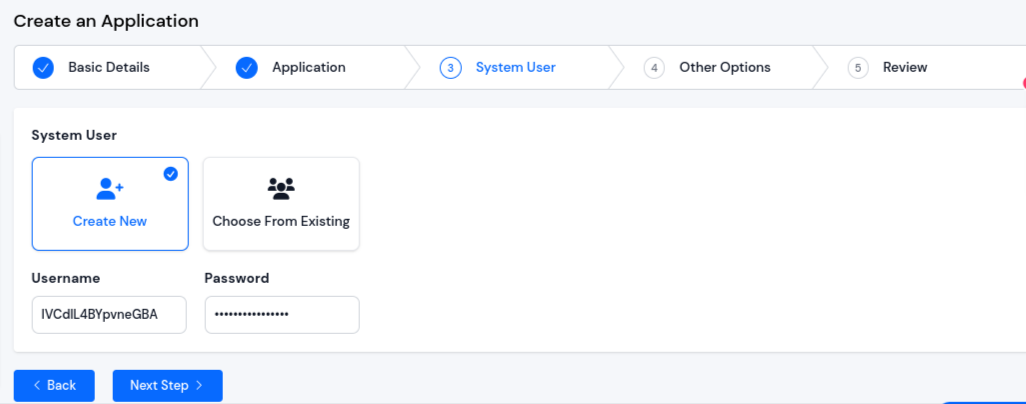
Click the Next Step to continue.
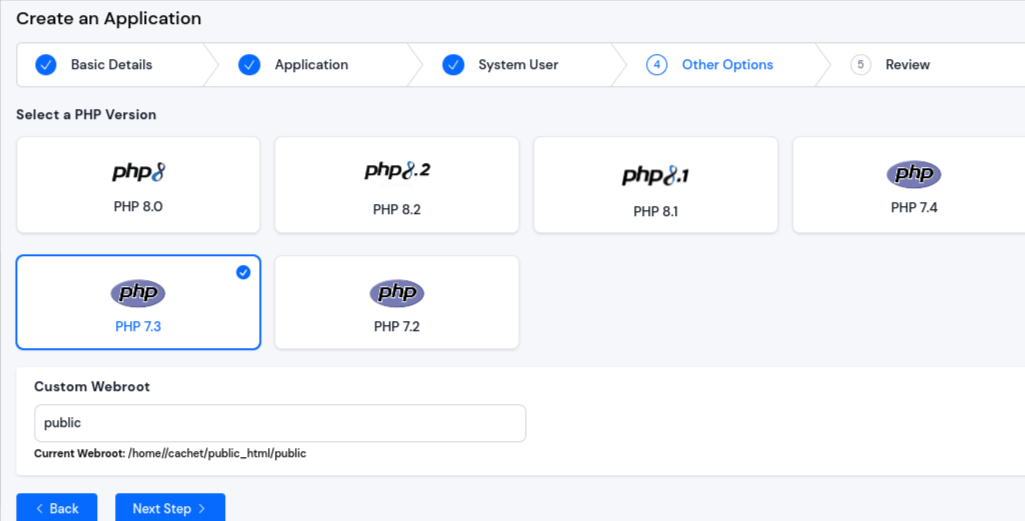
4. Other Options
In this step, select PHP version 7.3. Cachet supports PHP 7.1 - 7.3. Type Public in the Custom Webroot field.
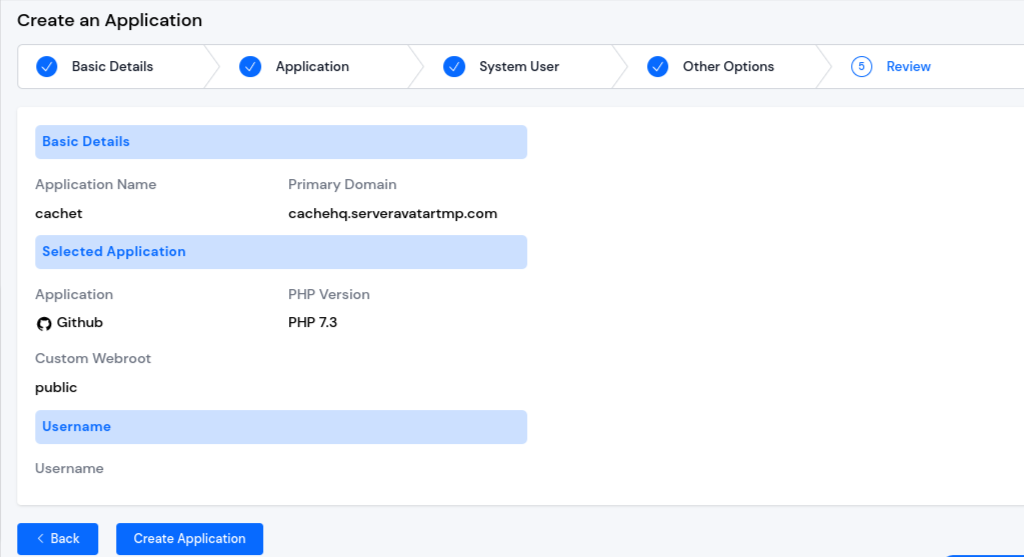
5. Review your application details
Review your application details. Click the Create Application button.
Step 2: Create a Cachet database
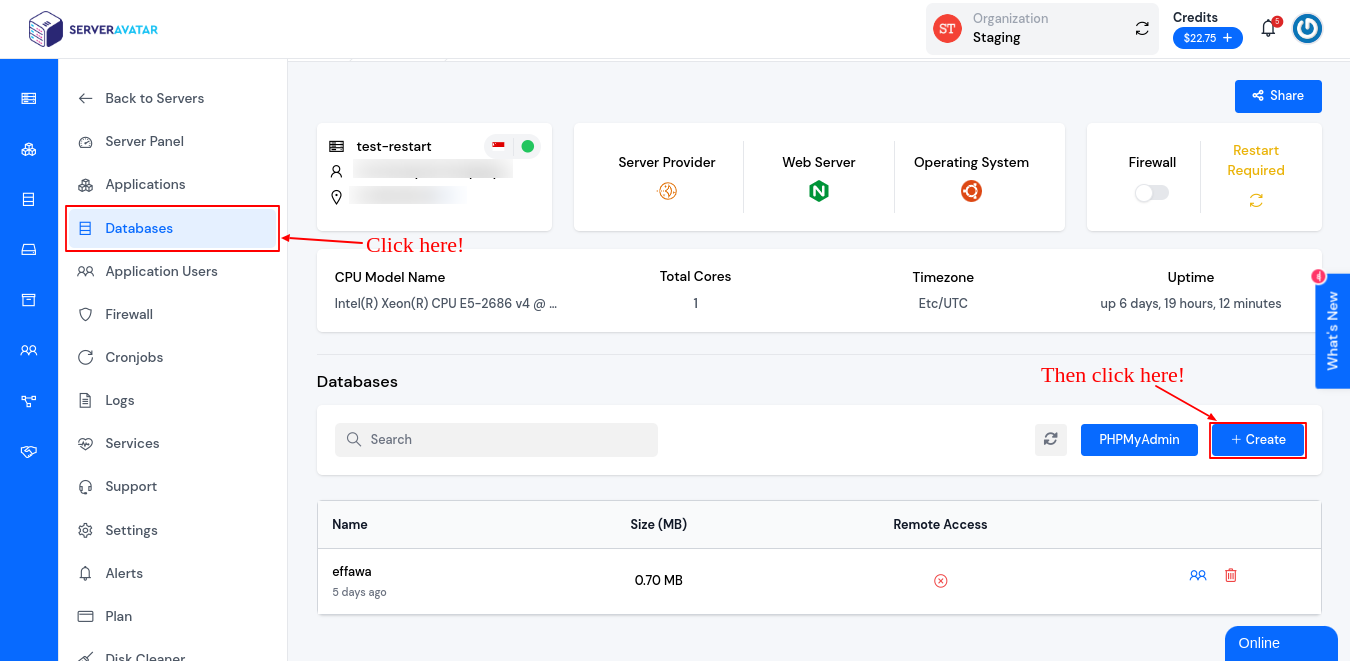
On the server panel, navigate to the Databases tab from the sidebar and click the Create button to create a MySQL database.
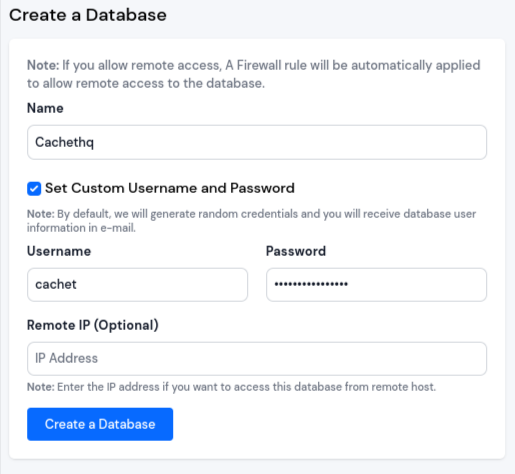
Fill in database details, including-
- Database Name
- Database Username
- Database Password
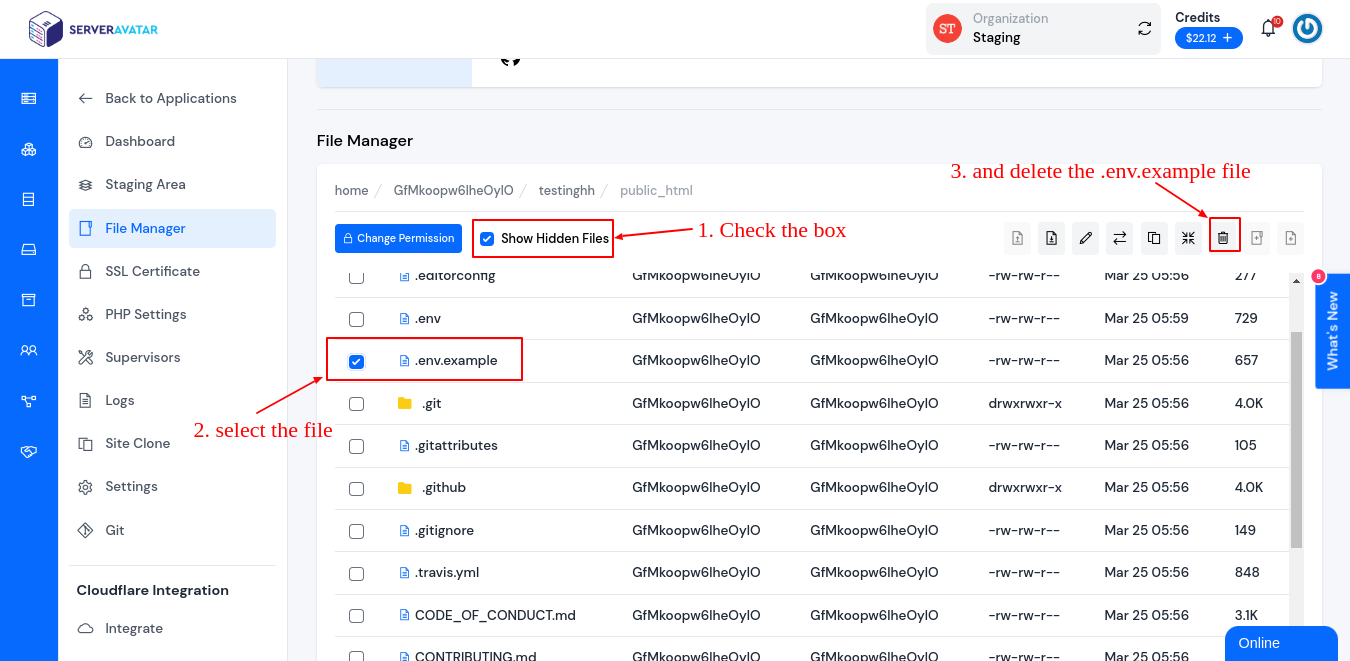
Step 3: Delete the .env.example file and update the database information
To delete the .env.example file, go to the application panel>>file manager and access the public_html folder. Now check the Show Hidden Files. The .env.example file is at the top of the multiple hidden files. Please select the file and delete it like the following image.
Now open the .env file and change the database details we created in the second step. It includes-
DB_DATABASE: Database Name DB_USERNAME: Database Username DB_PASSWORD: Database Password
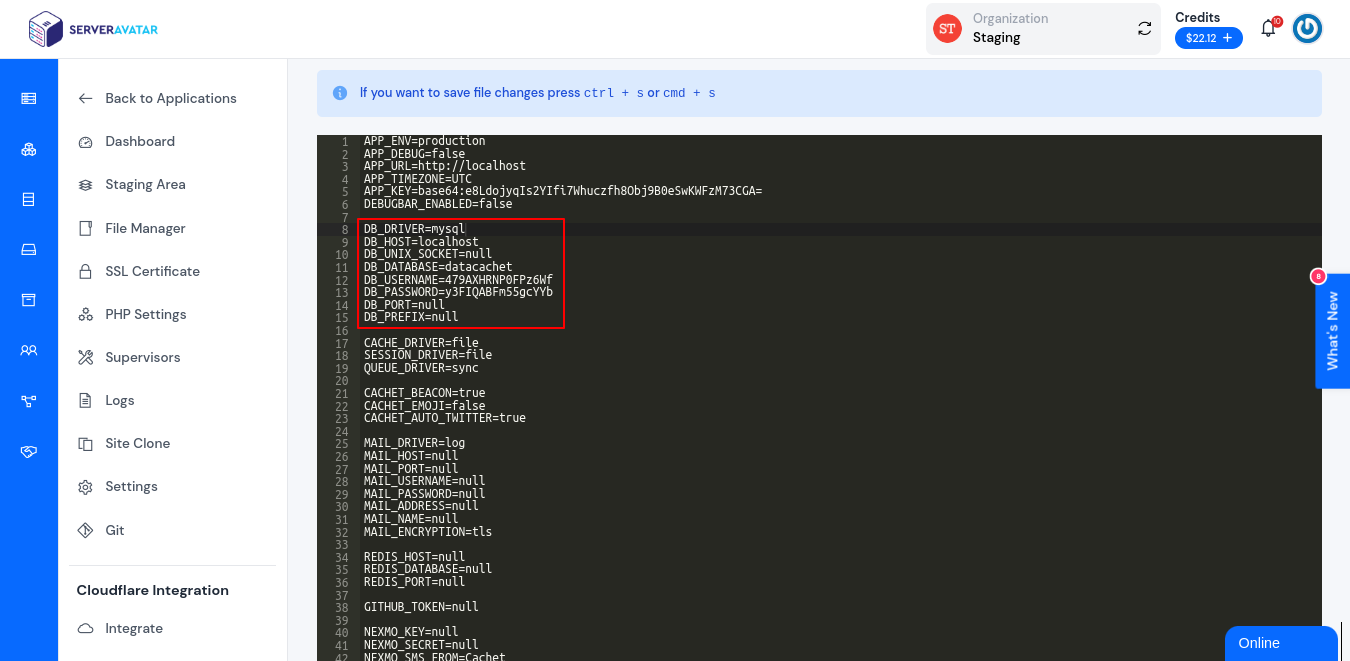
Don’t forget to save the file(CTRL+s) after making appropriate changes.
Step 4: Install SSL
To install SSL for your application. Go to your application panel and click the SSL Certificate from the sidebar.
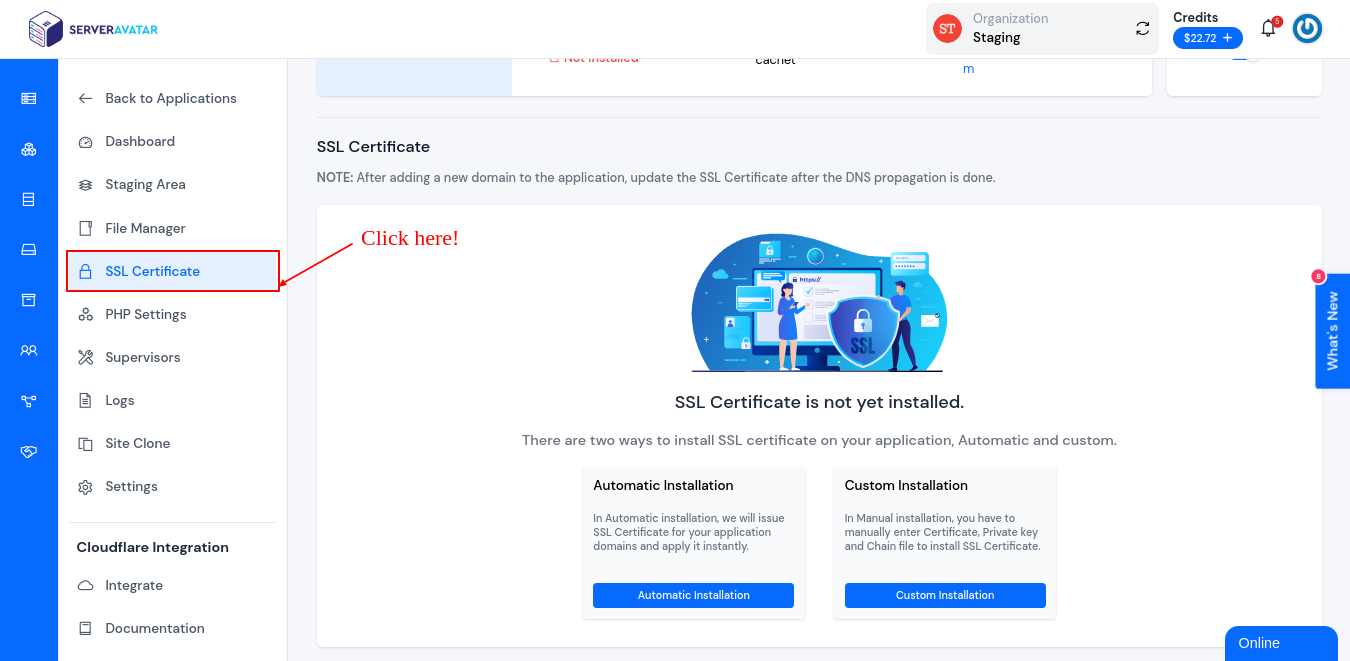
You can install Automatic SSL or a Custom installation method to secure your site with an SSL certificate. It is recommended to install automatic SSL for your application.
Step 5: Install and Set up Cachet
1. Environment set up
Access your domain/subdomain on the browser to install and set up Cachet. The setup screen will look like the following image.
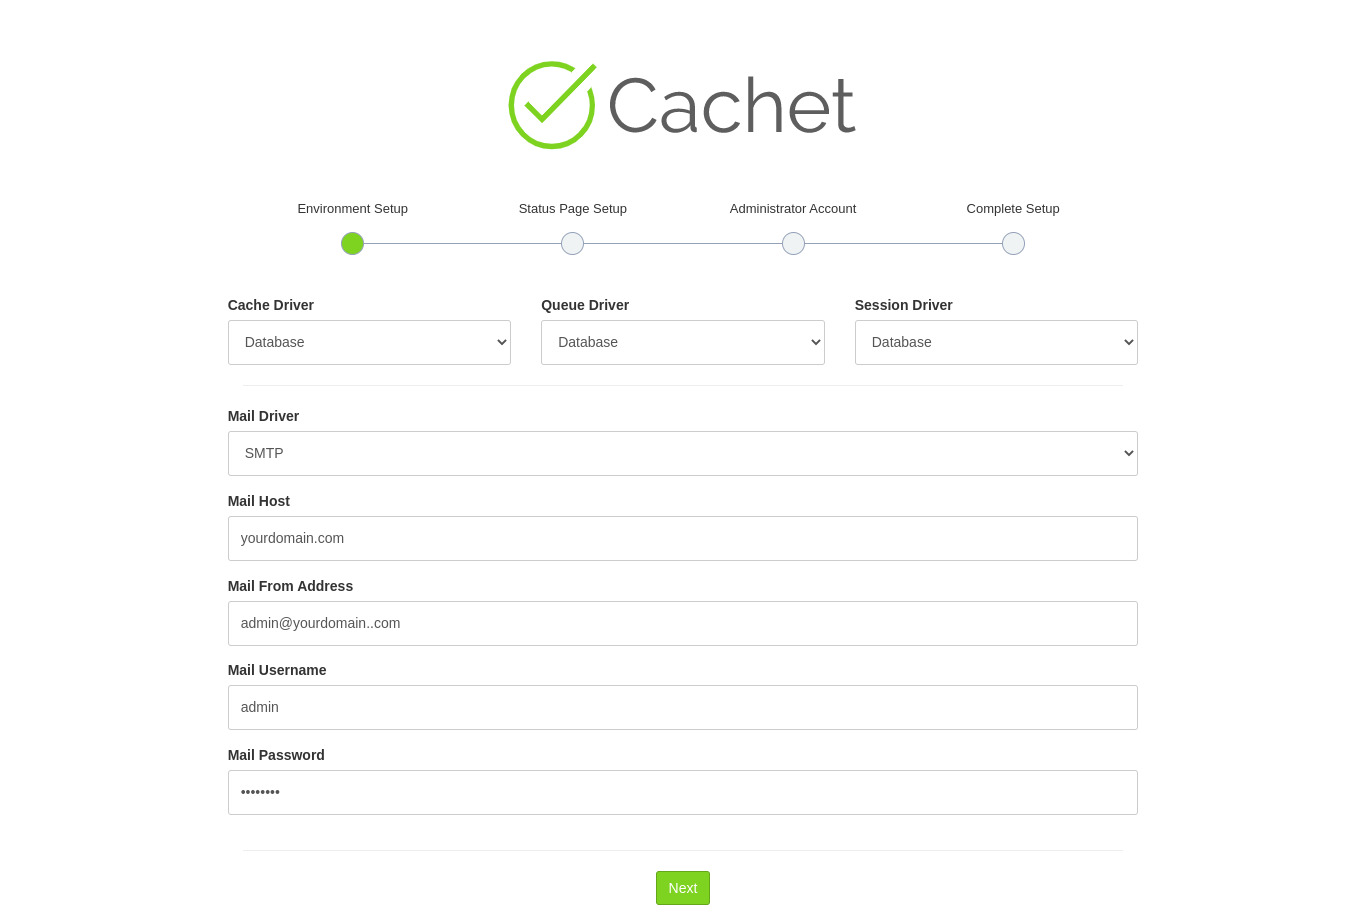
Fill in the required details in the above image and click the Next button.
2. Status Page Setup
On the next page, you’ll need to set up the status page. Here you can fill up the details, including your Website Name, Website Domain, Timezone, and Language.
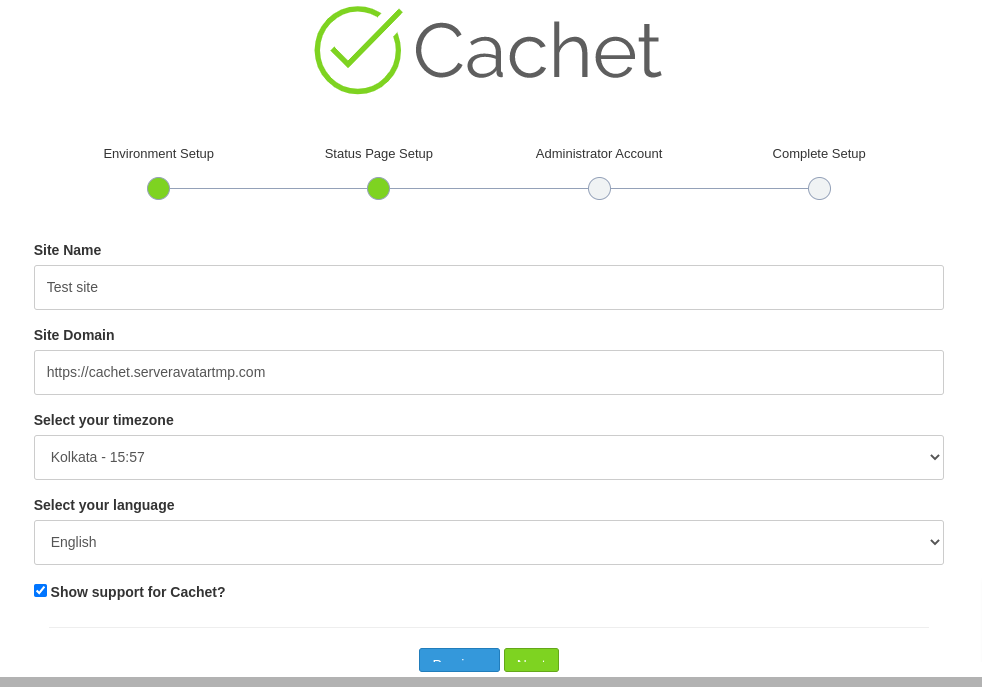
Click the Next button to continue.
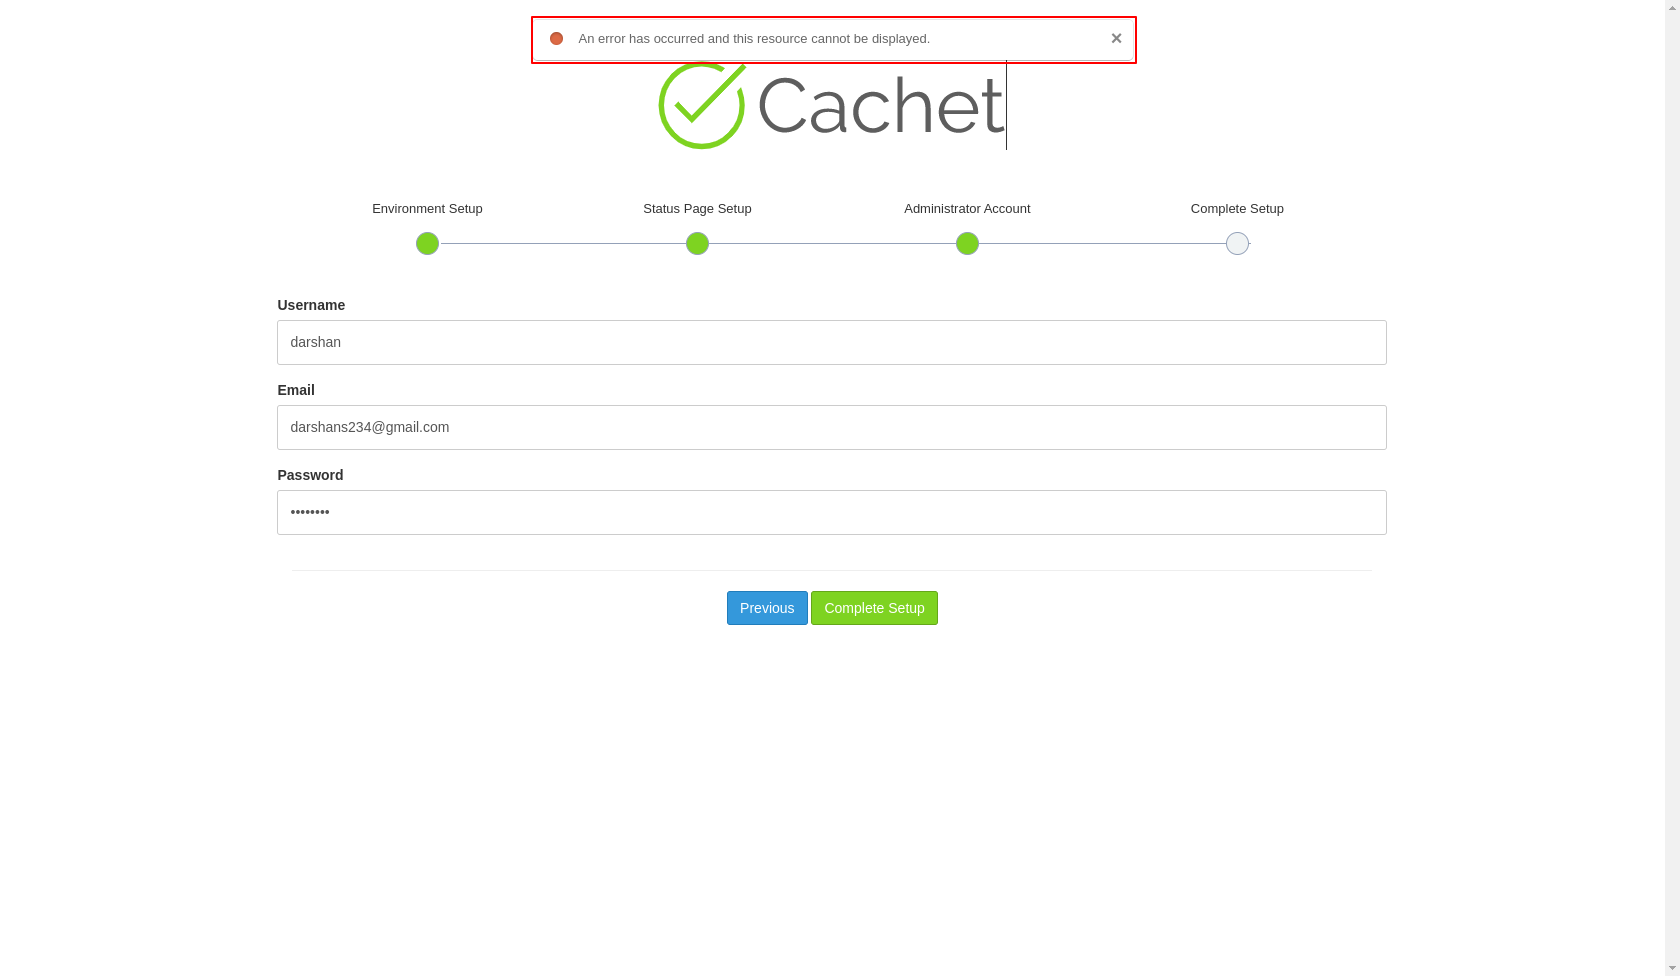
3. Administrator Account
Fill up admin details, including** Admin Username**, Email, and Password.
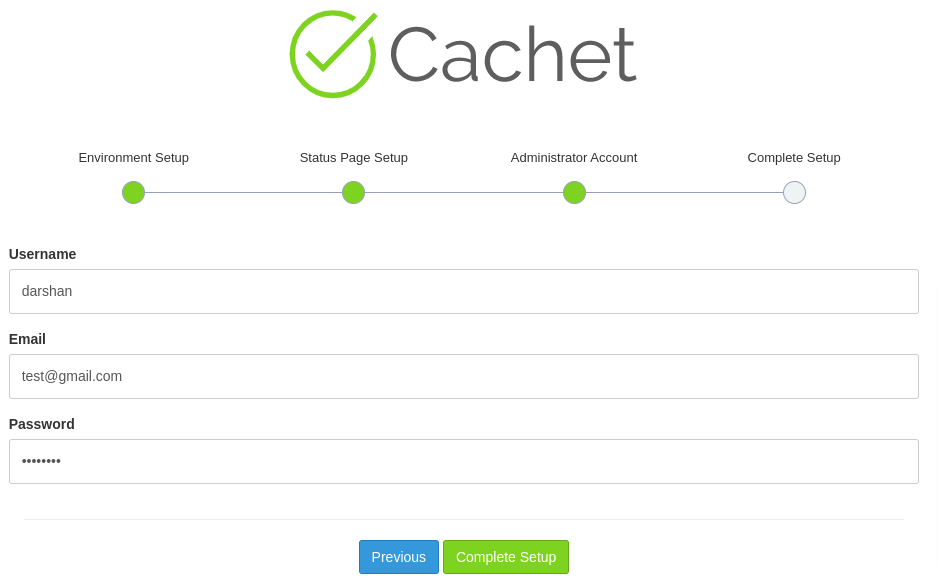
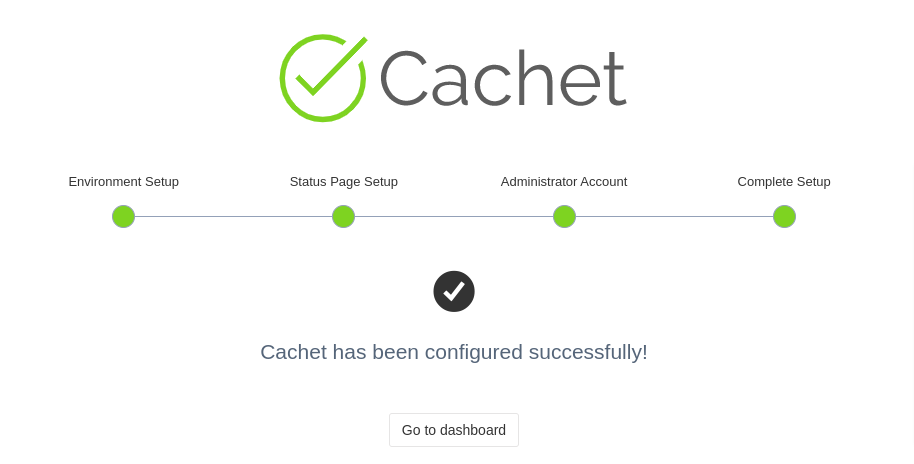
Once you enter all the details, click the Complete Setup button. The message will display like the following image. Click the Go To Dashboard button to continue.
Notice: you may see the error “An error occurs, and this resource cannot be displayed.”
If it occurs, log in to your application using an SSH connection. You can see the credentials in the application panel in the following image.
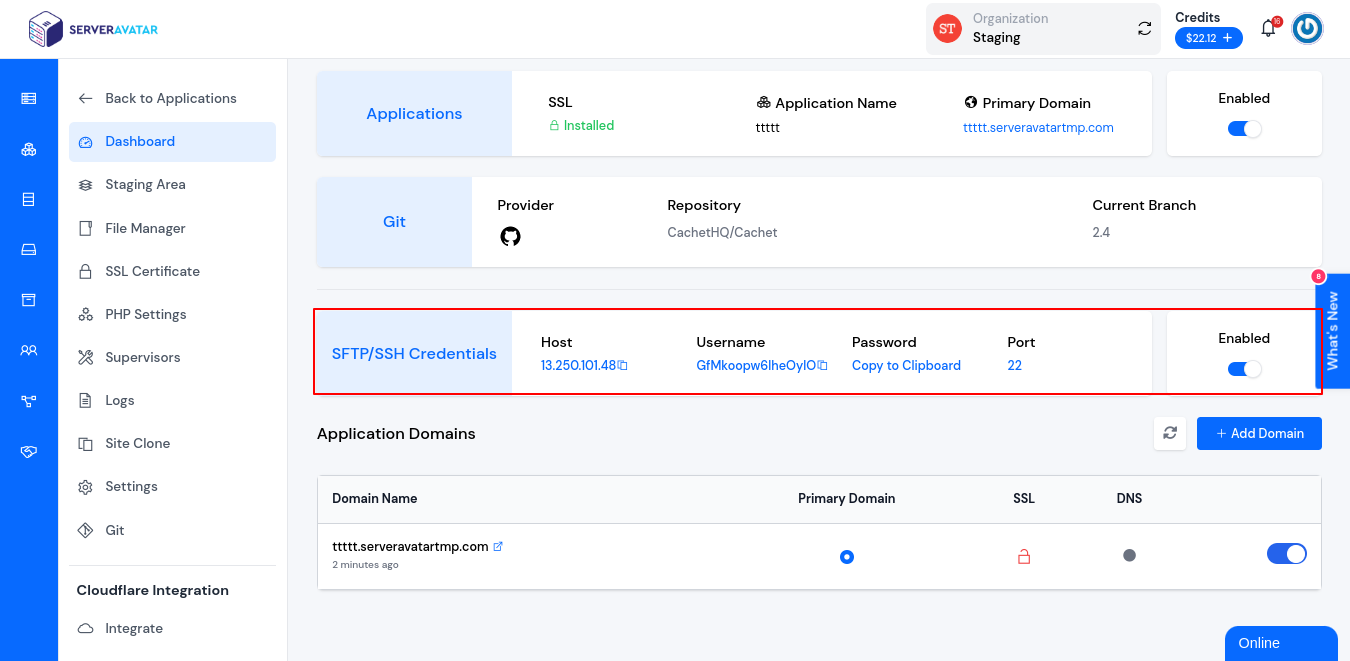
Execute the following command in your terminal to log in to your application-
ssh Username@Host
Now go to your application path using “cd Application_Name/public_html” and execute the following command.
Php7.3 artisan migrate:refresh
After that, go to your setup page and click the Complete Setup button. It will configure cachet successfully.
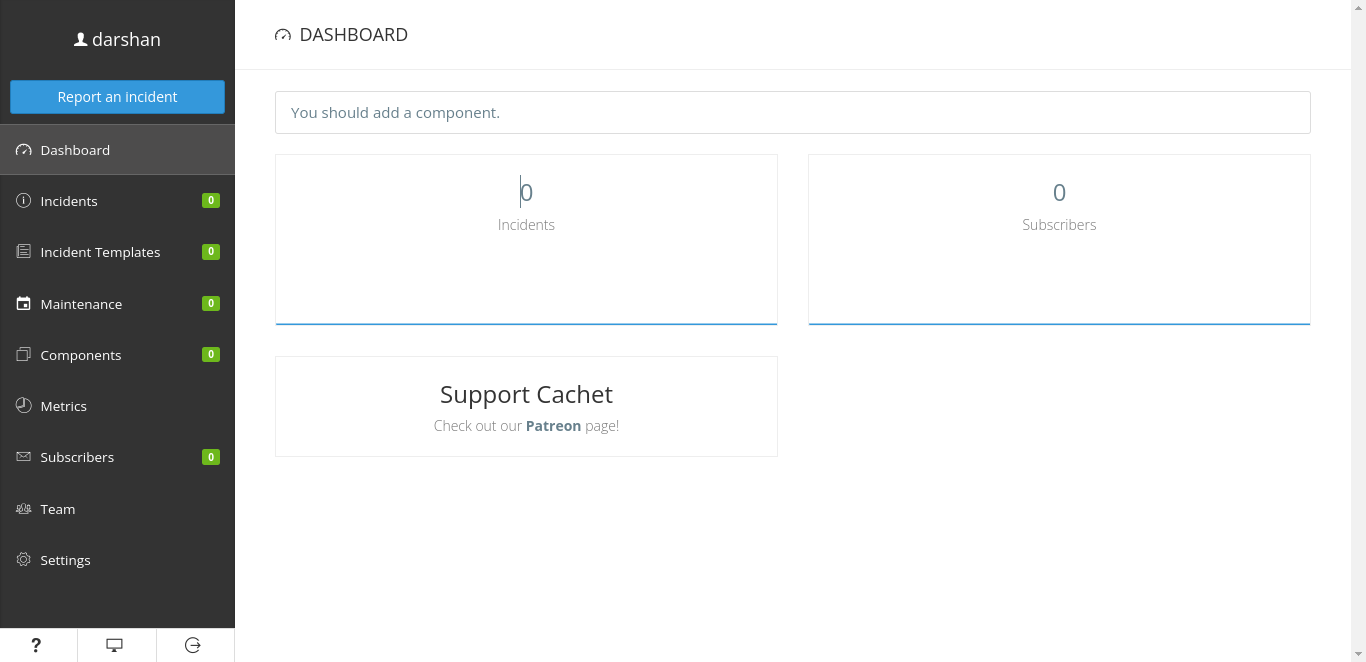
Once you access the dashboard, you’ll create and manage components and incidents, including updating incidents with additional information and marking them as resolved when the issue is fixed.
That’s it. Your CacheT instance should be live and you can start working on your status pages. We hope this tutorial was helpful to you. You can also refer to other deployment tutorials given below.