PrestaShop is an open-source e-commerce platform known for flexibility and extensive customization options. PrestaShop offers a different catalog of modules and themes, enabling users to customize their stores to specific needs. With a user-friendly interface, PrestaShop caters to both small businesses and larger enterprises. Its scalability and regular updates make it a reliable choice for building and growing an online retail presence. Hosting PrestaShop on AWS Lightsail ensures reliability with its scalable infrastructure and straightforward deployment options. ServerAvatar makes the deployment of the PrestaShop Application on the AWS Lightsail platform an easy step-by-step process.
Create VM Instance in AWS Lightsail
To create a server in AWS Lightsail, First log in to the AWS Lightsail console. Once you are there, Follow the steps given below.
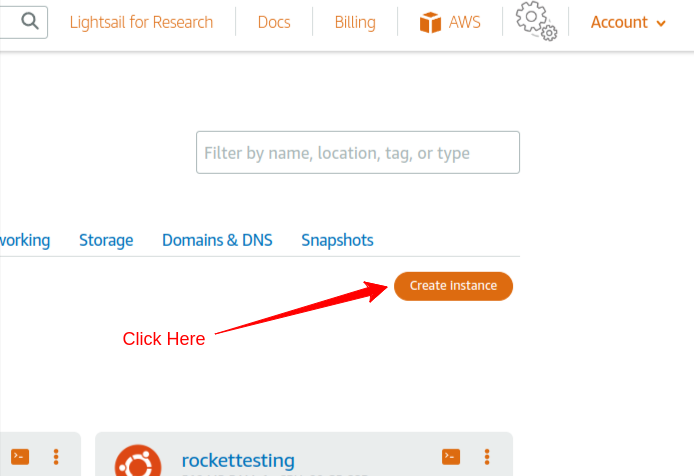
Step 1: Go to the Instance Creation Form
To access the instance creation form, Go to the AWS Lightsail dashboard and click on the orange button with the Create Instance text. See the following image for reference.
Step 2: Select the Location of your Instance
First of all, You have to select the location for your instance. It is always better to select a location closest to your major traffic source. It will decrease the latency for the majority of your website visitors.
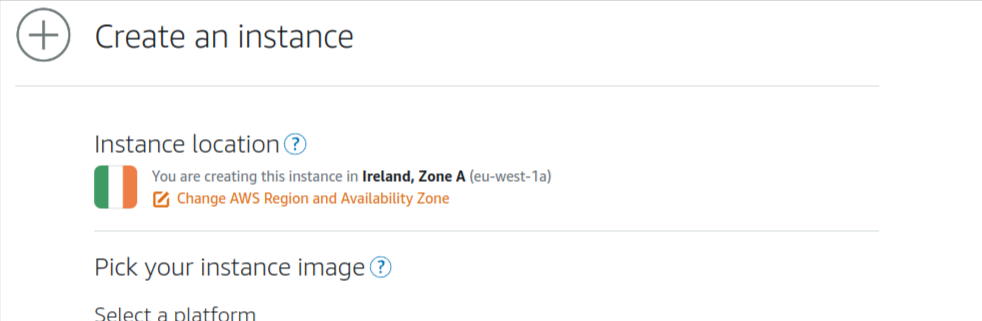
If you want to change the location of your server, You can simply update the current region in your AWS account.
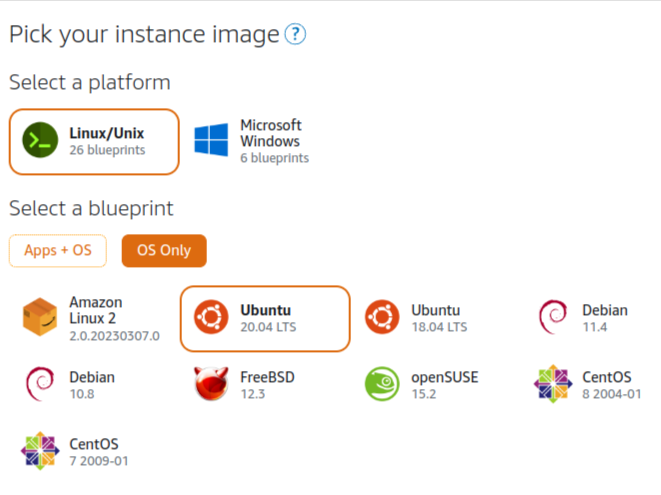
Step 3: Select the OS for your Instance
After selecting the location, Select the operating system for your instance. In this case, First, click on OS Only and then select Ubuntu 20.04 as an operating system just like the following image.
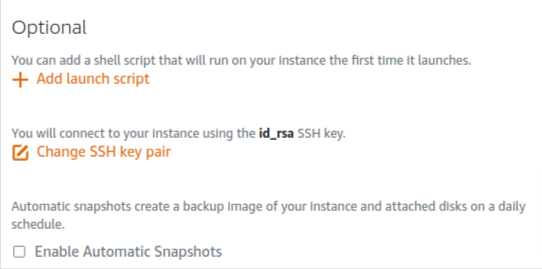
Step 4: Select SSH Key and Launch Script (Optional/Advanced)
This is an optional step. Here you can set the Launch script and the main SSH key for your server. If you don't understand the launch script and SSH keys, Just ignore this step.
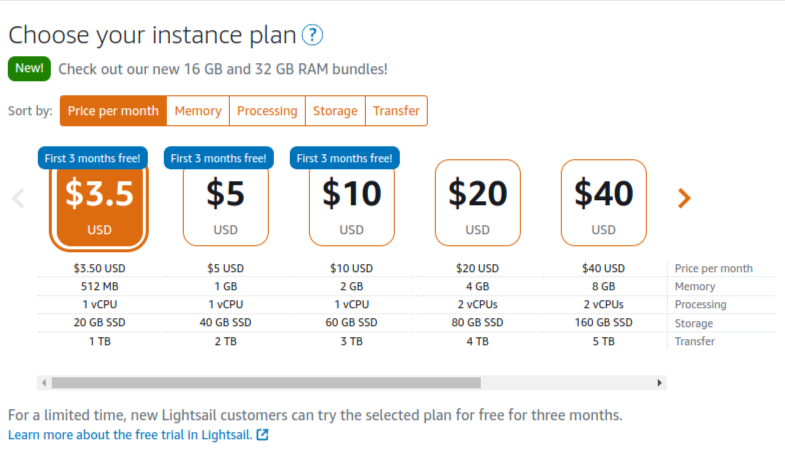
Step 5: Select the Plan
In this step, select the size of your VM instance. AWS Lightsail provides lots of different options when it comes to plans and pricing. The plan and pricing selection completely depend on the requirements of your site(s). So, select the plan based on the complexity and traffic of your sites.
To host PrestaShop, a minimum configuration of 1 or more GB of RAM and a minimum of 1GB of disk space is required. The necessary resources can differ based on factors like the size of your media files, the complexity of your templates, and the number of extensions you use.
Step 6: Verify and Create the Instance
Finally, Enter the name of your instance, and the number of instances you want to create and assign the tags accordingly for identification. Once done, click on the Create Instance button to start the instance creation process.
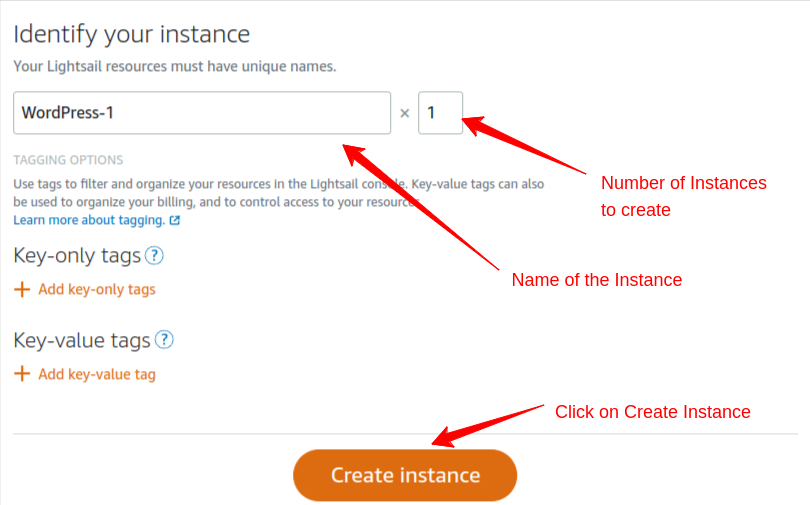
It might take a few minutes to deploy the instance. Once done, follow the below-given step to update the firewall rules for the VM instance.
Step 7: Update Firewall Rules
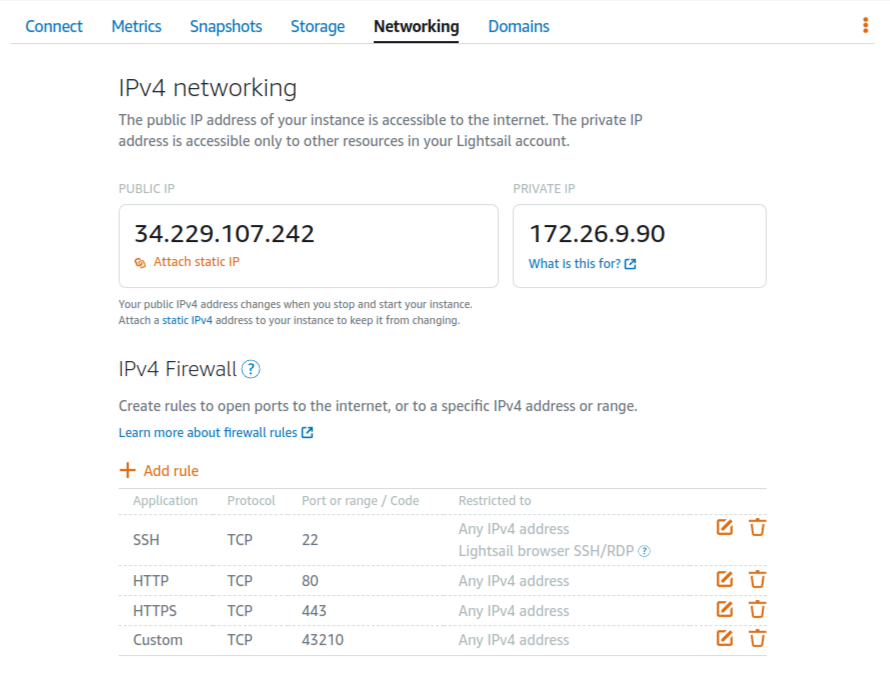
ServerAvatar requires 43210 port open. In total, You need to keep the following ports open on the instance.
- 22 (SSH): To access your server via SSH.
- 80 (HTTP): To access your sites on HTTP.
- 443 (HTTPS): To access your sites on HTTPS.
- 43210 (ServerAvatar): To allow communication between ServerAvatar and your instance.
To update the firewall rules for a specific instance, Go to the AWS Lightsail dashboard and click on the name of the instance you want to update. Then go to the Networking section and add the missing firewall rules. After updating the firewall rules, the networking section of your Instance should look like the following image.
Initial Server Configuration
The Initial server configuration includes the installation and configuration of various packages required to host your website. Usually, You have to write commands and modify configuration files. Luckily, With ServerAvatar, Your full server configuration and optimization can be automated.
Here are the three ways to automatically configure your server with ServerAvatar.
Connect a server using a direct method
- Login/Register to ServerAvatar account, click the Create button from the right side of the screen, and select Server from the dropdown.
- Select Direct Method in the serve connecting method section.
- Type the Server Name as per your choice.
- Select a Tech Stack as per your need. You can either select Apache, Nginx, OpenLiteSpeed or Node Stack.
- Select a Database: MySQL, MariaDB or MongoDB.
- Enable the toggle if you want to install the latest LTS version of node.js on your server.
- Select a Management plan and click the Connect Now button.
- You’ll see the command on your screen. Login to your server using an ssh connection and execute that command as a root user.
- The server connection process will be started on your ServerAvatar account after executing the command.
Connect a server using integration
- Login/Register to your ServerAvatar account, navigate to the Integration tab from the sidebar of the panel, and access Cloud Platform from the dropdown.
- Now Select a cloud platform you want to link with ServerAvatar.
- The popup form will appear on your screen. Enter details to link your cloud provider account. The integration method is different based on the cloud provider you select.
- You can integrate five different cloud provider platforms with ServerAvatar, which is-
Check the above link of cloud platforms to know more about integrating cloud platforms with ServeAvatar.
Connect a server using commands
Step 1. Login to your server using root user
Once you create a server as per your requirements, connect to your server using an ssh connection and execute the below three commands as a root user in your server console area.
wget https://srvr.so/install
chmod +x install
./install
Step 2. Select a web server
It will ask you which web server you would like to install on your server: Apache, Nginx, OpenLiteSpeed or Node Stack. Type anyone that you would like to install on your server and hit the enter button.
Step 3. Claim your server
Completing the process will give you a link to claim your server.
Open the link on your browser to access the ServerAvatar server panel.
Auto-install Prestashop with ServerAvatar
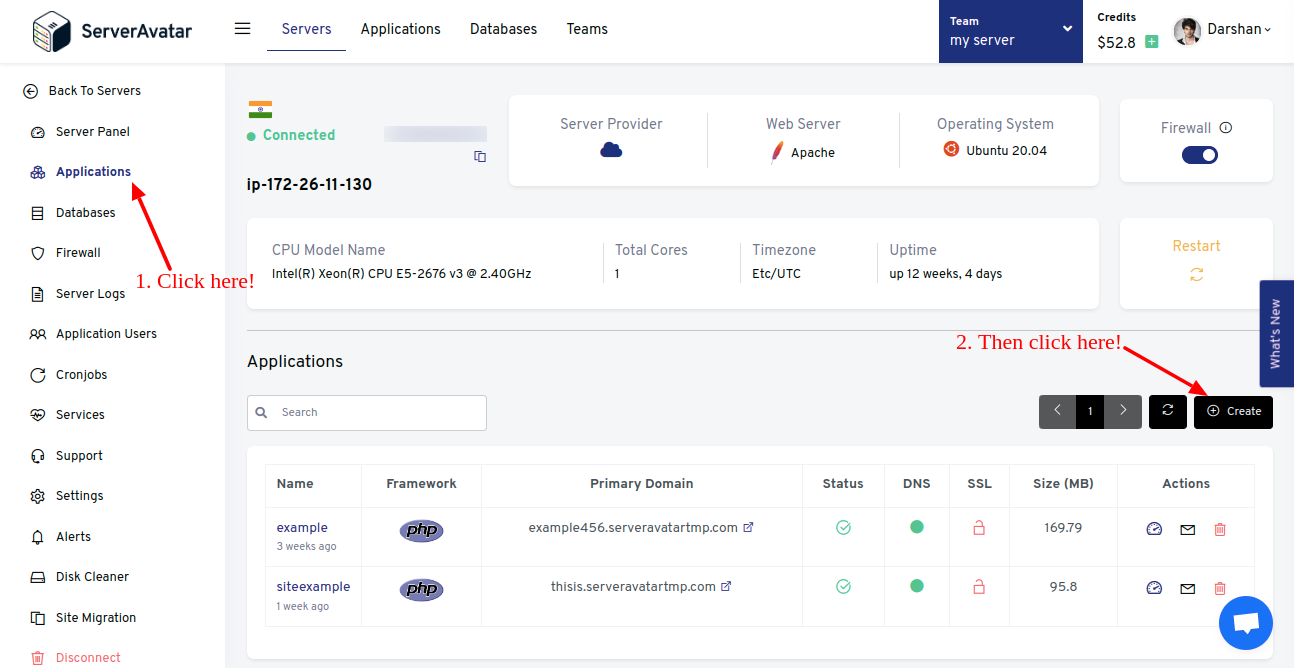
Step 1: Create a PHP application
On the server panel, access the Application tab from the sidebar and click the Create button like the image below.
Fill up the details, including the Application Name, Primary Domain name, and other Advanced Settings if required.
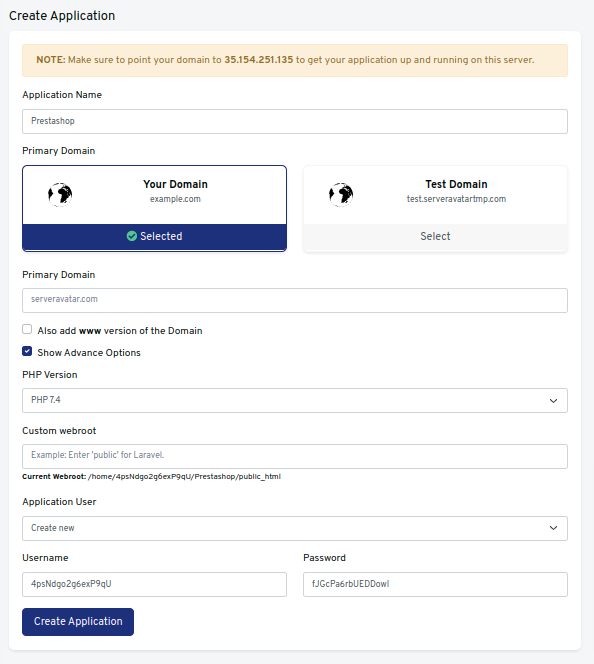
Note that:
If you want to host the PrestaShop e-commerce platform on your domain, then make sure to point your domain to the current IP address of your server, and for that:
-
Log in to your hosting provider site, where you buy your domain. You can check your domain information with one click.
-
Access DNS Manager to edit your DNS records(contact the support team if you don’t find them)
-
Change the IP address of A Record of your website to the current server’s IP address.
Click the Create Application button.
Step 2: Auto-install PrestaShop with ServerAvatar
Now on the application panel, click the Auto Deploy button from the sidebar.
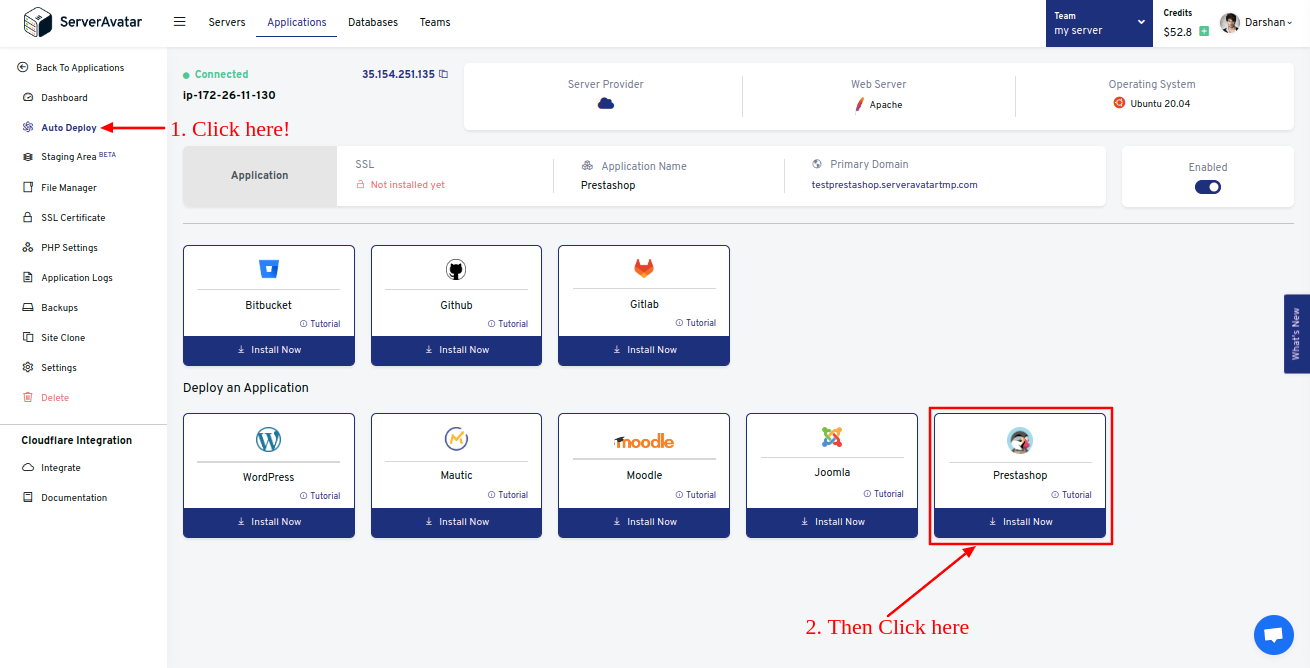
Click the PrestaShop Auto Install card, as you can see in the above image.
It asks to enter PrestaShop details to deploy an application, which includes-
Database details
- Database Server: Select the server you want to host your database.
- Database Name: Enter the database name.
PHP Settings
- PHP Version: Select the supported PHP version for the Prestashop application
Admin Information
- First Name:Admin's first name
- Last Name: Admin last name
- Email: Admin email address. This email will be used in case you forget your password
- Password: Admin login password
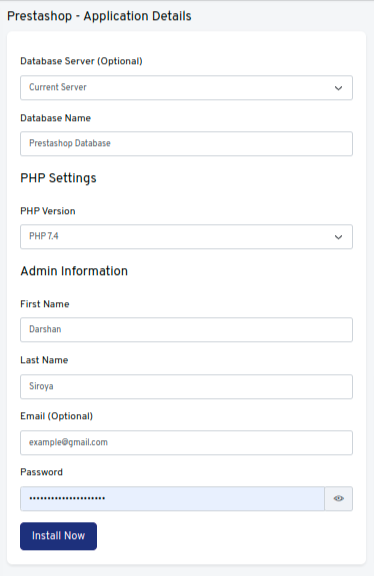
Once you fill in all the details, click the Install Now button.
Step 3: Install SSL Certificates
Go to the application panel. Click the SSL Certificate tab from the sidebar.
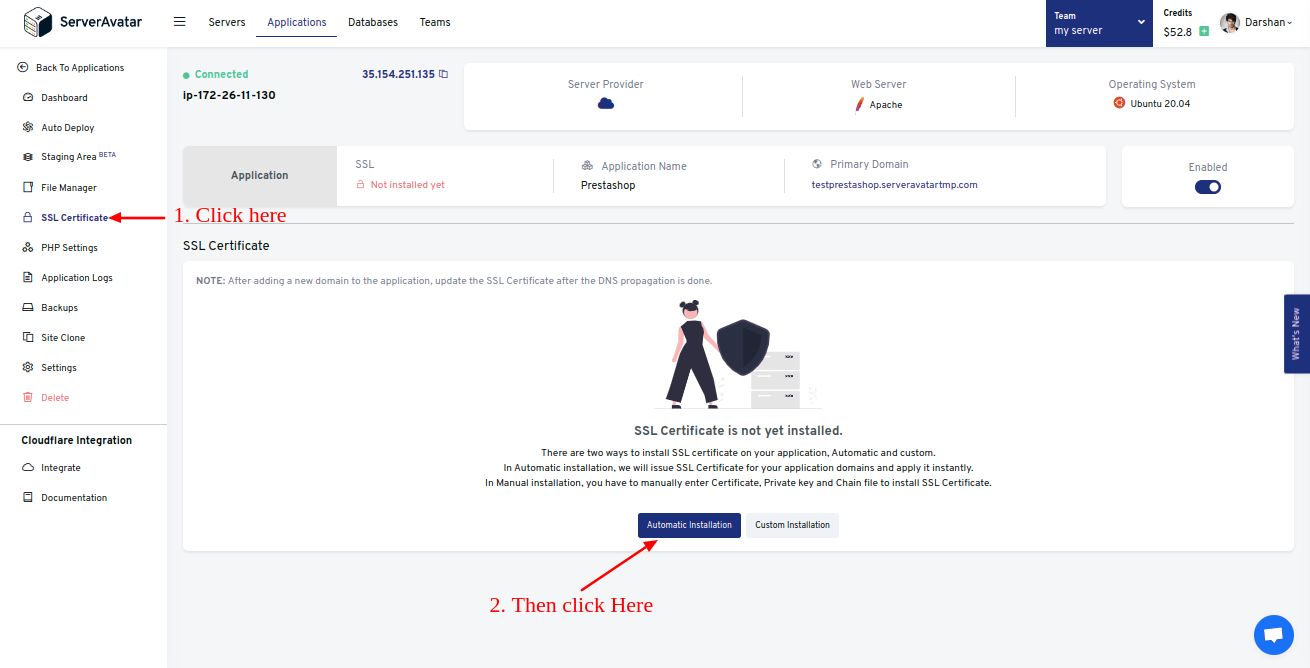
You can also Force HTTP to HTTPS to redirect all your traffic to the secure connection.
Access the URL of your application on the browser and log in using admin credentials to use the Prestashop admin panel.
That’s it. Now you can add your products and manage all your products on one dashboard.