Vultr
Vultr is a very popular cloud platform, just like AWS, Google Cloud, and others. But it is very easy to use and has a simple interface. If you are a Vultr customer, you can integrate your Vultr account with your ServerAvatar account.
The greatest single benefit of this integration is that you can completely bypass the server creation and connection process, saving at least 10 minutes.
The Vultr integration process is a two-step process:
- Create Vultr API Token
- Connect Vultr Account with ServerAvatar
Let’s get started with the first step.
Generate Vultr API Token
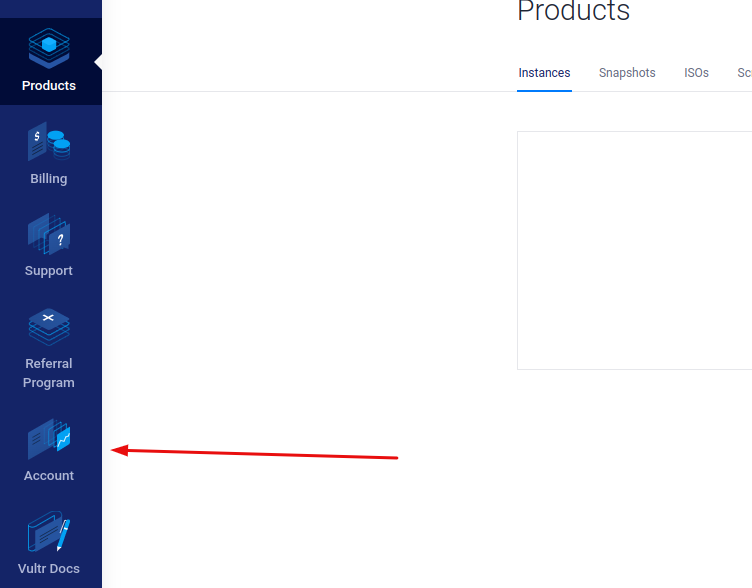
Step 1: Click on Account in the left sidebar.
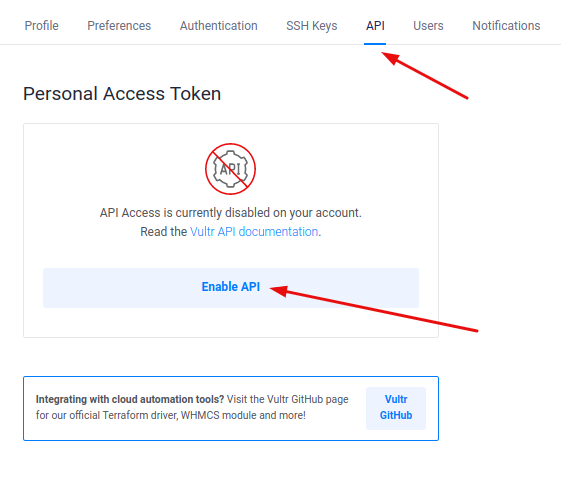
Step 2: Click the API section and click on the Enable API button.
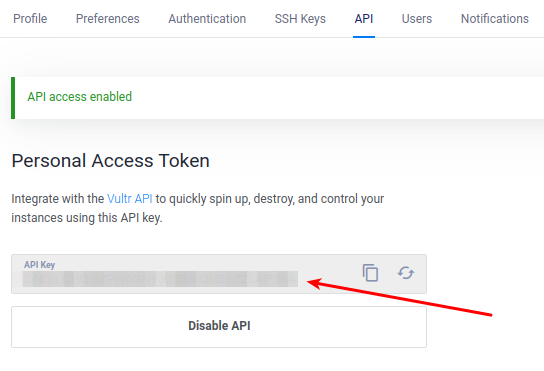
Step 3: You can copy or refresh your API key.
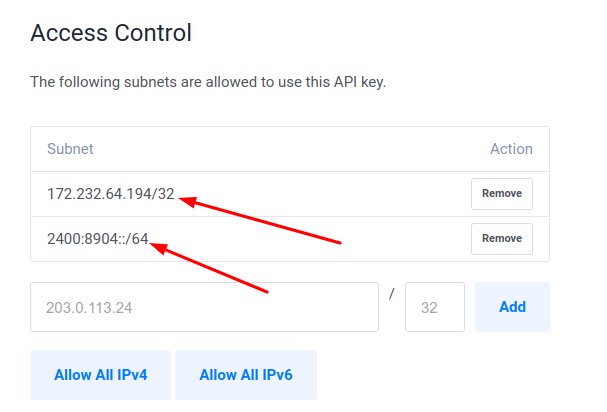
Step 4: Add below two ip in access control.
- **ipv6 : **
2400:8904::f03c:93ff:fe90:9c3e/64 - **ipv4 : **
172.232.64.194/32
Set up a Vultr API Token on ServerAvatar
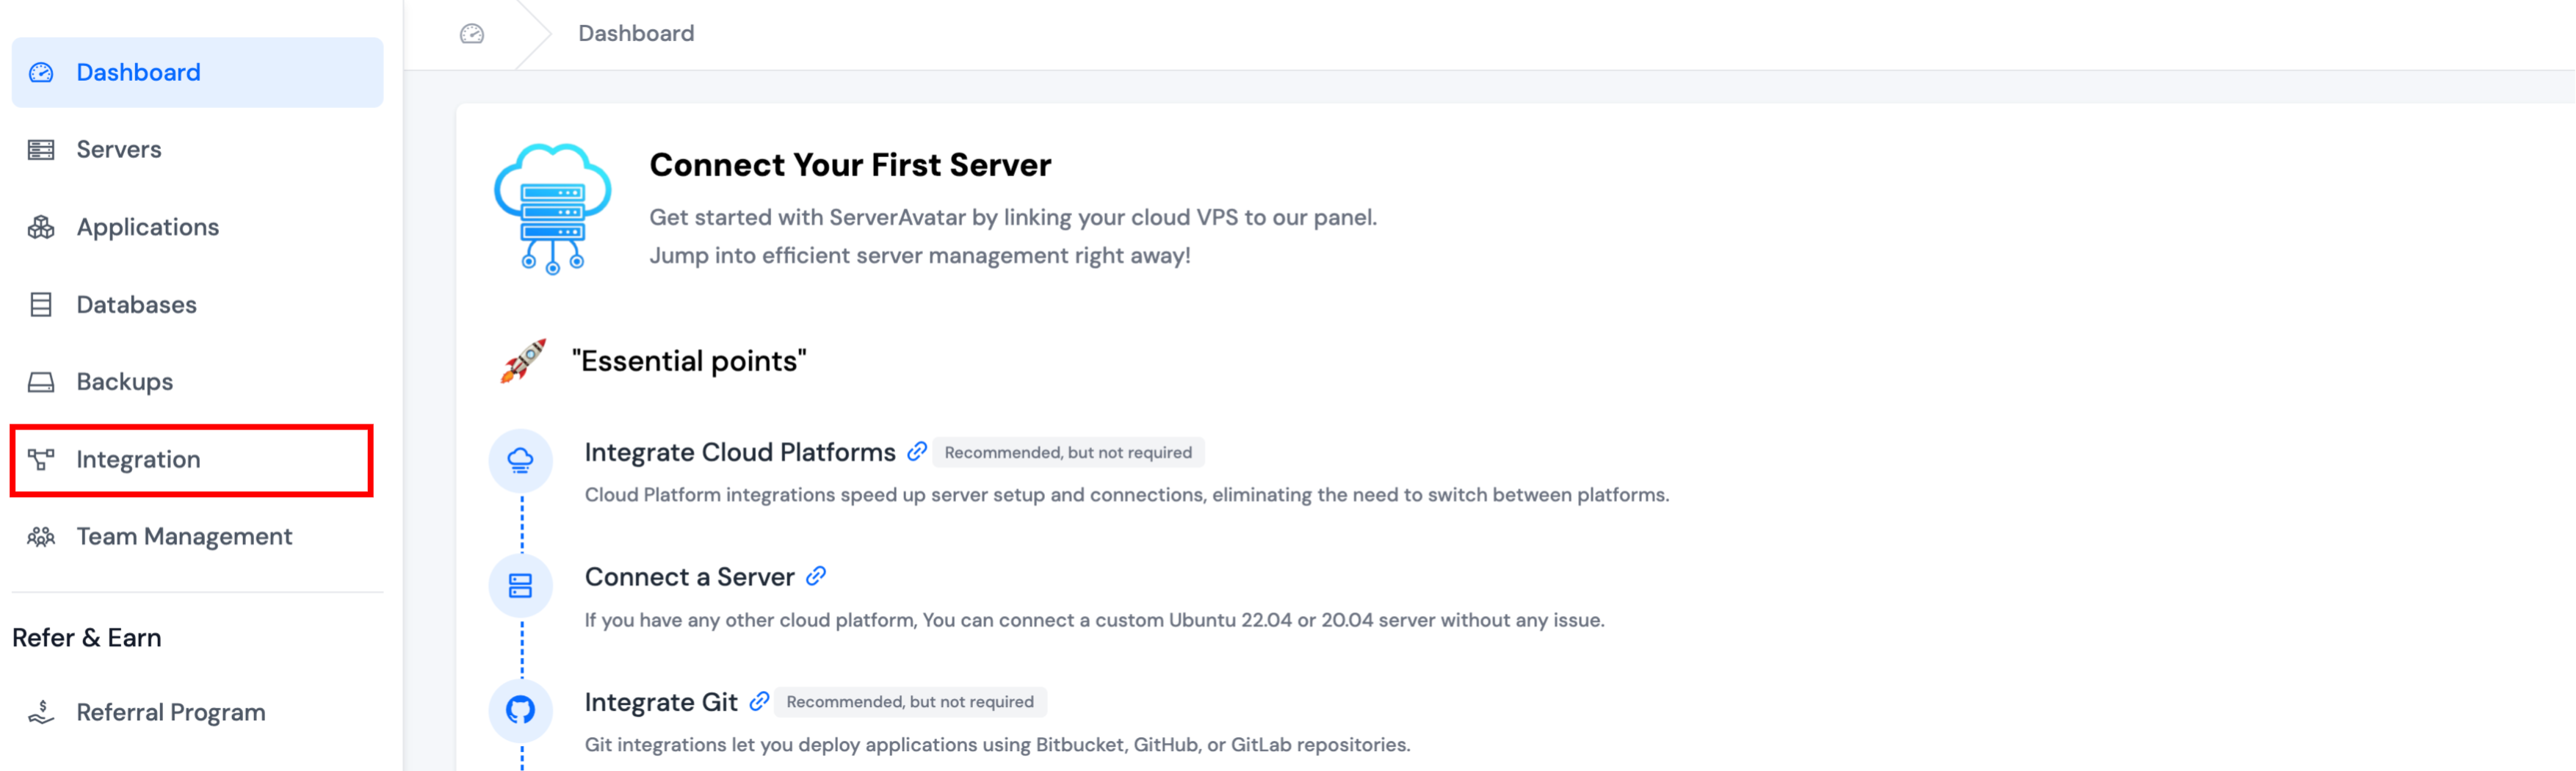
Step 1: On the left-hand sidebar of the ServerAvatar dashboard, click on the Integration tab as shown in the below image.
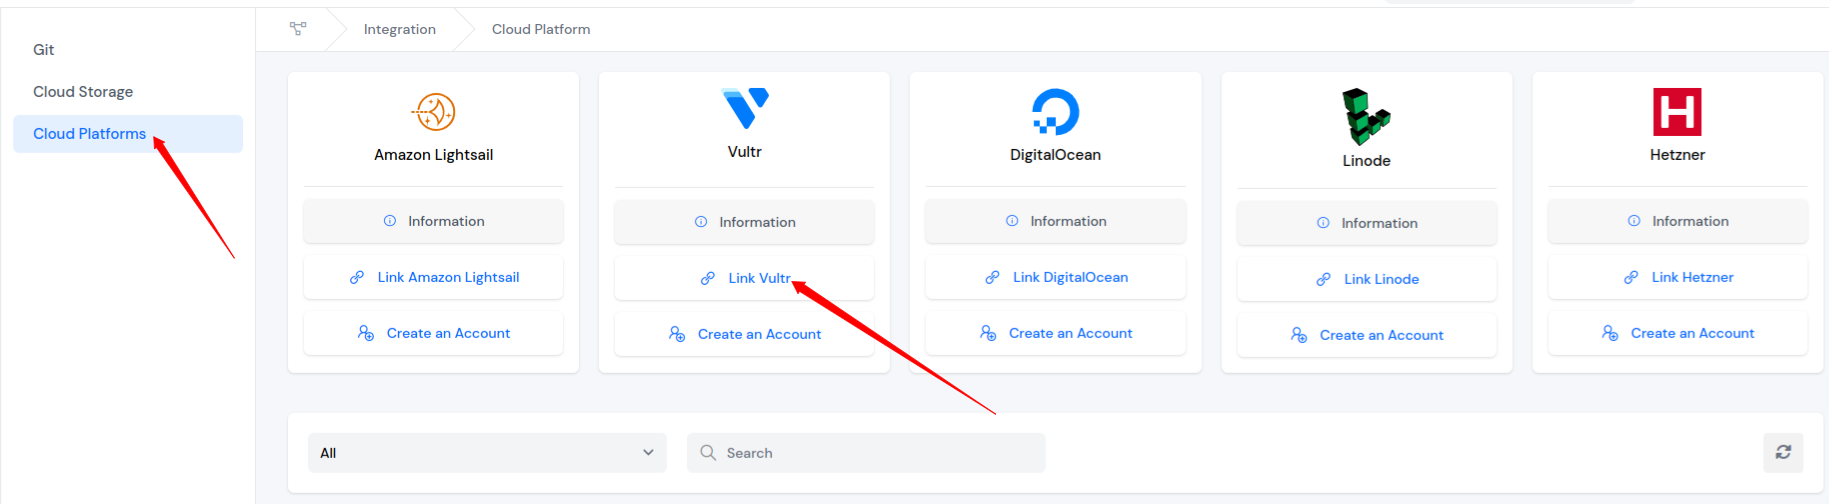
Step 2: Navigate to the Cloud Platforms, and click on the Link Vultr button.
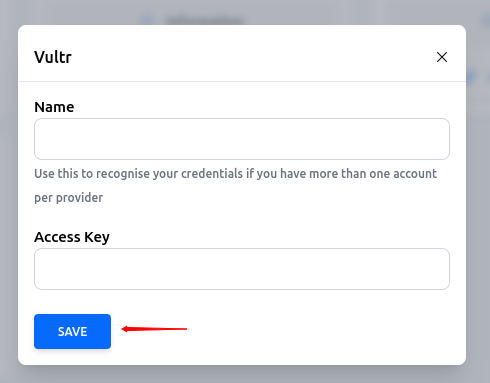
Step 3: Enter Name and Access Key and Click on the Save button.