Webhooks
Set up webhook URLs to receive instant notifications for key events like user actions, transactions, and ticket updates — delivered as structured JSON payloads to your system.
Webhooks allow your system to automatically send real-time data to external services whenever specific events occur in your platform. This enables seamless integration with third-party applications, monitoring systems, and custom workflows.
Overview
The Webhooks section allows you to:
- Create new webhooks for different events
- Update existing webhook configurations
- Delete webhooks you no longer need
- Enable/Disable webhooks without deleting them
- View webhook history to monitor delivery status
- Send test webhooks to verify your endpoint is working correctly
Accessing Webhooks
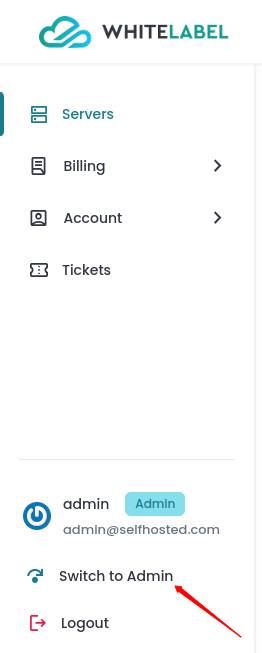
Step 1: First, log in to the Self Hosted panel, and go to admin side by clicking on Admin as shown in the image below.
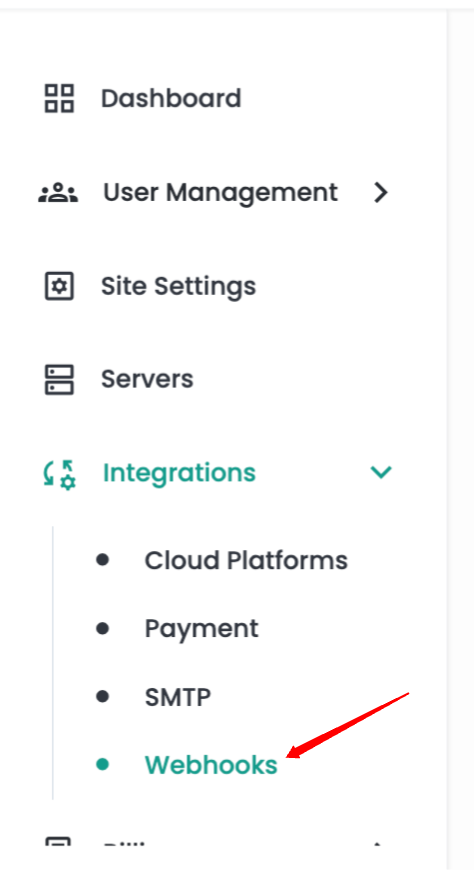
Step 2: Click on the Integrations -> Webhooks option from the left side panel.
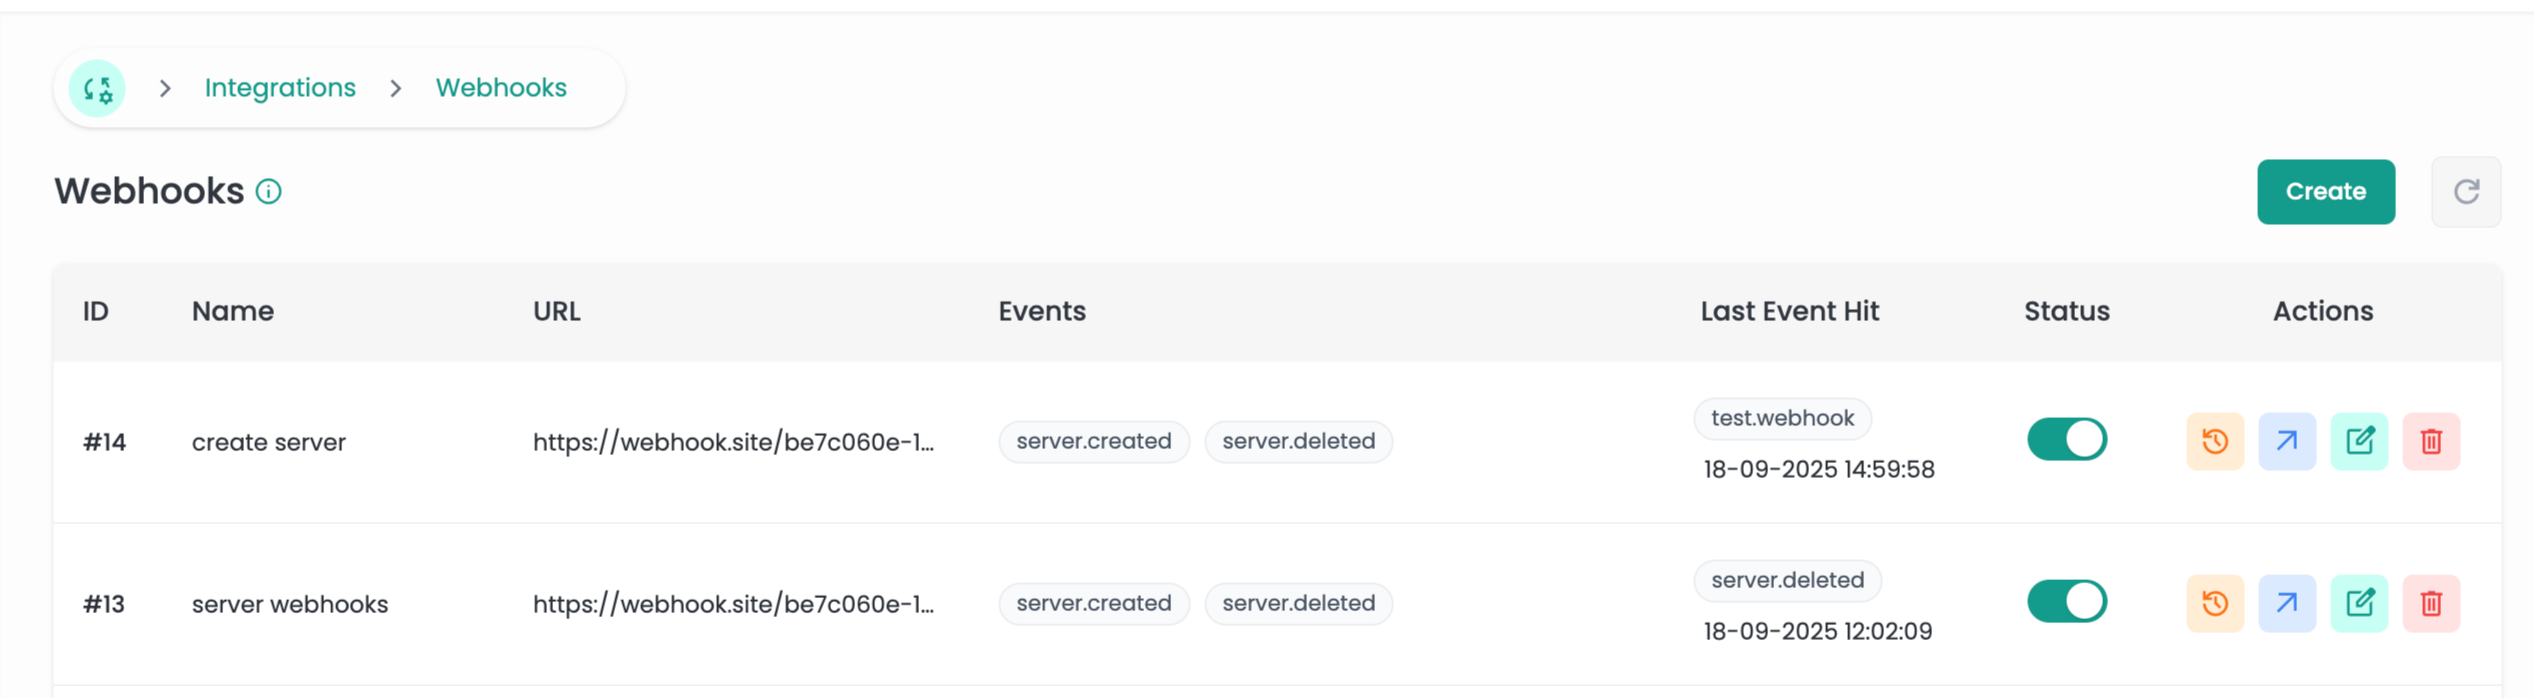
Webhooks Dashboard
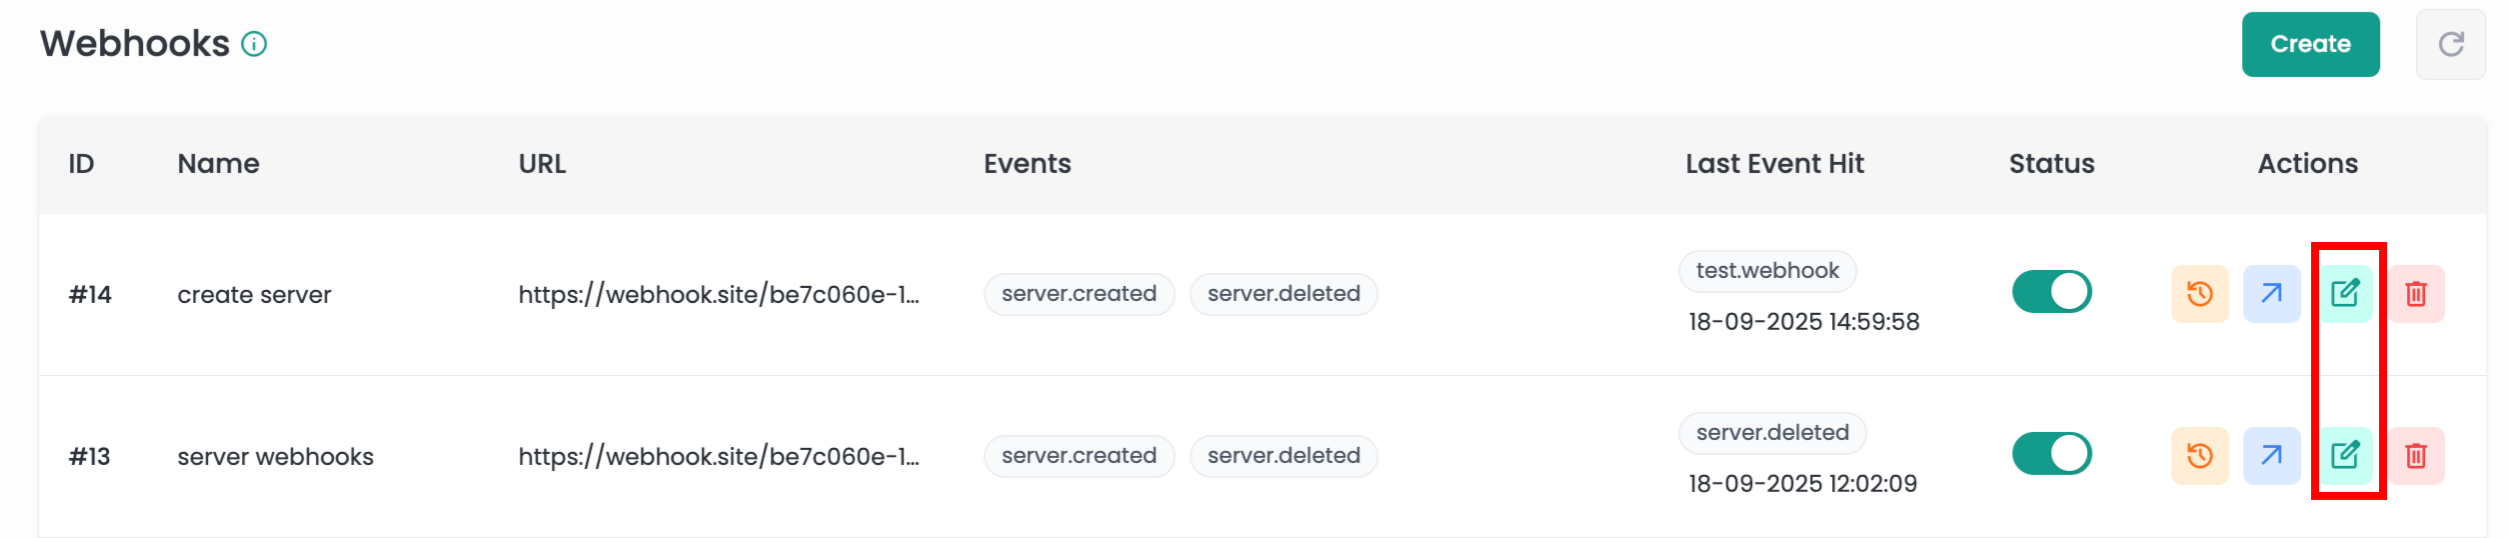
The webhooks dashboard displays all your configured webhooks in a comprehensive table format with the following information:
- Name: User-defined name for easy identification
- URL: The endpoint URL where webhook payloads are sent
- Events: List of events that trigger the webhook
- Last Event Hit: Shows the most recent event that triggered the webhook with timestamp
- Status: Toggle switch to enable or disable the webhook
Create Webhook
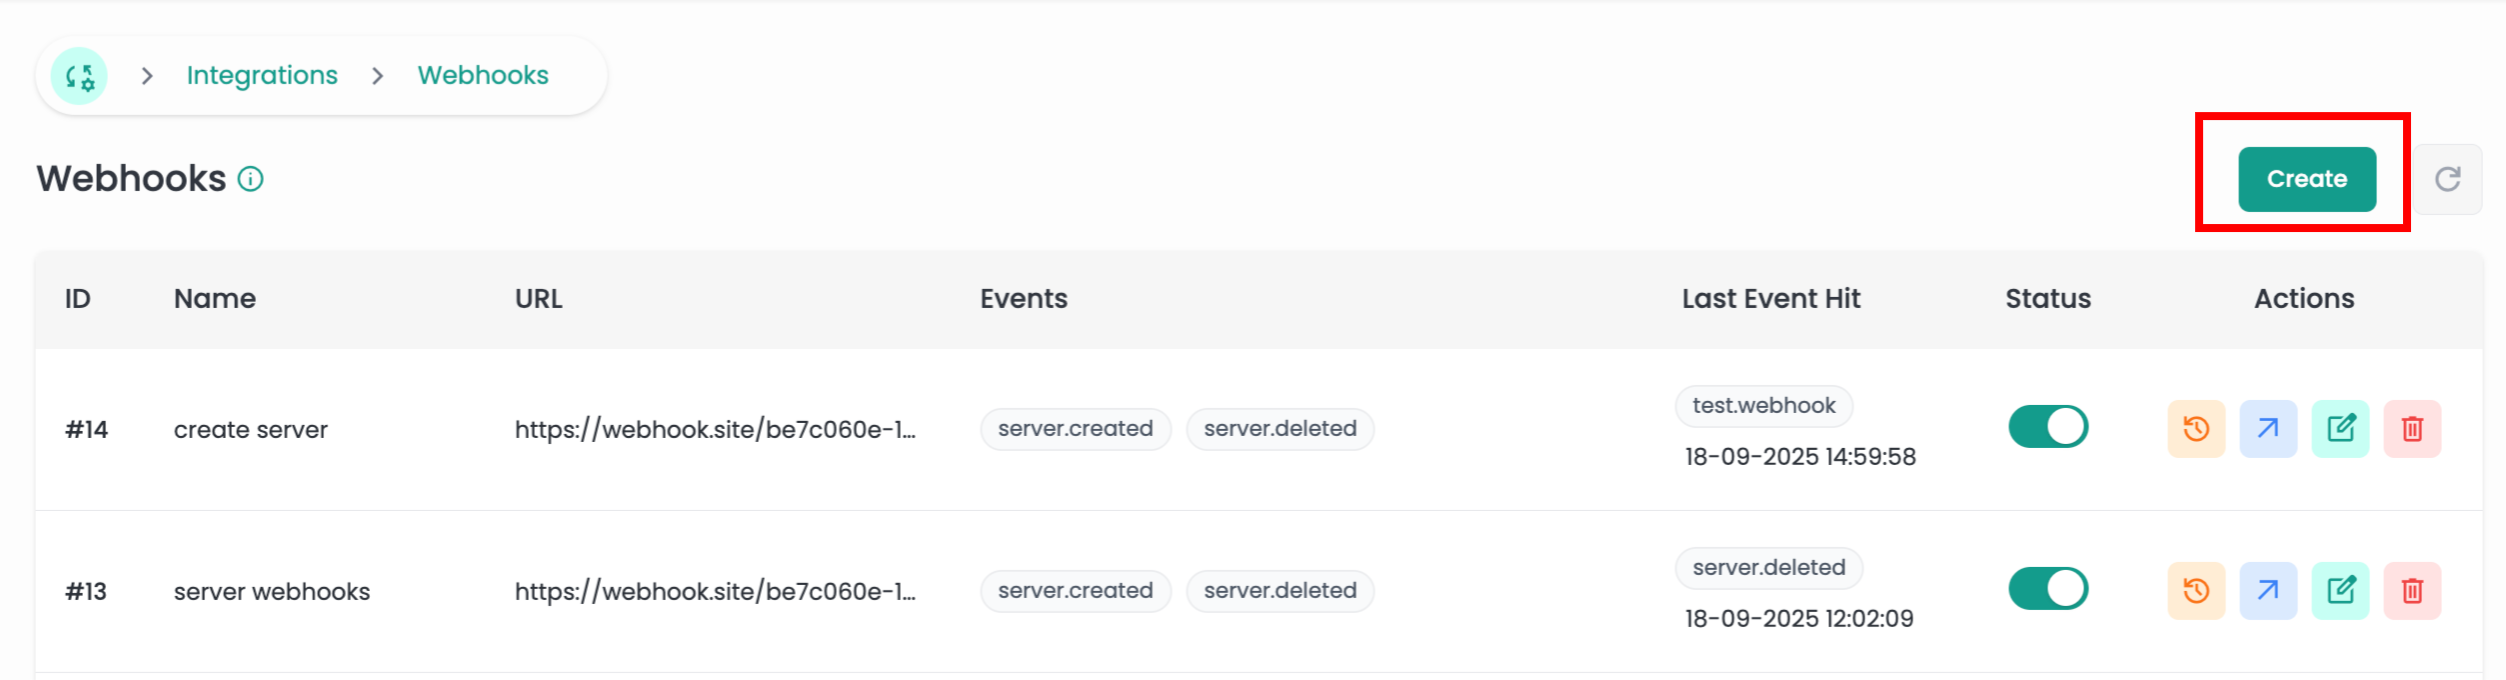
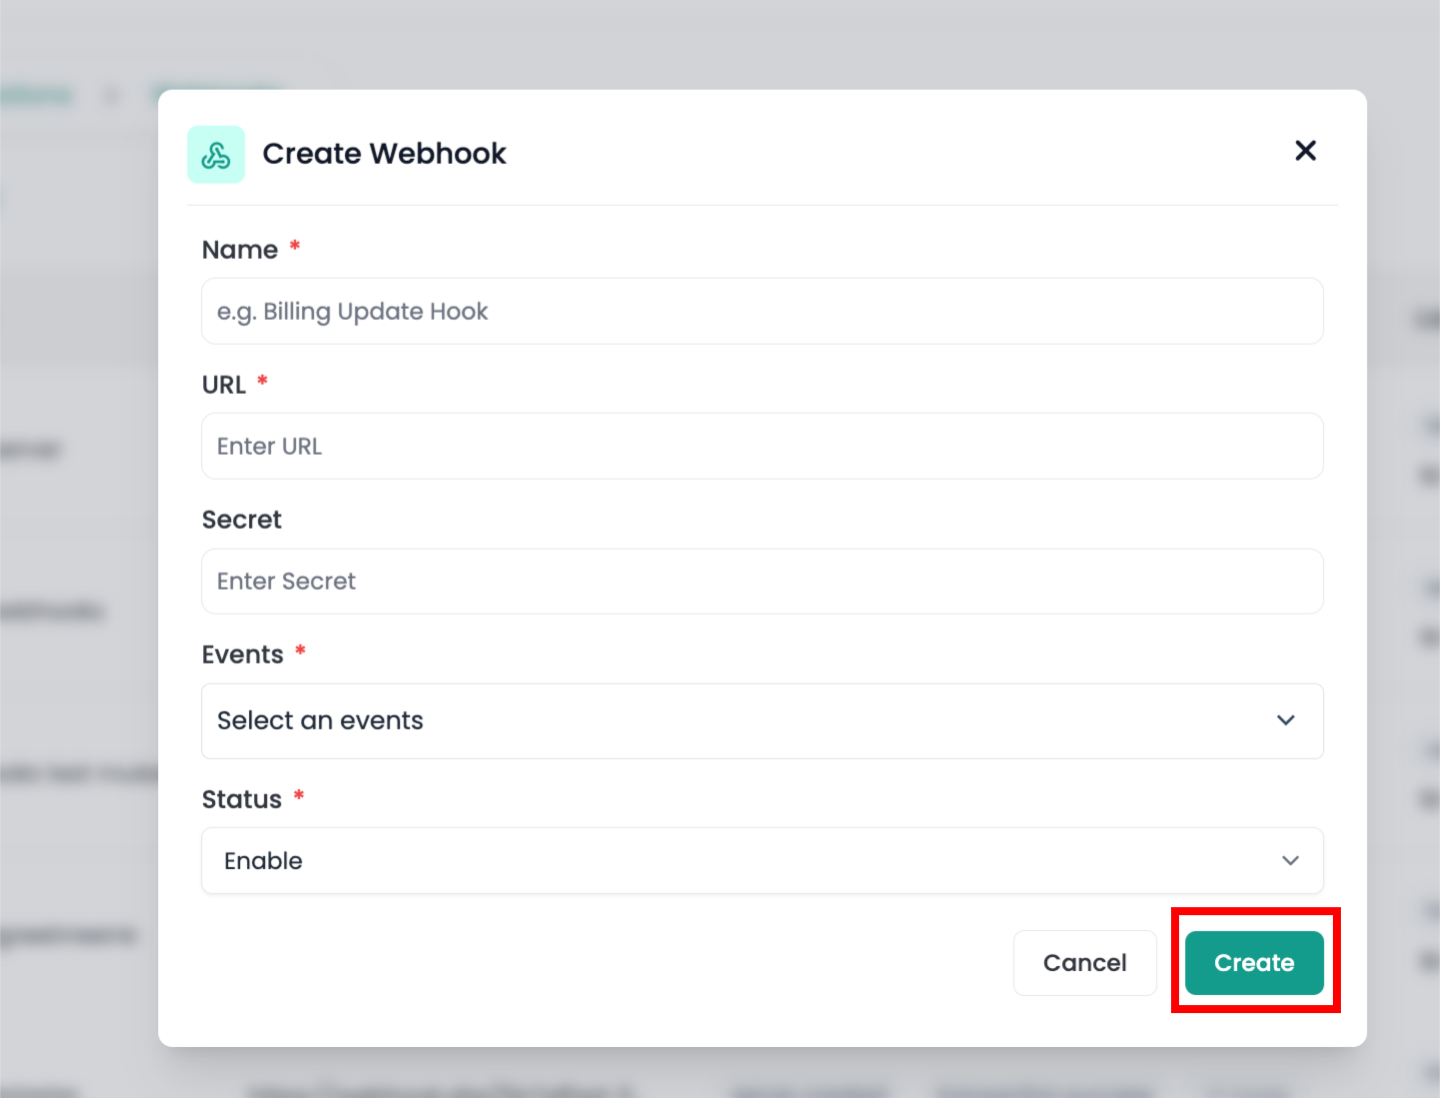
Step 1: Click on the Create button in the top right corner of the webhooks table.
Step 2: Fill in the webhook configuration form with the following details:
- Name: Enter a descriptive name for your webhook (e.g., "Billing Update Hook")
- URL: Enter the complete URL where you want to receive webhook notifications
- Secret: (Optional) Enter a secret key for webhook signature verification
- Events: Select one or more events that should trigger this webhook
- Status: Choose whether to enable or disable the webhook immediately
Step 3: Click the Create button to save your webhook configuration.
Available Events
The following events can trigger webhooks:
-
User Events:
user.created- When a new user account is createduser.updated- When user information is modifieduser.deleted- When a user account is deleted
-
Server Events:
server.created- When a new server is createdserver.deleted- When a server is deleted
-
Transaction Events:
transaction.created- When a new transaction is initiatedtransaction.success- When a payment transaction is successfultransaction.failed- When a payment transaction failstransaction.refunded- When a transaction is refunded
-
Ticket Events:
ticket.created- When a support ticket is createdticket.closed- When a ticket is closedticket.reopened- When a closed ticket is reopened
Update Webhook
Step 1: Click on the Edit icon next to the webhook you want to modify.
Step 2: The update form will open with the current webhook configuration pre-filled.
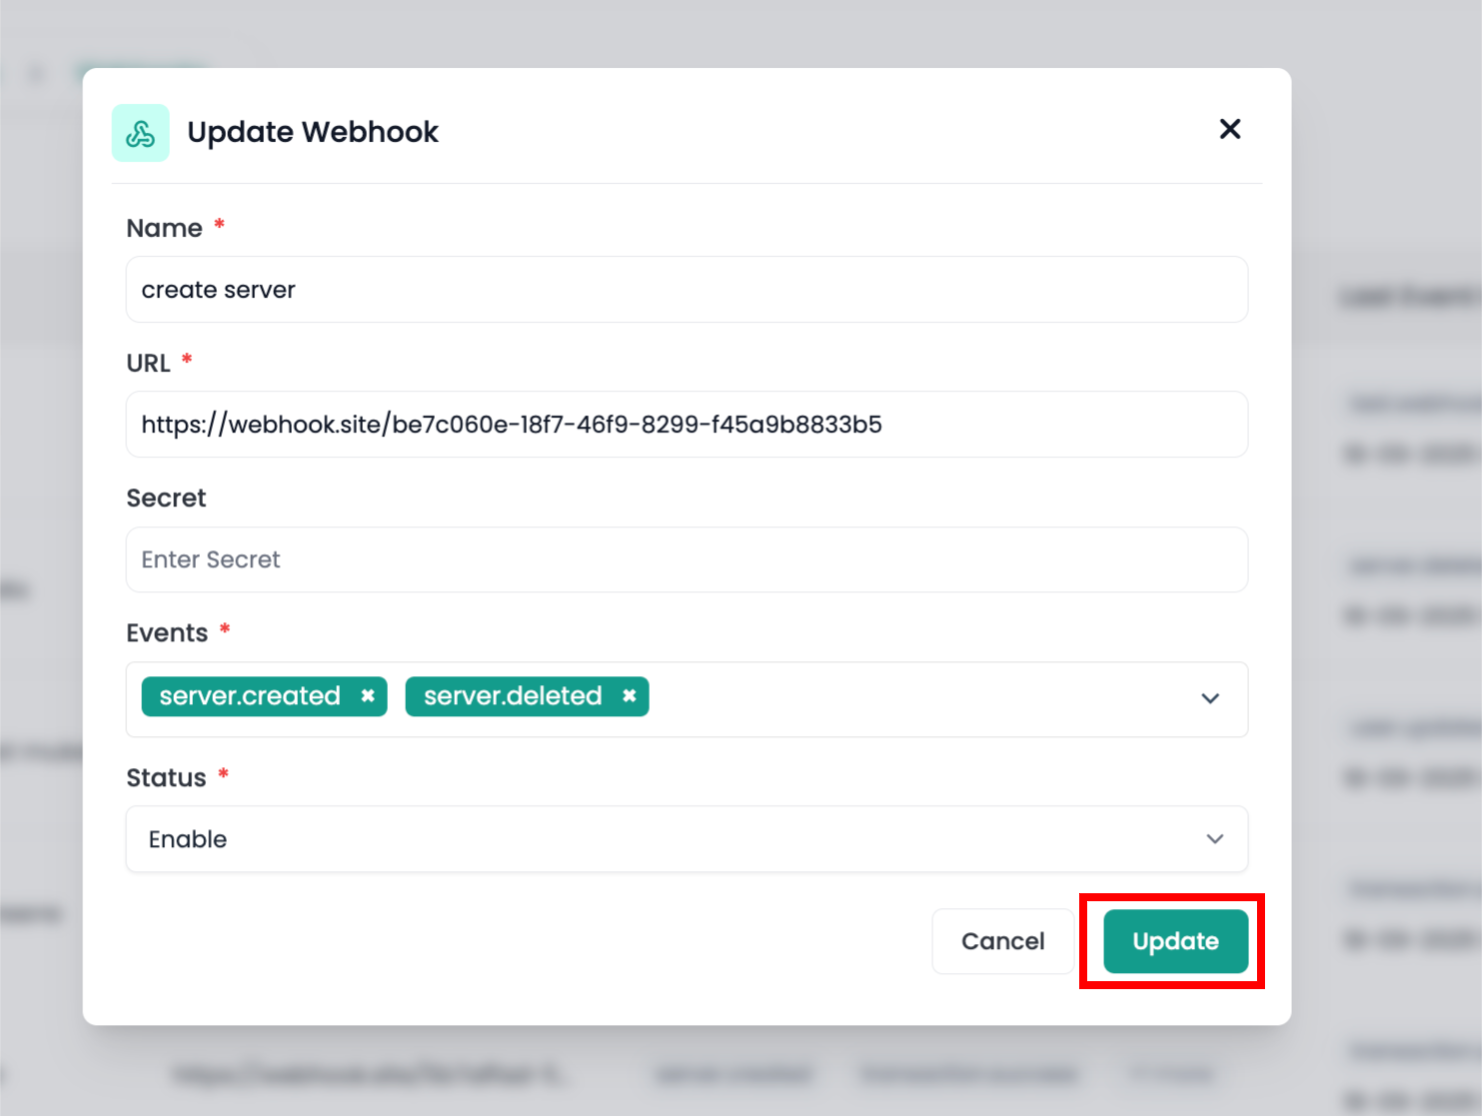
Step 3: Modify the fields you want to change and click the Update button to save your changes.
Delete Webhook
Step 1: Click on the Delete icon next to the webhook you want to remove.
Step 2: Confirm the deletion when prompted.
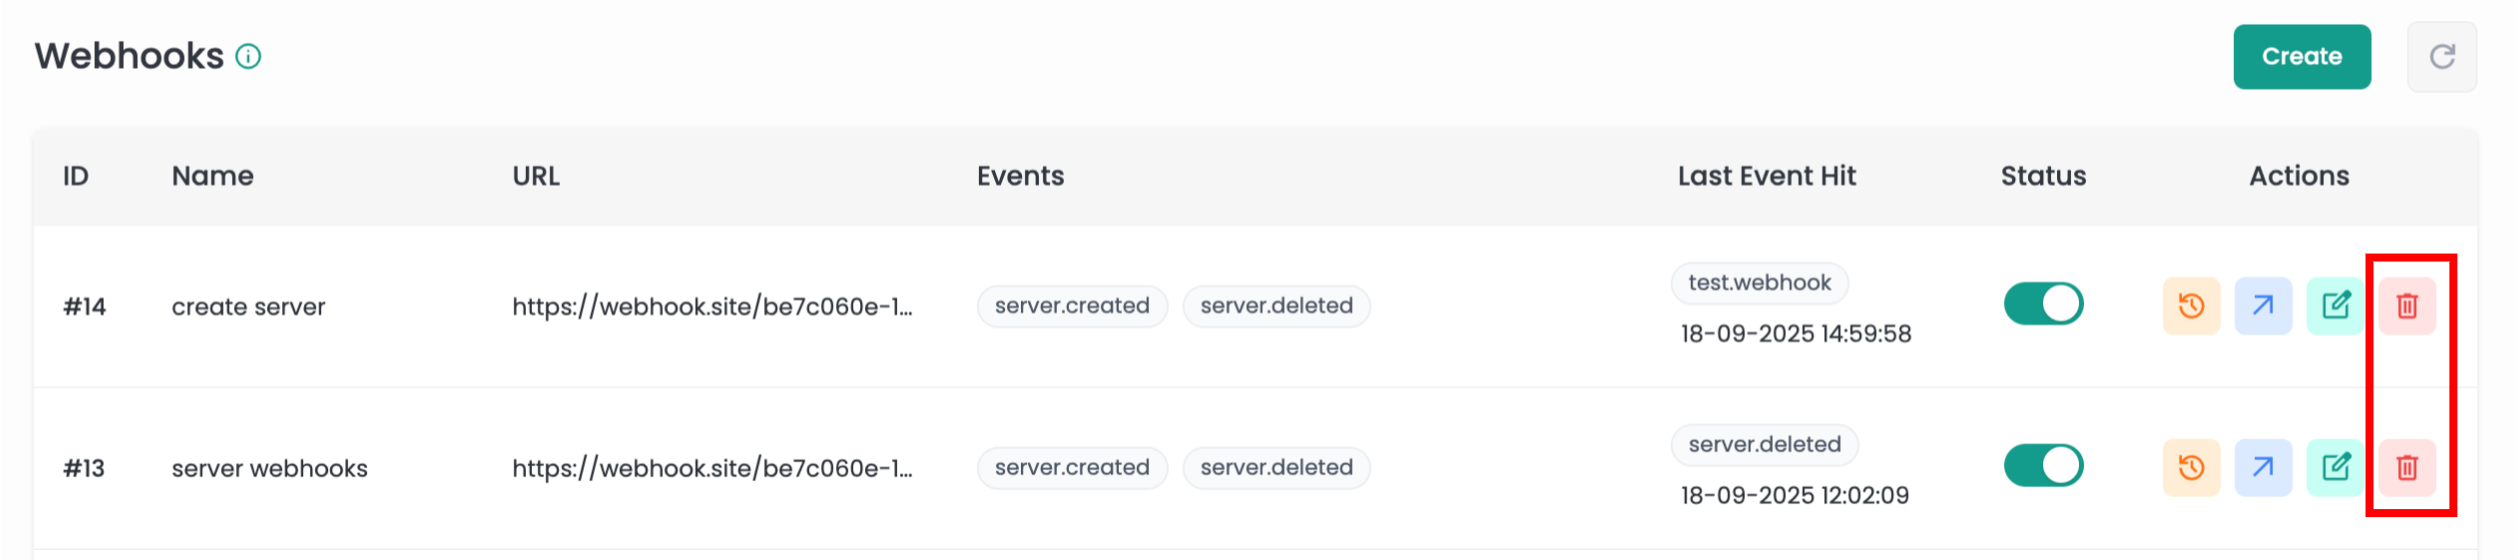
Deleting a webhook is permanent and cannot be undone. Make sure you want to remove this webhook before confirming the deletion.
Enable/Disable Webhooks
You can easily enable or disable webhooks using the status toggle switch in the webhooks table:
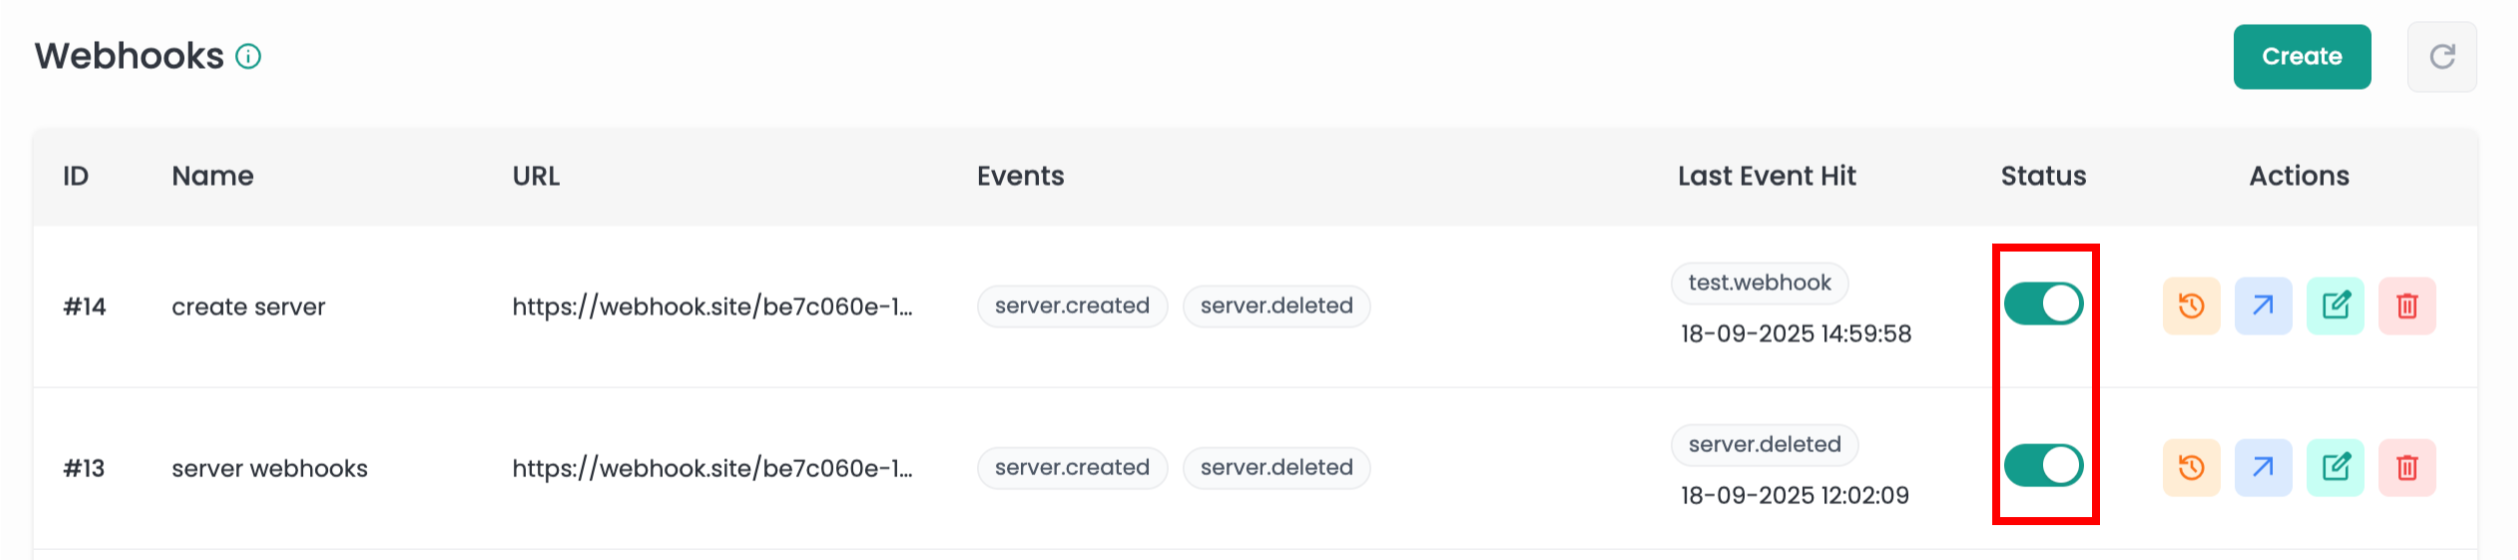
Enabling the webhook sends notifications; disabling it stops them.
This allows you to temporarily stop webhook notifications without deleting the configuration.
Webhook History
Step 1: Click on the Webhook History icon next to any webhook to view its history.
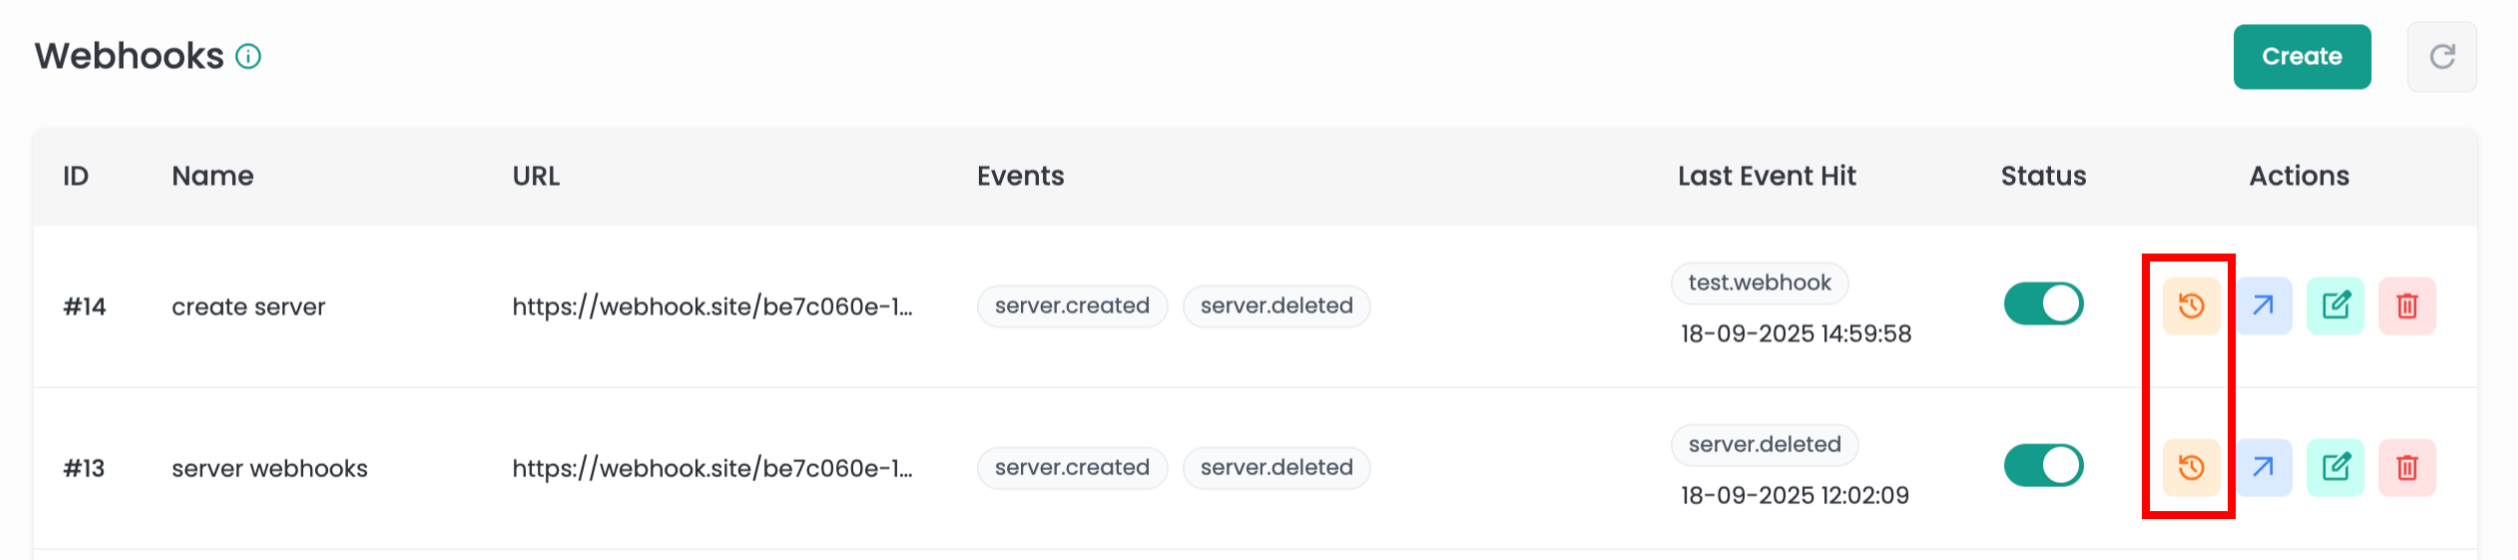
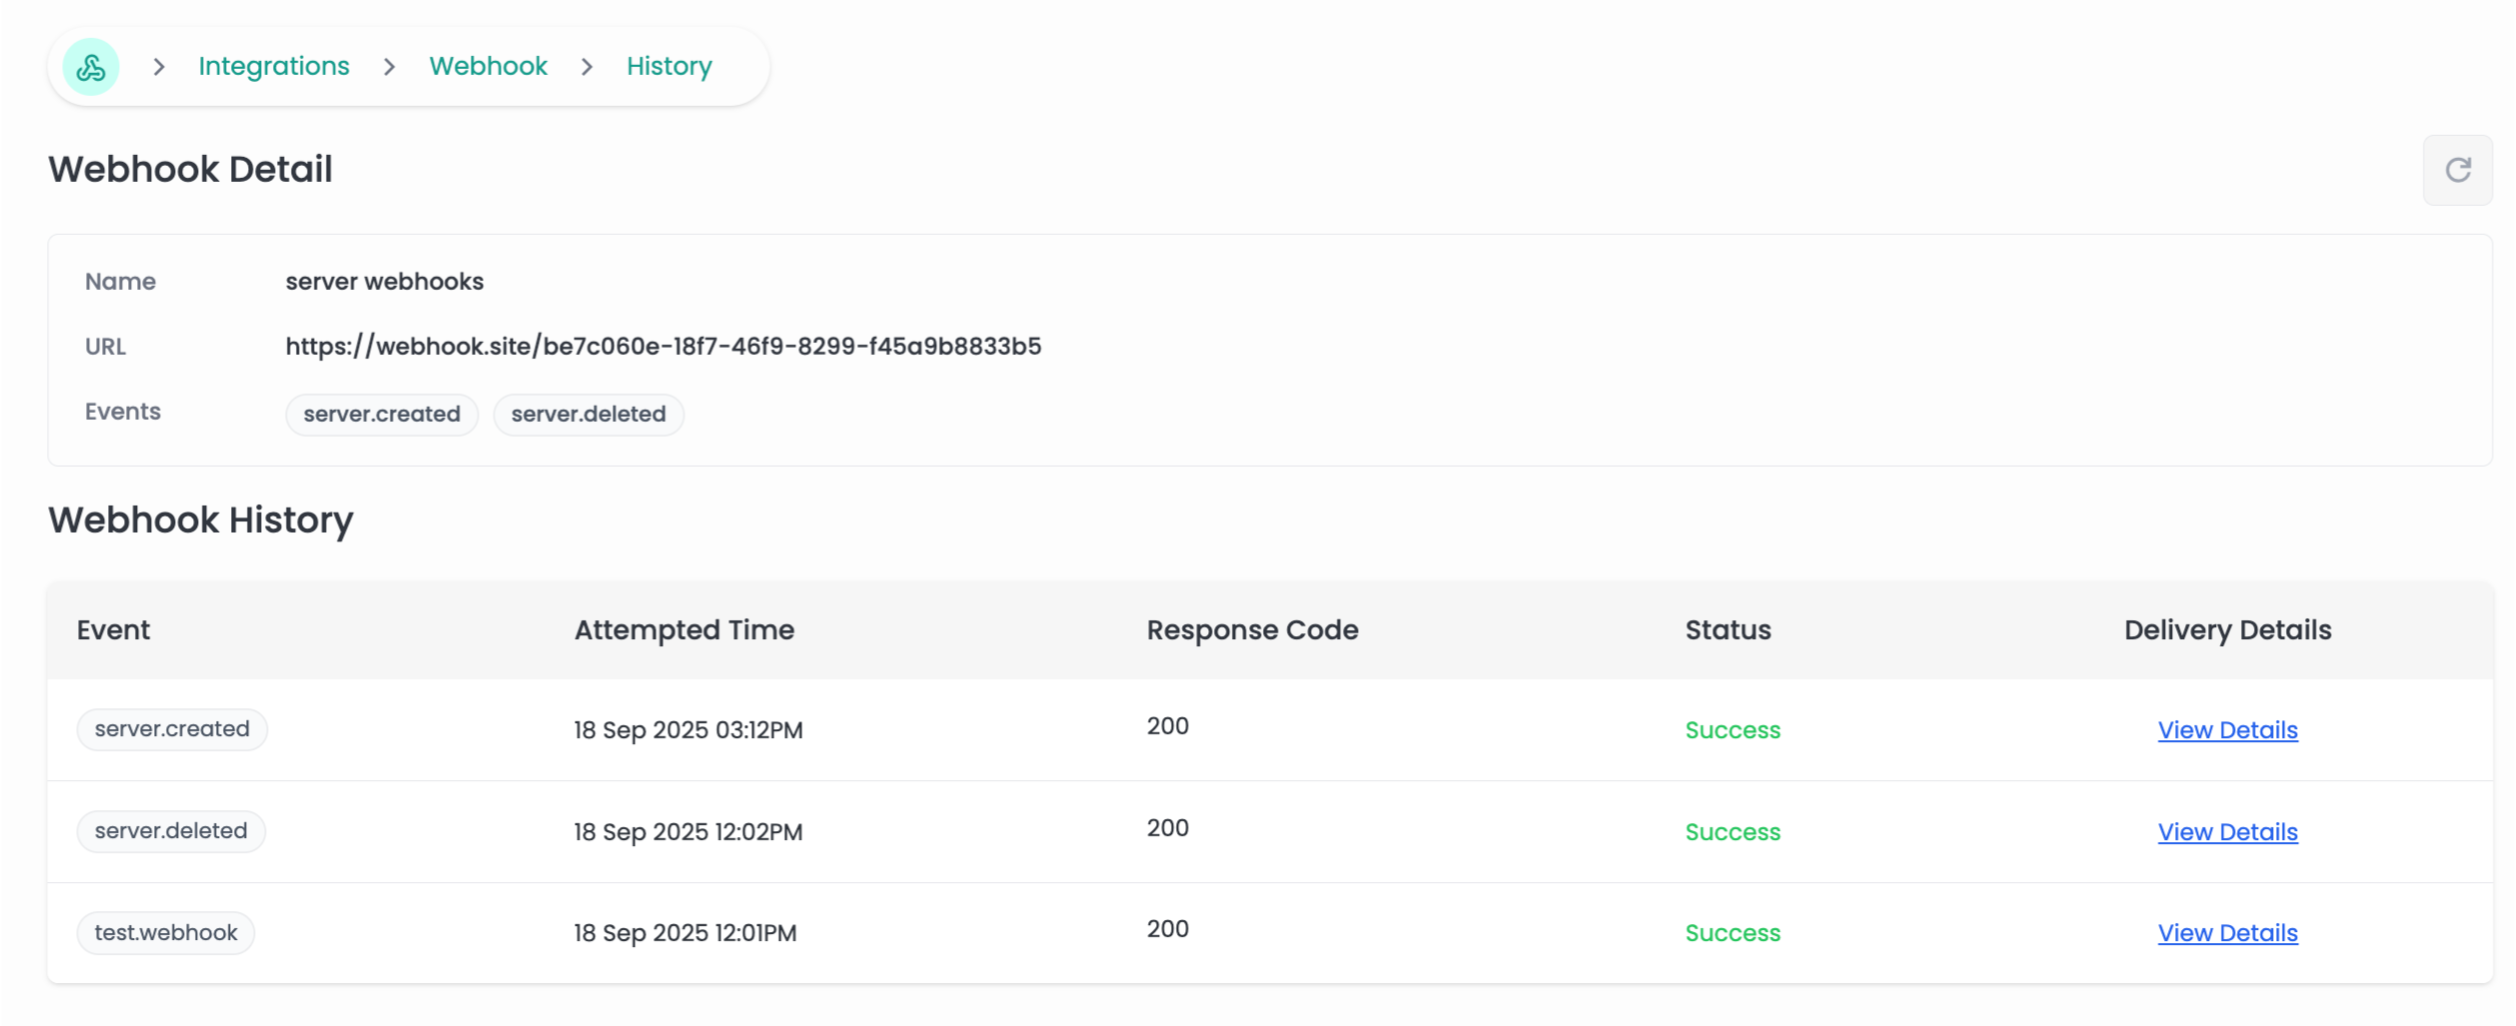
Step 2: The webhook detail page shows:
Webhook Information
- Name: The webhook name
- URL: The target endpoint URL
- Events: List of configured events
Webhook History Table
The history table displays all webhook delivery attempts with the following information:
- Event: The specific event that triggered the webhook
- Attempted Time: Timestamp when the webhook was sent
- Response Code: HTTP response code received from your endpoint
- Status: Delivery status (Success/Failed)
- Delivery Details: Link to view detailed delivery information
View Delivery Details
Step 1: Click on View Details in the webhook history table to see detailed information about a specific webhook delivery.
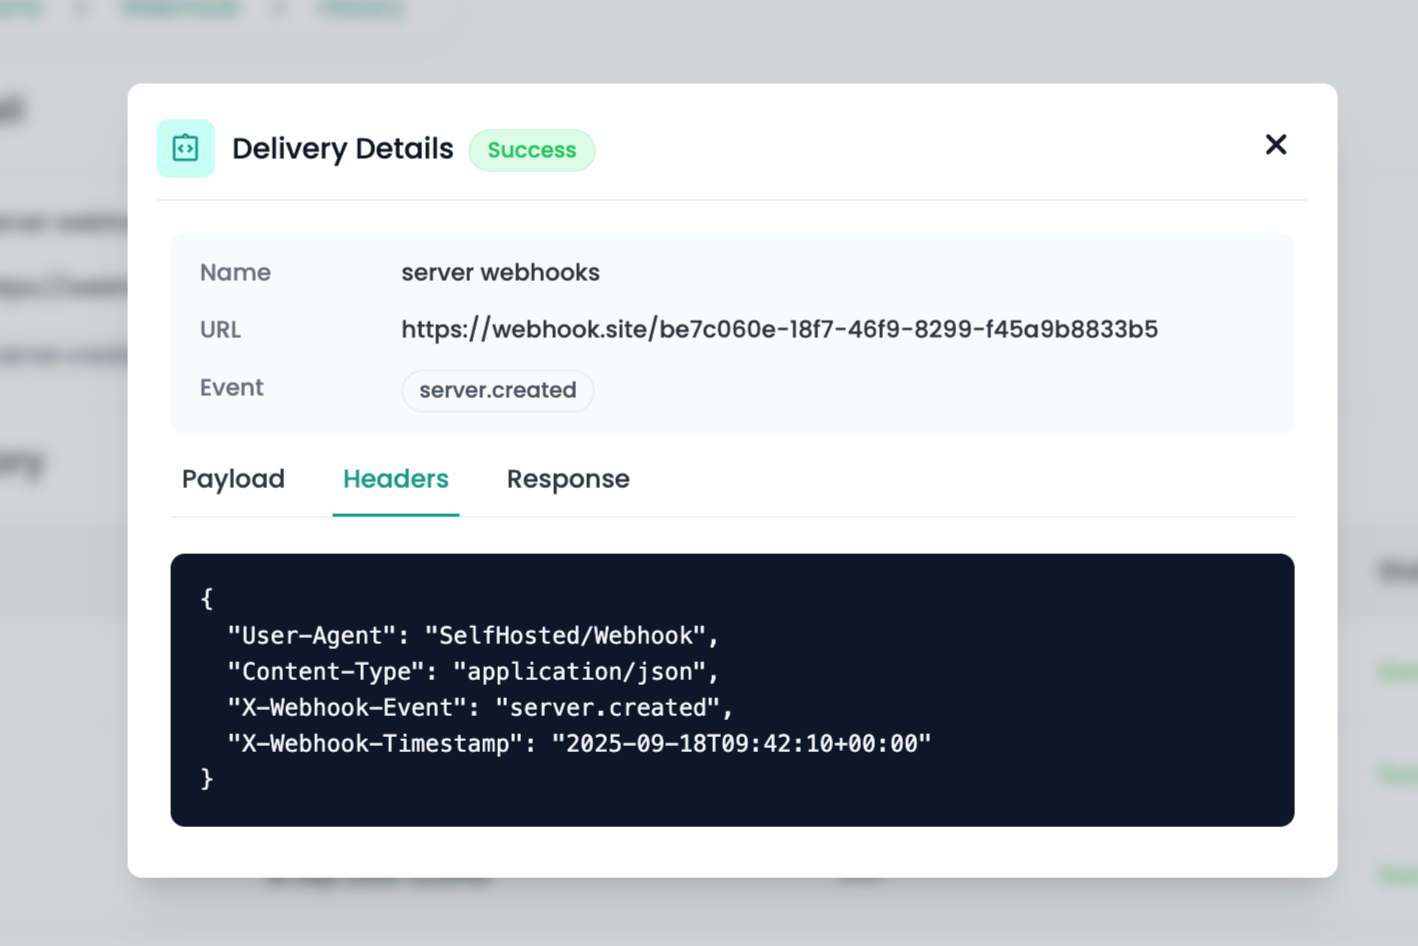
The delivery details modal shows:
- Payload: The JSON data that was sent to your endpoint
- Headers: HTTP headers included in the webhook request
- Response: The response received from your endpoint
Send Test Webhook
Step 1: Click on the Send Test icon next to any webhook.
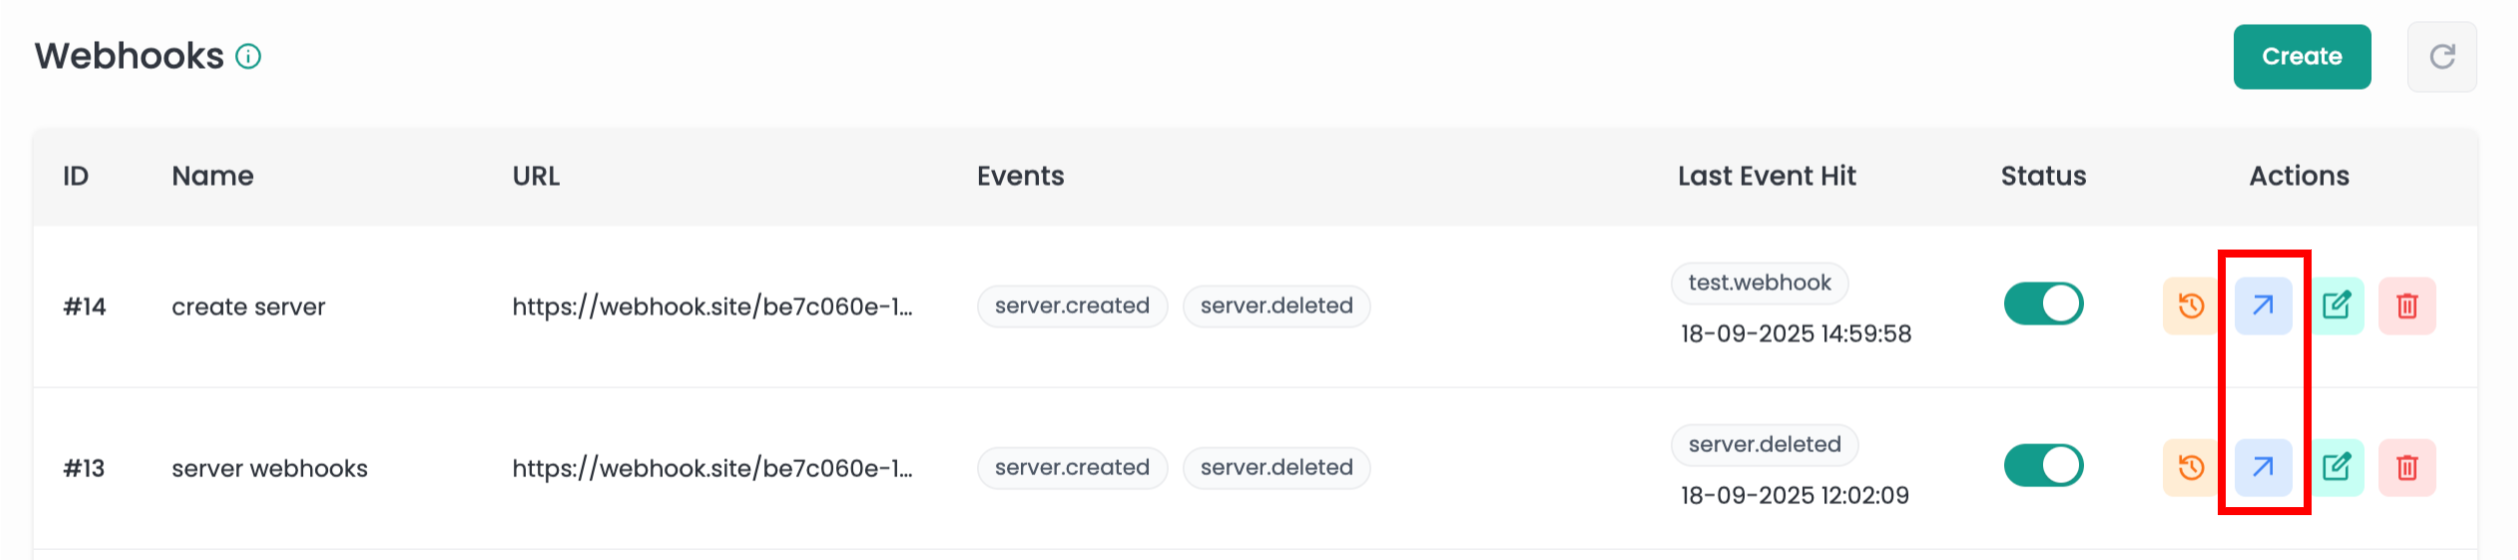
Step 2: A test webhook will be sent to your configured URL with a test.webhook event.
Step 3: Check your webhook history to verify the test was received successfully.
This feature helps you verify that your webhook endpoint is working correctly before relying on it for production events.