Domain Service
In this setup, you can configure your file manager domain and temporary domain. These configurations enable your users to upload and download files through the file manager. When accessing the temporary domain functionality, you can seamlessly use the temporary domain functions for your application.
To configure these domains, you need to use Amazon Route 53. You cannot change name server to another CDN name server it must be AWS route 53.
Steps to Configure Domains
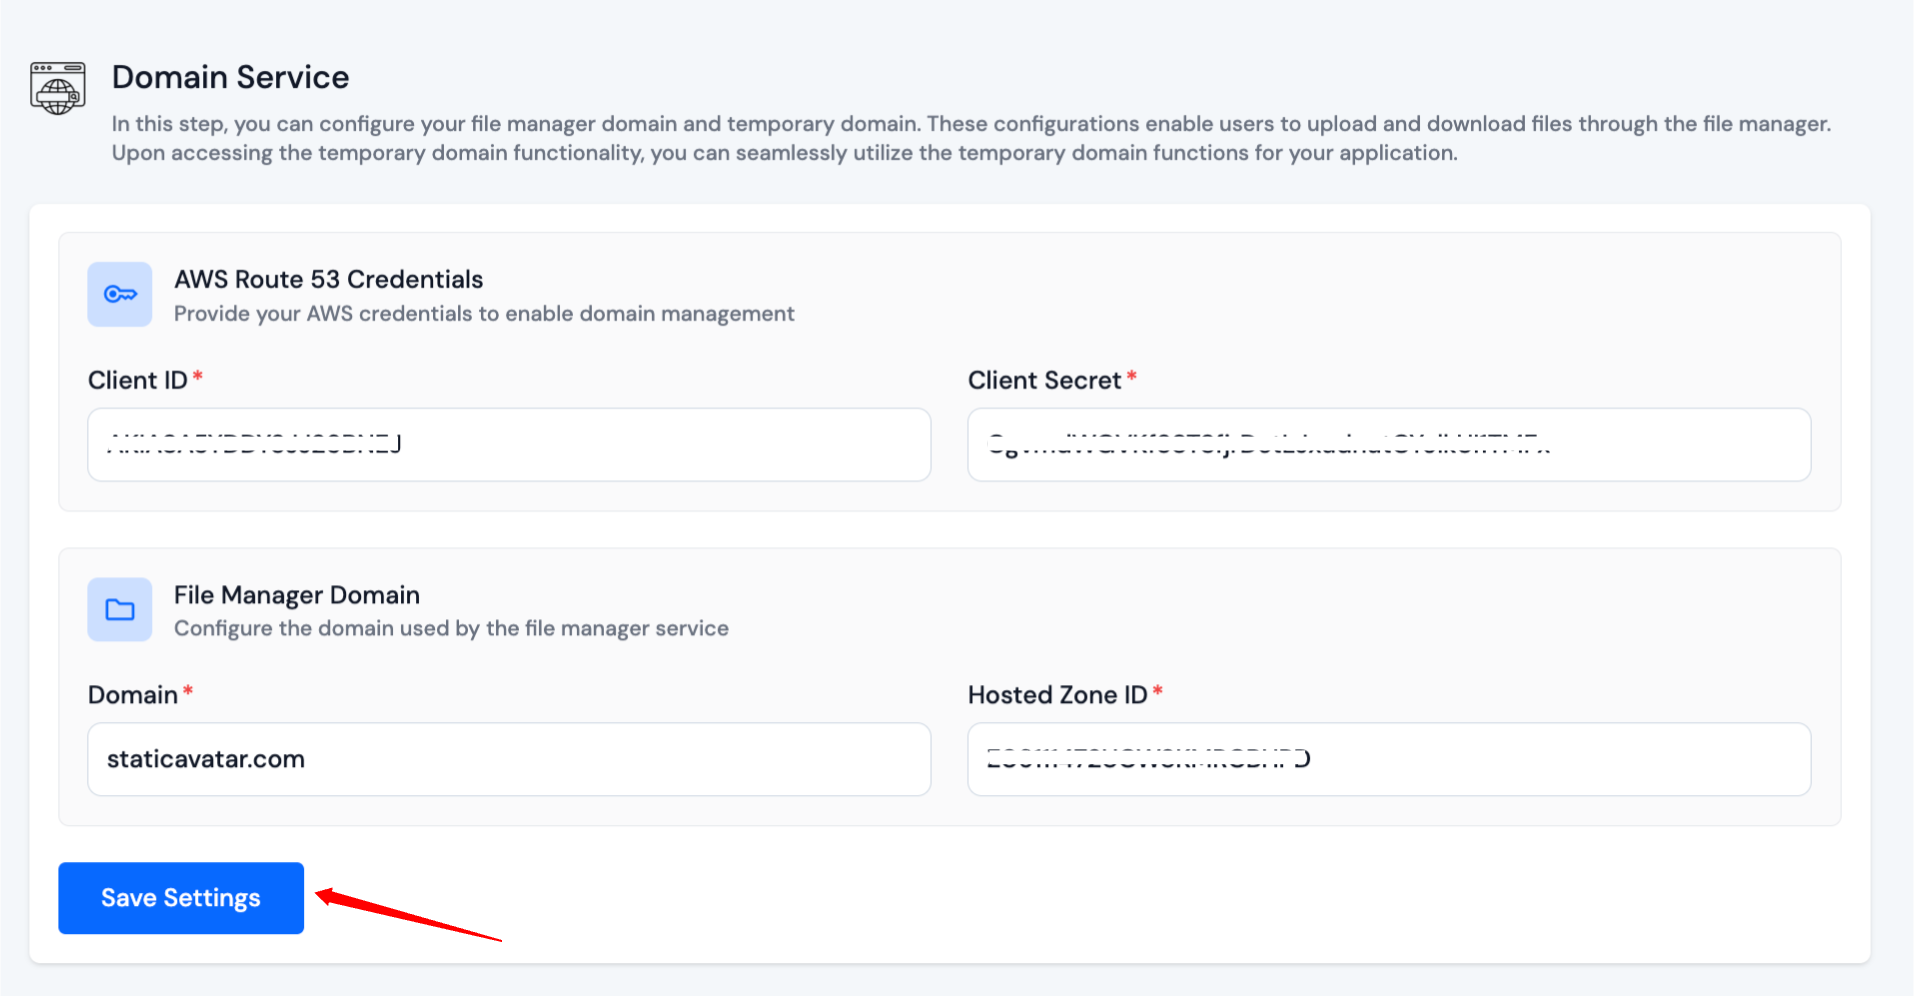
1. Add Route 53 Client ID and Client Secret
To start, you need to add your Route 53 client ID and client secret.
If you don’t have a Route 53 client ID and client secret, follow these steps to generate them:
-
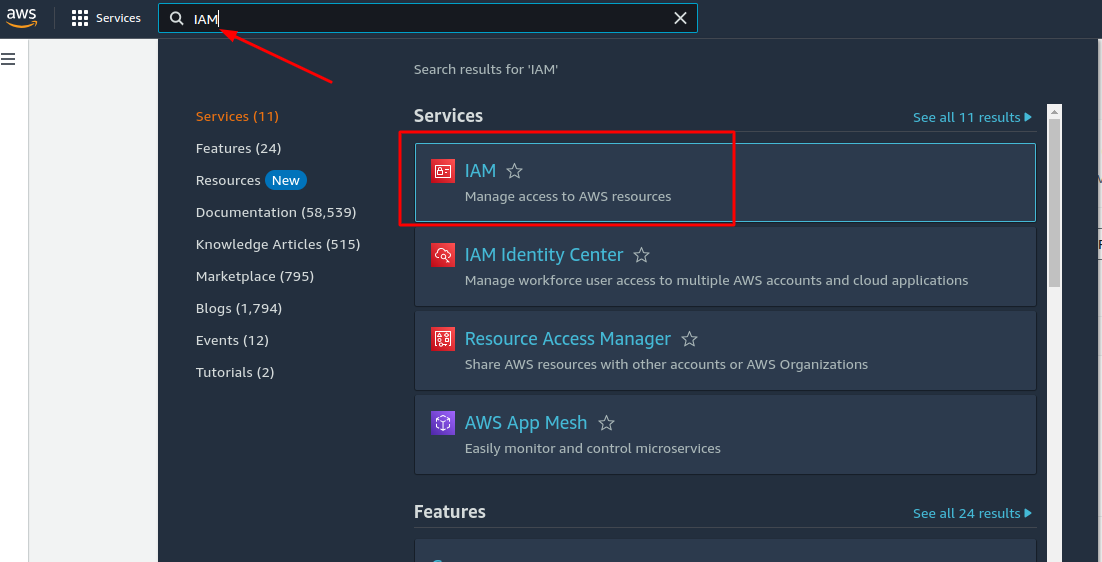
Log in to your AWS Management Console.
-
Navigate to the IAM (Identity and Access Management) service.
-
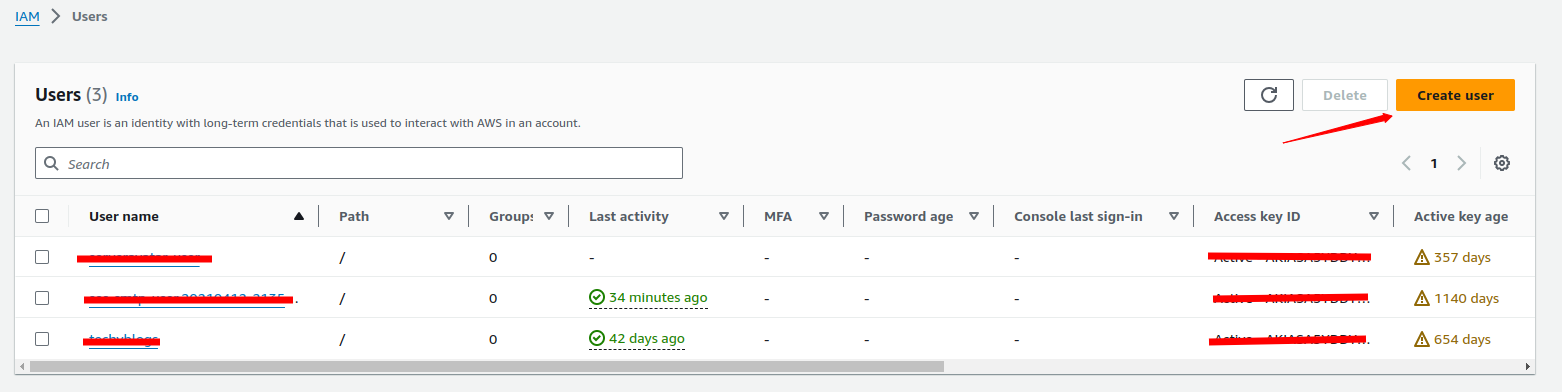
Click on the Users and then click on Create user

-
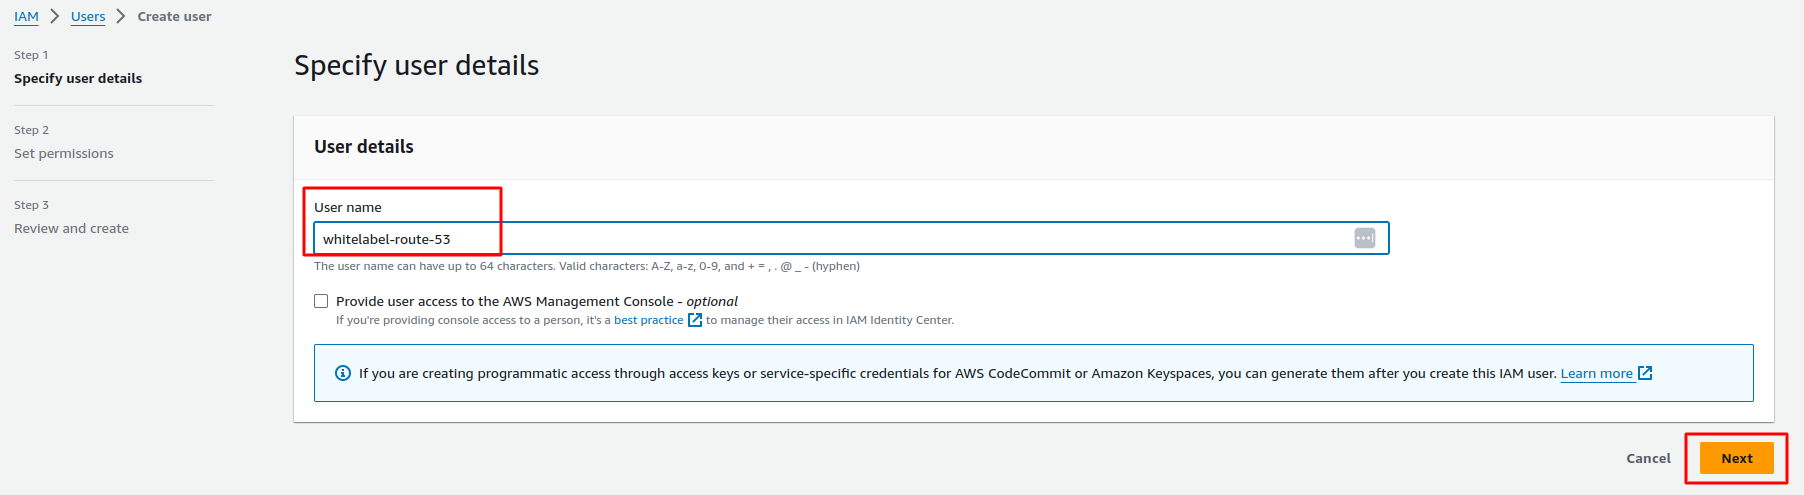
Enter a User name and click on Next button.
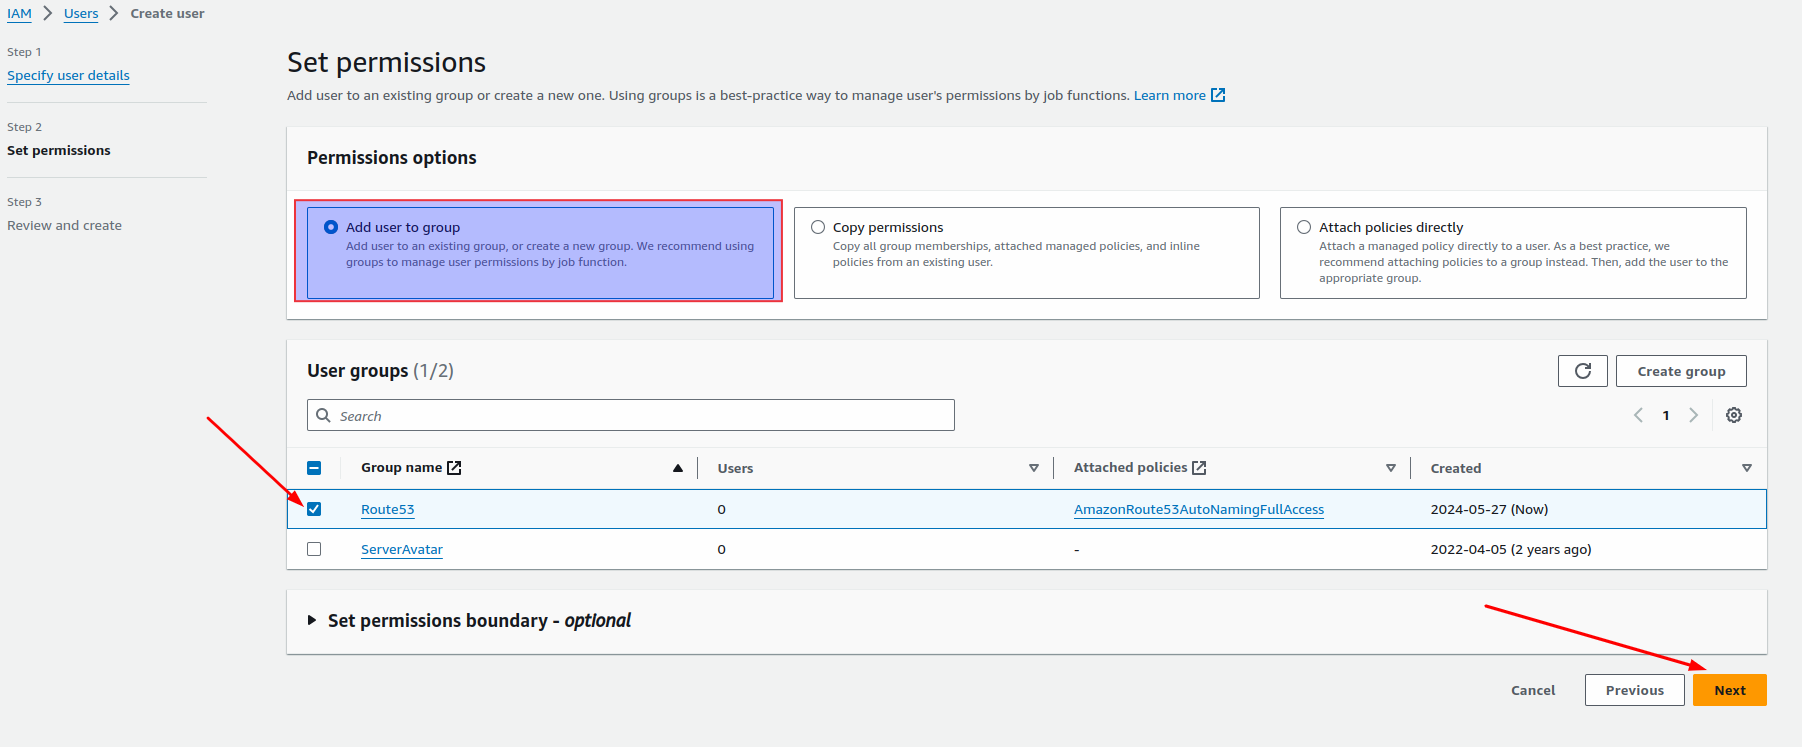
If you don't have any groups:
- Click Create Group.
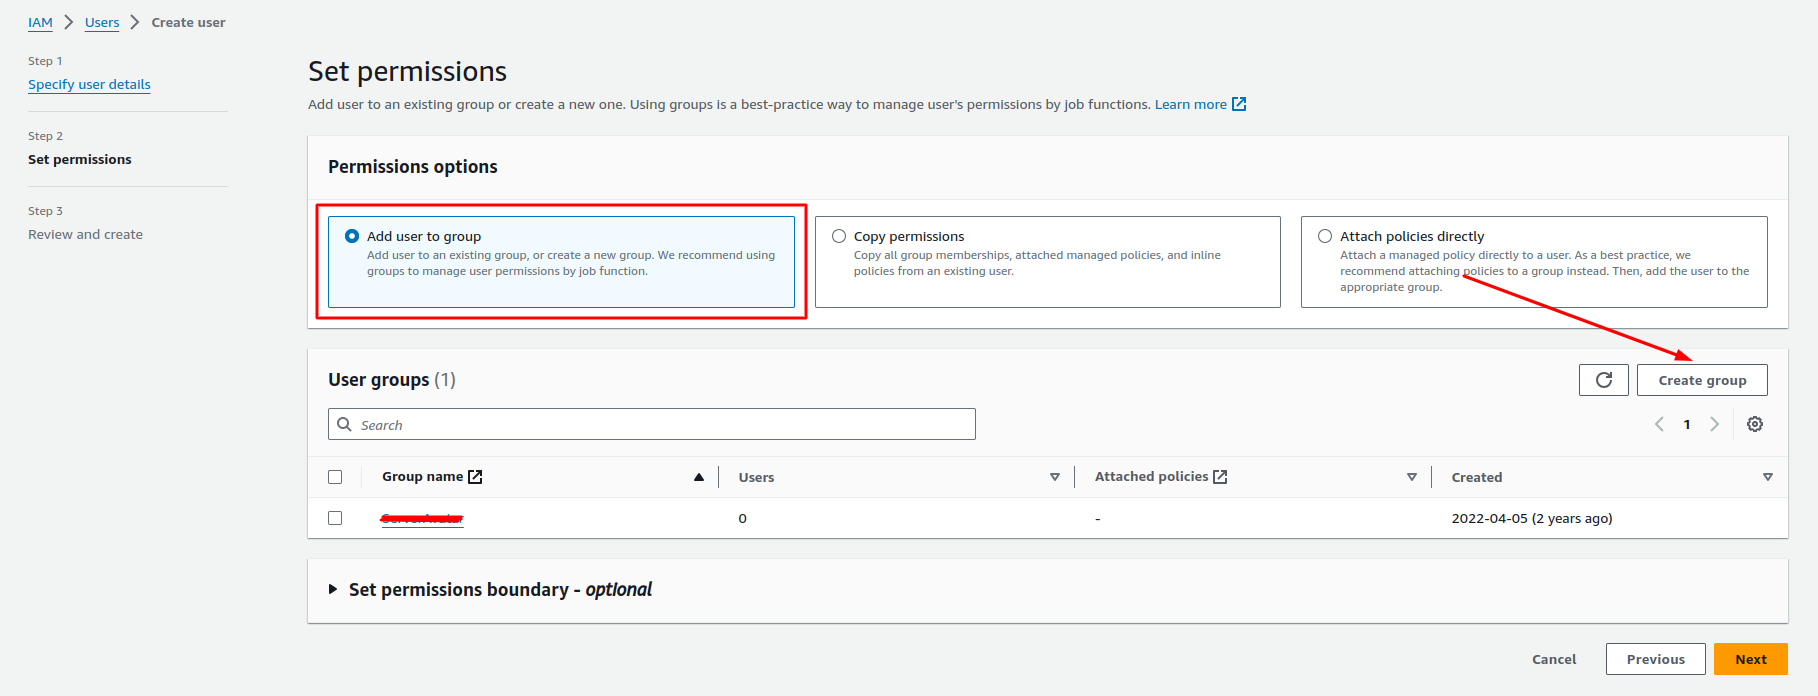
- Enter a group name. Attach the AmazonRoute53FullAccess policy to this group. Click Create user group.

- Click Create Group.
-
Attach the AmazonRoute53FullAccess policy to the user, either by selecting the group you just created or attaching the policy directly and click on Next button.
-
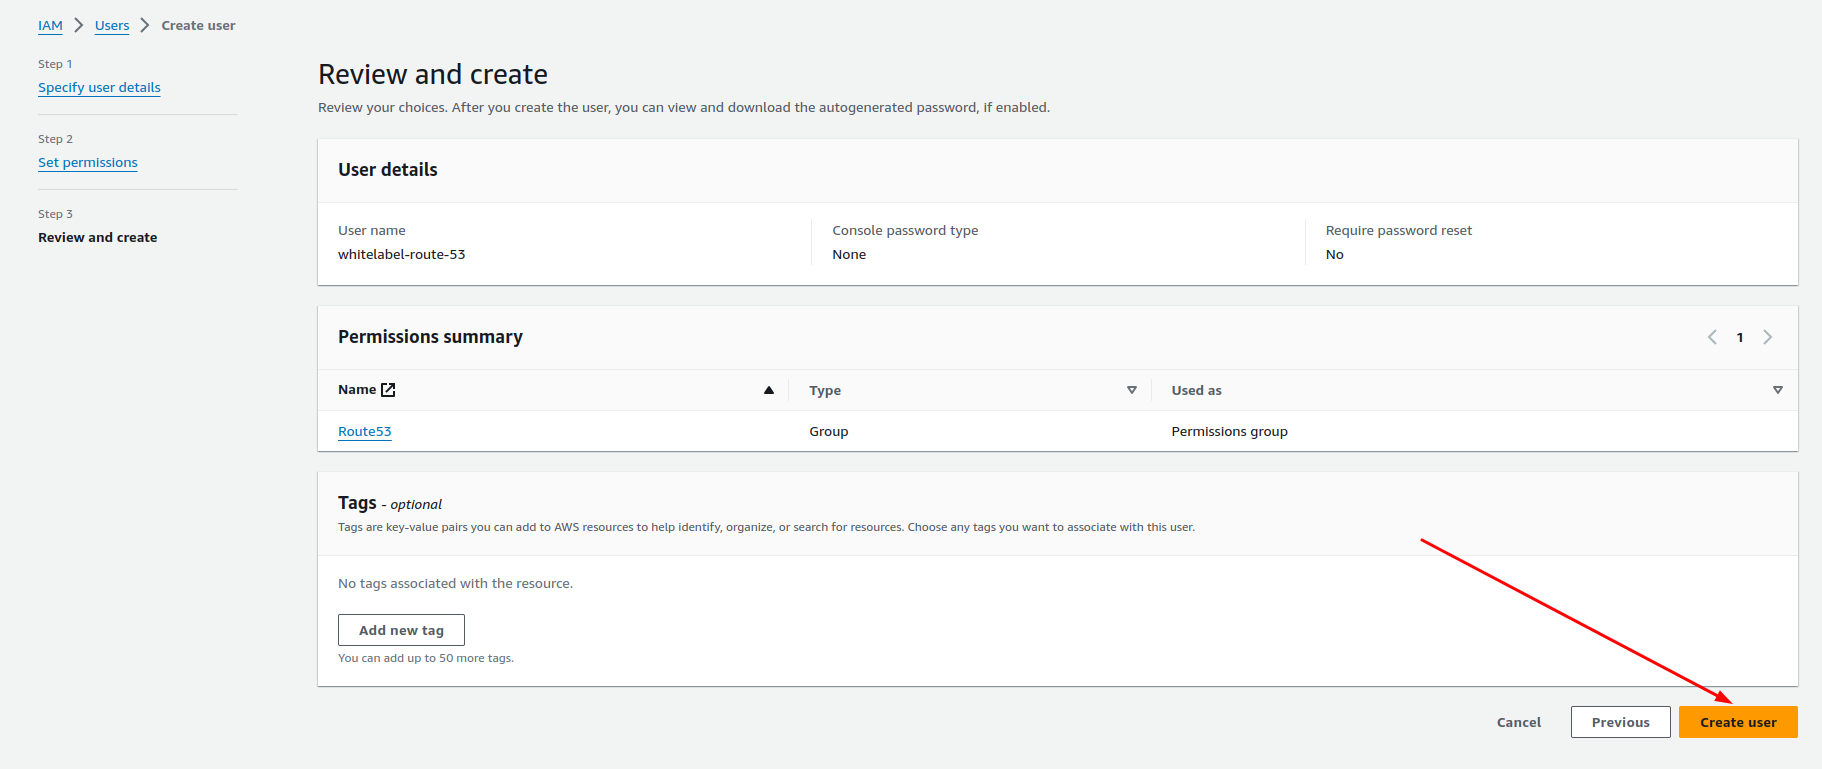
Review the user details and click Create user.
-
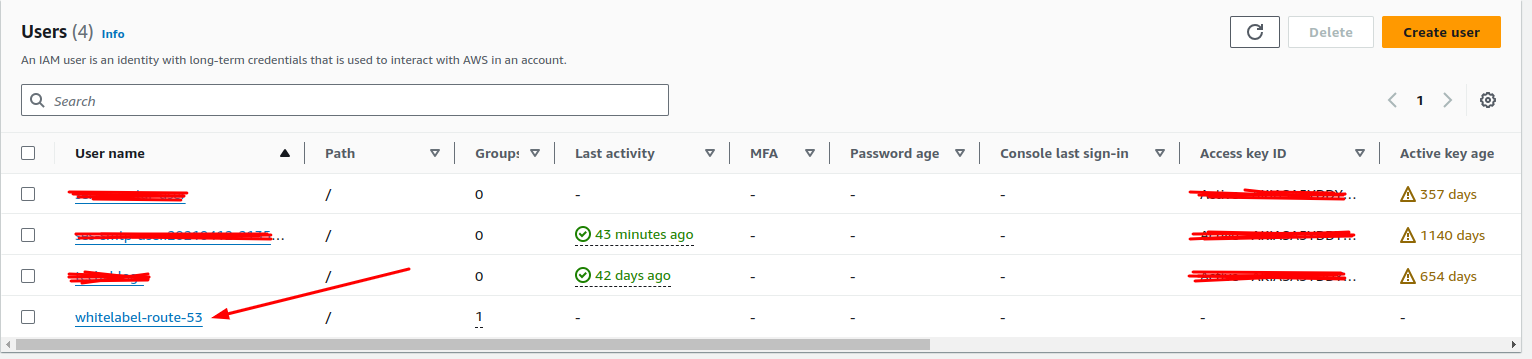
Click on the user name from users list.
-
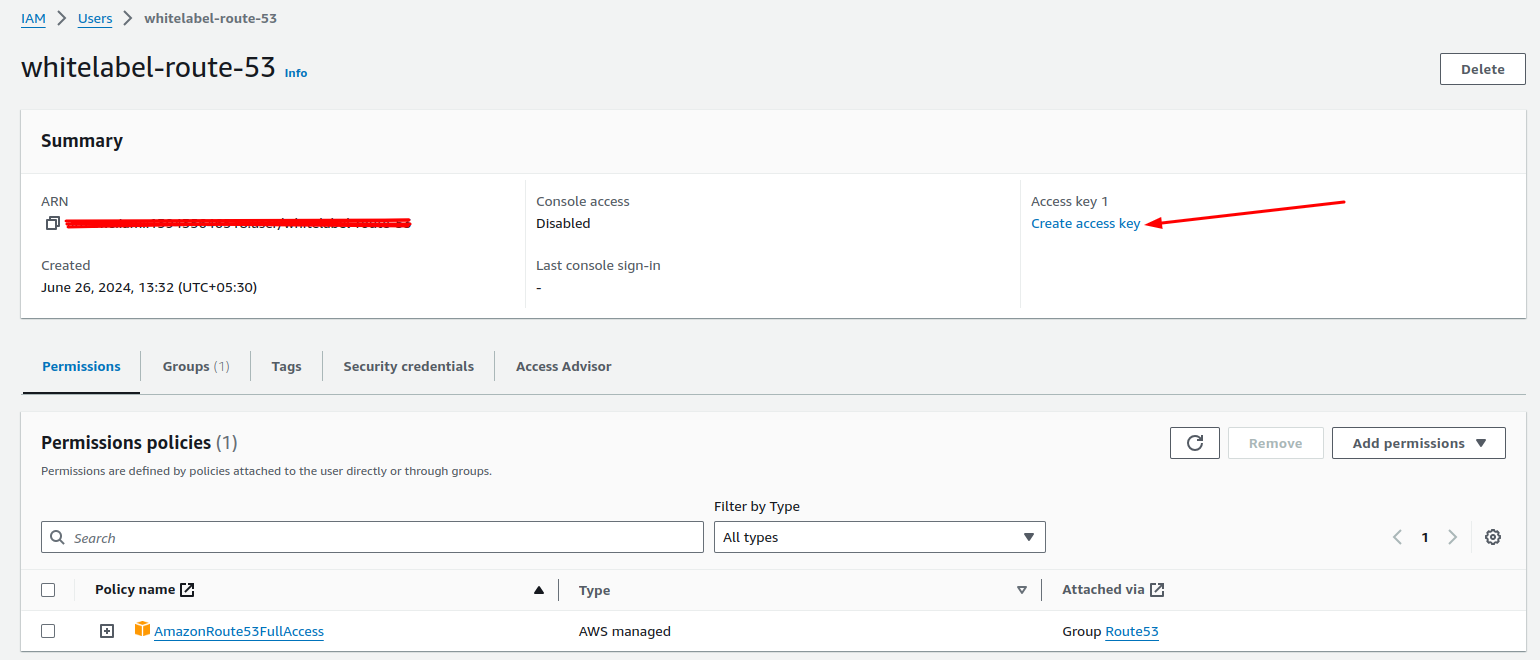
Click on Create access key.
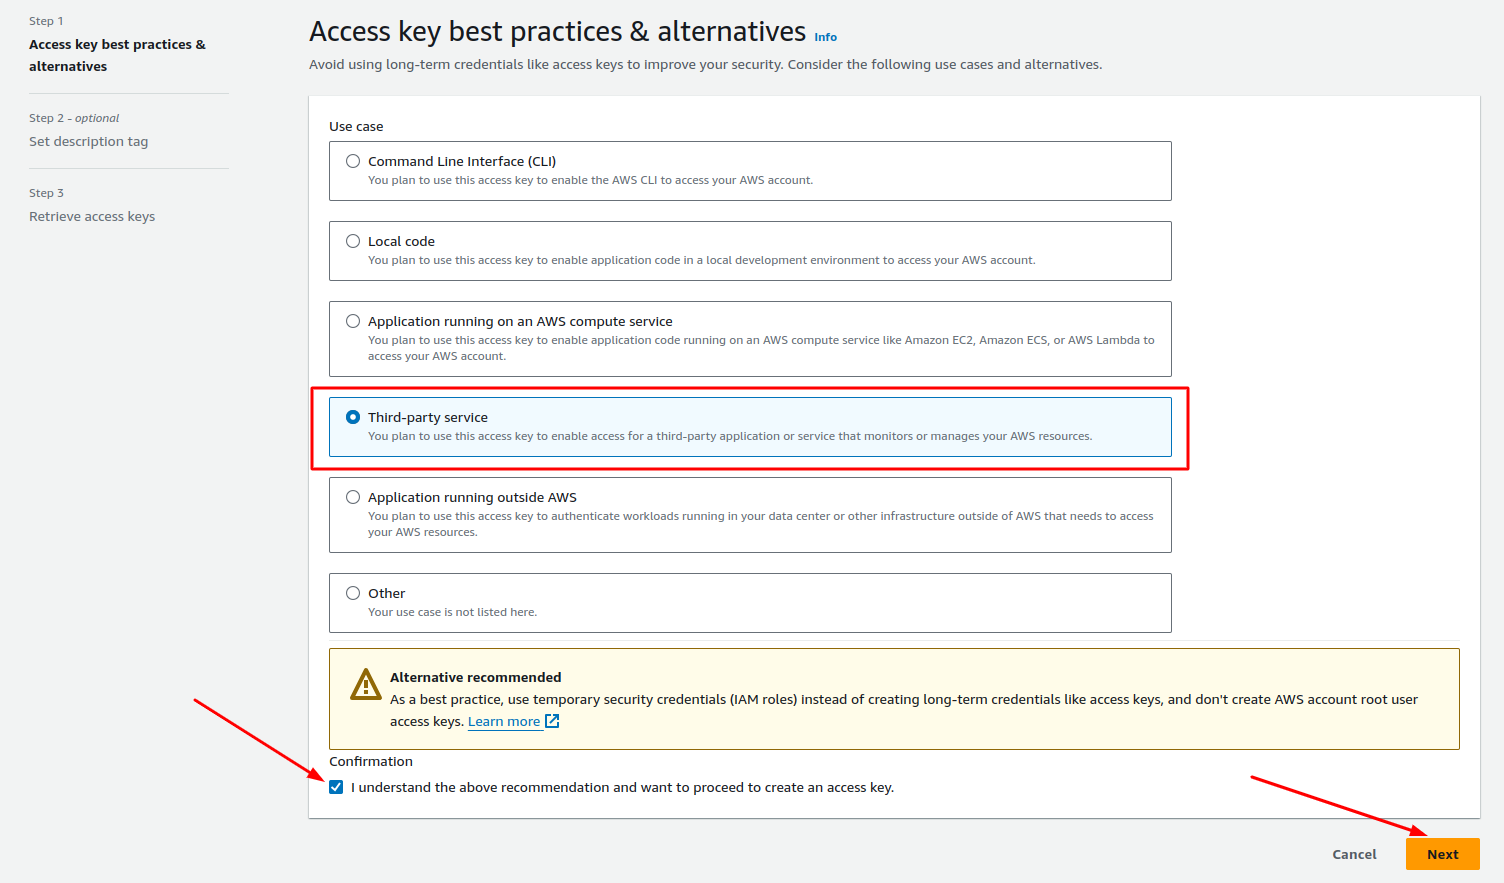
-
Select Third-party service from use case and check confirmation checkbox and then click on Next button.
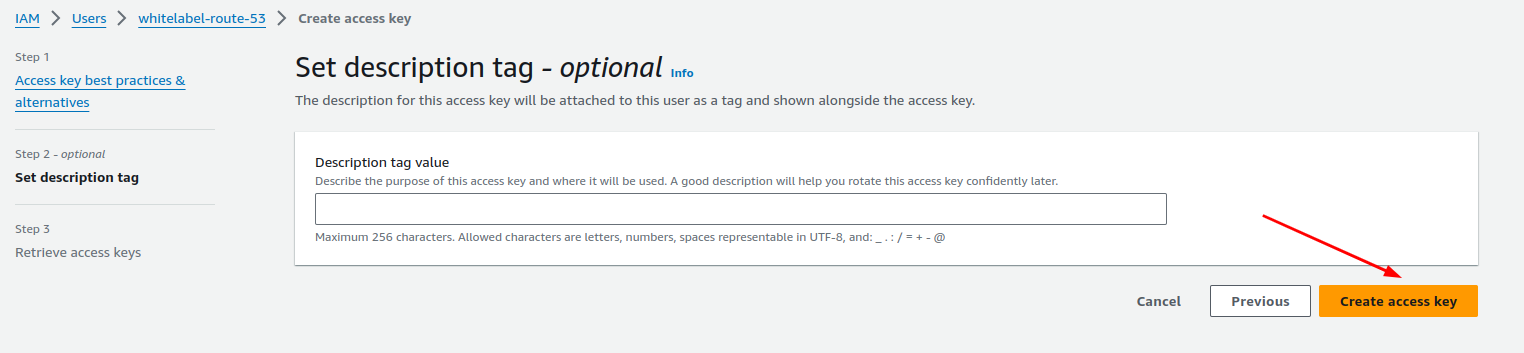
-
Set Description tag. This is optional. Now, click on Create access key.
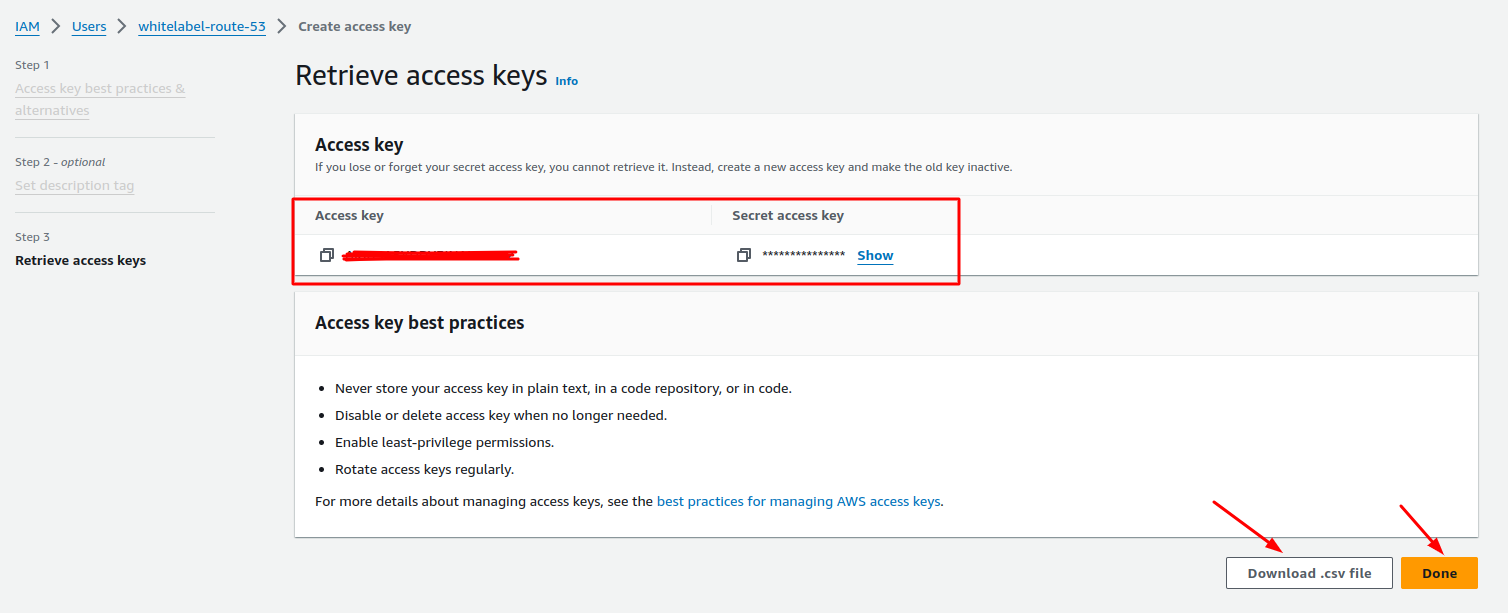
-
Download the CSV file with your new access key ID and secret access key.
2. Add File Manager Domain
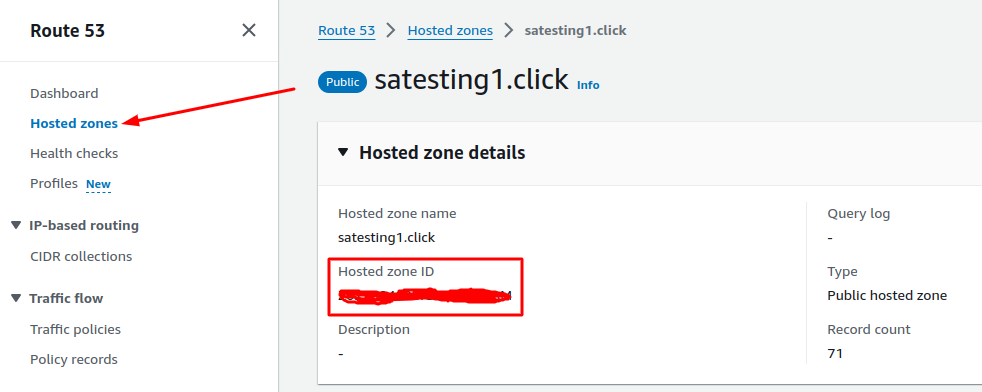
To obtain the Hosted Zone ID, navigate to your Route 53 dashboard and select Hosted zones. Locate the domain you're interested in from the list of hosted zones. Click on the Domain name to access its details. The Hosted Zone ID can be found at the top of the details page.
Enter your Route 53 client ID and client secret. In the "File Manager Domain" field, enter the Domain you want to use for the file manager and enter Hosted zone ID and click Save Settings.
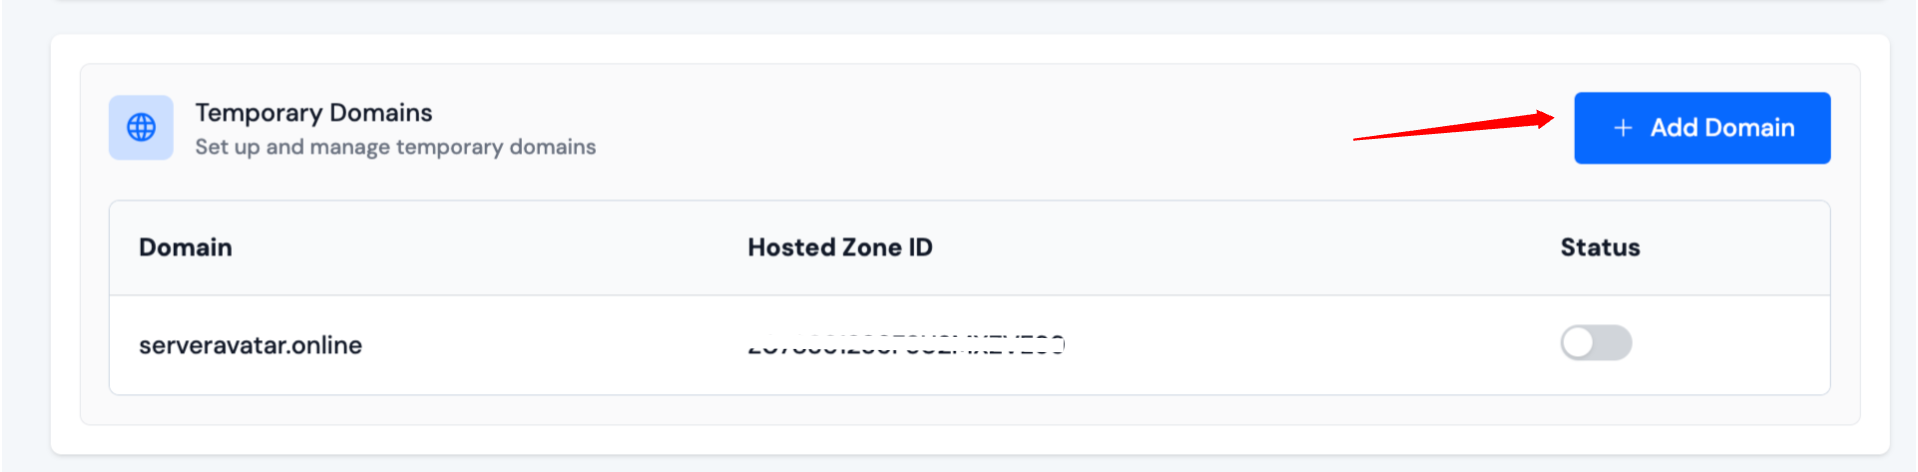
3. Add Temporary Domain
Until you add the client ID and client secret, you won't be able to add a temporary domain. Adding a temporary domain button will be disabled.
-
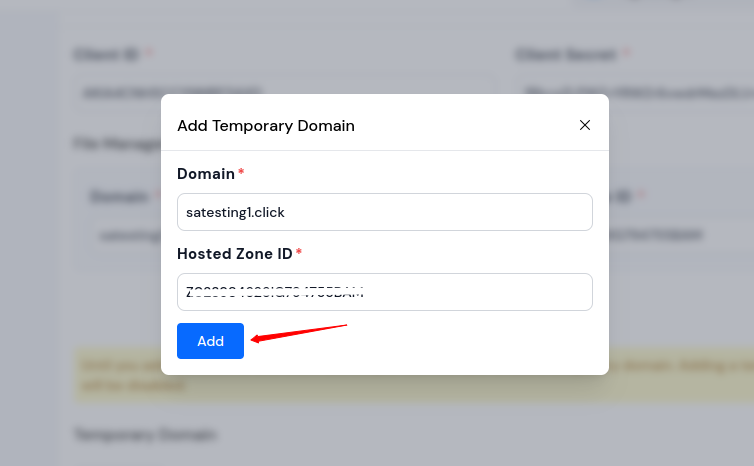
Click on Add Domain in the Temporary Domain section.
-
A popup will appear with two fields: Domain and Hosted Zone ID. Enter the domain and the hosted zone ID. Click the Add button to add the domain.
-
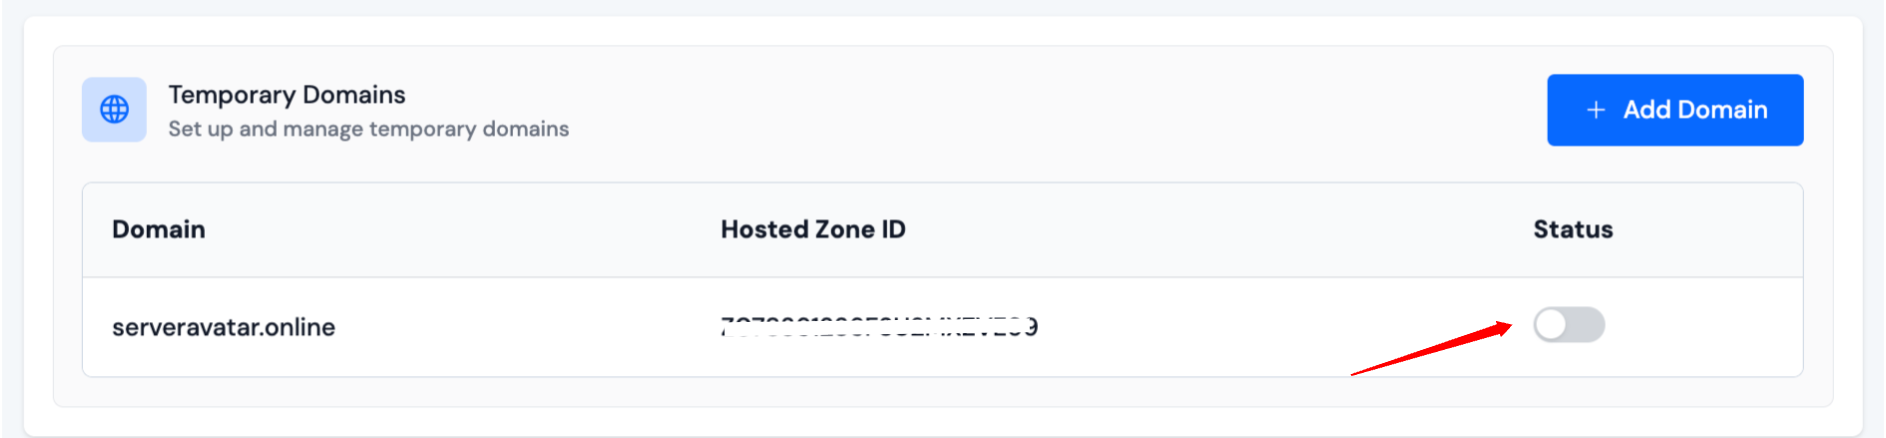
The domain will then appear in the table of temporary domains.
-
You can enable or disable each domain at any time using the toggle switch in the table. Only enabled domains will appear to users as options for temporary domains when creating or staging applications.
Update Domain Service Details
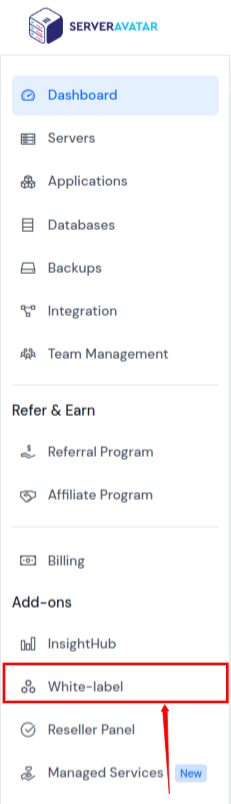
After completing the entire setup process for your whitelabel panel, you'll display the whitelabel dropdown menu in the sidebar.
Navigate to Whitelabel > Domain Service.
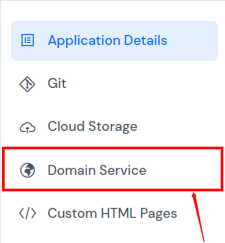
From this page, you can update your Domain Service Details.