Instant Backup
The Instant Backup feature allows you to create backups of your server at any given moment. These backups are taken instantly and can be used to restore your server to a previous state in case of any issues or changes you want to revert.
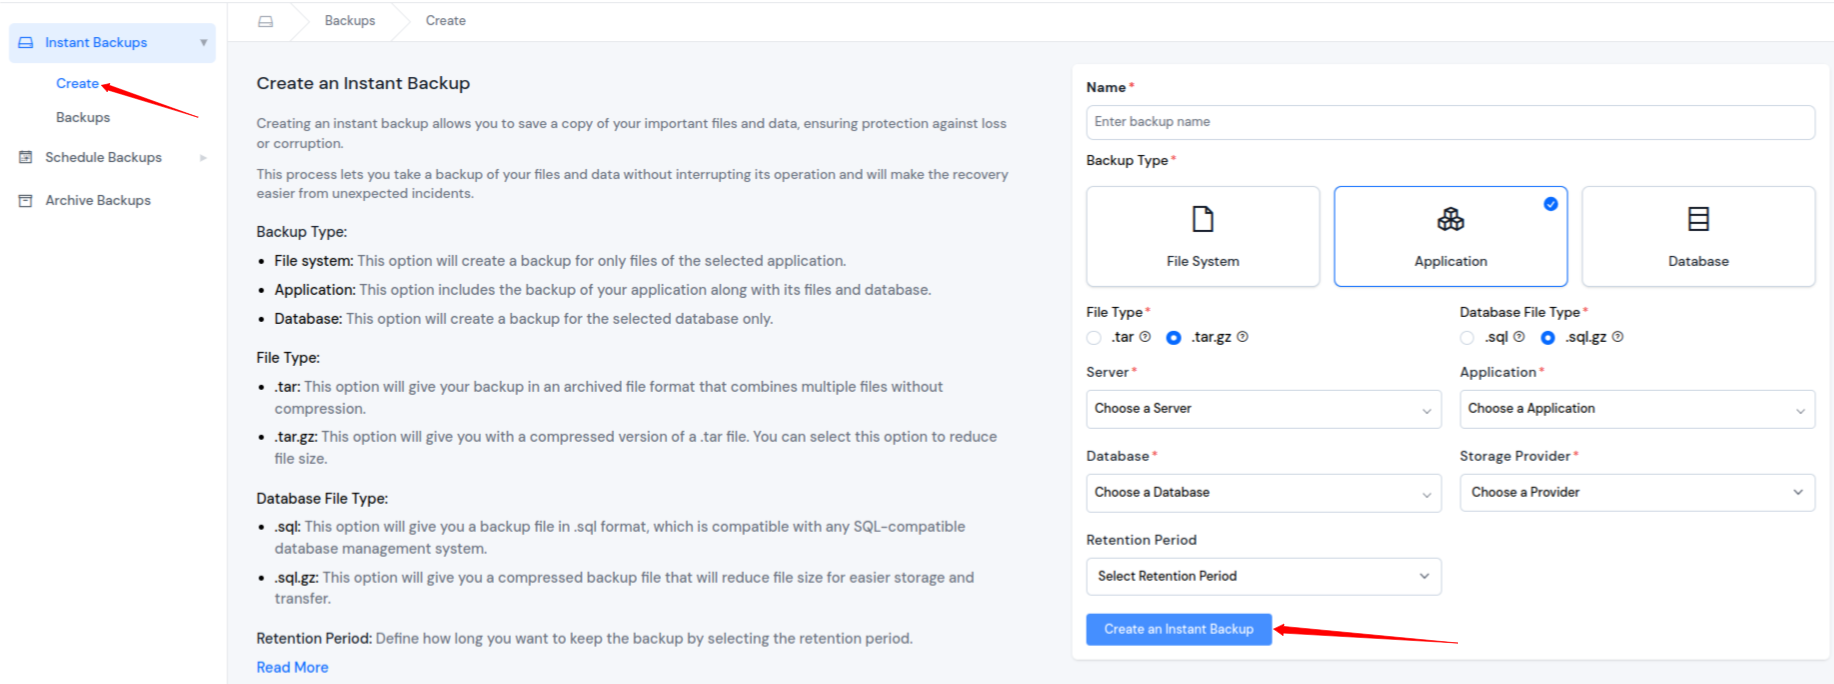
Create an Instant Backup
To create an instant backup, follow these steps:
- Log In: Log in to your ServerAvatar account and navigate to the Backups section in the sidebar.

-
Select Instant Backup: Click on the Instant Backup >> Create tab to create an instant backup.
-
Fill in the Backup Details:
-
Name: Provide a meaningful name for your backup. This will help you identify it later.
-
Backup Type: Choose from one of the following backup types:
- File System: This option will create a backup for only files of the selected application.
- Application: This option includes the backup of your application along with its files and database.
- Database: This option will create a backup for the selected database only.
-
File Type: Select the file type for the backup:
- .tar: This option will give your backup in an archived file format that combines multiple files without compression.
- .tar.gz: This option will give you with a compressed version of a .tar file. You can select this option to reduce file size.
-
Database File Type: Choose the database file type (if applicable):
- .sql: This option will give you a backup file in .sql format, which is compatible with any SQL-compatible database management system.
- .sql.gz: This option will give you a compressed backup file that will reduce file size for easier storage and transfer.
-
Server: Select the server for the backup, which can be associated with File System, Application, or Database.
-
Application: Choose the application (if applicable) for File System or Application backup.
-
Database: Select the database (if applicable) for Application or Database backup.
-
Storage Provider: Choose a storage provider where you want to store the backup.
-
Provider Account: Select the account of the storage provider if you have multiple storage accounts configured.
-
Retention Period: Define how long you want to keep the backup by selecting the retention period.
-
-
Create an Instant Backup: After filling in the required details, click the "Create an Instant Backup" button to initiate the instant backup process.
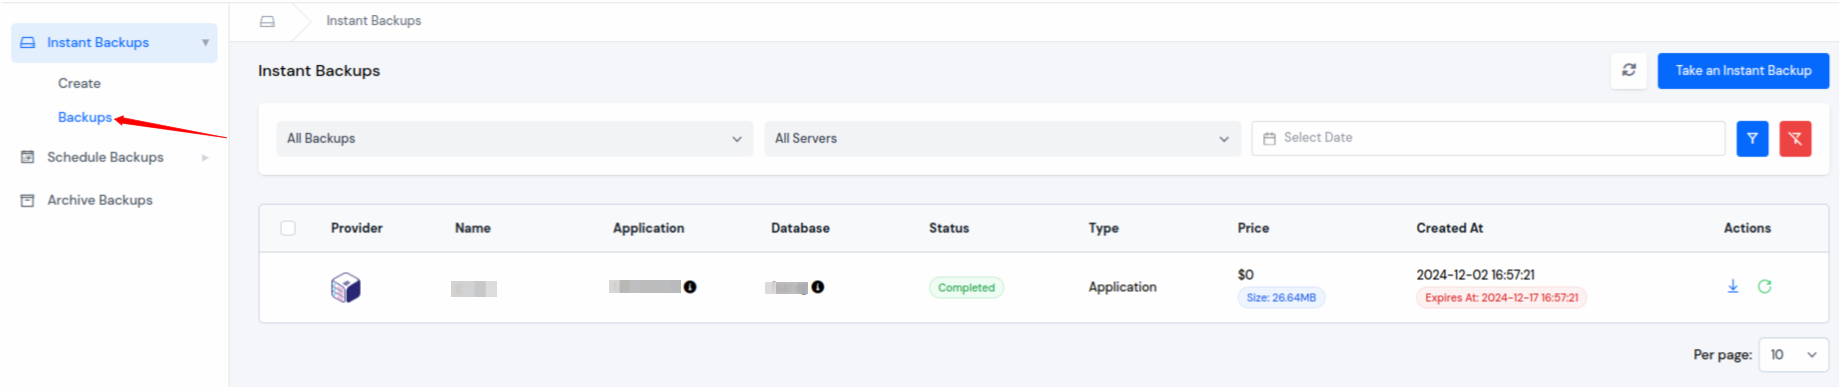
List of Instant Backups
In the Instant Backups >> Backups section, you can see a list of all your previously created instant backups. This list includes details such as the backup name, creation date, and application (if provided), database (if provided), etc.
To access the list of instant backups list:
-
Navigate to the Instant Backup >> Backups tab in the sidebar.
-
You will see a table with the following columns:
-
Provider: The storage provider where the backup is stored.
-
Name: The name you provided for the backup.
-
Application: The associated application for the backup (if applicable).
-
Database: The associated database for the backup (if applicable).
-
Status: The current status of the backup, indicating whether it's completed or in progress.
-
Type: The type of backup (File System, Application, or Database).
-
Price: The cost associated with the backup (if applicable).
-
Created At: The date and time when the backup was created.
-
Actions: You can see the icon to Download or Restore the backup. You can perform actions on individual backups as needed, such as restoring your server to a specific backup point.
-
By regularly creating instant backups of your server, you can ensure that you have a safety net in case of unexpected issues or changes that need to be rolled back.
Note: Remember to manage your backups wisely, as they consume server storage space. Delete older backups when they are no longer needed to free up resources.
For more information on the other backup features like "Schedule Backup" and "Archive Backup," refer to the respective sections in the sidebar.
That's it! You now know how to create instant backups and manage them using ServerAvatar's intuitive interface.