Manual Restore Backup
The manual backup restoration process is used to restore data from one server to another, particularly when a server has been disconnected or deleted but its backup data is still available. This method enables the recovery of data or applications from the backup. It proves beneficial in scenarios where a server has been disconnected or deleted, yet its backup data remains. This procedure facilitates the restoration of data or applications from the backup.
To manually restore the backup, follow these steps:
- First, you can find the backup that was taken from your old server in the Archive Backups section. Follow the provided steps to download the backup of first server from the Archive Backup section.
Step 1: First, log in to the ServerAvatar Account.
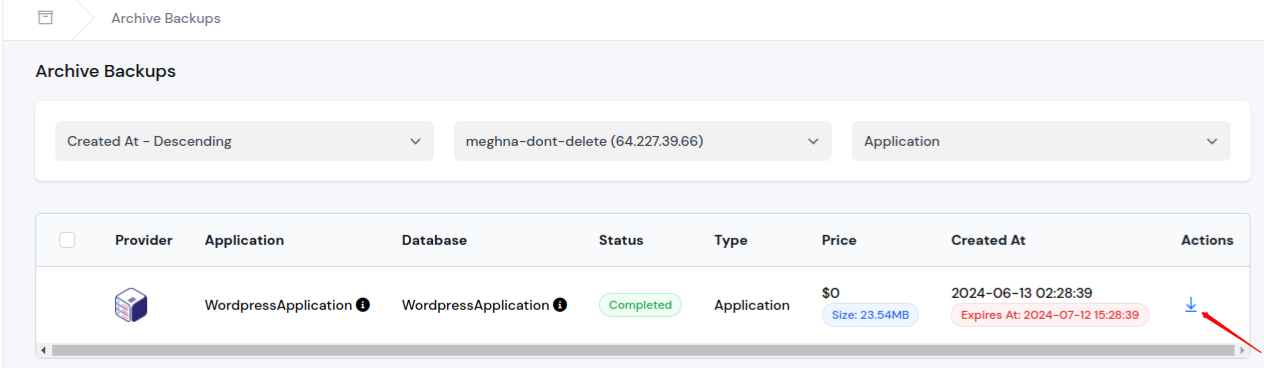
Step 2: Now, navigate to the Backups Section.

Step 3: You can see Archive Backups option there and you will find the backed-up data from the deleted server.

Step 4: Click the download icon to download the backedup data, which will be stored on your system.
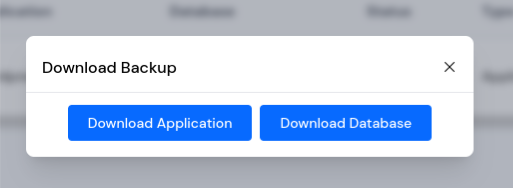
Step 5: You will see two options Download Application and Download Database. Download both files.
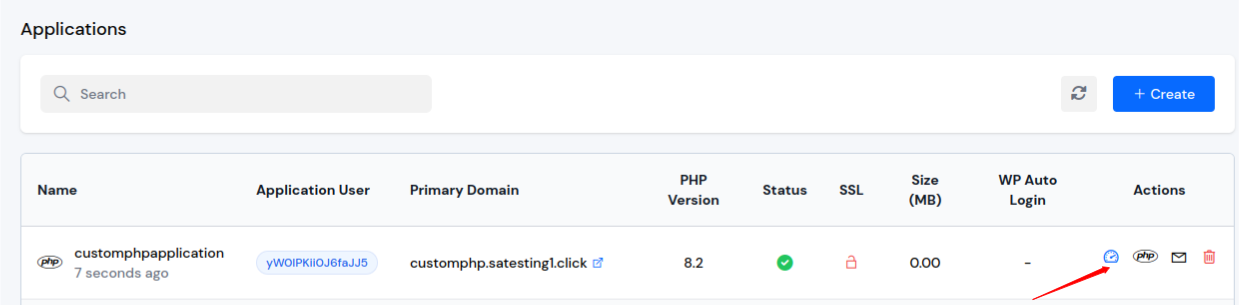
Step 6: Now, Navigate to your Server Dashboard and create a new Custom PHP Application. Follow the below link to create Custom PHP Application.
Step 7: After creating a new Custom PHP Application, navigate to Dashboard of the Application as shown in the image.
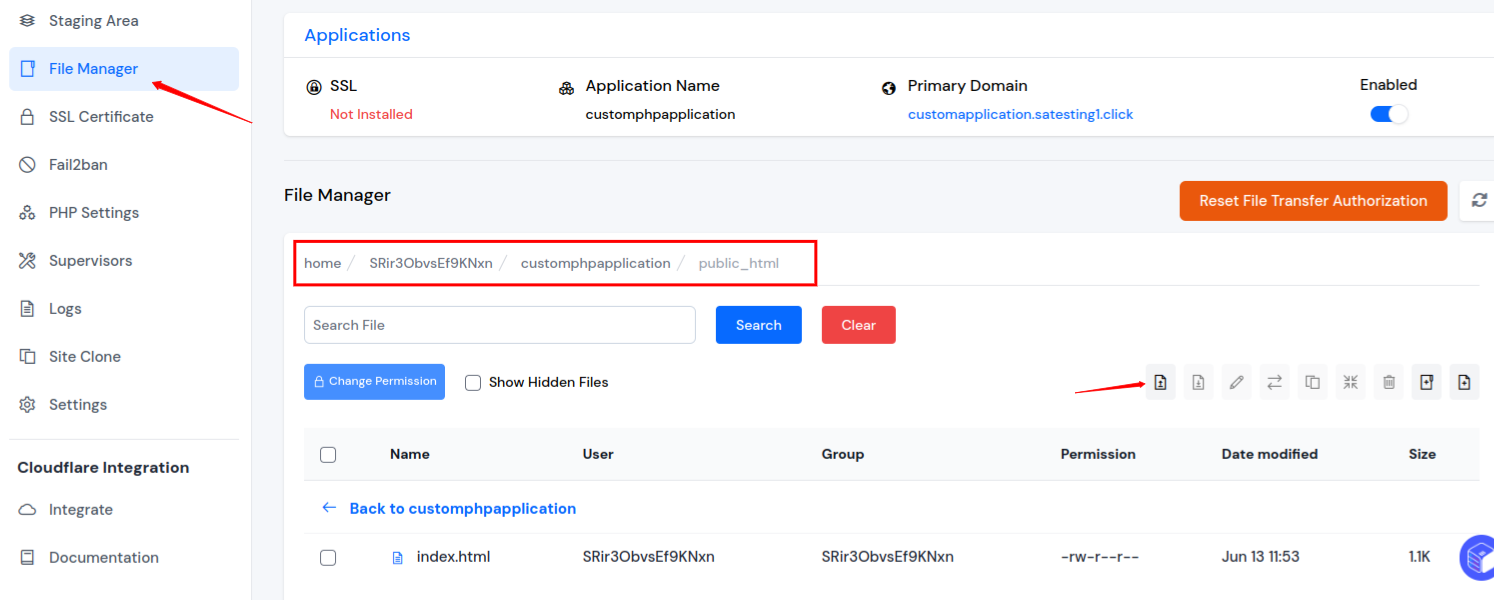
Step 8: Go to File Manager option, Navigate to public_html folder and upload the application file by clicking on upload icon which is downloaded from archive backup section.
Step 9: Now go to Databases and click the Create a Database button to create a fresh database for the application.
Set the custom username and password as it is required later to login to PHPMyAdmin for further process.

Step 10: Open PHPMyAdmin and enter the credentials of database which we set while creating the new database and login to PHPMyAdmin.
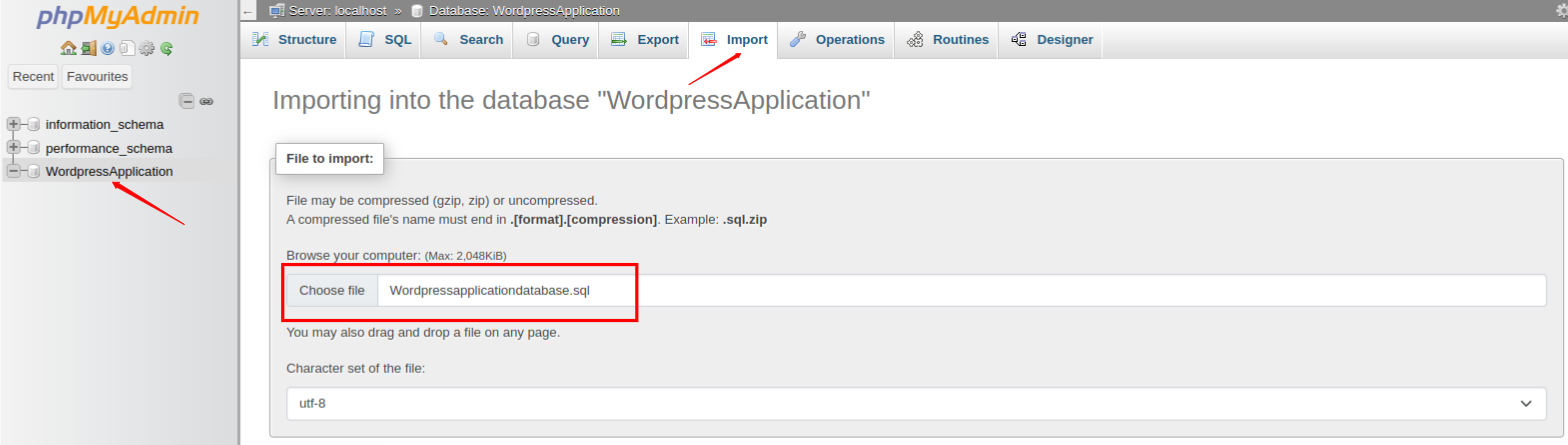
Step 11: Select the database from the left Sidebar and go to Import option, attach your database backedup file and click on import button at the end of the form.
Step 12: You will see the message of import successfully finished, and the manually restoration process of backup has been finished.
