Create Database User
Step 1: First, log in to your ServerAvatar account.
Step 2: Click on the Server Dashboard button.

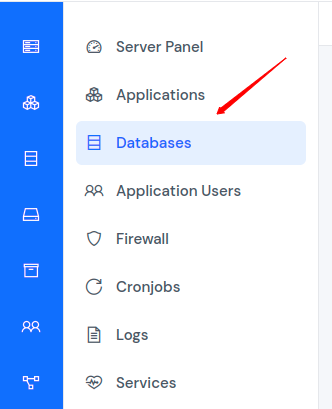
Step 3: On the left-hand sidebar of the Server Panel, click on Databases.

Step 4: Now, you will see the Databases table like the image below. Click on the User icon.

Step 5: Now, click on the Create a Database User button.

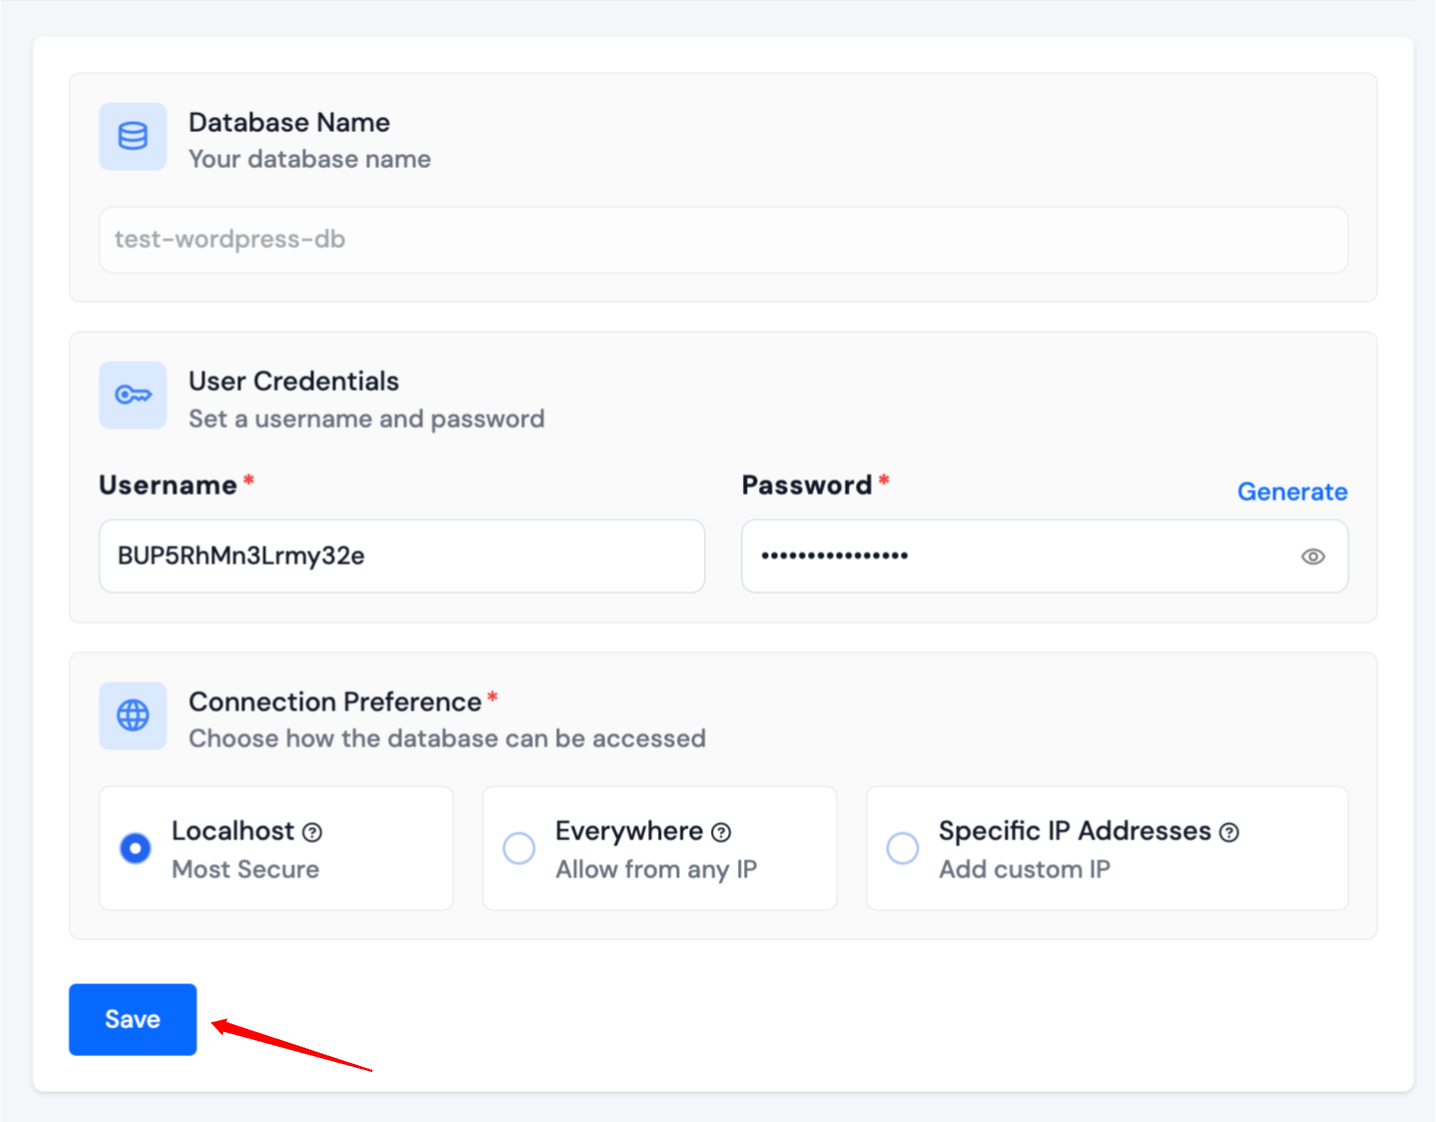
Step 6: ServerAvatar will automatically generate a Username and Password, or you can enter them yourself.
The connection preference defines where the user can connect from:
Everywhere: Allow connections from any IP address. This is useful for users who need to access the database from various locations, but it can be less secure.
Specific IP: Allow connections only from specified IP addresses. This option enhances security by restricting access to known IP addresses. You can specify multiple IP addresses.
Localhost: Allow connections only from the localhost (127.0.0.1). This is the most secure option, but it limits access to the machine where the database is hosted.
Then, click on the Save button.
