Manual Installation
Install Insighthub
A basic access log InsightHub is a web interface that displays access log data in a tabular format. It typically includes columns for key information like date, IP addresses, URLs, status codes, methods, user-agent, referers, bandwidth, bots, and many more. Users can sort, filter, and search the log data and may have options to specify date ranges. User authentication is implemented to restrict access to authorized users. The panel is designed to be responsive and user-friendly.
Log in to your ServerAvatar account, navigate to the Billing -> Add-on section, and then Purchase the InsightHub.
Follow this step-by-step guide to set up your InsightHub.
System Requirements:
- Operating System: Ubuntu 20.04 or Ubuntu 22.04 Server
- Core: 2 or More
- Memory: 2 GB or Higher
- Disk Space: At least 10 GB Space Required
- A stable internet connection
Software Components:
- Web Server: Apache or Nginx
- Database: MySQL or MariaDB
- Caching: Redis
- PHP: Version 8.2 or higher (PHP-FPM and CLI)
- NodeJs 20.x.x & NPM 10.x.x
- InsightHub License Key
- SMTP Credentials
- SSL
- Supervisor
Follow these straightforward steps to get started:
Step 1. System Check
Step 1.1. PHP Cli Version
Access the ServerAvatar server panel, go to Settings in the sidebar, and change the PHP-CLI version to 8.2 or above.

Step 1.2. Install Node.js
If Node.js is already installed on your server, and the Node.js version is 20.x.x, and NPM version is 10.x.x, then skip this step.
Install Node.js from the Settings tab under General Settings.

If the Node.js and NPM versions are not the latest, Update Node.js and NPM from the Settings tab under General Settings.

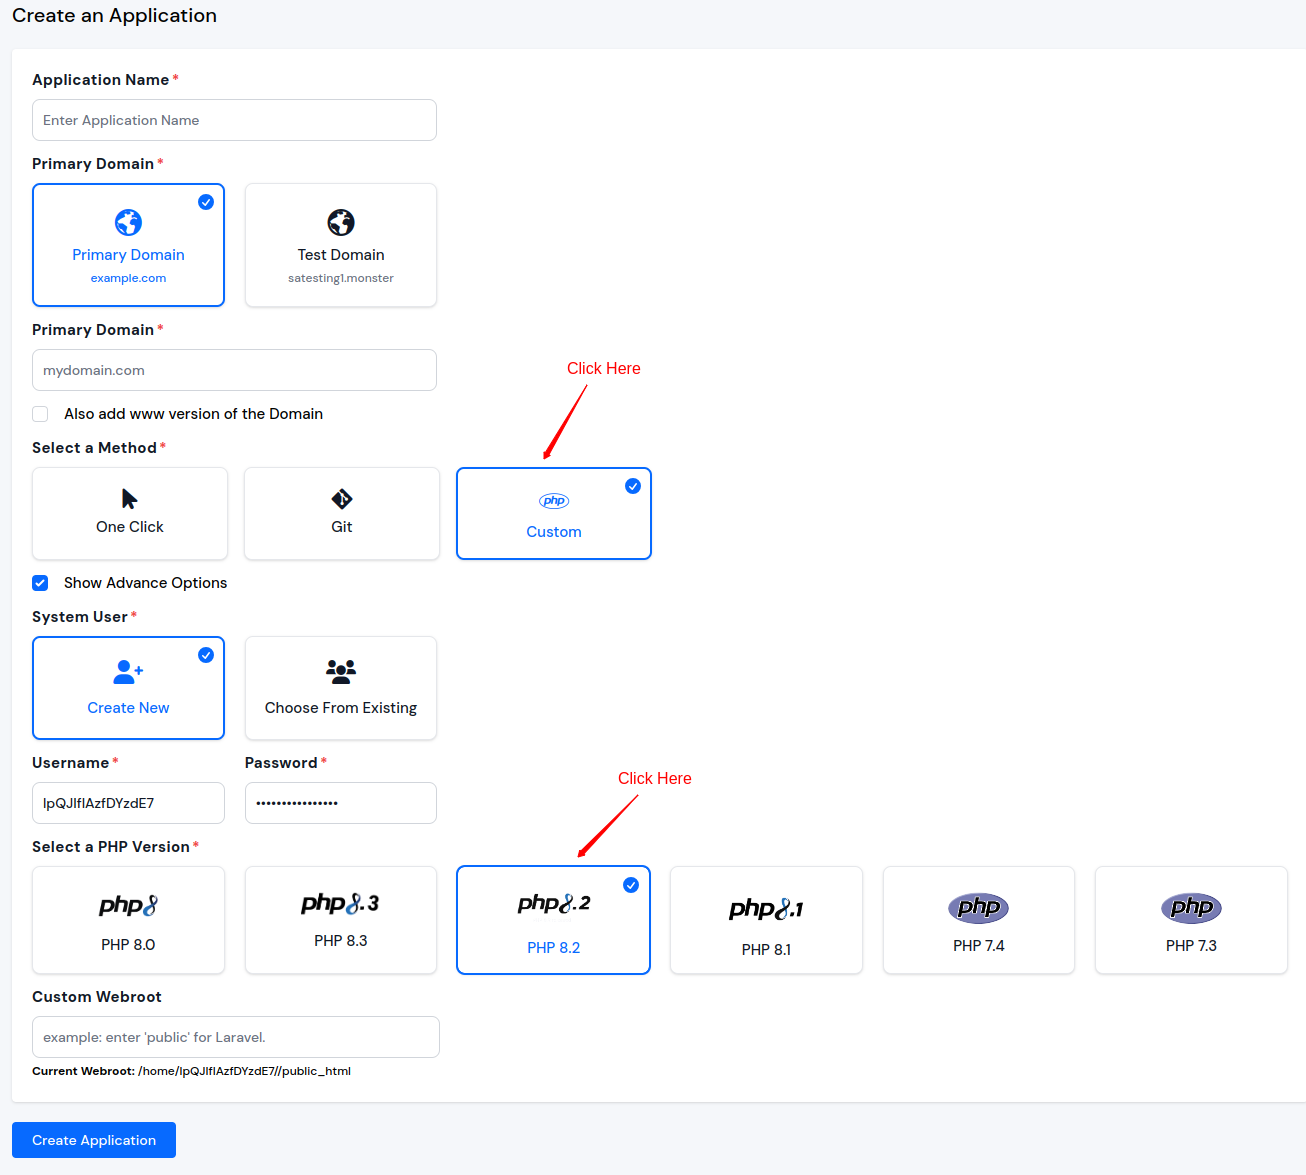
Step 2. Create a Custom PHP Application
Locate the Applications tab and Create an application on your primary or temporary domain.
In the application creation form, check the Advanced Option box and change the PHP version to 8.2 or above.
Empty your application's public_html directory before proceeding. This prevents potential conflicts during installation. Access the File Manager tab within your application dashboard to complete this step.
Step 3. Create a Database
Go to the Databases tab from the sidebar of the server dashboard and create a database for InsightHub.
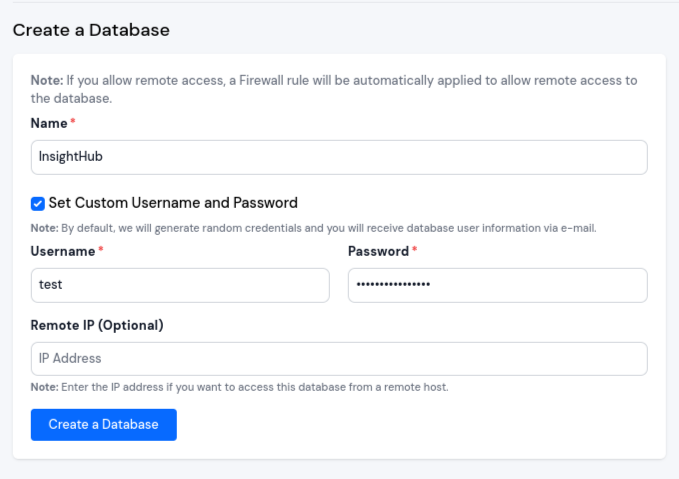
You will need database credentials during the InsightHub setup process.
Step 4. Server Login
The script doesn't run when logged in as the root user.
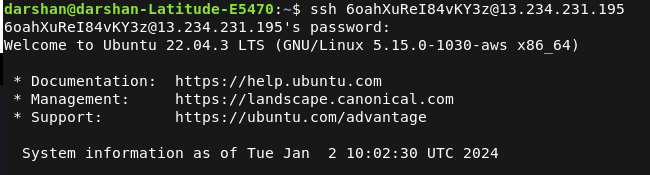
Login to your server and go to your application directory. Connect using SSH by running the ssh username@host command. You can find credentials from the application panel dashboard as shown below:

Step 5. Script Download and Execution
Now run the below command outside of your application directory.
wget https://srvr.so/insighthub
chmod +x insighthub
./insighthub
Do not remove the "insighthub" file located outside of your application directory. It plays a crucial role in the update process.
You can follow the commands in the image below for easy execution:

Step 6. Set Custom Webroot
After script execution, set the custom webroot to public navigating Settings tab of your application dashboard.

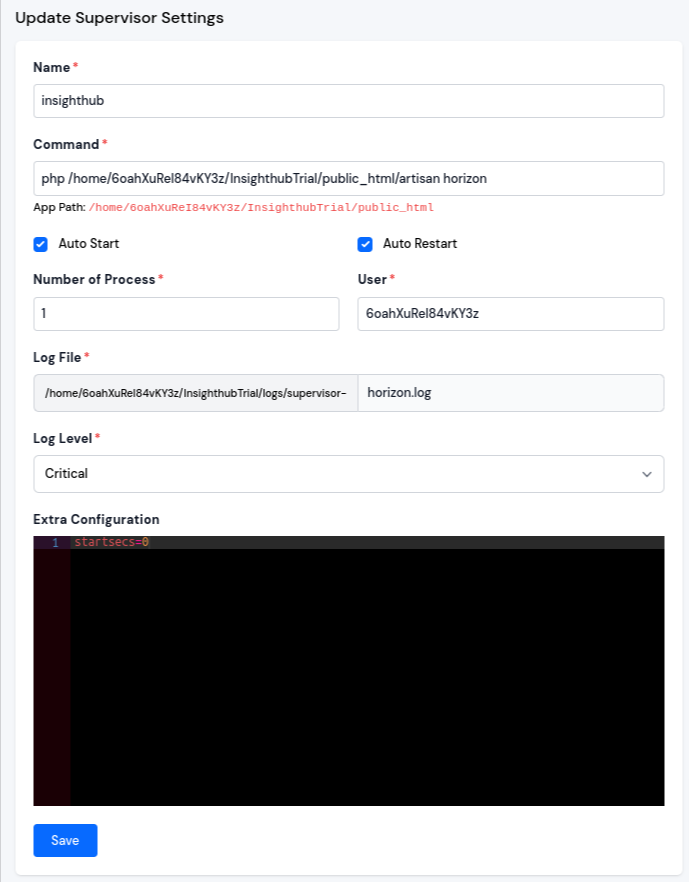
Step 7. Supervisor Configuration
Navigate to the Supervisors tab within your Application Dashboard and create a supervisor for InsightHub. Follow the image below for the supervisor configuration.
Command
php /home/{application username}/{application name}/public_html/artisan horizon
Step 8. Cronjob Setup
Navigate to the Cronjob tab within your Server Dashboard and Configure a Cronjob for InsightHub.
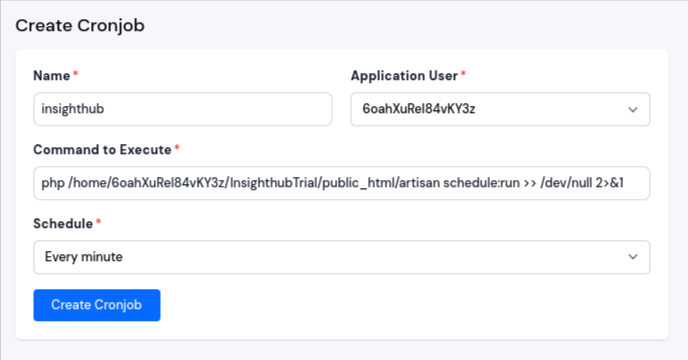
Command
php /home/{application username}/{application name}/public_html/artisan schedule:run >> /dev/null 2>&1
Step 9. Setup InsightHub
Access your Application Domain to complete the InsightHub setup steps:
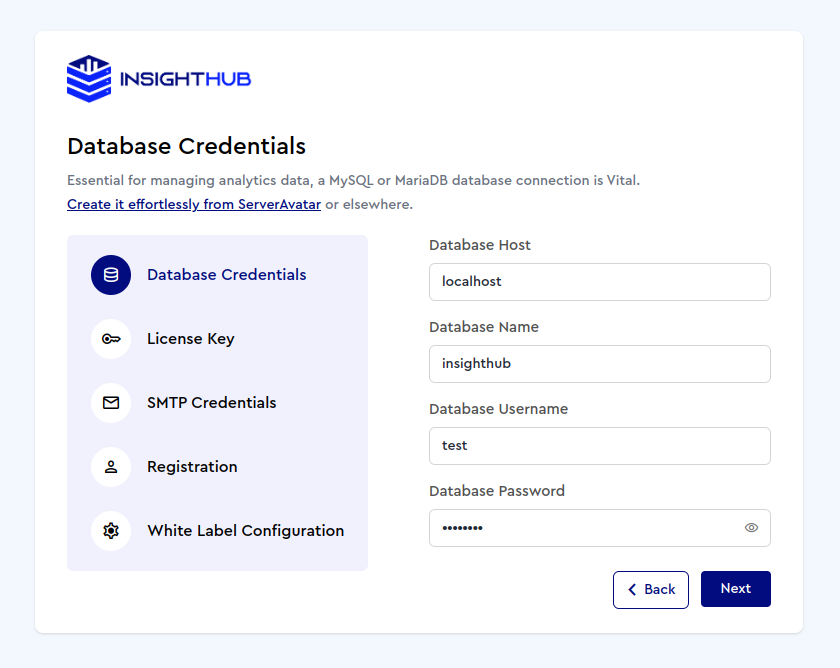
Step 1: Database Credentials
Enter the database credentials generated in the 3rd Step.
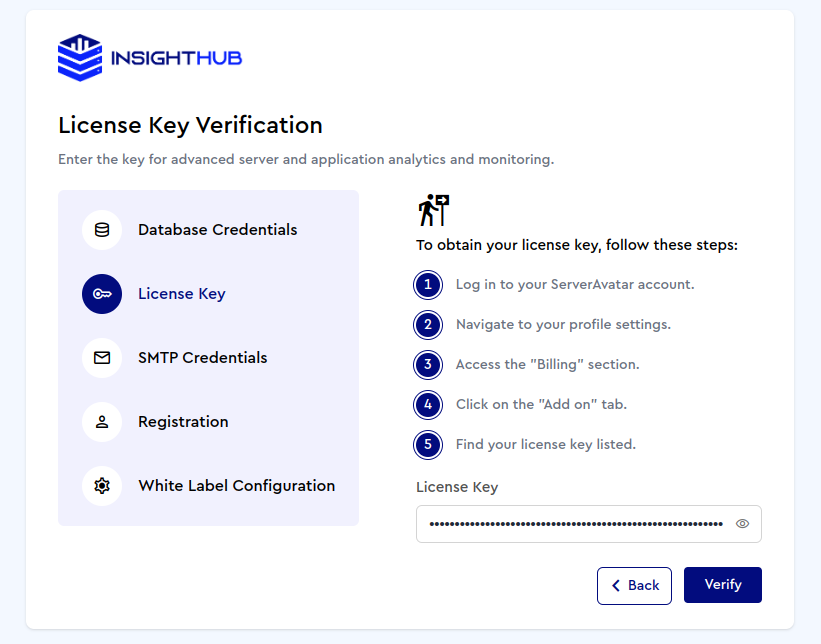
Step 2: License Key
Retrieve the license key from User profile>>Billing>Add-on
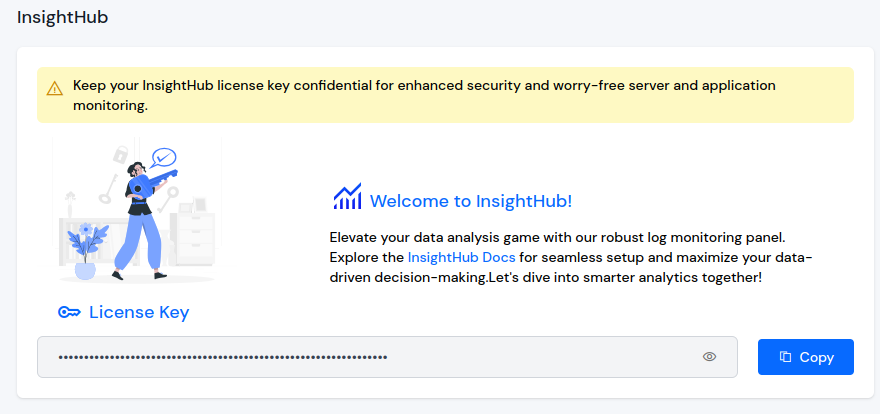
Paste the copied license key here:
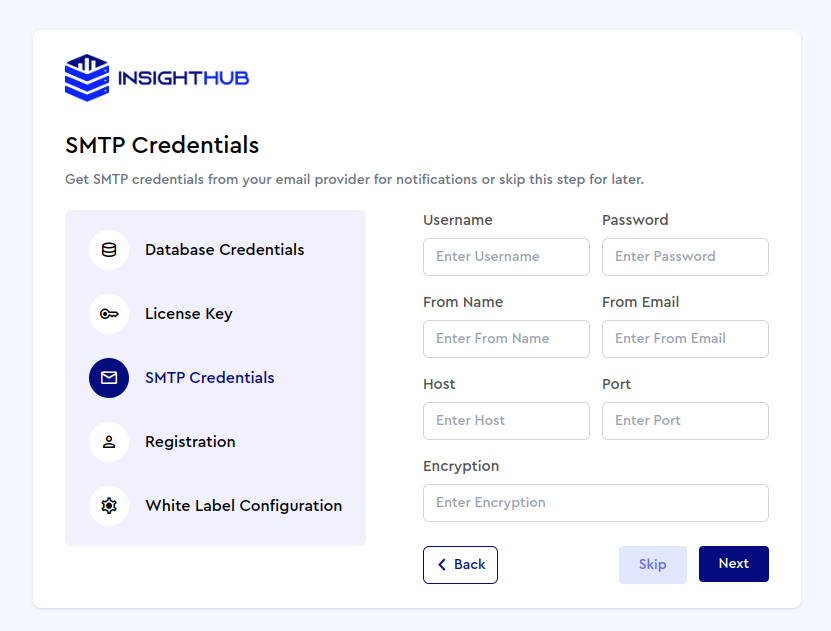
Step 3: SMTP Credentials
Enter SMTP details for the mail configuration. You can also skip this step.
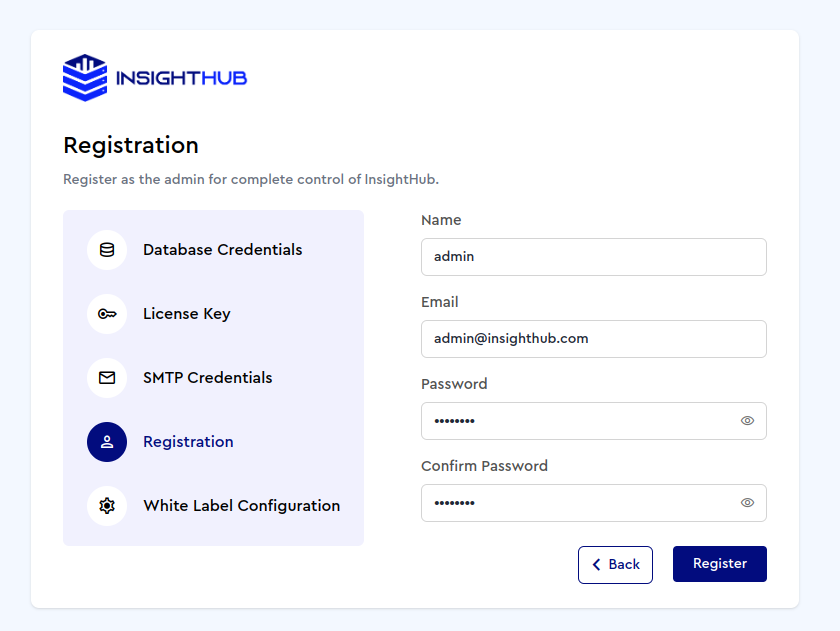
Step 4: Registration
Register as the administrator to gain complete control of InsightHub.
Step 5: White-label Configuration
Effortlessly customize the appearance for a unique monitoring experience.
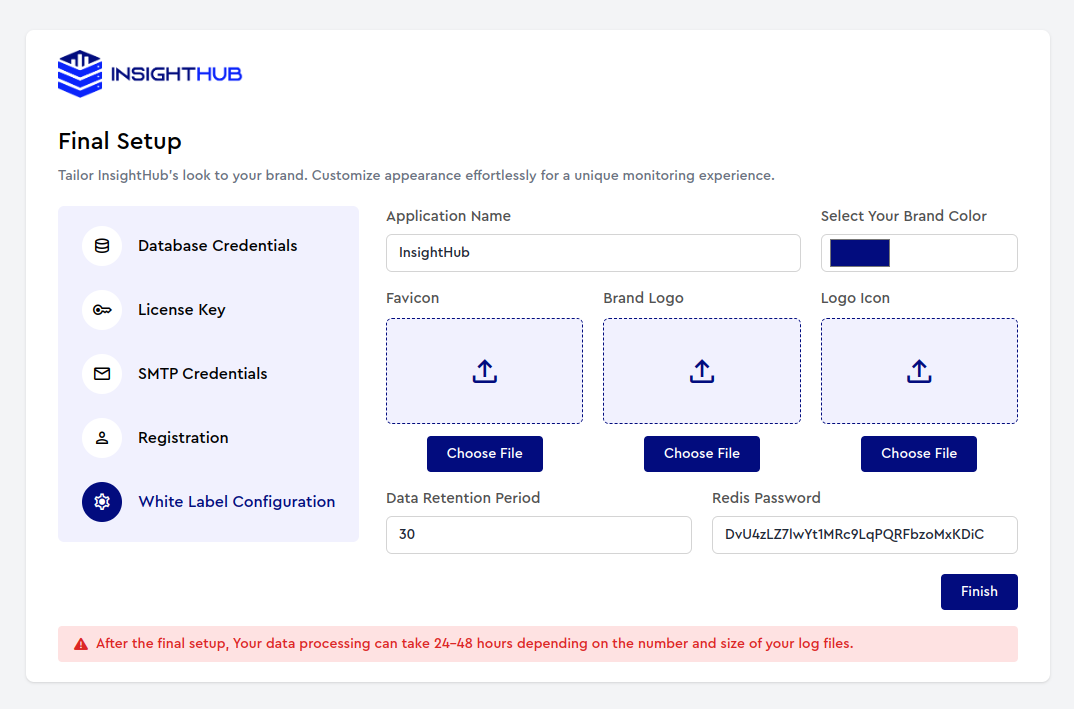
Data Retention Period: Data prior to the number of days specified in the retention period will be deleted.
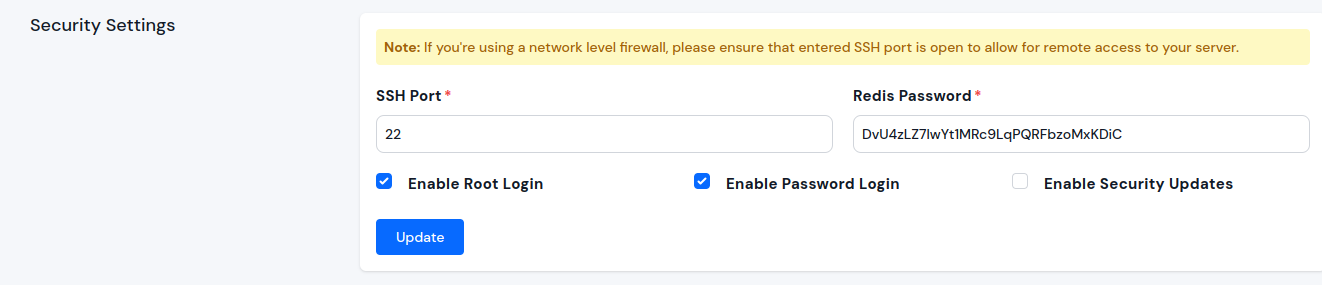
Redis Password: Get it from Server Settings>>Security Settings from your server panel.
Please click the Finish button to finalize the setup process.
Step 6: Restart Supervisor
Restart Supervisor From Your Application's Supervisor Tab which was created in Step 7.

Congratulations! You've successfully set up InsightHub. Dive into your data now and uncover actionable insights
Environment Variables
Want to Increase Insighthub Data Processing Speed?
Be careful while setting this value. Adjust it based on server resources to ensure optimal performance. Consider the available memory, processing power, and other server capacities when configuring this variable.
Below are the environment variables configured in the .env file of insighthub:
MAX_CRONJOB_APPLICATION
This variable is utilized for determining the number of applications fetched every time a cron job runs. It sets the batch size for application retrieval during each cron job execution.
Example usage in .env file:
MAX_CRONJOB_APPLICATION=5
Purpose: Fetching the number of applications every cron job run.
FETCH_ACCESS_LOG_LIMIT
The FETCH_ACCESS_LOG_LIMIT variable controls the number of records fetched at a time from the access log file. It plays a crucial role in managing the granularity of data retrieval from the log file.
Example usage in .env file:
FETCH_ACCESS_LOG_LIMIT=2000
Purpose: Fetching the number of records at a time from the log file.
INSERT_CHUNK_SIZE
This variable, INSERT_CHUNK_SIZE, is responsible for creating chunks of data based on the value specified in FETCH_ACCESS_LOG_LIMIT. It determines the size of each chunk for efficient data processing and insertion.
Example usage in .env file:
INSERT_CHUNK_SIZE=50
Purpose: Creating chunks based on FETCH_ACCESS_LOG_LIMIT for data insertion.
PROCESS_CHUNK_READ_SIZE
The PROCESS_CHUNK_READ_SIZE variable is used for processing the data fetched from the log file. It represents the size of each chunk of data that is read and processed during the data processing phase.
Example usage in .env file:
PROCESS_CHUNK_READ_SIZE=1000
Purpose: Processing data fetched from the log file.
Important: After making changes to the .env file, don't forget to restart the queue by running the following command:
php artisan optimize:clear
php artisan queue:restart
Update Insighthub
Step 1. Server Login
Connect to your server using an SSH client and the credentials you used for initial setup. The command you can use to login to the server is ssh username@host.
Step 2. Navigate to The Appropriate Directory
Position yourself outside of your InsightHub application directory. This is typically the parent directory containing the application folder.

Step 3. Execute Script
The "insighthub" script already exists outside of your application directory, do not remove it. It's essential for the update process.
Run the following command in your terminal:

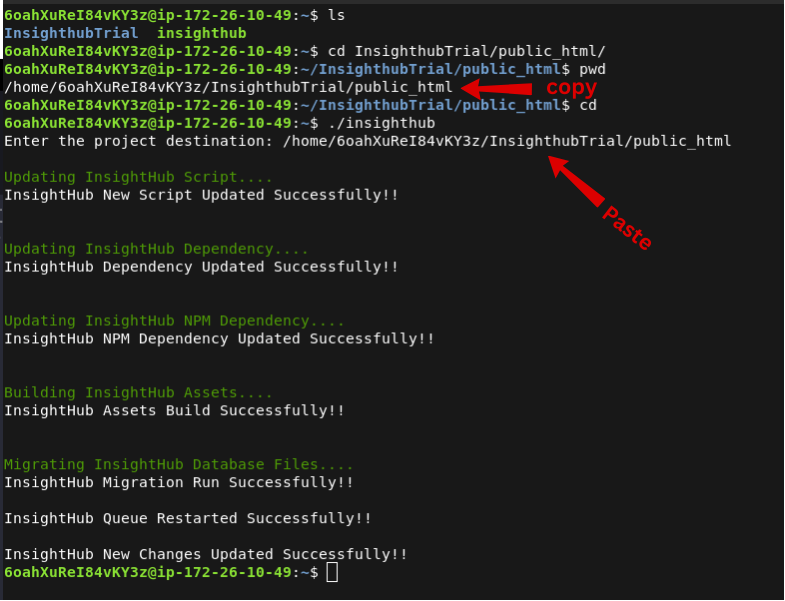
Step 4. Provide Destination Path
When prompted, enter the full path to your InsightHub application directory. Ensure accuracy to avoid errors. Refer to the image below to understand the update process easily: