Managed Server Installation
Step-by-Step: Create a Managed Server
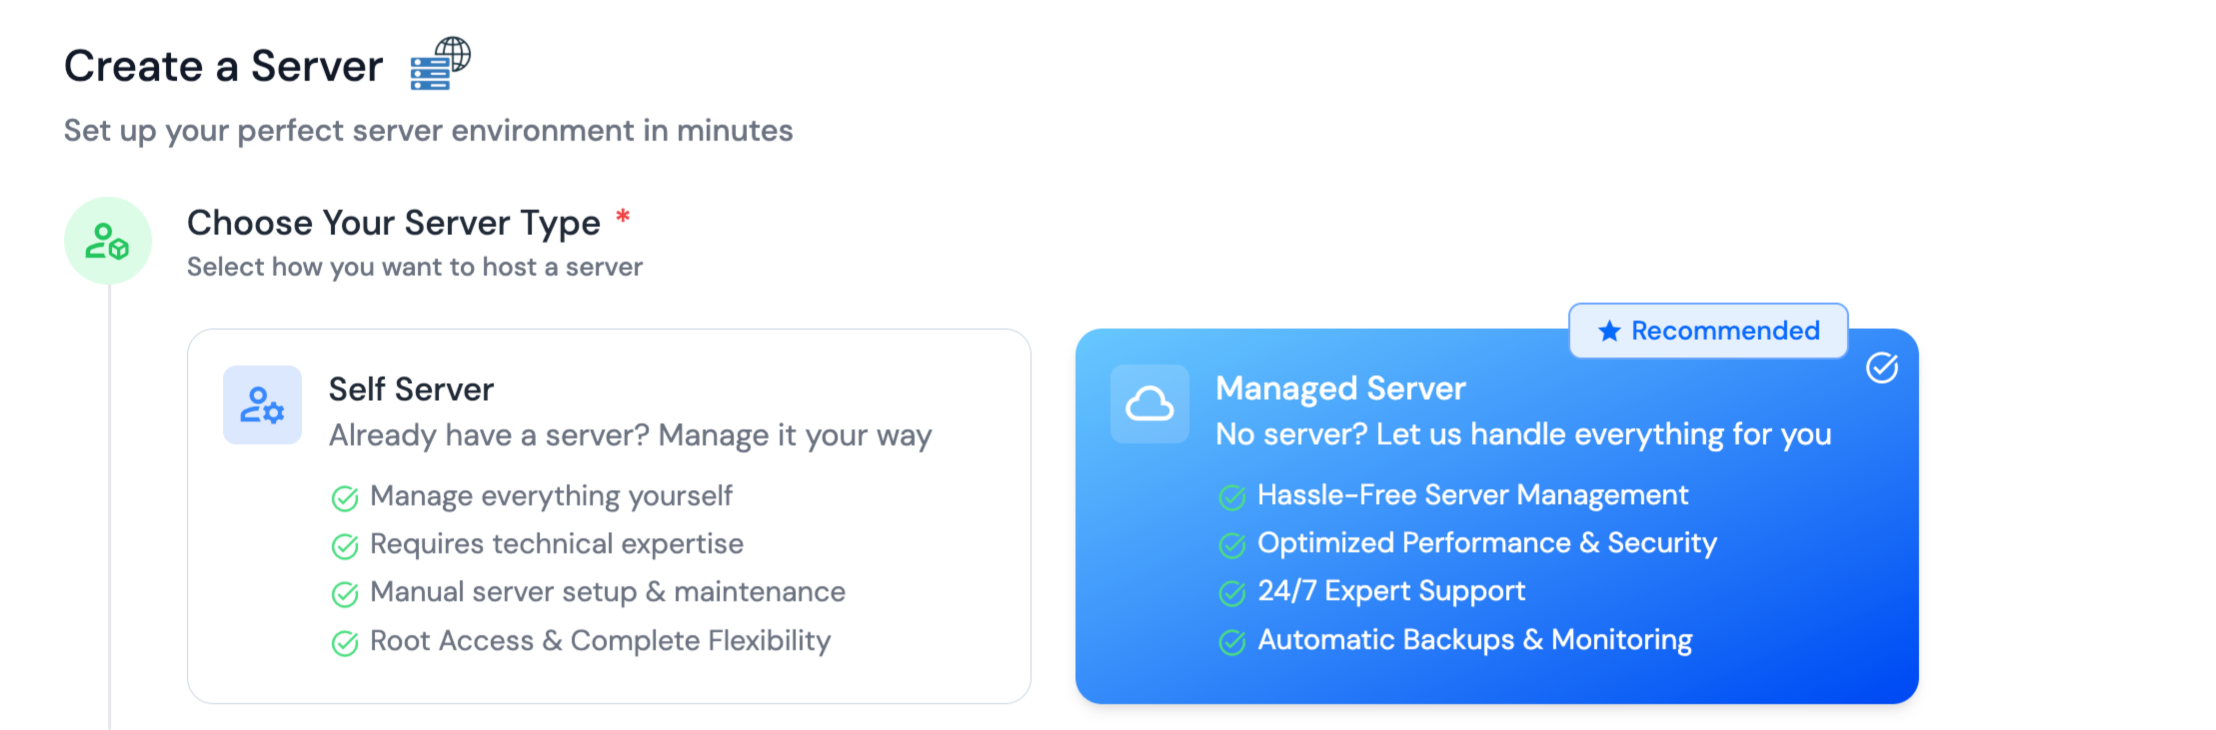
Step 1: Log in to your ServerAvatar Dashboard and click the Create → Server button.

Step 2: Select Managed Server as your server type.
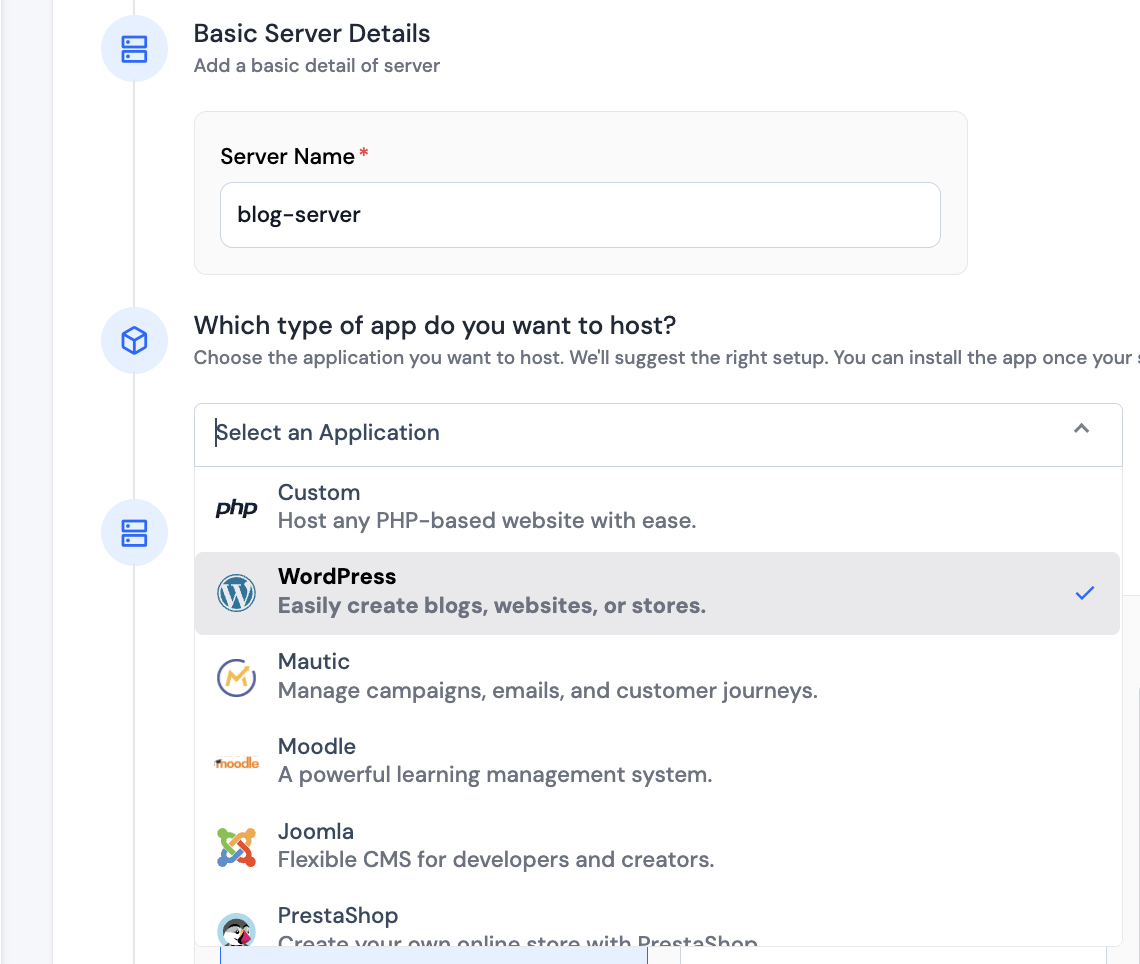
Step 3: Enter a Server Name to identify the server within your dashboard.
Step 4: Optionally, select the Application Framework you plan to use (e.g., WordPress, N8N, etc.). This helps suggest the ideal configuration.
Step 5: Choose the Tech Stack, Operating System, and Database as per your project needs.
Selecting the Node Stack disables MySQL/MariaDB options, as they aren't supported in that stack.

You can also enable installation of Node.js or Yarn by toggling the respective options.

Step 6: Pick a Server Location and Size. These define the region (data center) and the computing power of your server.

Step 7: Click Deploy Server. ServerAvatar will create and configure the server for you.
Installation Process
During installation, you will see which services are being installed and configured in real-time. ServerAvatar will perform the following steps:
- Install a web server (Apache, Nginx, or OpenLiteSpeed)
- Install PHP and all supported versions (from 7.2 to 8.4)
- Install and configure PHP-FPM
- Install and configure MySQL
- Install and configure Redis
- Create a SWAP memory file
- Create basic virtual host files
- Install Git and Composer
- Finalize the setup and perform testing
This process usually takes 5–15 minutes. After that, your server is ready for deploying websites and applications directly from the ServerAvatar panel.