Change Custom Webroot
Changing the custom webroot of an application is a delicate task that requires caution and attention to detail. Altering the webroot path directly impacts how the application serves content to users. Failure to changing webroot path can result in the application becoming down or inaccessible, potentially leading to service interruptions and negative user experiences.
Follow the steps given below to change webroot path of your application in ServerAvatar:
Step 1: First, log in to your ServerAvatar account.
Step 2: Click on the Server Dashboard button.

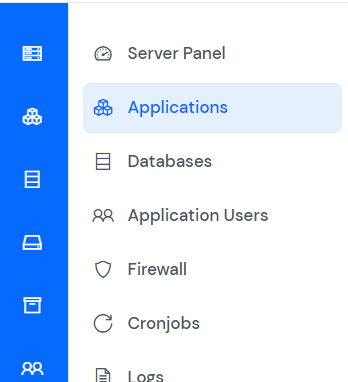
Step 3: Now, you will see the option Applications on the left-hand sidebar of the Server Panel. Click on Applications.
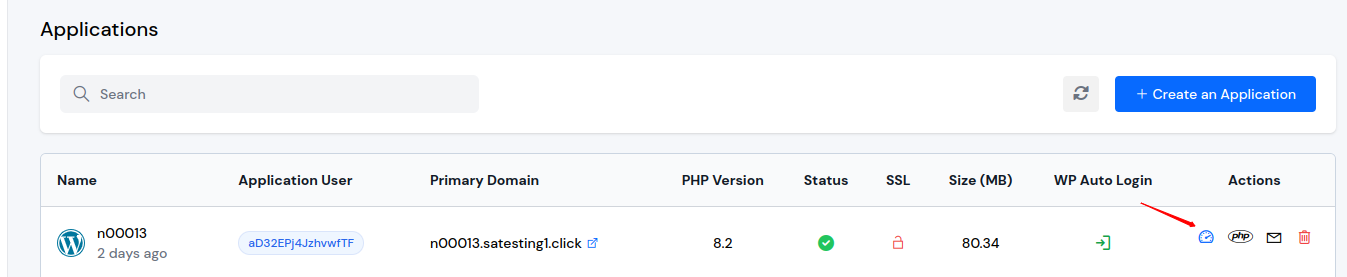
Step 4: Now, you will see the Applications table like the image below.
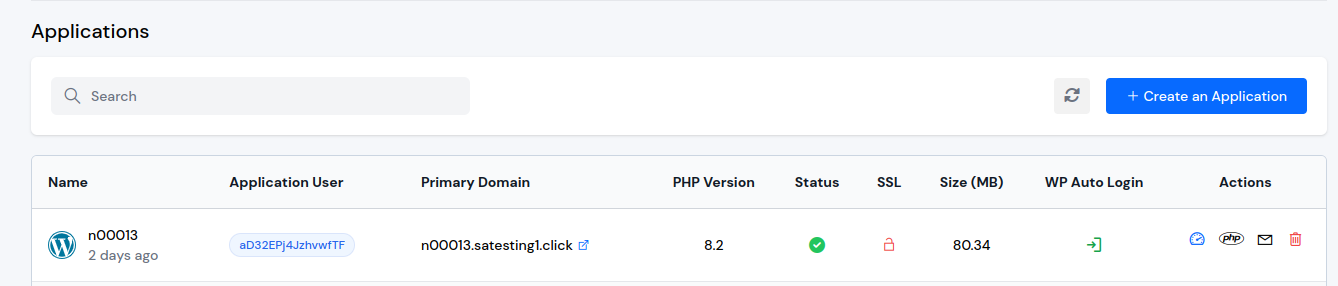
Step 5: Click on Application Name or Dashboard icon to access application panel.
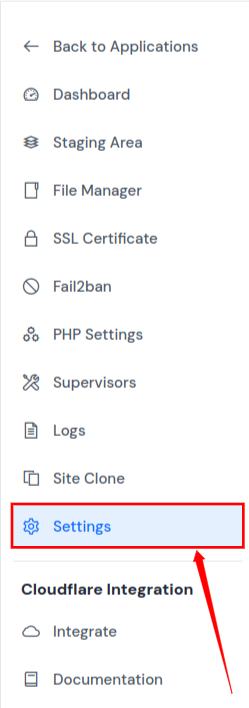
Step 6: Now, you will see the option Settings tab on the left-hand sidebar of the Application Panel. Click on Settings as shown in the image below.
Step 7: You will see the Settings page as shown in the image below. Made the change as per your requirement in "Change Custom Webroot" section and click on the Update Custom Webroot button as mentioned in the image below.
