Staging Area
The Staging Area provides a safe environment where you can test updates, new features, or configuration changes without affecting your live production site. When you create a staging area, it clones your existing application, allowing you to experiment freely.
Changes made in the staging area do not impact your live environment. Once you are satisfied with your changes, you can push them to production or pull the latest live site into staging for testing.
Access the Staging Area
Step 1: Log in to your ServerAvatar account.
Step 2: Navigate to your server's Dashboard.

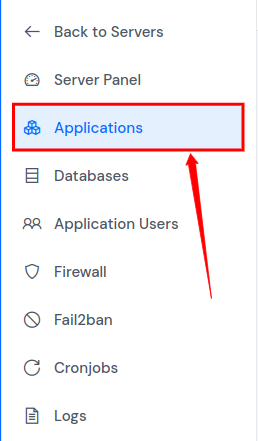
Step 3: In the Server Panel sidebar, click on Applications.
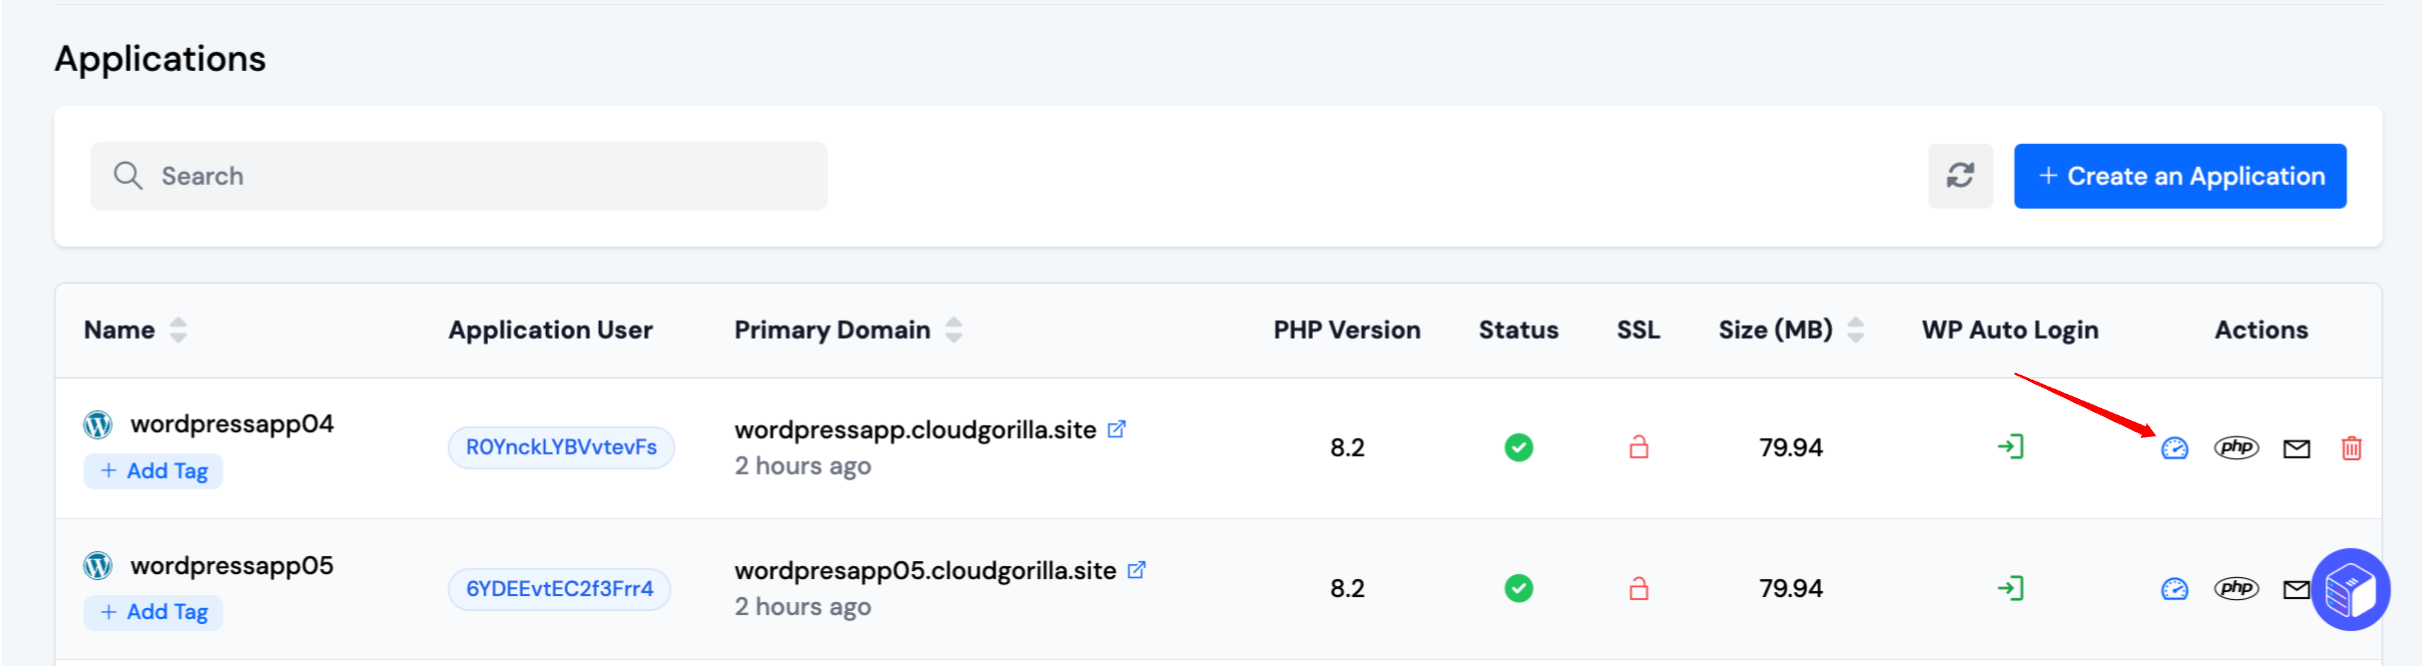
Step 4: Locate the application for which you want to create a staging area. Click on the Application Name or the Dashboard icon to access the application panel.
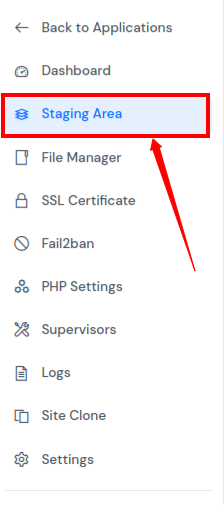
Step 5: From the application sidebar, click on Staging Area.
Create a Staging Area
Step 6: Fill out the staging area form with the necessary details. Once complete, click the Create Staging Area button.
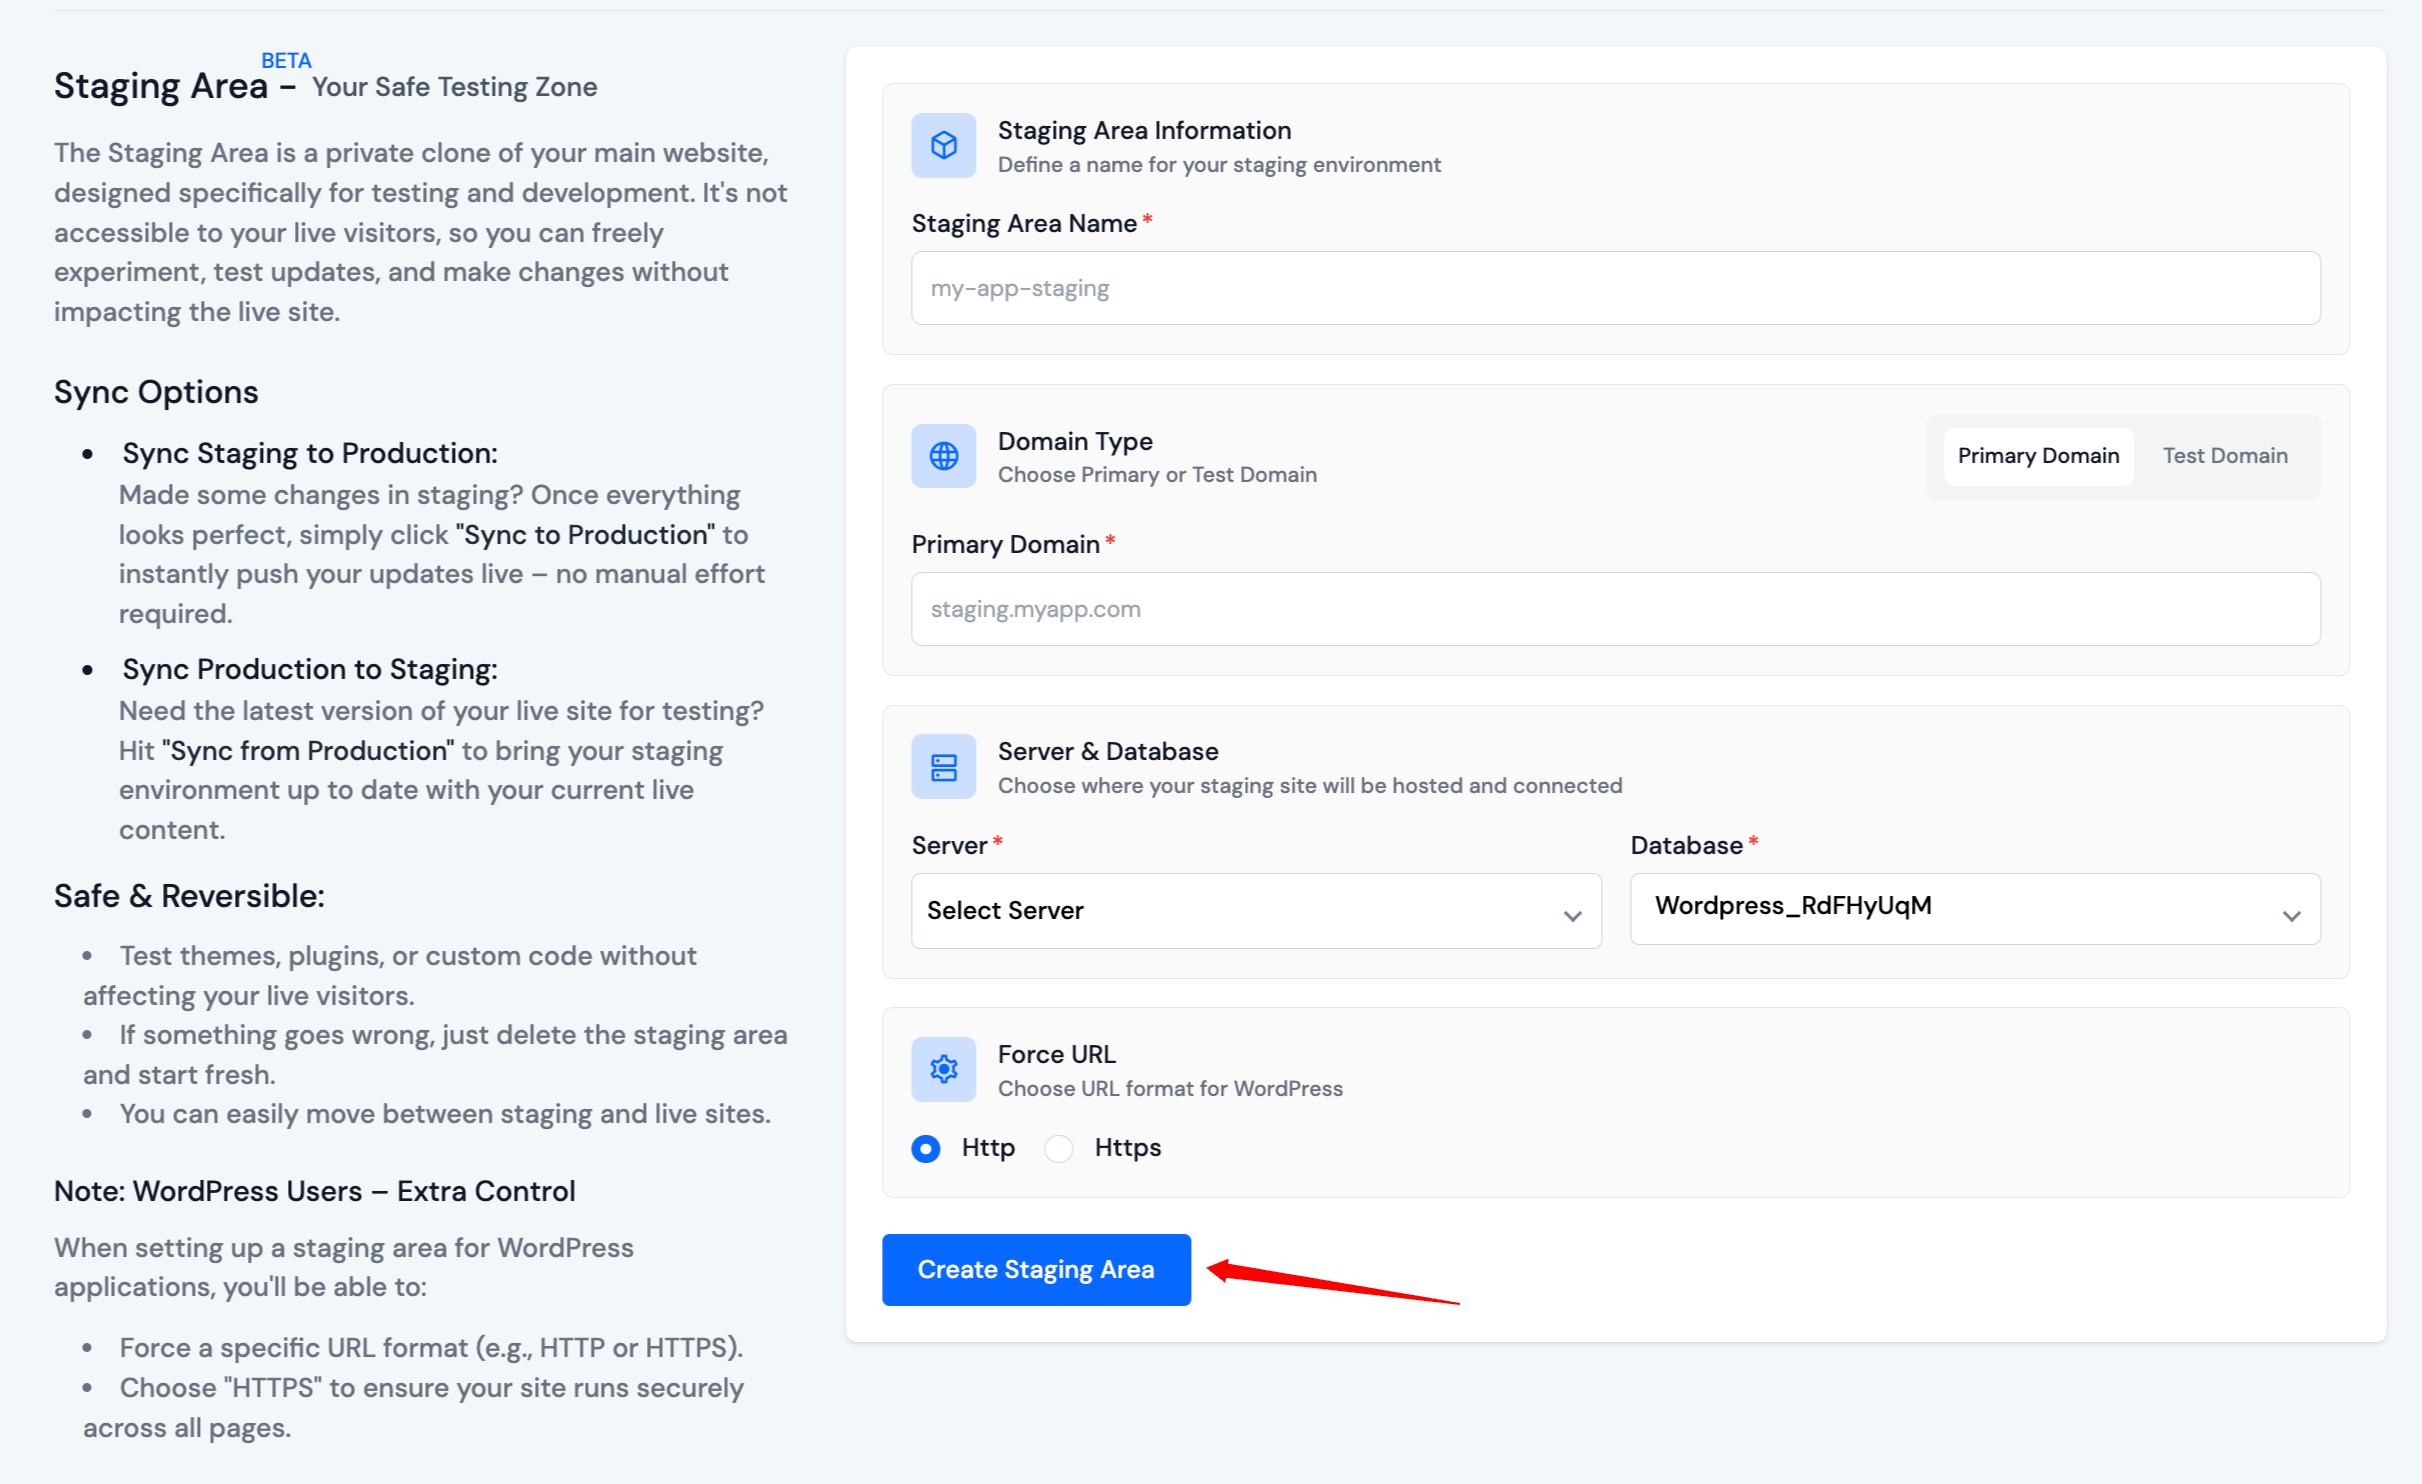
If you're working with a WordPress application, you will be asked to choose between HTTP and HTTPS for internal URL handling.
If you want to enforce HTTPS across all URLs in your WordPress site, select HTTPS. Otherwise, select HTTP.

After submitting the form, the staging area will begin its creation process.

Work with the Staging Area
When creation finishes, the staging page shows your staging application details and available actions.

Open Staging App
Use Open Staging App to go directly to the staging application panel and manage files, settings, and other features like a normal application.

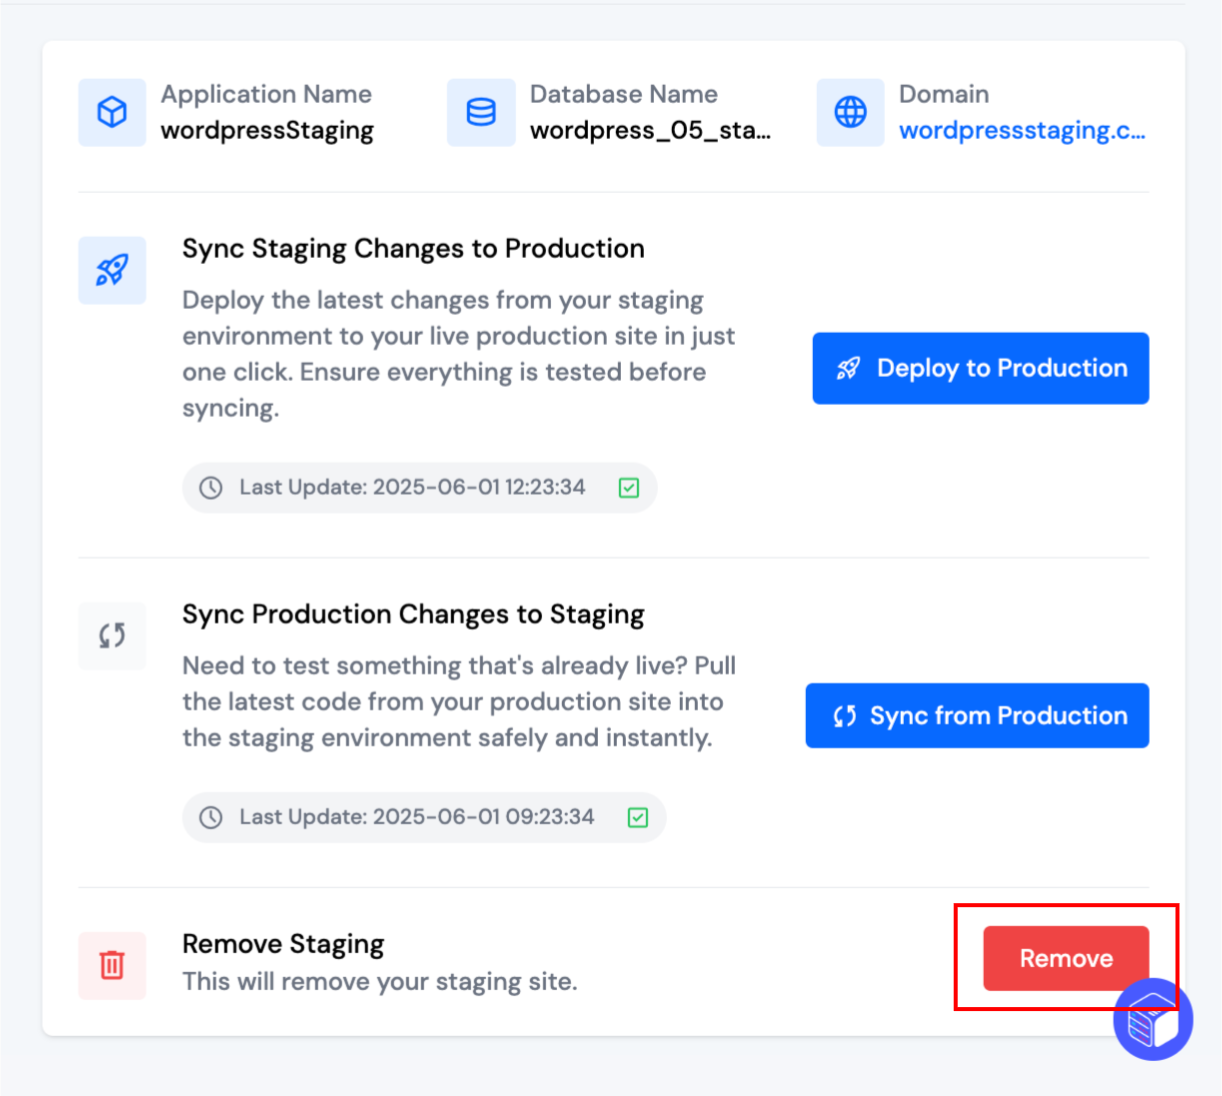
Sync Staging Changes to Production
When staging changes are tested and ready, click Deploy to Production and confirm the action.
For WordPress applications, you may be asked to enforce either HTTPS or HTTP for URLs during this process.

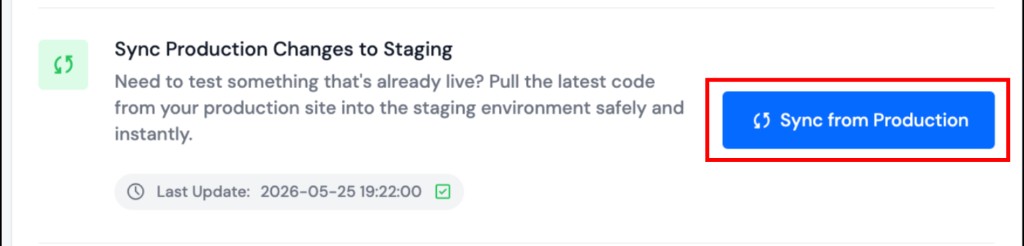
Sync Production Changes to Staging
Use Sync from Production when you need staging to match the current live site before testing.
Syncing from production replaces your staging environment. Any changes in staging will be lost.
Remove the Staging Area
Click Remove, then confirm to permanently delete the staging area.