Database Details
You can easily view your application's database details directly on the application dashboard through the ServerAvatar panel. Whether your database is hosted remotely or locally. Here's a step-by-step guide for assistance.
Step 1: First, log in to your ServerAvatar account.
Step 2: Click on the Dashboard button next to your server.

Step 3: Click on the Applications option on the left-hand sidebar of the Server Panel.
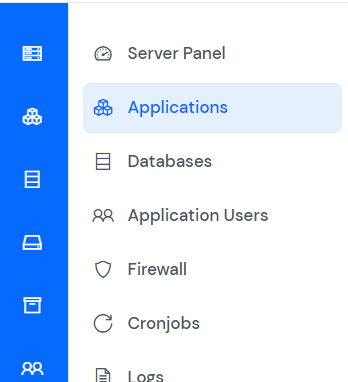
Step 4: You will now see the Applications table like the image below.

Step 5: Click on the Application Name or Dashboard icon to open the application panel.

Step 6: You can see the "Add Database Details" section in the application panel as shown in the image below.

Add the Database
Step 1: Click on the Add Database button as displayed in the image below.
You can view your application's database details and access information of your database. Adding a database will not impact the application's functionality or its connection to the database.

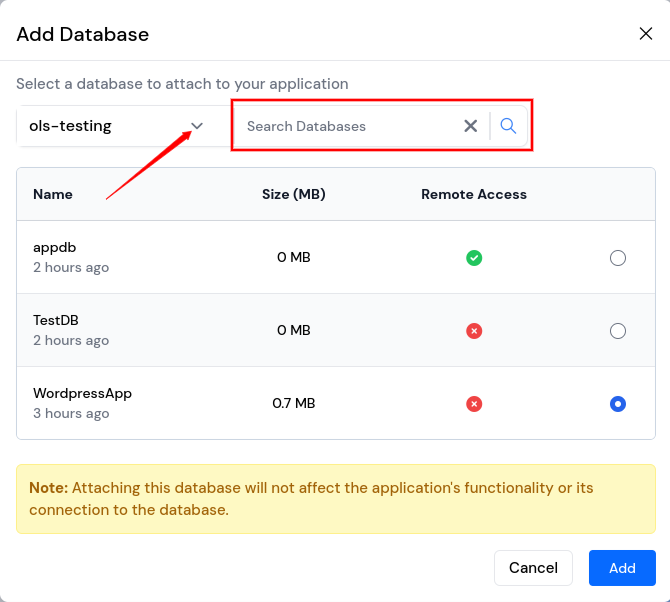
Step 2: A pop-up will appear to add the database. The first server from your server list is selected automatically, and all the databases of selected server will be listed below, including their name, size, and whether they are remotely accessible or not.
Select the appropriate database and click on the Add button.
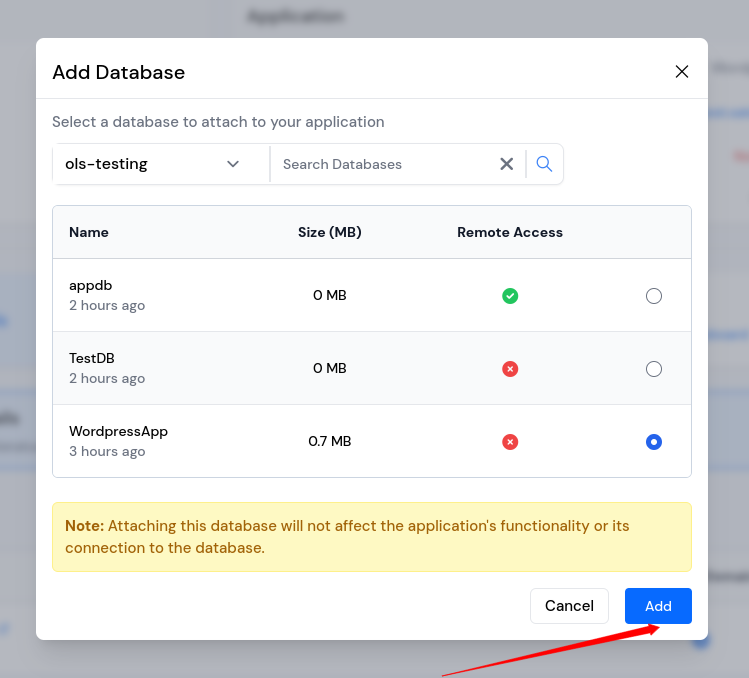
You can change the server by clicking on the drop-down menu next to the server name. Additionally, you can search for a specific database by its name using the search database section.
View Users
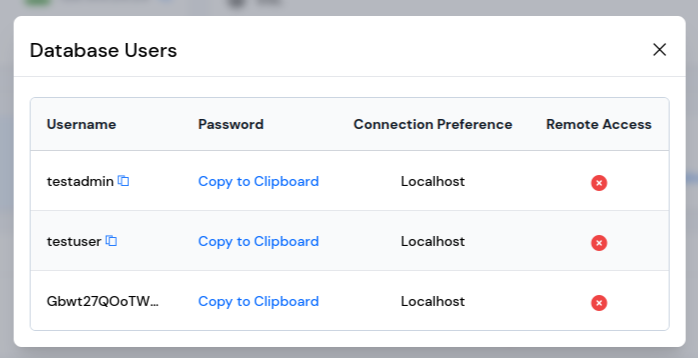
You can view all the database users associated with the selected database.
Step 1: Click on the View Users icon.

Step 2: A pop-up will appear listing all the database users along with their username, password, and whether they are remotely accessible or not.
Remove the Database
Once you have added the database, you can remove it from the Database Details section.
Step 1: Click on the Remove icon mentioned below in the Remove Database section, as shown in the below image.

Step 2: A confirmation pop-up will appear. To remove the database from the database details section, click on the Yes, I'm sure button.
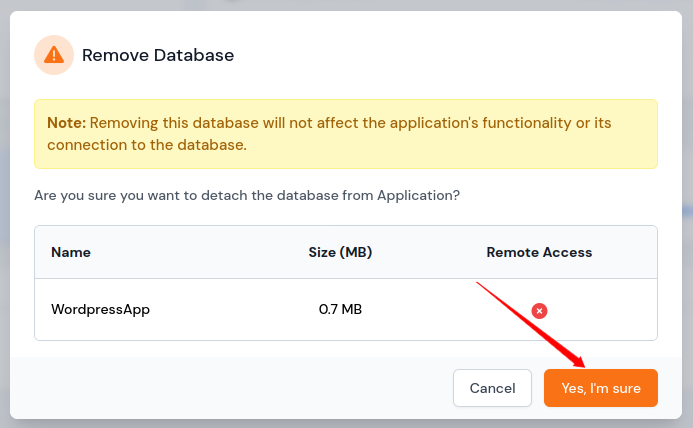
Removing the database will not affect the application's functionality or its connection to the database. It only removes the database details from the section.