Deploy from Github
Deploying Node.js application using ServerAvatar is a straightforward process. ServerAvatar simplifies the setup and management of Node.js applications, offering a user-friendly platform for deploying and running projects seamlessly.
Once you have connected your server with ServerAvatar, you can follow the steps below to install the Github repository on your server automatically.
Step 1: Select Your Node Stack Server
Begin by clicking on the Node Stack server where you intend to create the new Node.js application.

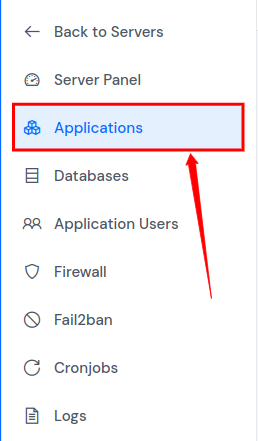
Step 2: Navigate to Applications
Once on the server panel, find and click on the Applications option in the left-hand sidebar.
Step 3: Create a New Application
Within the Applications section, click on the Create an Application button located at the top right of the Applications table.

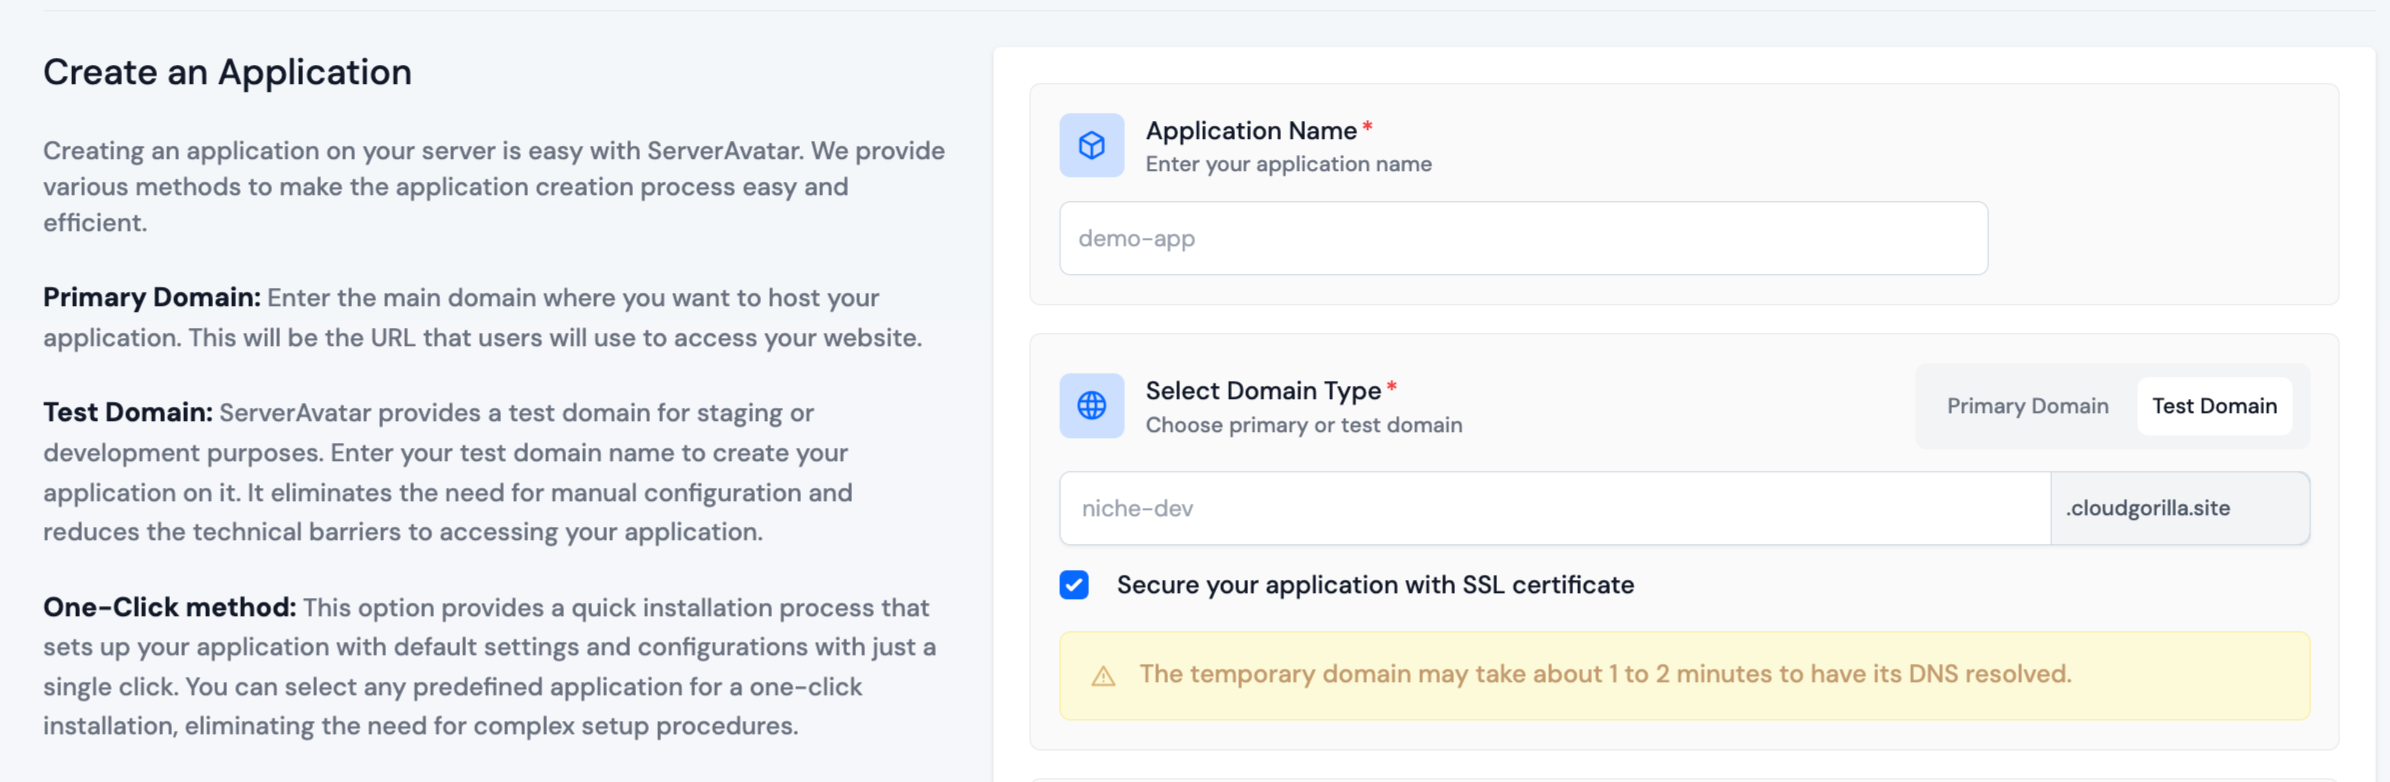
Step 4: Enter Required Informations
Step 4.1 Basic Details
- Provide a name for your application in the Application Name field.
- Choose between a Primary Domain or a Test Domain in the Domain field. If you select a test domain, you can change it later to a primary domain.
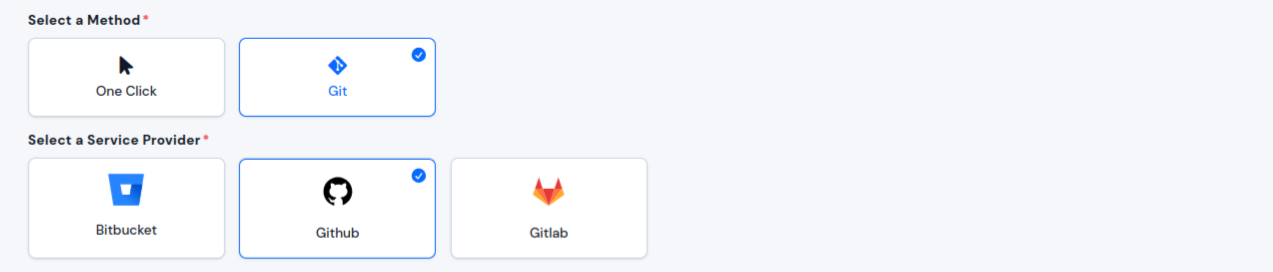
Step 4.2 Select a Method
Choose a Git method and Github service provider for cloning your project from Github.
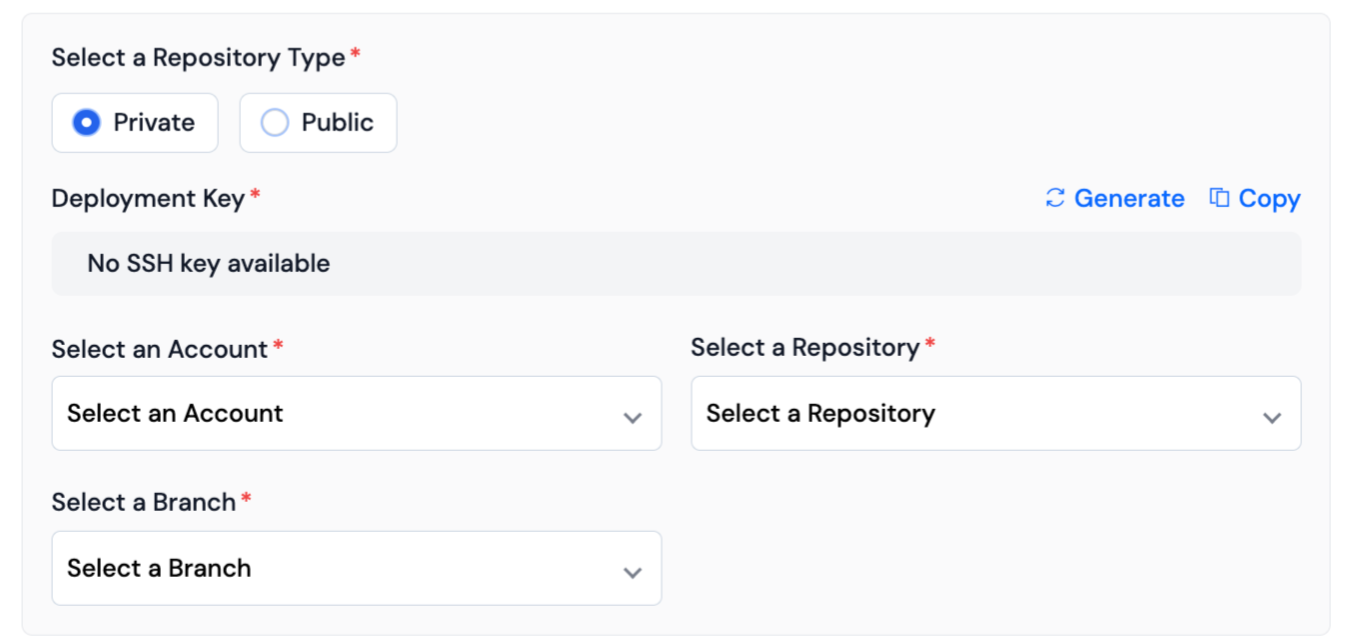
Step 4.3 Provider Information
-
Provide necessary information for cloning your repository, such as provider account, repository type, repository name, and branch.
-
Additional information form for deploying the application will appear.
-
If you select a static site, you'll only need to select Package manager and Process mode and input the Package Installation Command and Build Command.
-
If you select server-side rendering, you'll be prompted for additional details like Package manager, Process mode, Port number, Package Installation Command, Build Command, Start App Command, etc.
-
If you select client-side rendering, you'll just need to select Package manager and Process mode and input the Package Installation Command and Build Command.
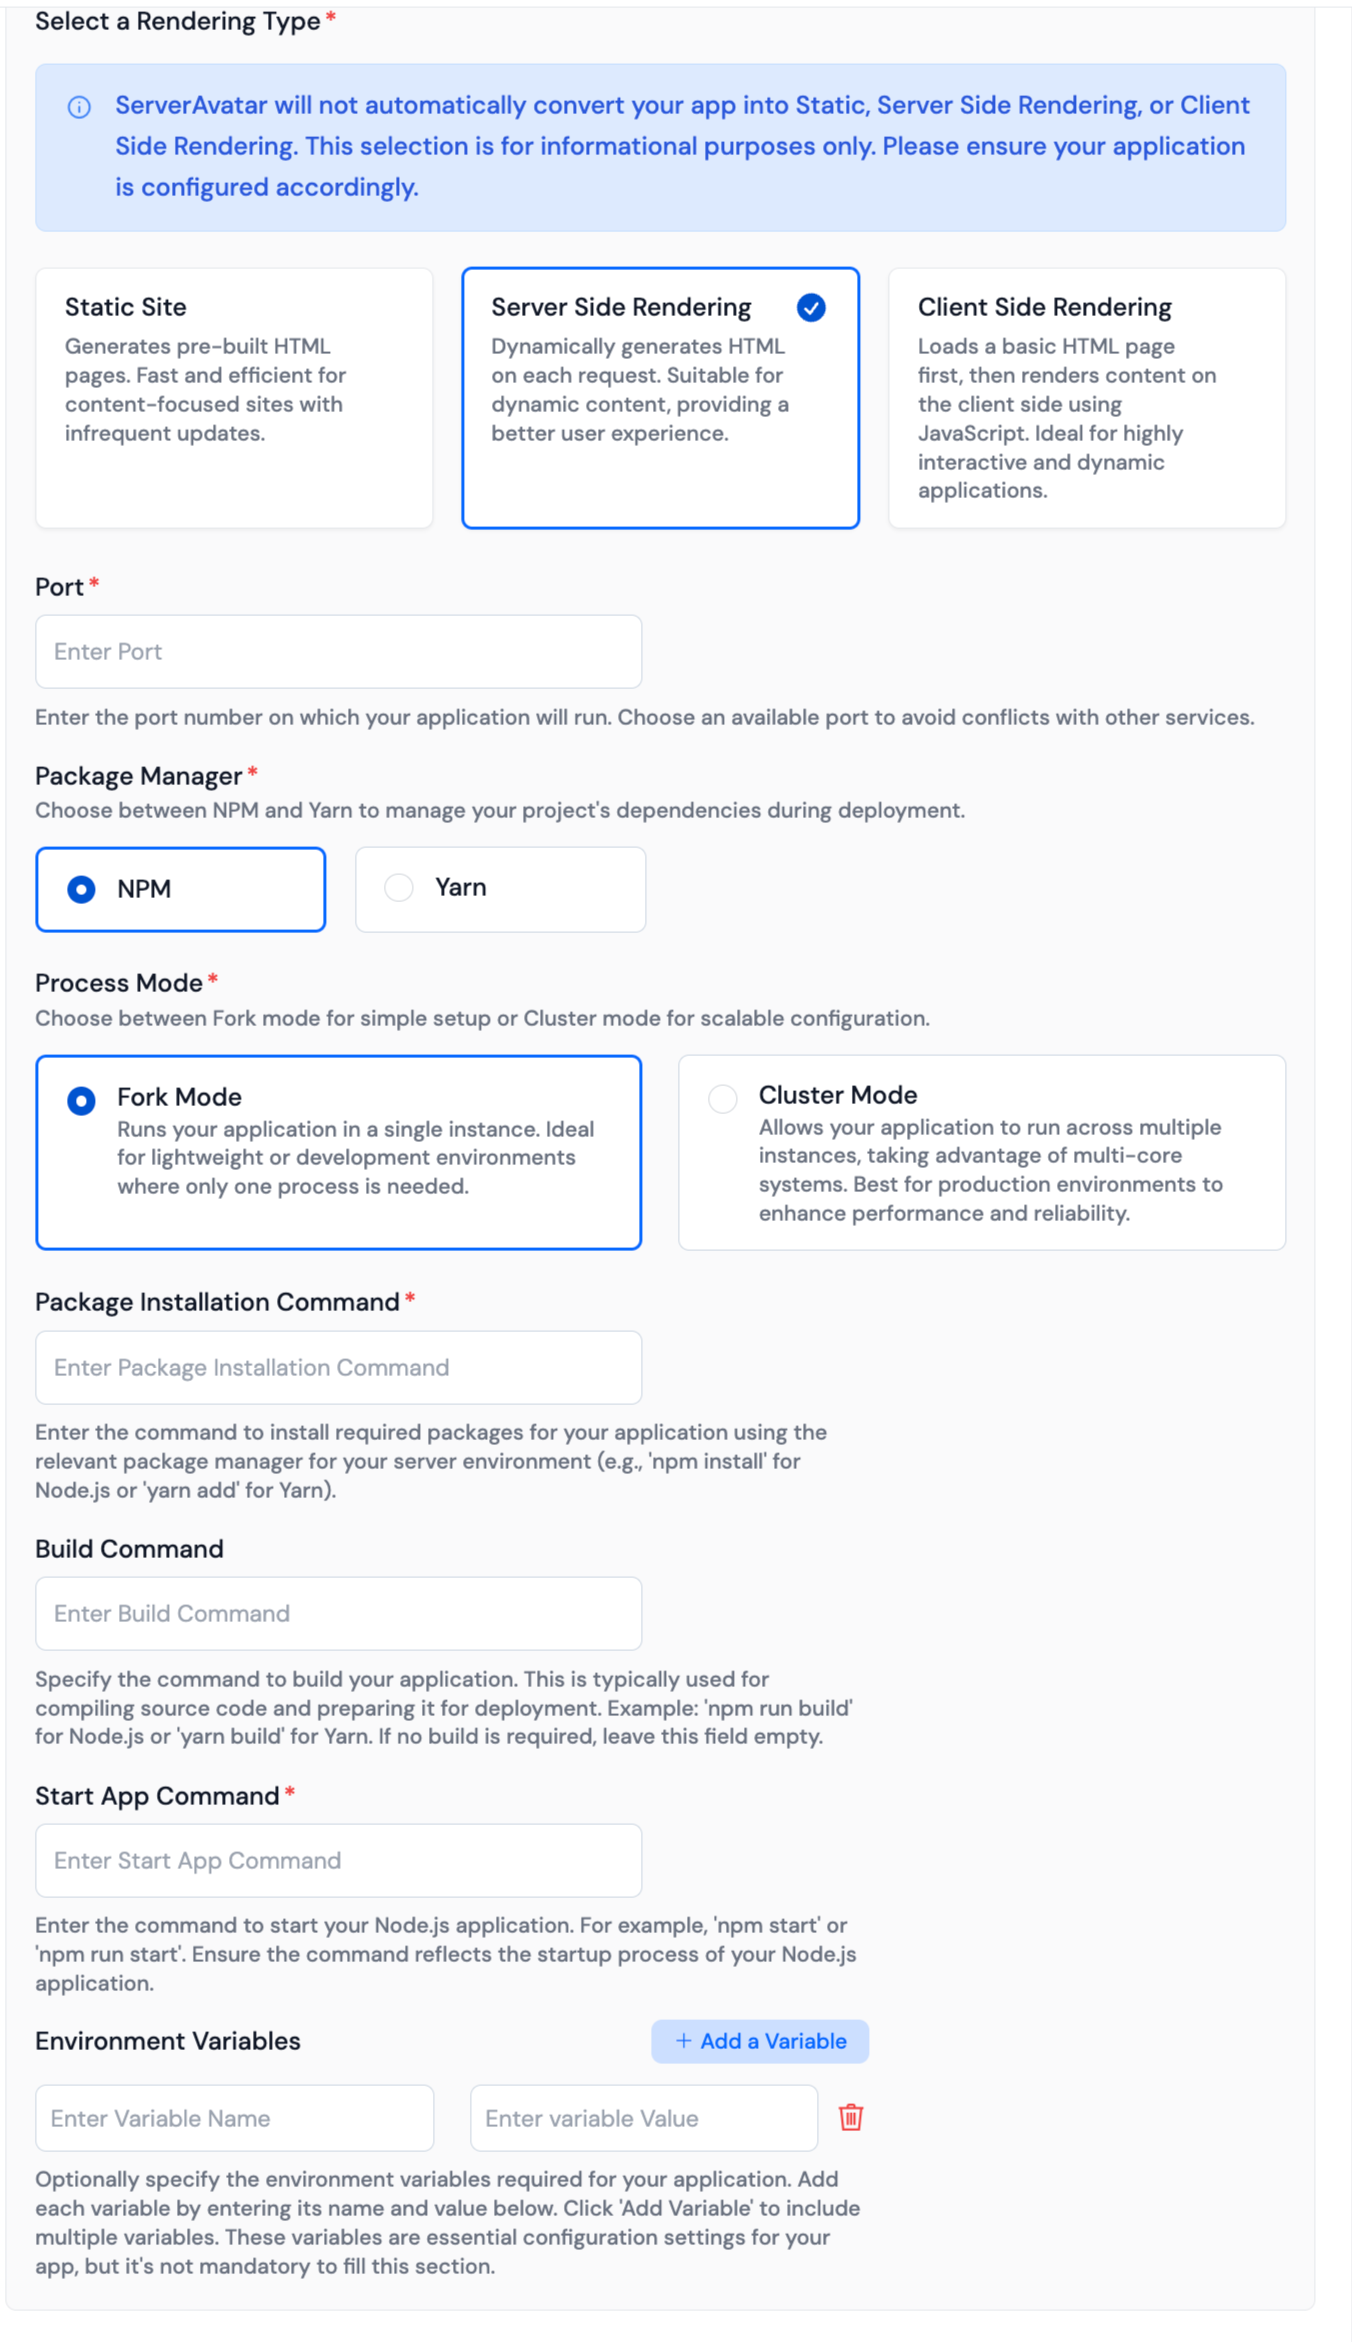
- Port: Specify the port number on which the Node.js application will listen for incoming connections.
- Package Manager: Choose between NPM and Yarn to manage your project's dependencies during deployment.
- Process Mode: Choose between Fork mode for simple setup or Cluster mode for scalable configuration.
- Rendering Type: Choose from three options: Static Site, Server Side Rendering (SSR), Client Side Rendering (CSR).
- Package Installation Command: Command to install dependencies and prepare the application for execution.
- Build Command: Required for static or CSR rendering. Specifies the command after package installation.
- Start App Command: Required for SSR rendering. Specifies the command to start the Node.js application.
- Environment Variables: Optional parameter for setting environment variables.
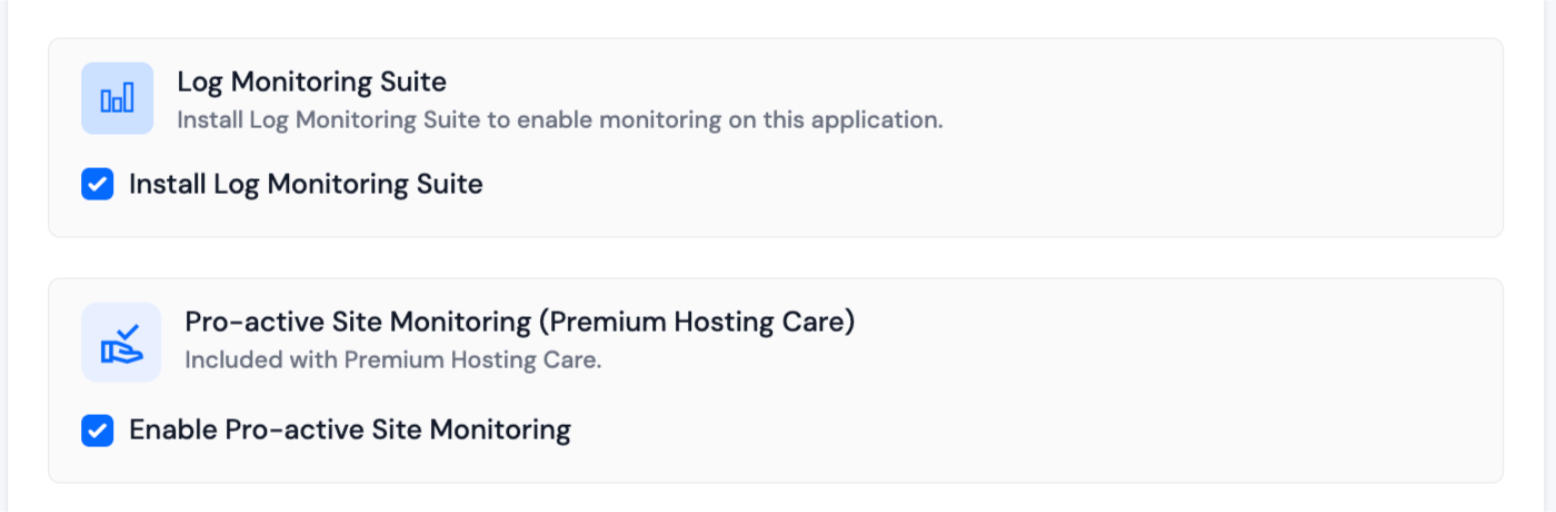
Step 4.4 Log Monitoring Suite
-
If you have purchased the Log Monitoring Suite, you will see a checkbox option to Install Log Monitoring Suite on this application.
-
Check this option if you want to enable log monitoring for your application. This will allow you to monitor and analyze application logs directly from the ServerAvatar dashboard.
Step 4.5 Pro-active Site Monitoring (Premium Hosting Care)
-
If you have purchased Premium Hosting Care, you will see a checkbox option to Enable Pro-active Site Monitoring on this application.
-
Check this option if you want to enable pro-active site monitoring for your application. Premium Hosting Care provides top-tier server management. Enjoy high-priority support, optimization, app-level troubleshooting, proactive monitoring, and a dedicated Slack channel for real-time assistance.
-
If you haven't purchased Premium Hosting Care yet, you can learn how to purchase Premium Hosting Care from the Add-ons section.
Step 4.6 Advance Options
-
Click on Show Advanced Options to access additional configuration settings for your application.
-
When creating a new application in ServerAvatar, you have the option to either create a new system user for the application or use an existing one. A system user is a user account created on your server, which is used to manage files and permissions for your application. You can create new user or select the existing user by clicking on the Show Advance Option below.
-
You also have the option to specify a custom webroot path for your application. By default, ServerAvatar sets the webroot path to /public_html for your application. However, if you want to set a custom webroot path, you can do so by entering the desired path in the "Webroot" field provided. This can be useful if you have specific requirements for the directory structure of your application.
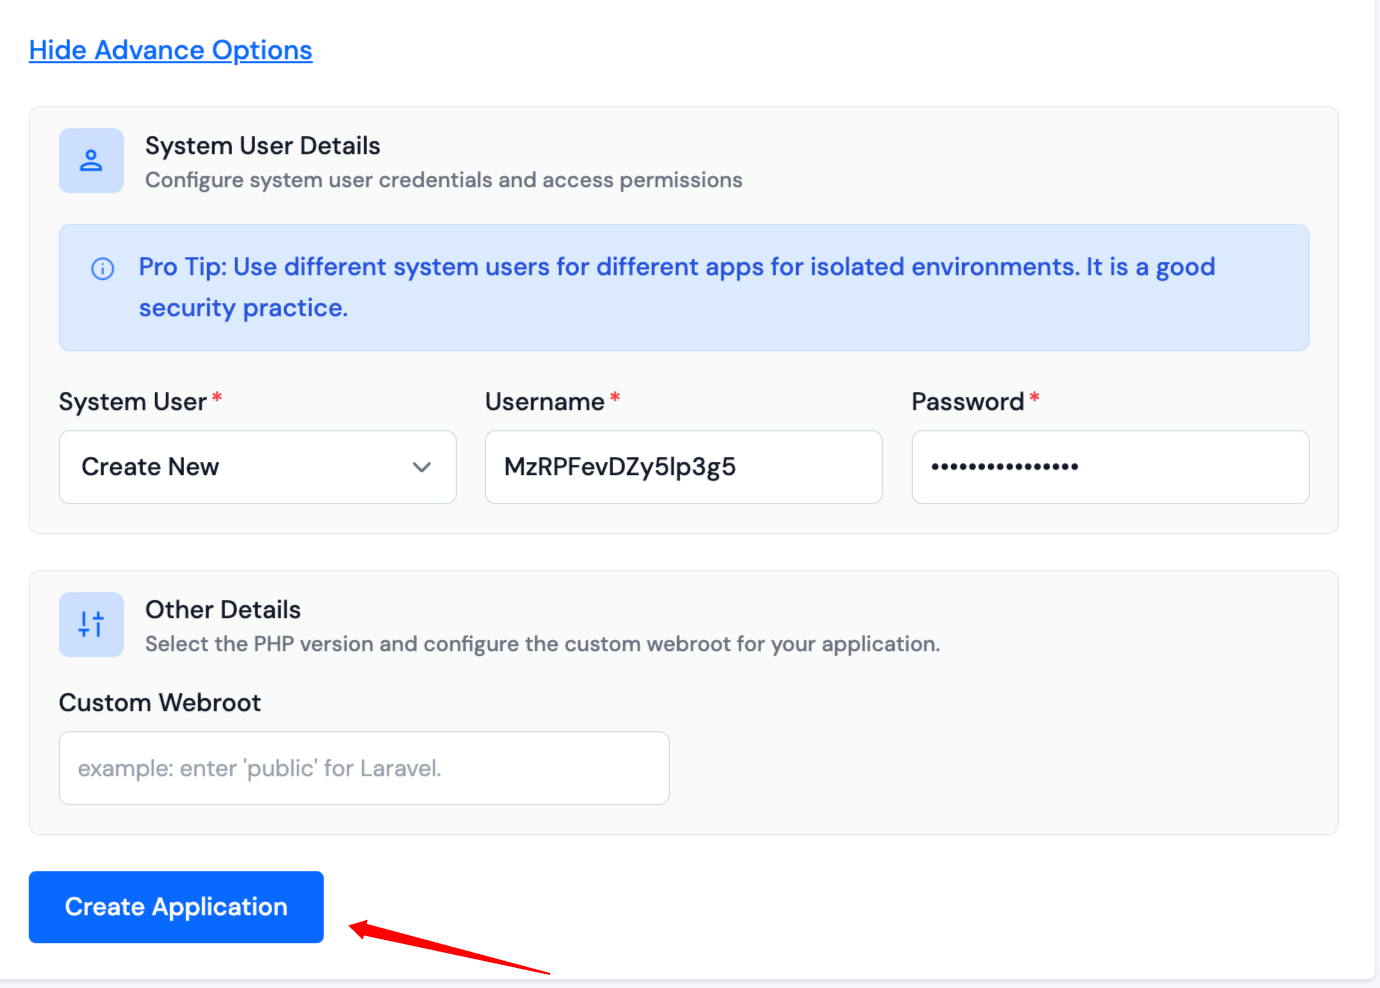
- Click on the Create Application button. Your application is expected to be live within the next 10-15 seconds.
You can monitor the installation progress in real-time through the application installation status displayed below.

Once the installation is complete, you will be automatically redirected to the application dashboard. From here, you can efficiently manage and oversee the operations of your deployed application.
Update Nginx Configuration, Deployment Commands, and Environment Variables
To update Nginx Configuration, Deployment Commands, and Environment Variables, navigate to Application Dashboard -> Settings.

PM2
If your application involves Server-Side Rendering (SSR), you'll find the PM2 option in the left sidebar.
Explore the PM2 section to access details about your process manager and retrieve PM2 logs.
