PHPMyAdmin
PHPMyAdmin is a free and open-source web-based administration tool for MySQL and MariaDB databases. It provides an intuitive graphical interface that allows you to manage your databases, execute SQL queries, import and export data, and perform various database administration tasks without needing to use command-line tools.
ServerAvatar offers three ways to work with phpMyAdmin: deploy a phpMyAdmin application with the one-click installer, use Quick Access to open phpMyAdmin from database sections, or use One-Click phpMyAdmin Login to open phpMyAdmin already signed in as a database user.
Deploy PHPMyAdmin Application
Step 1: Click the server on which you want to create the new application.

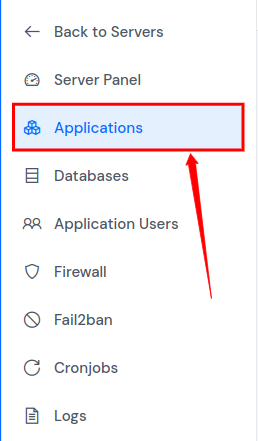
Step 2: On the left-hand sidebar of the Server Panel, click on Applications.
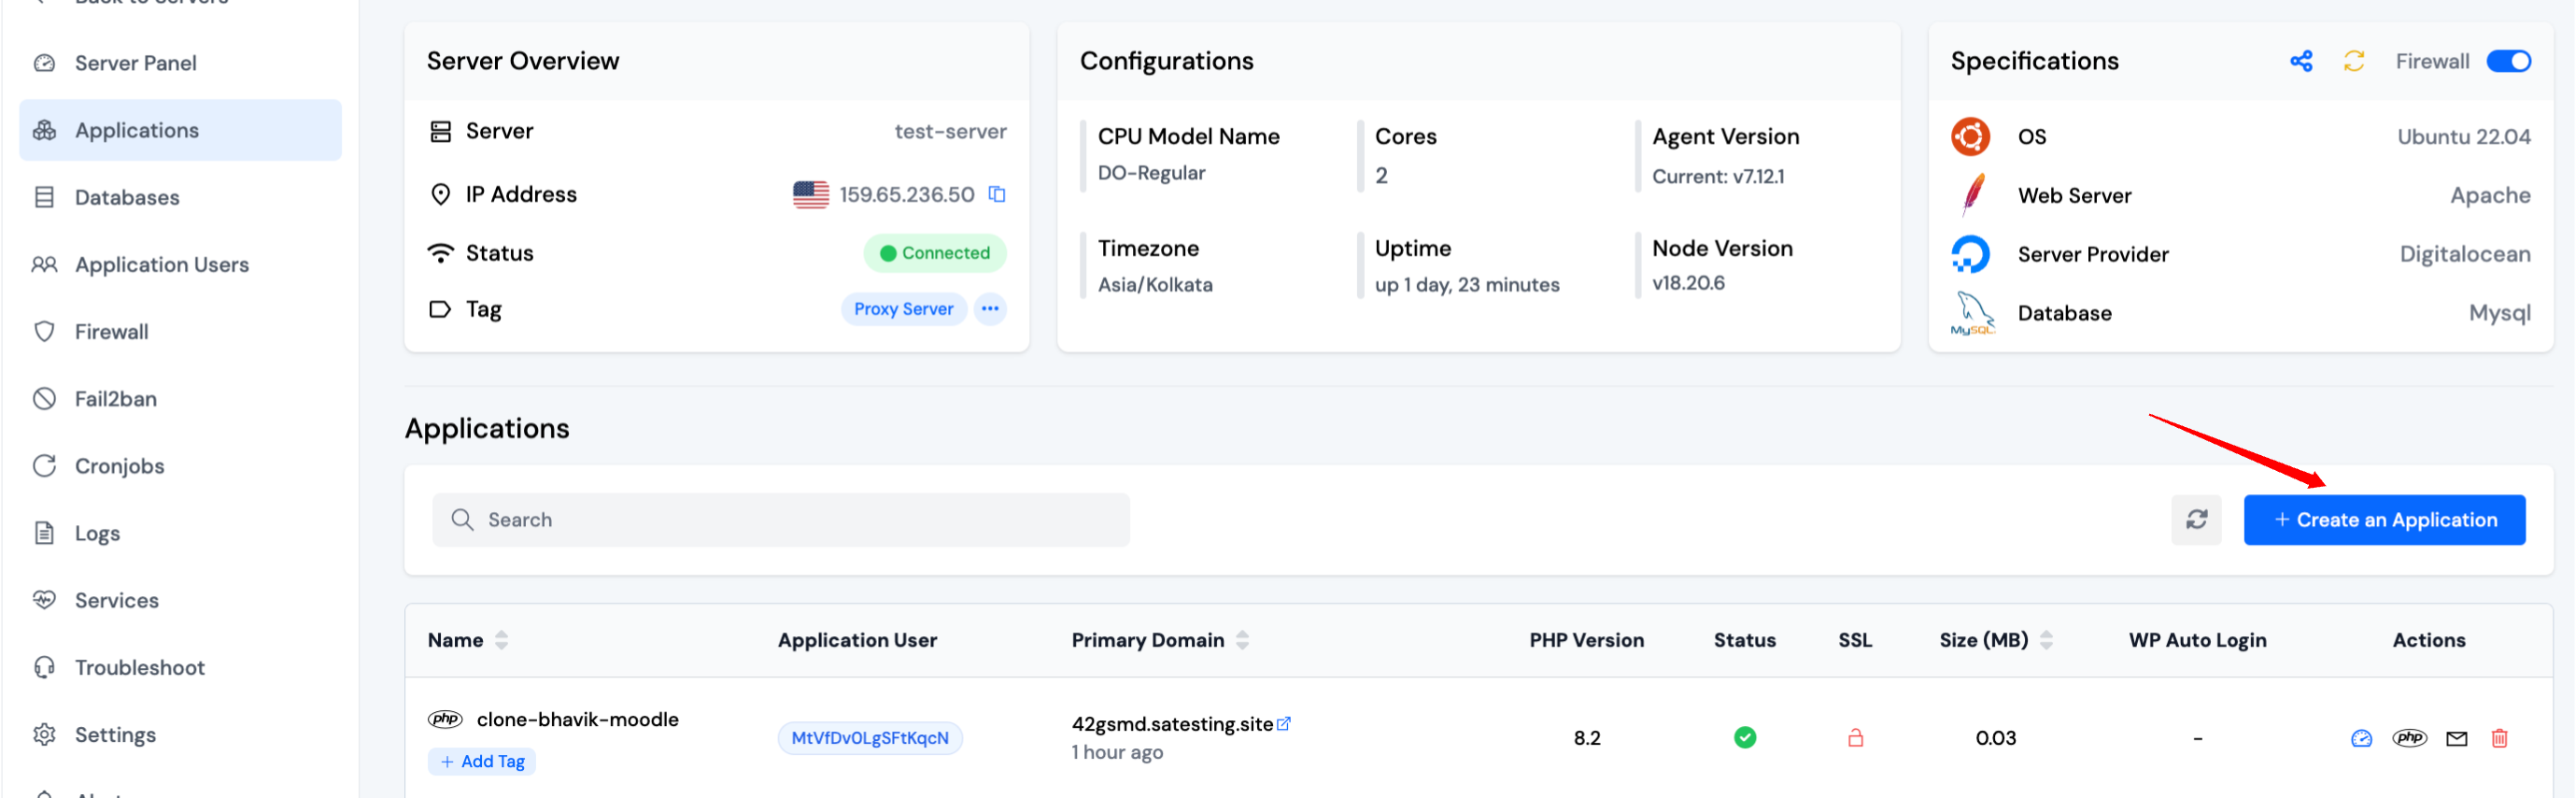
Step 3: You will see the Applications table. Click on the Create button at the top right of the Applications table.
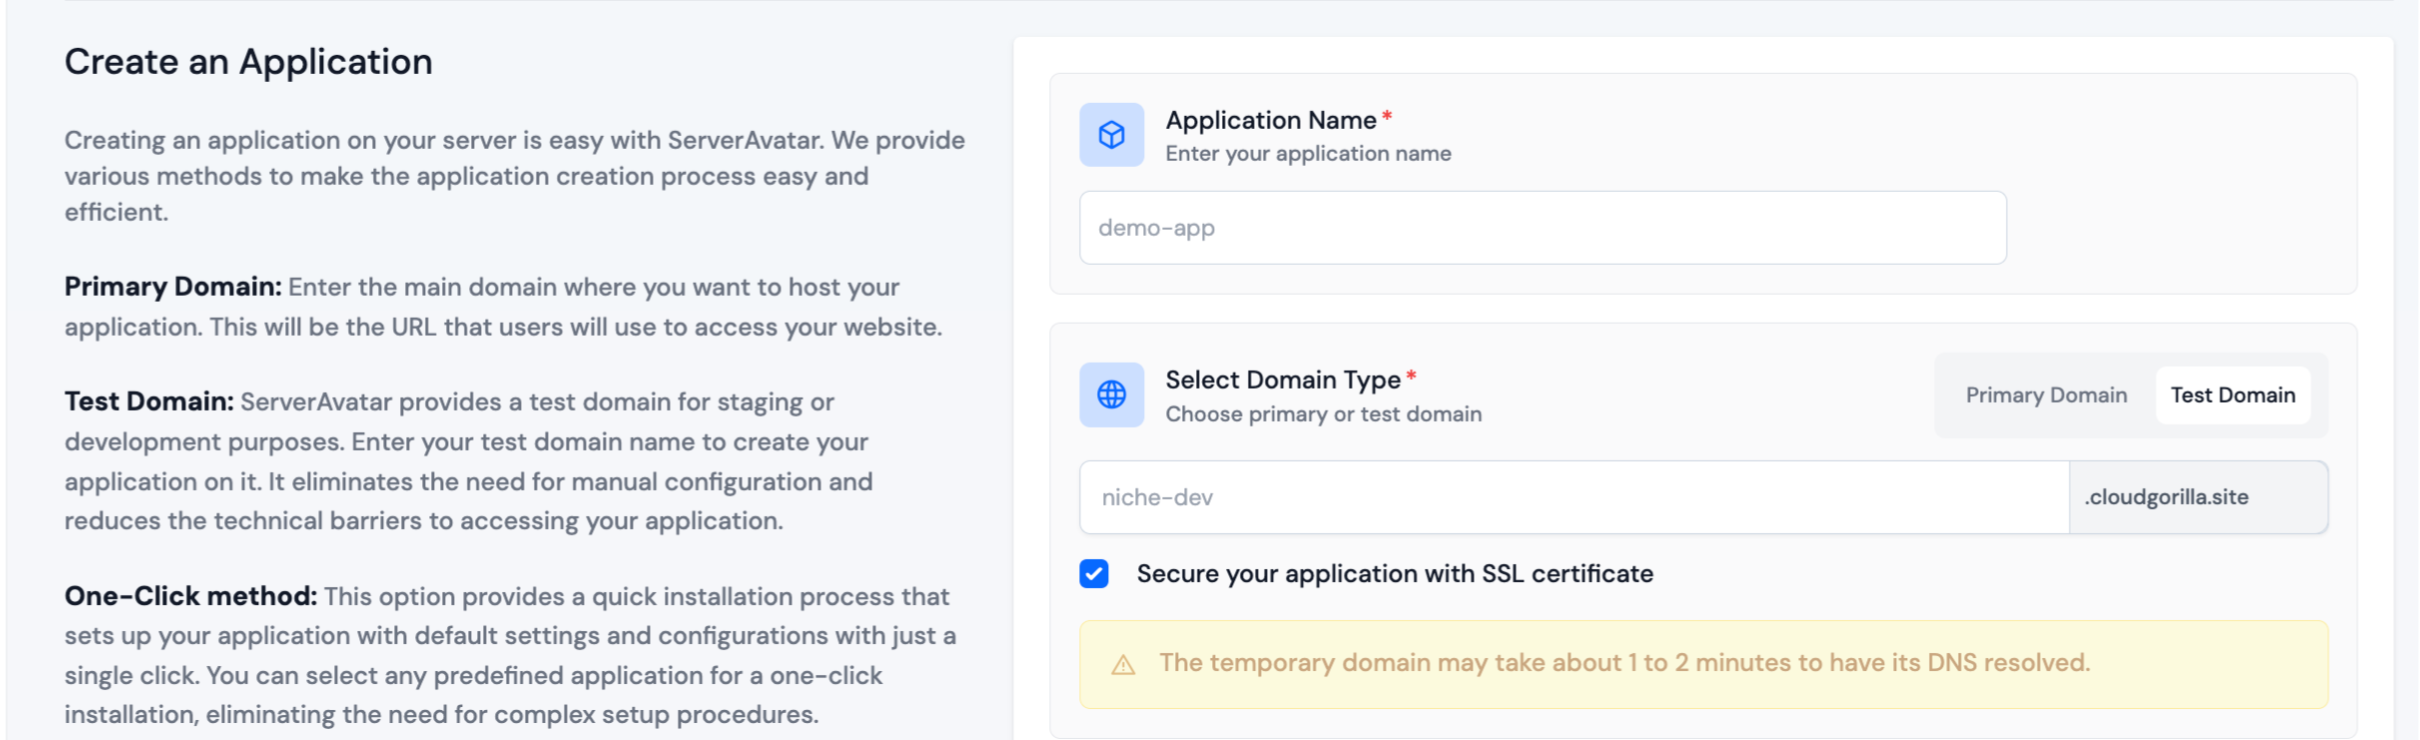
Step 4: Basic Details
-
Enter the name of your application in the Application Name field.
-
Choose whether you want to use a primary domain or a test domain in the Domain field. If you select a test domain, you can change it later to a primary domain.
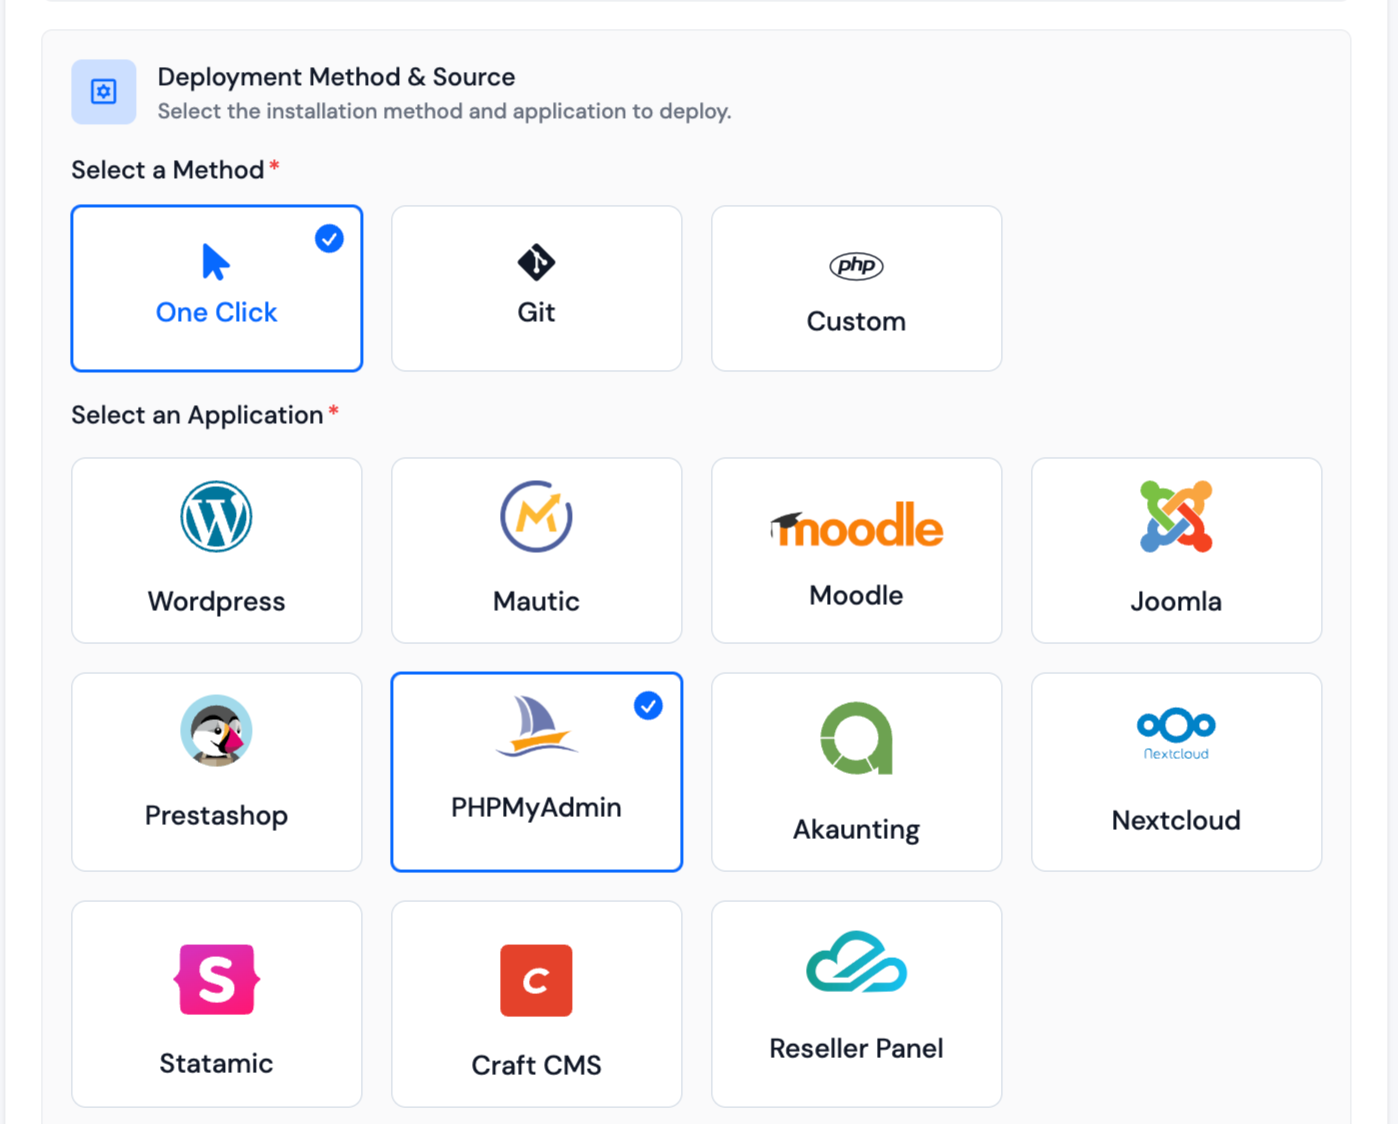
Step 5: Application
-
Choose the One-click method, then select a PHPMyAdmin. ServerAvatar will automatically download and install PHPMyAdmin and configure the necessary dependencies.
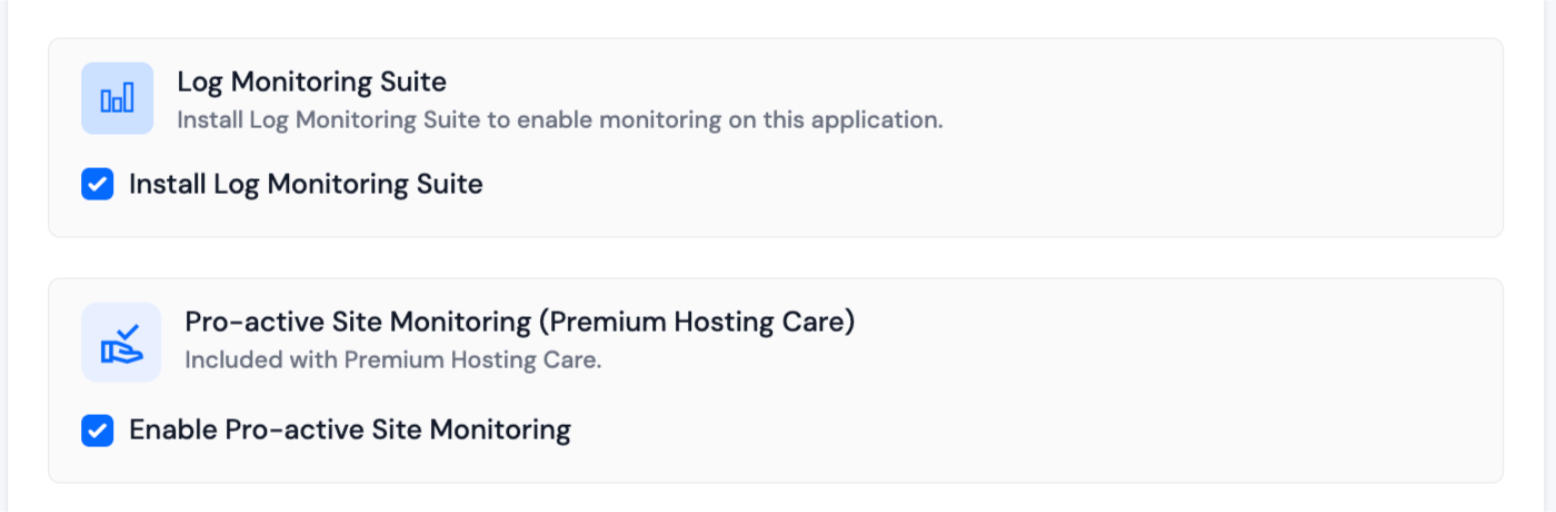
Step 6: Log Monitoring Suite
-
If you have purchased the Log Monitoring Suite, you will see a checkbox option to Install Log Monitoring Suite on this application.
-
Check this option if you want to enable log monitoring for your application. This will allow you to monitor and analyze application logs directly from the ServerAvatar dashboard.
Step 7: Pro-active Site Monitoring (Premium Hosting Care)
-
If you have purchased Premium Hosting Care, you will see a checkbox option to Enable Pro-active Site Monitoring on this application.
-
Check this option if you want to enable pro-active site monitoring for your application. Premium Hosting Care provides top-tier server management. Enjoy high-priority support, optimization, app-level troubleshooting, proactive monitoring, and a dedicated Slack channel for real-time assistance.
-
If you haven't purchased Premium Hosting Care yet, you can learn how to purchase Premium Hosting Care from the Add-ons section.
Step 8: Advance Options
-
Click on Show Advanced Options to access additional configuration settings for your application.
-
When creating a new application in ServerAvatar, you can either create a new system user for the application or use an existing one. A system user is a user account on your server used to manage files and permissions for your application.
-
You can also select the PHP version for your application.
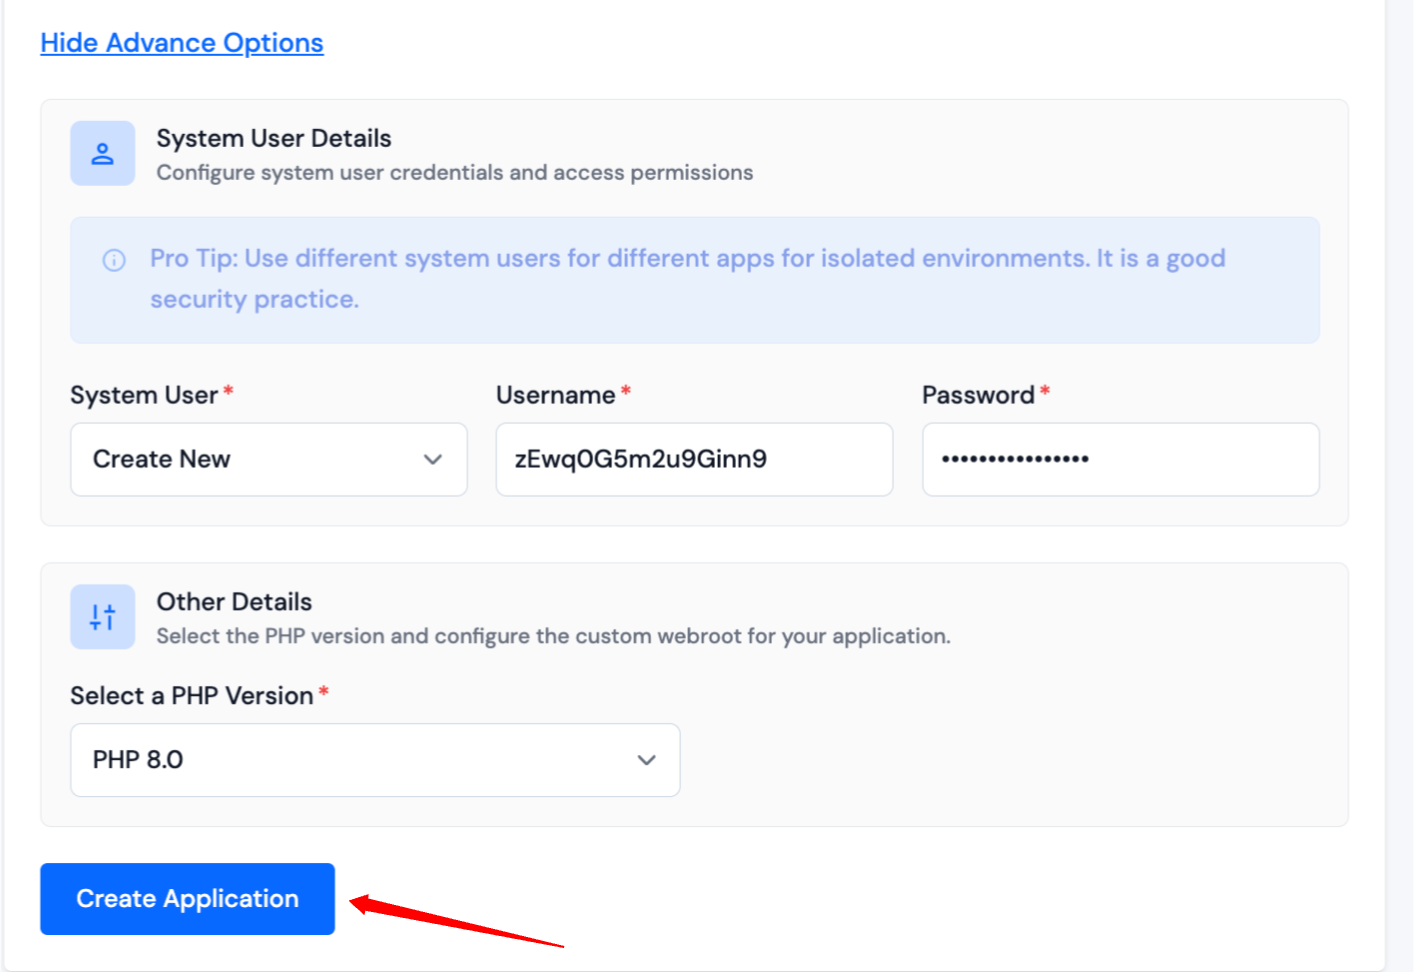
- If any changes are required, the user can go back to the respective sections and make the changes. If everything looks good, they can click on the Create Application button to create the application. The website should be live in the next 10-15 seconds. Once the application is installed, the user will be redirected to an application dashboard from which they can manage the application.
Quick Access to PHPMyAdmin
ServerAvatar provides a convenient quick access feature that allows you to access PHPMyAdmin directly from the Databases list, Database Users list, or Application Panel, eliminating the need to search through your entire applications list.
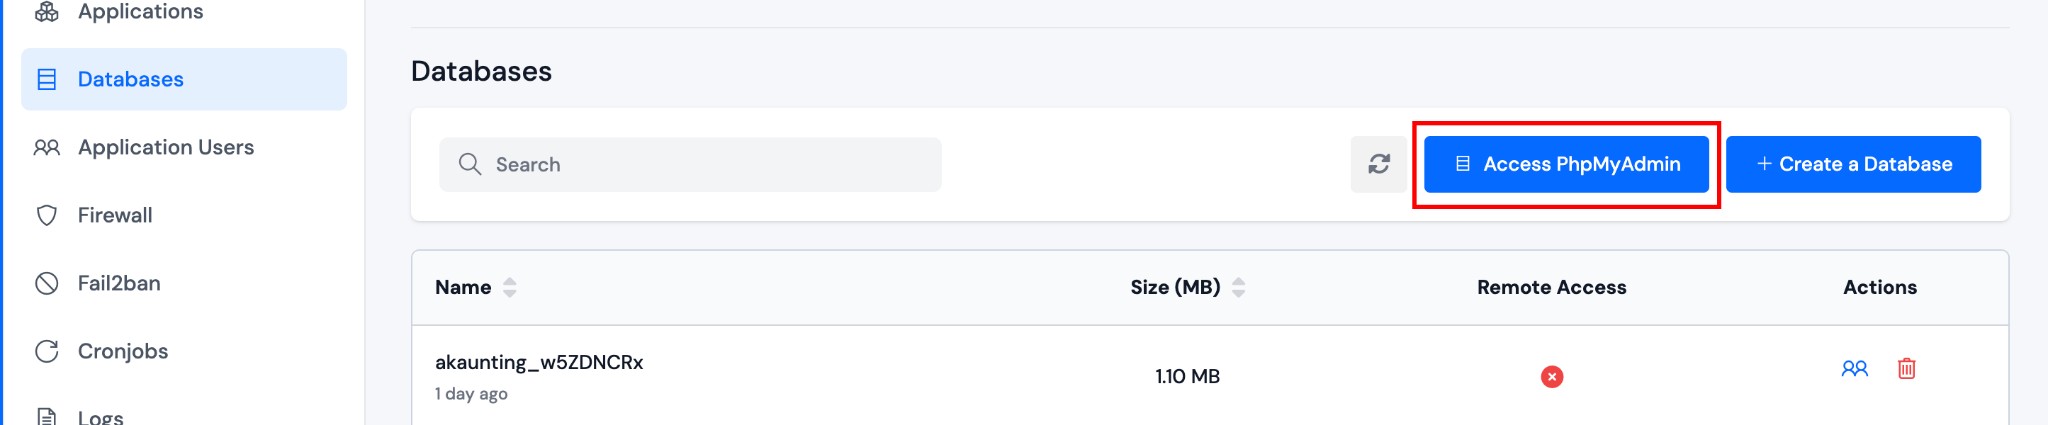
Access from Database List
You can quickly access PHPMyAdmin from the Databases section:
- Click the server on which you want to access PHPMyAdmin to open its Server Panel.
- On the left-hand sidebar of the Server Panel, navigate to the Databases section.
- Click on the Access PhpMyAdmin button located at the top of the database list.
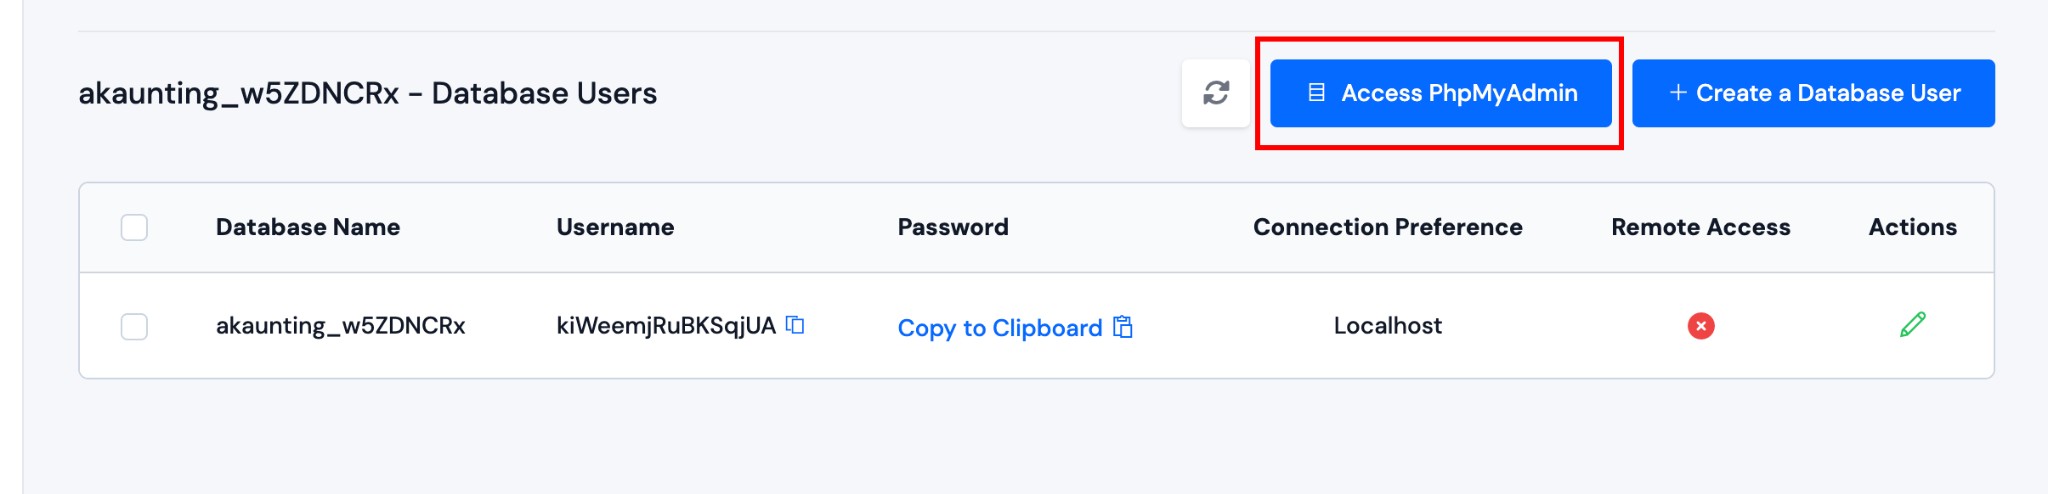
Access from Database Users List
You can also access PHPMyAdmin from the Database Users section:
- Click the server on which you want to access PHPMyAdmin to open its Server Panel.
- Navigate to a specific database's user management page from the Server Panel.
- Click on the Access PhpMyAdmin button located at the top right of the database users list.
Access from Application Panel
You can also access PHPMyAdmin directly from the Application Panel:
- Click the server on which you want to access PHPMyAdmin to open its Server Panel.
- Navigate to the application for which you want to access the database.
- In the Database Details section of the application panel, click on the Access PhpMyAdmin button located at the top right of the section.

How It Works
When you click the Access PhpMyAdmin button, ServerAvatar will automatically handle the following scenarios:
-
No PHPMyAdmin Application Exists: If you don't have any PHPMyAdmin application on that server, ServerAvatar will automatically create a PHPMyAdmin application and open it in a new tab once the installation is complete.
-
Single PHPMyAdmin Application Exists: If you already have one PHPMyAdmin application on the server, clicking the button will directly open that application in a new tab for easy access.
-
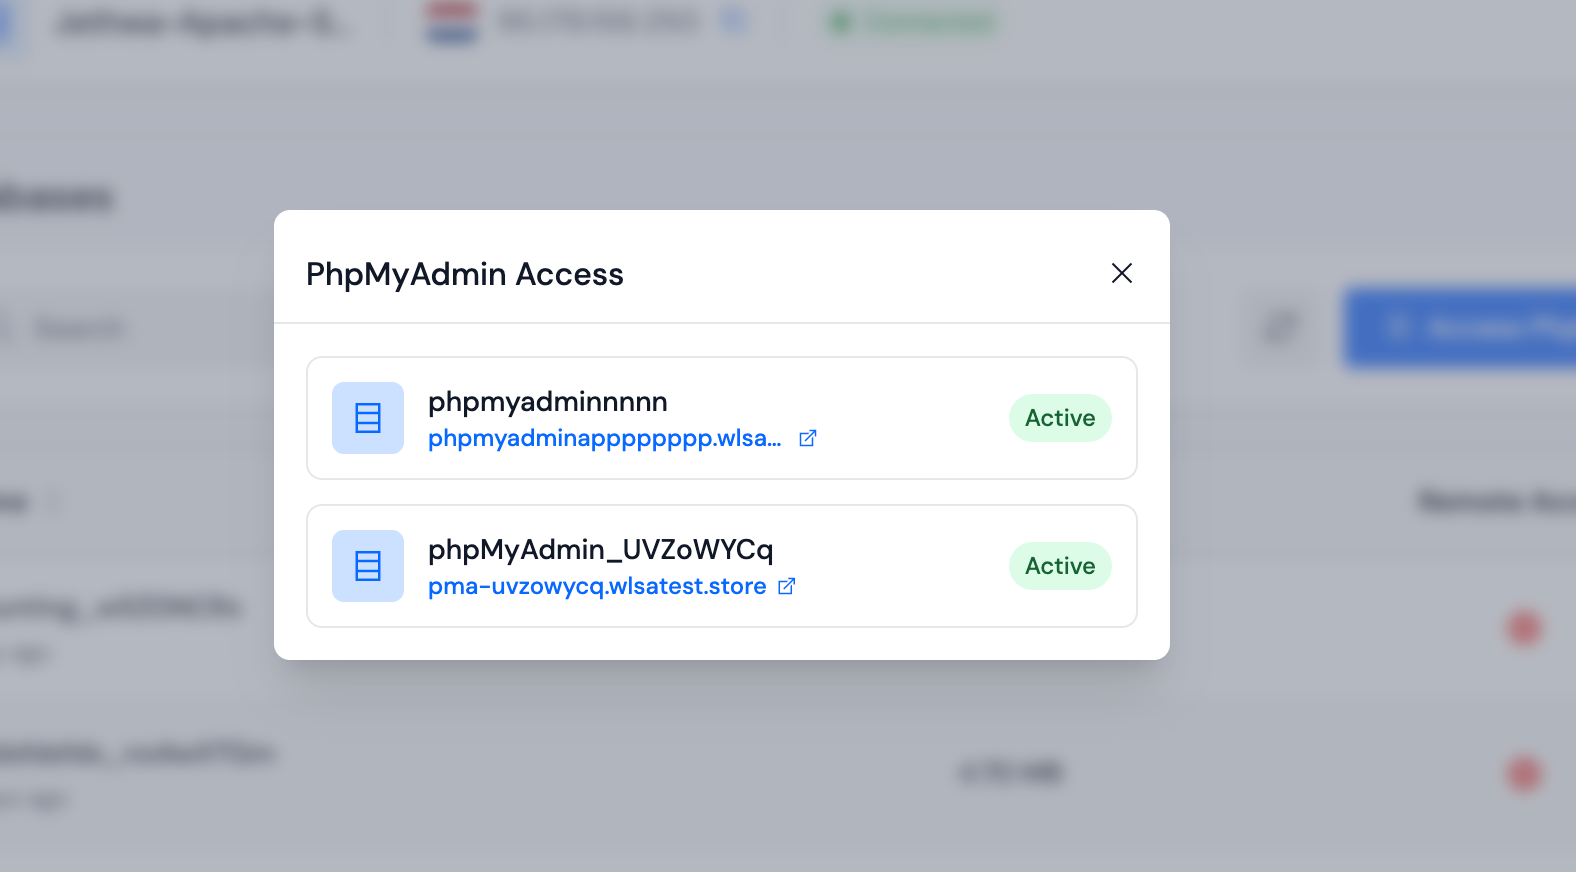
Multiple PHPMyAdmin Applications Exist: If you have more than one PHPMyAdmin application on the server, a modal will appear displaying a list of all available PHPMyAdmin applications. You can then select which application you want to access.
This quick access feature saves time by allowing you to access PHPMyAdmin directly from database management sections or the application panel without navigating through your entire applications list.
One-Click phpMyAdmin Login
One-Click phpMyAdmin Login signs you into phpMyAdmin as a database user and opens it in a new tab. You skip the manual username and password step.
This is separate from Access phpMyAdmin, which only opens the phpMyAdmin application without signing in.
Where you can use it
Use the green login icon in the phpMyAdmin column, or the phpMyAdmin Login button, depending on where you are working:
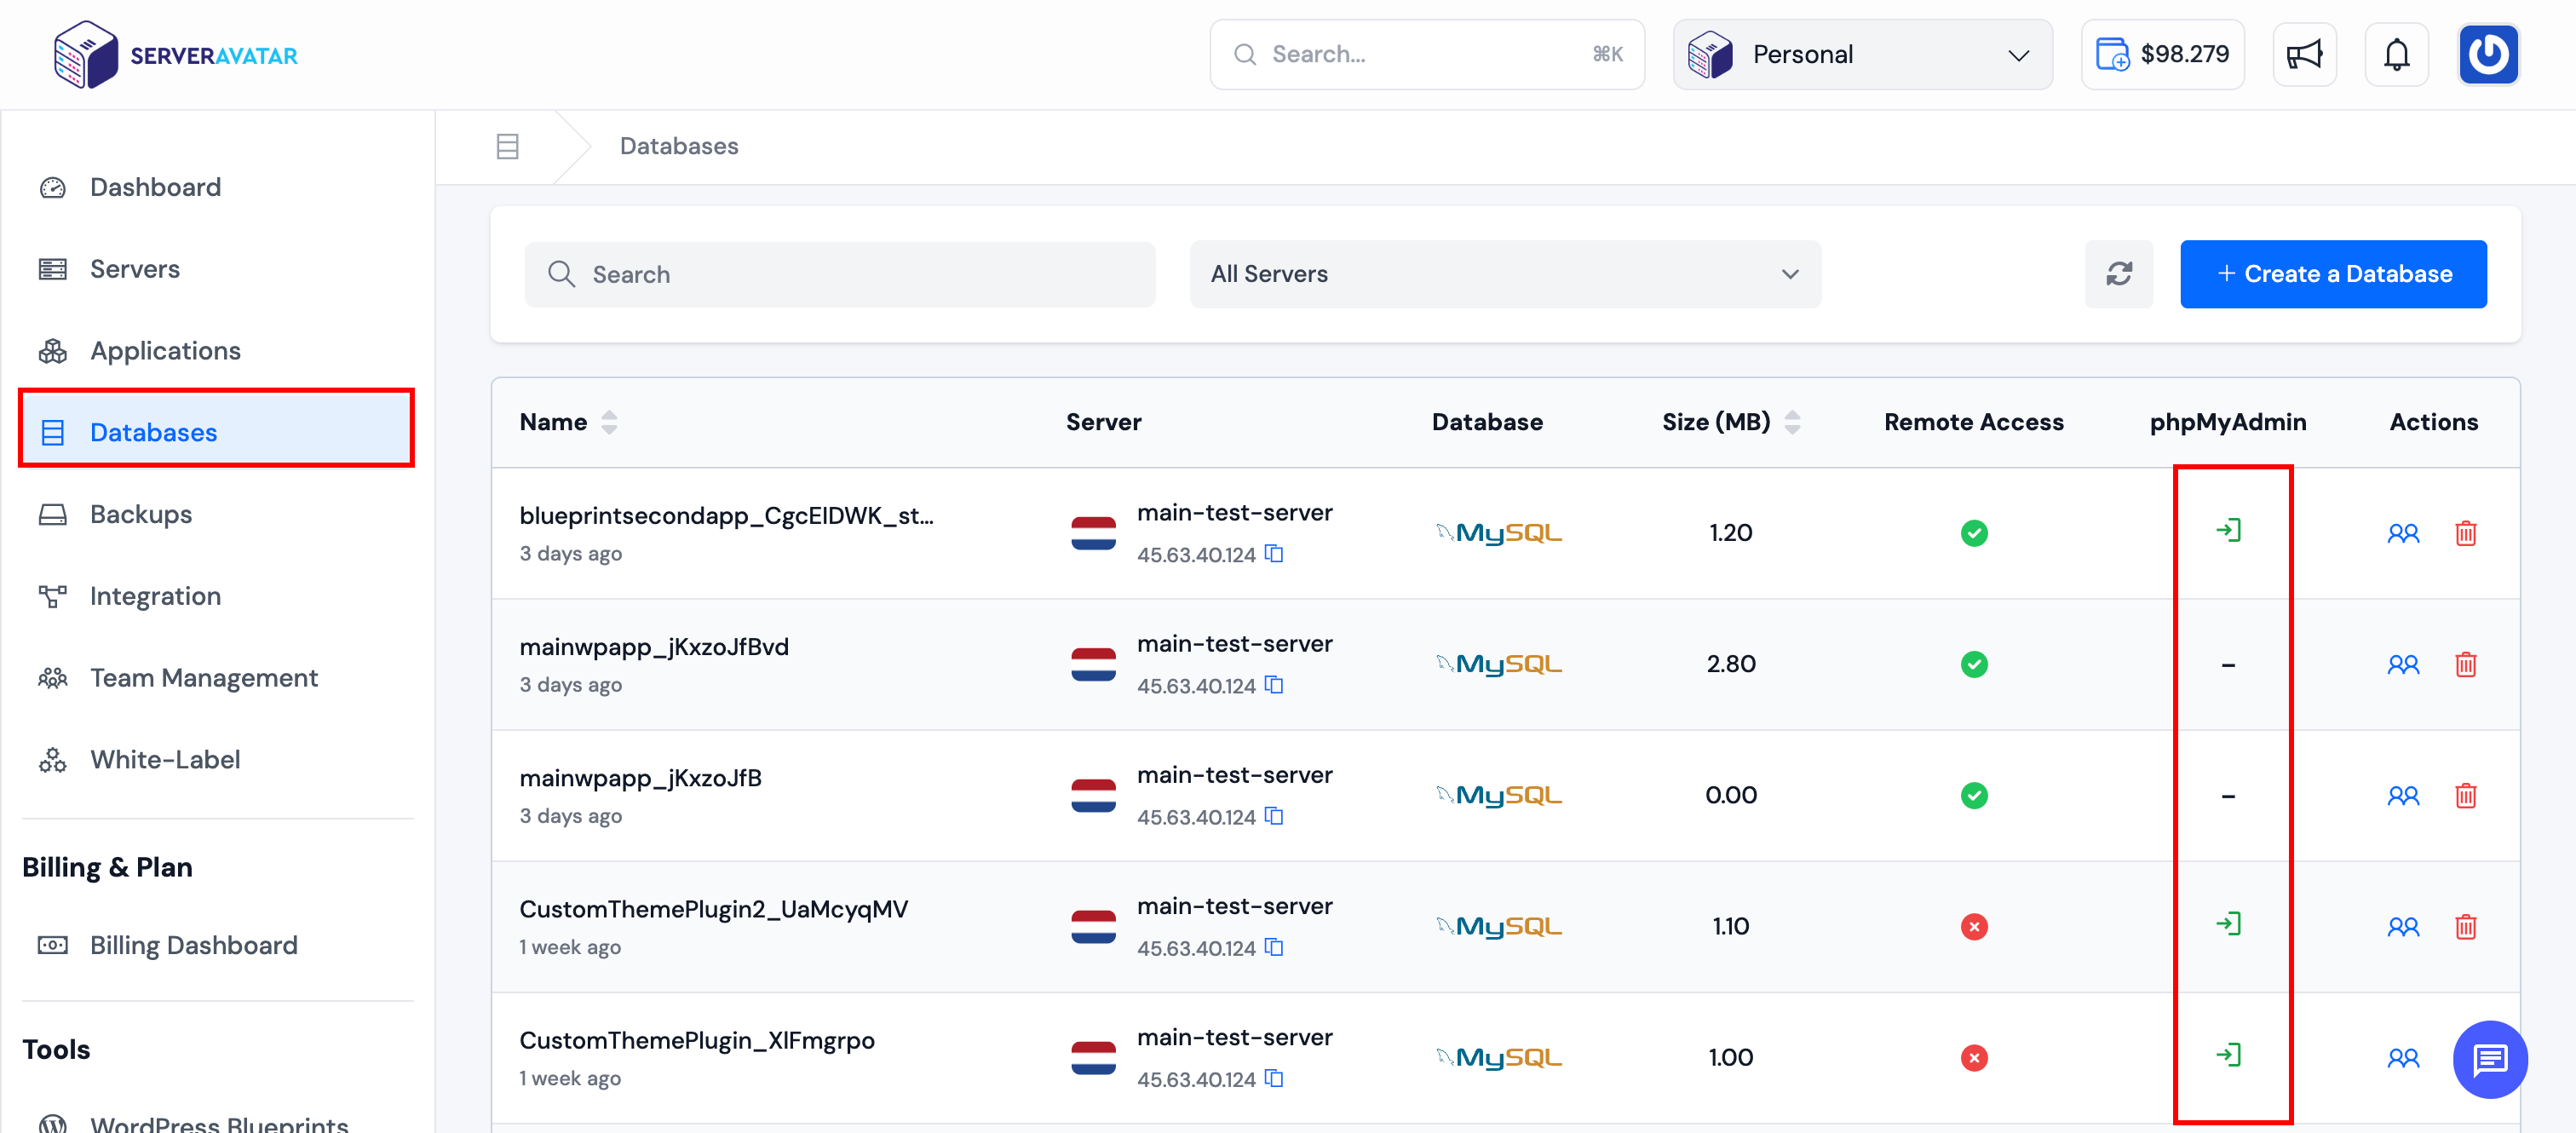
Organization Databases
Open Databases from the main sidebar to see databases across all servers in your organization. Click the login icon on a database row.
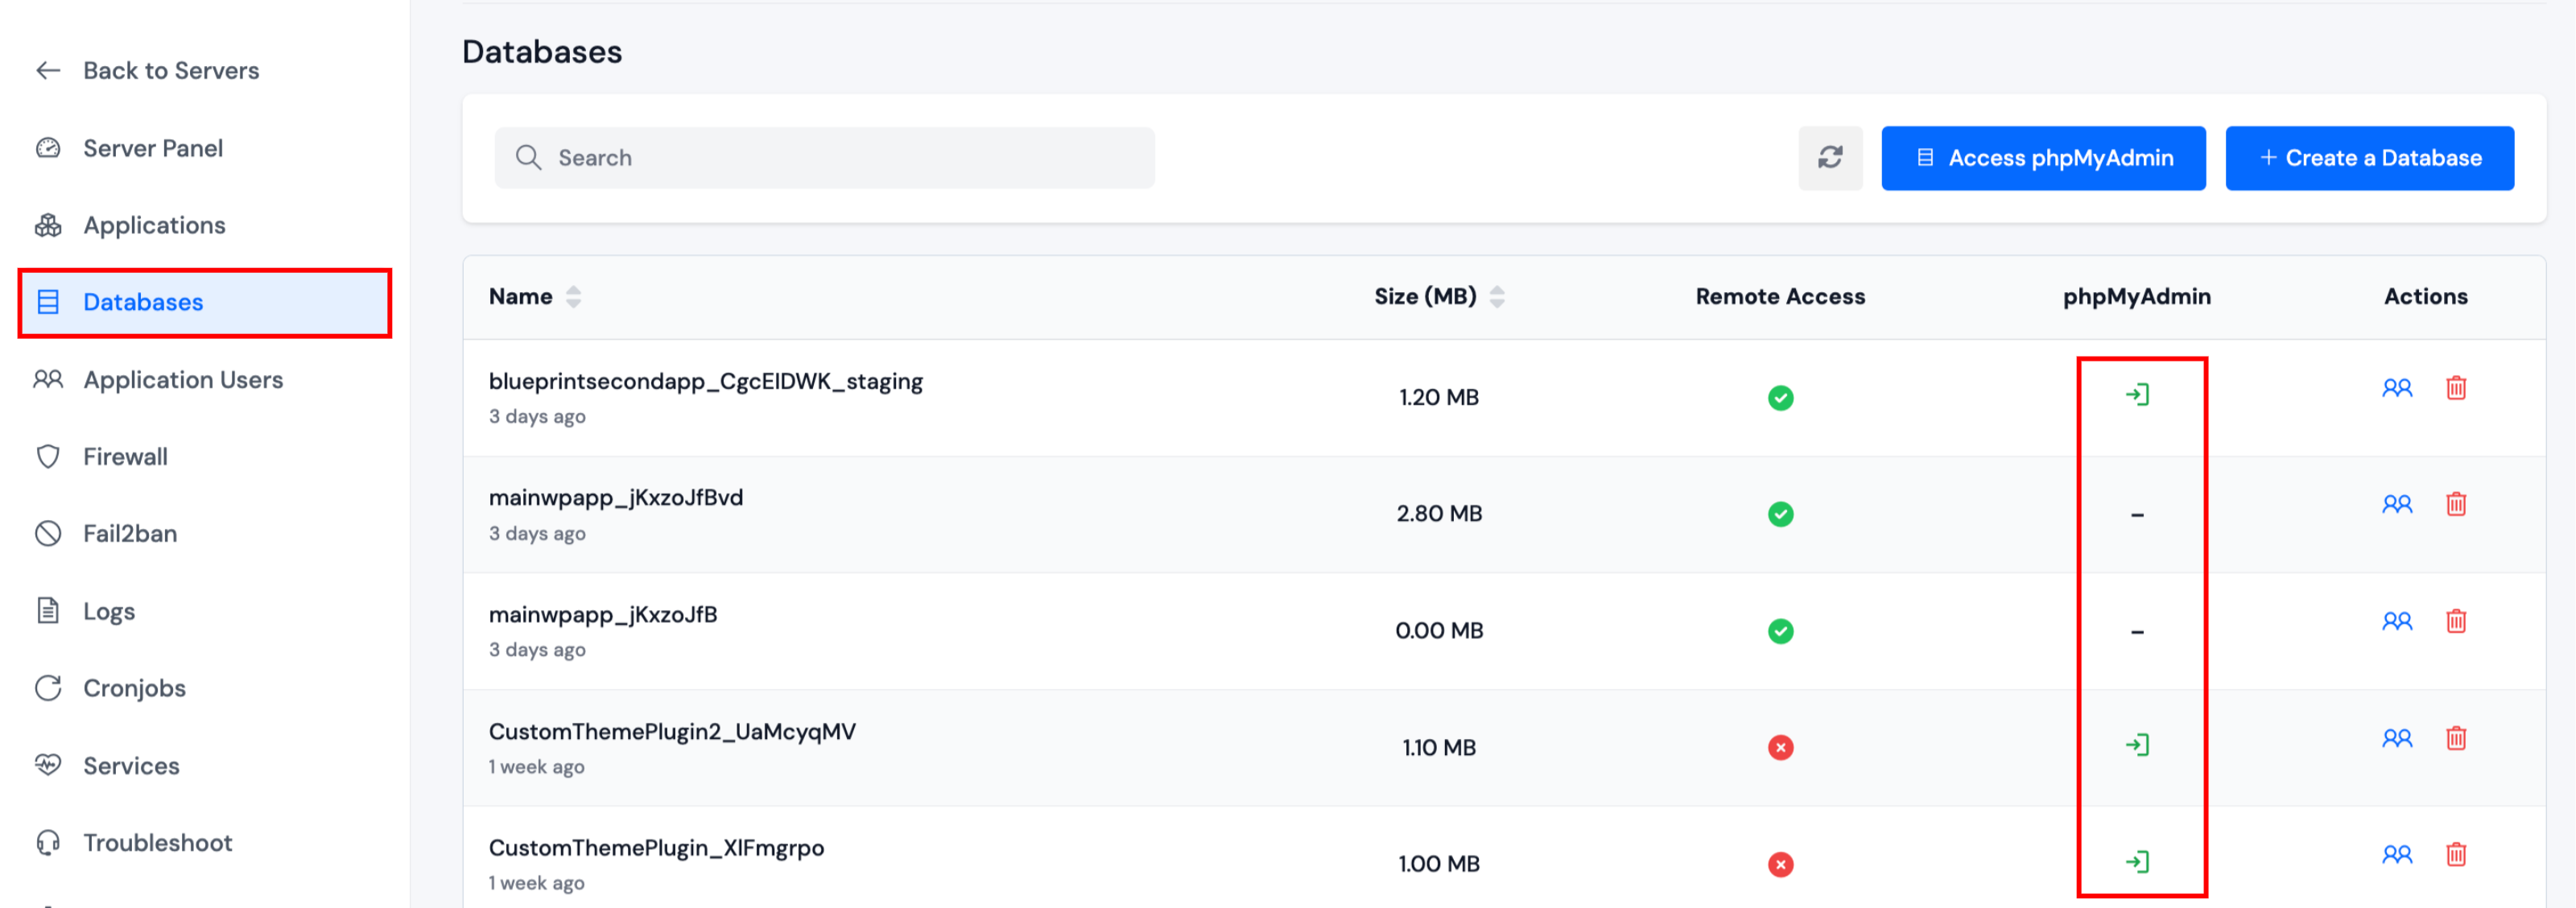
Server Databases
In a Server Panel, open Databases and click the login icon on the database you want to manage.
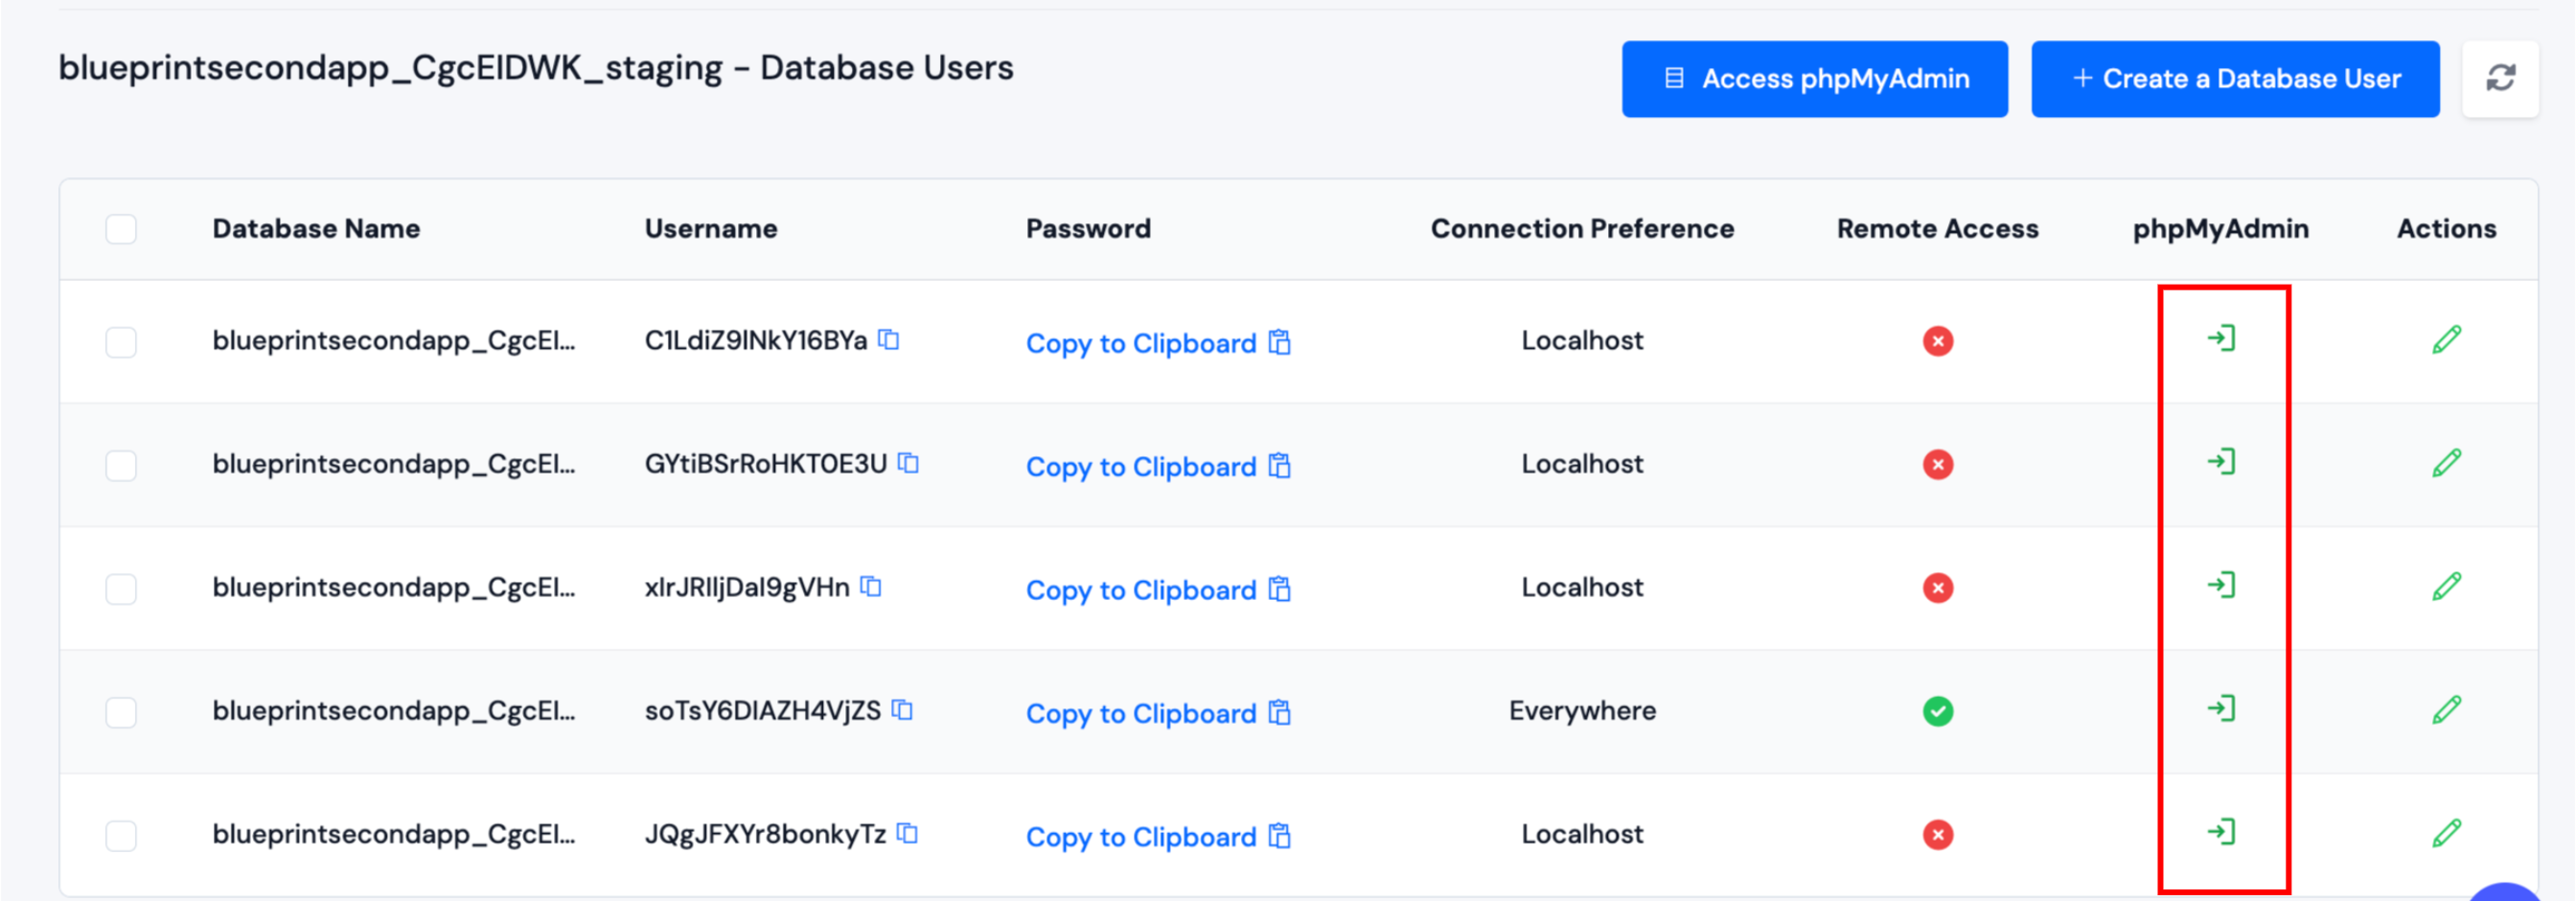
Database Users
Open a database’s user list and click the login icon next to a user. ServerAvatar logs in as that user directly.
Application Dashboard
On any application that has a database attached, open Dashboard and use phpMyAdmin Login in the Database Details section.
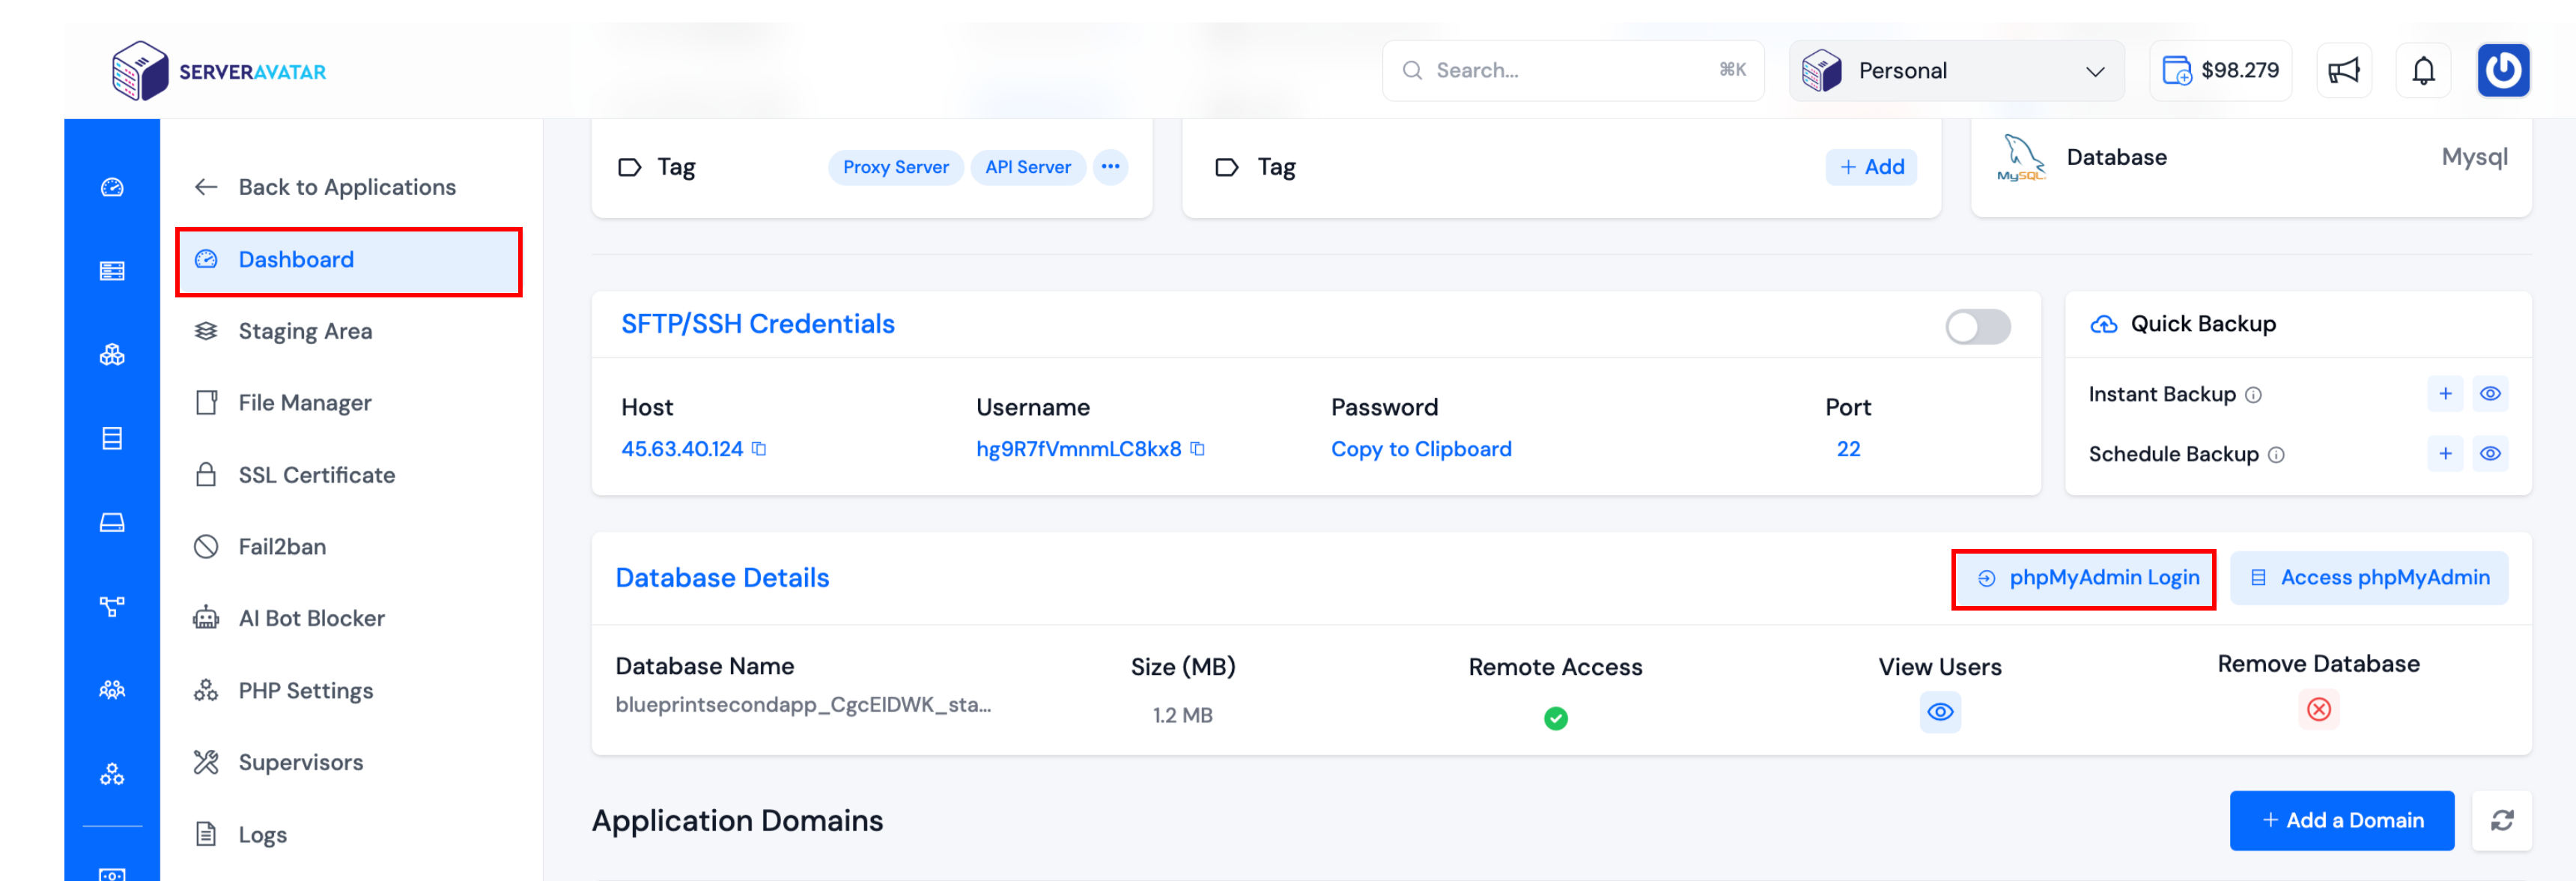
When login is available
One-click login works only when all of the following are true:
- The server is not MERN (MySQL/MariaDB servers only; MongoDB databases are not supported).
- At least one database user for that database has connection preference localhost or everywhere.
- Users with specific IP addresses only cannot use one-click login. Those rows show - instead of the login icon.
What happens after you click
- ServerAvatar finds eligible database users and a phpMyAdmin application on the server.
- If no phpMyAdmin app exists, one is created automatically (same behavior as Quick Access).
- One eligible user and one phpMyAdmin app: phpMyAdmin opens in a new tab, already signed in.
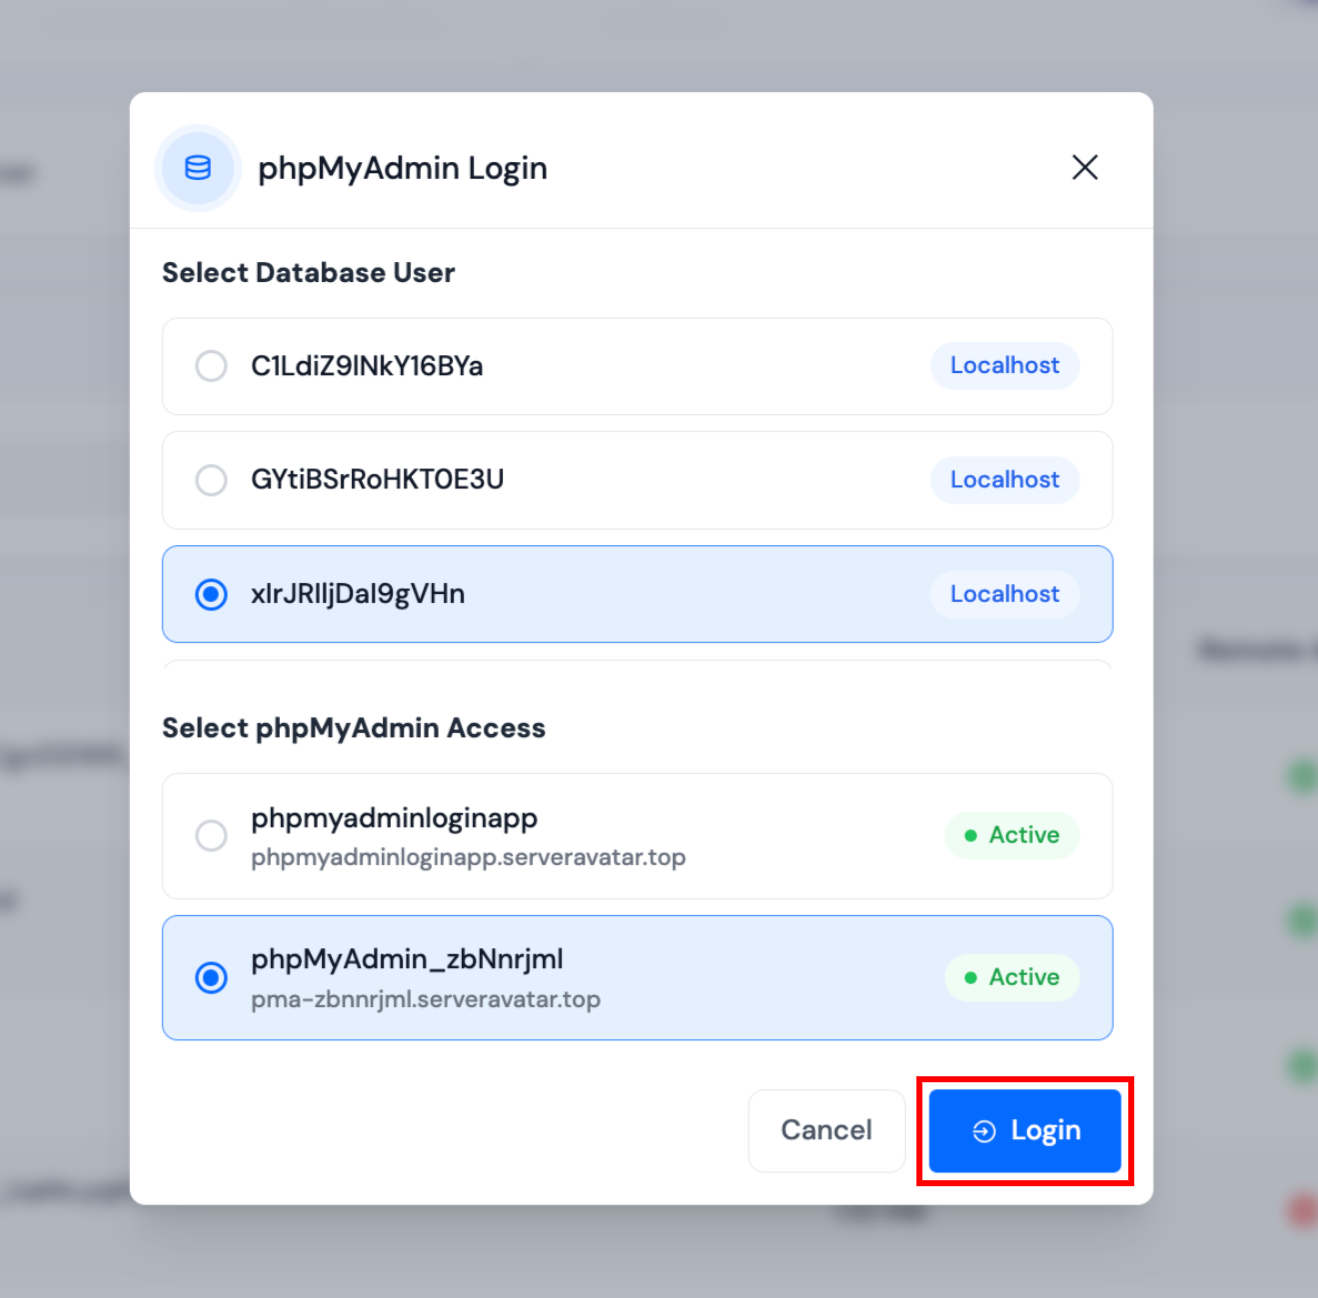
- Multiple users and/or multiple phpMyAdmin apps: a selection dialog opens. Choose the database user and phpMyAdmin instance, then click Login.
Use Access phpMyAdmin to open phpMyAdmin without auto-login. Use the login icon or phpMyAdmin Login when you want to manage a database immediately as a specific user.