WordPress Multisite is an excellent option for those who want to manage multiple websites from a single WordPress dashboard. As a super admin, it means you can manage multiple sites with suitable user roles.
The multisite feature enables you to manage a network of websites on a single server. Sounds good, isn’t it? It allows you to create a network of subsites within a single dashboard instance.
For example, Edublog, the largest education blogging management platform on the web, hosts 3 million blogs using the WordPress multisite feature. Likewise, you can customize and manage multiple subsites with different user roles and permissions that fit your needs.
This tutorial will show you how to install and set up a WordPress multisite network on cloud using ServerAvatar. Let’s look at the foremost essential steps for the WordPress multisite networks.
Install and Set up WordPress Multisite on cloud using ServerAvatar
With ServerAvatar, it is easy to deploy WordPress on cloud. As well as, manage your servers and sites within it with multiple features like File Manager, SSL Certificate, PHP Settings and much much more. Here are the features you can use with serveravatar.
Step 1. Connect a server with ServerAvatar
Connecting a server is an easy process. You need to execute the following commands as a root user in a clean/new Ubuntu 18.04, 20.04, or 22.04 server.
wget https://srvr.so/install
chmod +x install
./install
The server configuration will complete in less than 10 minutes. You can access a link on your console, click on that and claim your server using a simple interface. Yes, it’s that easy.
You can connect VPS/VM/Cloud Instance/Dedicated or Bare Metal server with ServerAvatar. You can connect your server with an IPv4 address and root password or only with an IP address.
Step 2. Setup domain mapping
Domain mapping allows you to use multiple domains for a single website, or you can say it assigns a network’s subsites a unique domain name.
And for that, you need to edit/change the DNS records of your website. If you purchase a domain from any domain registrar company, then make sure you can access the DNS management panel because it’s the tool you can use to control where your domain points to.
Since you manually configure a custom domain’s DNS records, the process is not the same; it depends on which domain registrar you use. But, here is the process you can follow for domain mapping for WordPress multisite.
Using IP-Address (A-record)
An A-record maps a domain name to the IP address. And a sub-domain is a name that takes the place of WWW. For example, if your domain is “WWW.example.com“, then the sub-domain for this URL looks like “blog.example.com”.
Using CNAME-record
It is easy to manage multiple sites or subsites using a CNAME record because, like in A-records, you don’t need to provide an IP address to all domains/subdomains. The CNAME record for multisite looks like the following image.
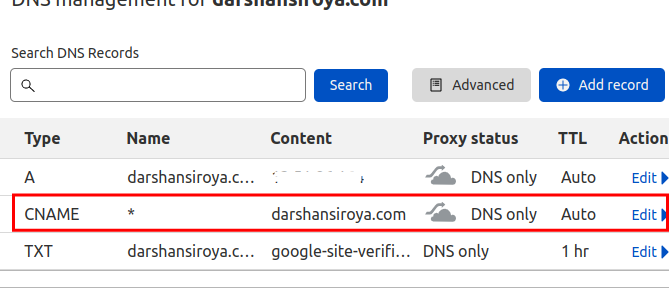
The “* “under the name indicates multiple subdomains that trigger DNS lookup to “darshansiroya.com”, returning the domain’s IP address via its A record.
You can also check how to change your domain nameserver and point to a new host.
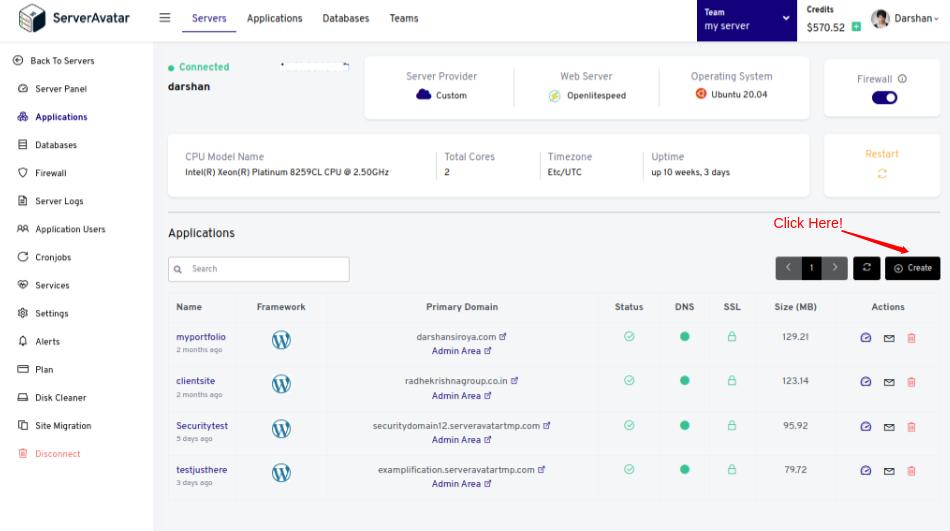
Step 3. Create an application and deploy WordPress on a server
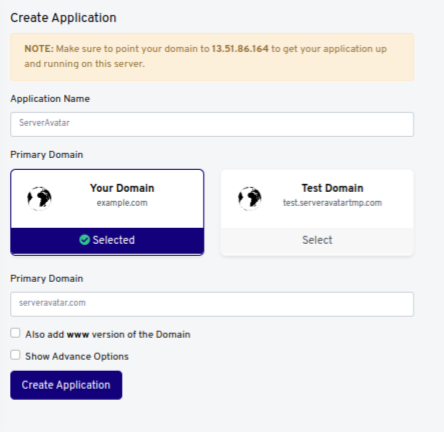
The next step on the ServerAvatar server panel is to create a PHP application by navigating Applications and clicking on the Create button like the image below.
It will ask for basic information to create an application like Application Name and Domain Name. Click on the Create Application, and your application is ready for installation.
The next step is to go to your created application and use the Auto Deploy option from the panel’s sidebar. There are multiple applications to deploy for Nginx and Apache users compared to Openlitespeed users.
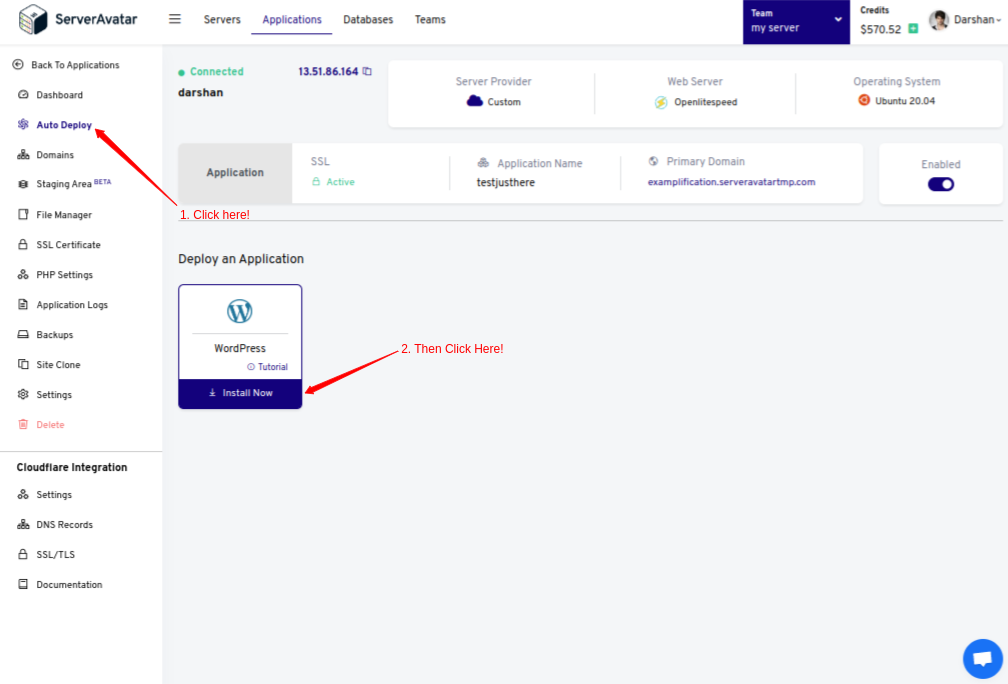
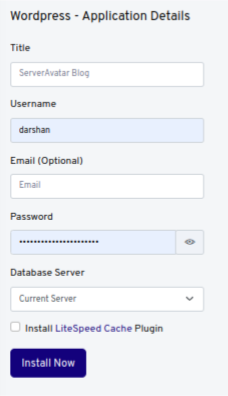
Install WordPress by filling in simple installation details like WordPress Title, Username, Password, and select Database Server from connected servers per your requirements.
Once you are filled, click the Install Now button, and WordPress has now been installed on your server.
Step 4. Add WordPress Multisite function in the WP-config.php file
To add the function in the WP-config.php file. Go to your application and access File Manager from the sidebar like the image below.
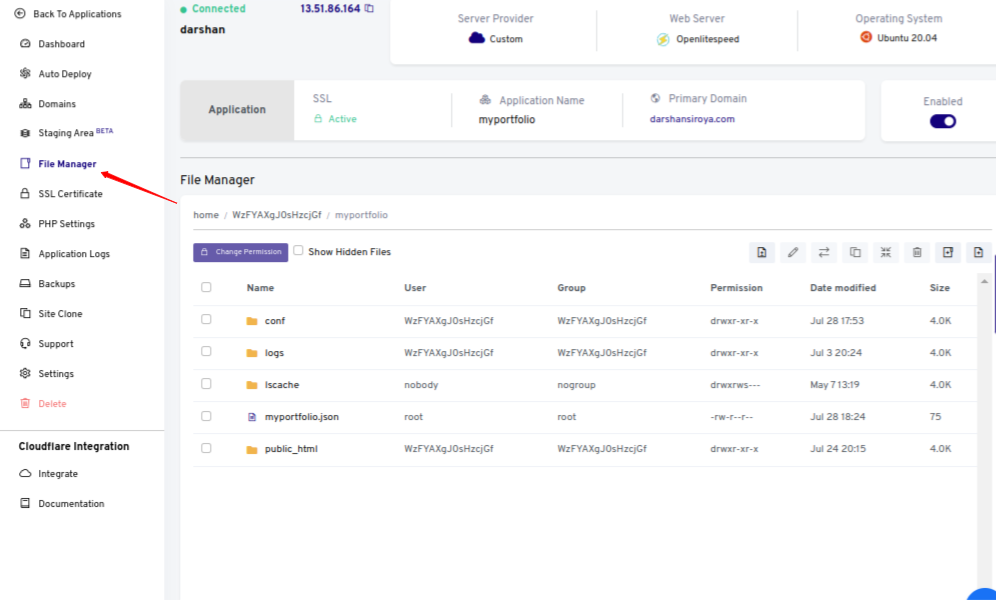
Now access WP-config.php and add the following line of code just before “That’s all, stop editing! Happy blogging” in the file.
/* Multisite */
define('WP_ALLOW_MULTISITE', true);
Don’t forget to save the file after adding the code.
Step 5. Choose domain structure for wordpress multisite
Now login to WordPress and go to Tools >> Network Setup to choose the addresses of sites.
The multisite feature allows you to add a new site using two methods: Subdomains or Sub-directories.
For example, If your domain name is “example.com“, the subdomain URL will look like “site1.example.com“.
On the other hand, the sub-directory path URL will look like “example.com/site1”.
Choosing sub-domain functionality will need wildcard DNS, which we discussed in Step 2. Note that you can not change these settings later.
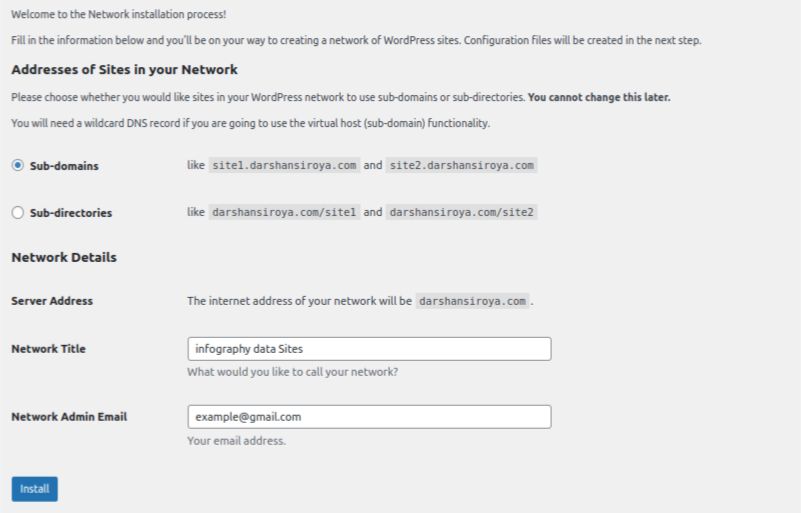
Add the appropriate Network Title and Admin Email to the Network Details section and click on the Install button.
Step 6. Enable the network
To enable the features of creating a network of sites, you need to add codes to:
- Wp-config.php file just before the “ That’s all, stop editing! Happy publishing.” line.
- And to the .htaccess file, replacing other WordPress rules.
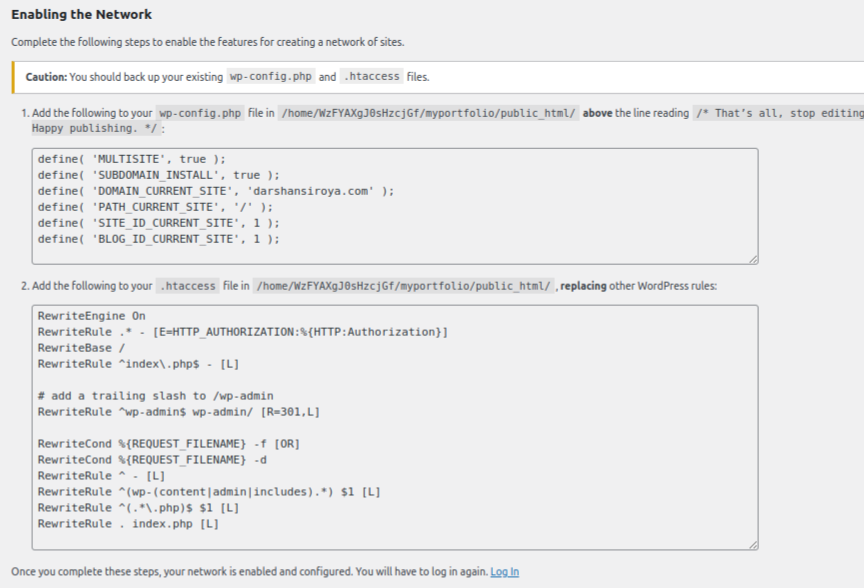
Once you complete these steps, log out and log in again to the WordPress dashboard and your Network is enabled and configured.
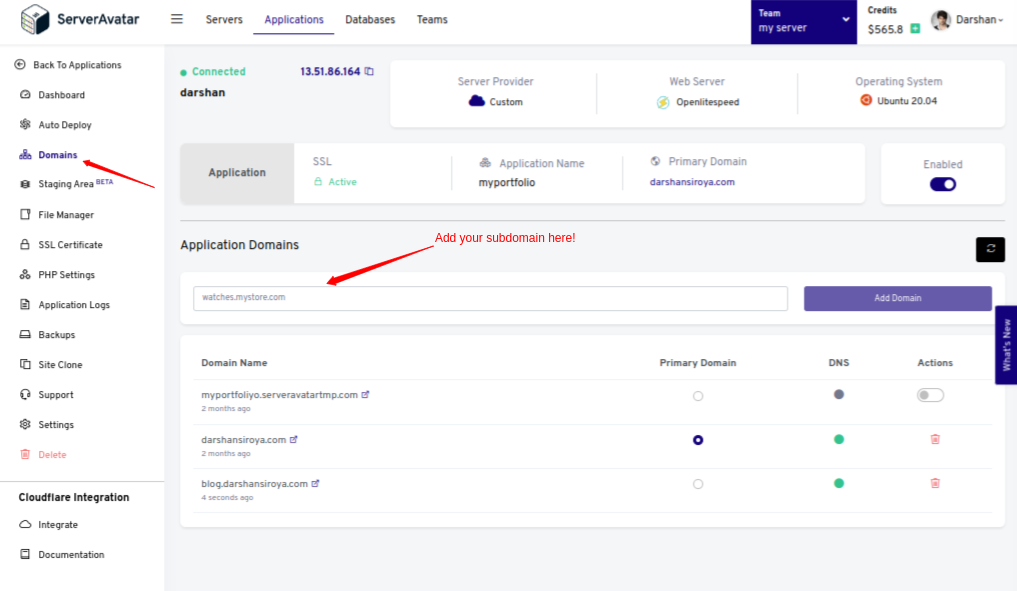
Step 7. Adding subsites
After you have updated both the files, add subsites on the ServerAvatar panel by checking the Domains feature from the sidebar of the panel. For example, I have added a subdomain “blog.darshansiroya.com” to the domain section.
Now create a site by navigating Sites >> Add New with required details like URL, Title, and Email address.
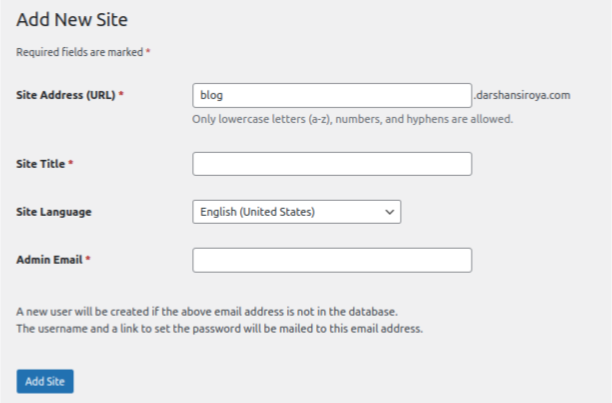
Once filled, click Add Site, and your subsite is ready to rock.
As an admin, you manage all Network related settings, which help you add subsites per your requirement or permissions.
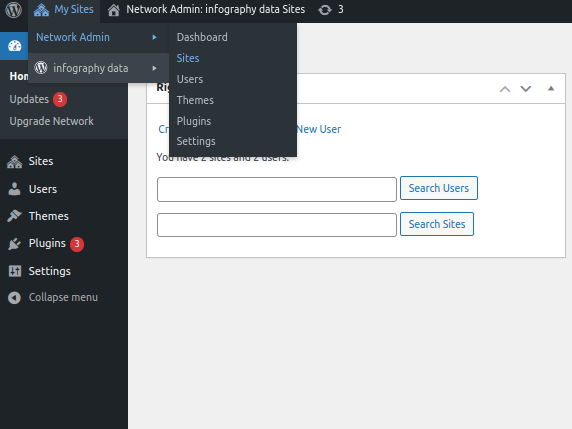
Let’s dive deep into the Network Settings tab to explore more about WordPress Multisite features.
Configuring Network Settings for WordPress Multisite
There are multiple ways; you can run subsites as per your way by using Network settings features. Network settings have different sub-settings, which include:
Operational Settings
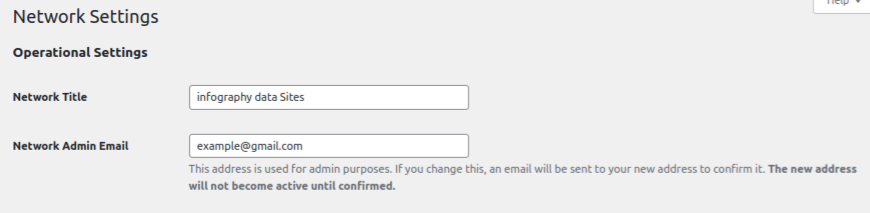
This setting helps you set Network Site Title and Email Address. This address is used only for admin purposes.
Registration Settings
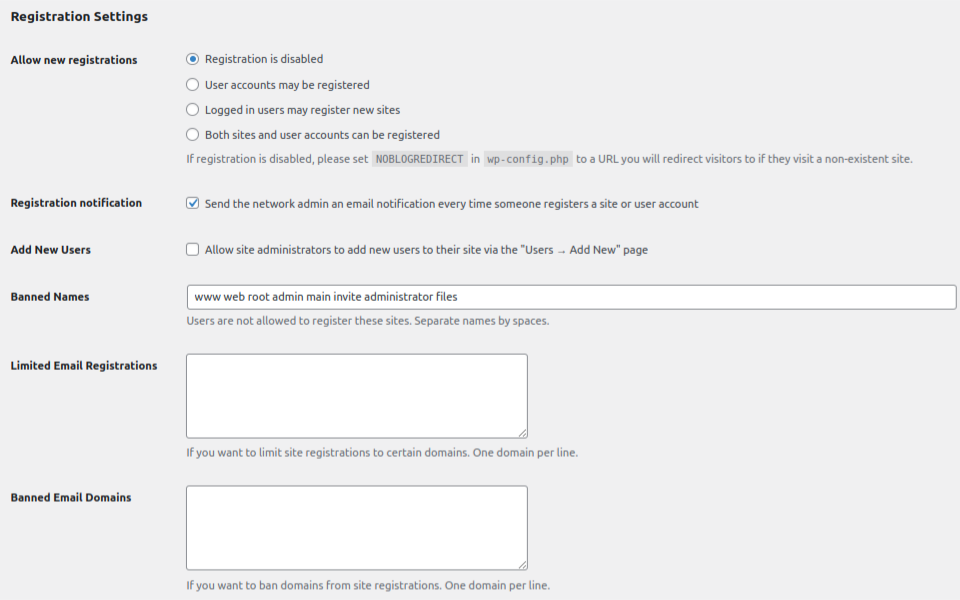
Registration settings are basic settings in your network setup where you set all users related settings which include:
Allows New Registration: By default, user and site registration are disabled. You can select your site to open for user registration, or only for logged-in users to register or allow both sites and user accounts to be registered.
Registration Notification: enable this to receive a notification whenever a new user or site is registered.
Banned Names: users can’t allow the subdomain prefix you type in this field. Like, admin.example.com is not preferable to use for any subsite user.
Limited Email Registration : It allows you to limit user/site registration to email addresses from specific domains.
Banned Email Domains: type one domain per line in this field to ban domains from site registration.
New Site Settings
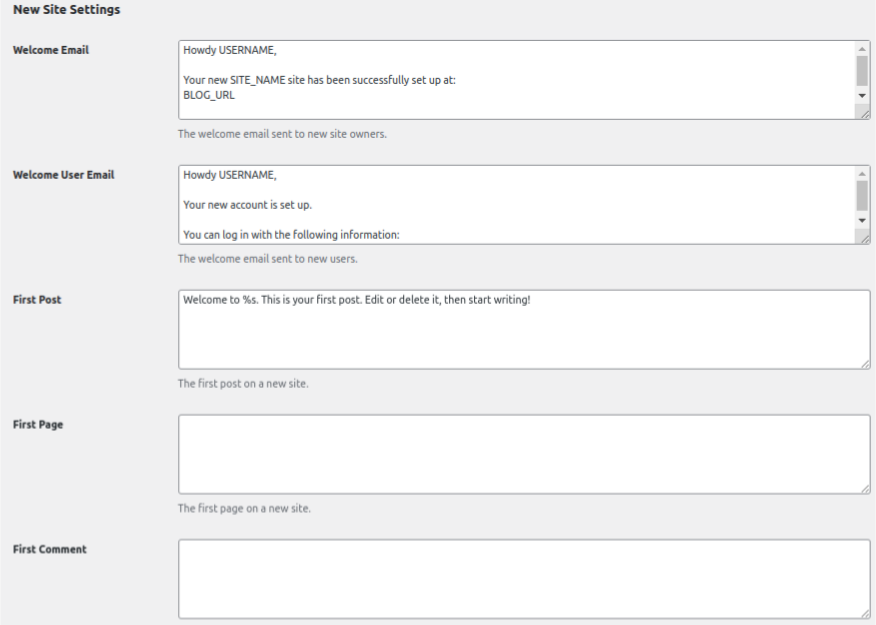
Welcome Email: You can send a customized email to the New Site Owner whenever they create a site on a subdomain.
Welcome User Email: This allows you to send a customized email to New Site Users with login information.
First Post/Page/Comment: Show customized messages to new site users whenever they publish their first posts, pages, or comments.
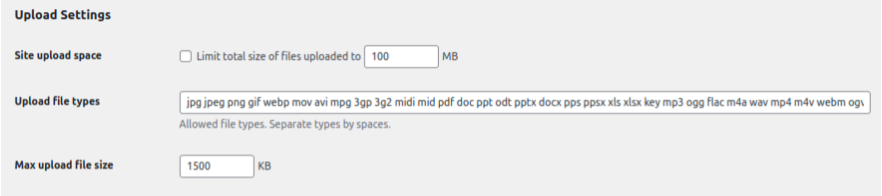
Upload Settings
Language and Menu Settings
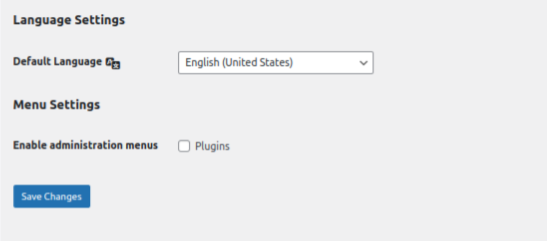
Language Settings allows you to set the default site language. And menu settings help site users to enable or disable plugins, but they can’t have permission to install/uninstall the plugin.
So here is the detailed overview of the WordPress Multisite feature and its settings. We hope this article might help you set multisite Network on your WordPress site.