Manual Installation
InsightHub is a web interface that displays access log data in a tabular format. It typically includes columns for key information like date, IP addresses, URLs, status codes, methods, user-agent, referers, bandwidth, bots, and many more. Users can sort, filter, and search the log data and may have options to specify date ranges. User authentication is implemented to restrict access to authorized users. The panel is designed to be responsive and user-friendly.
To set up InsightHub:
System Requirements:
- Operating System: Ubuntu 20.04 or Ubuntu 22.04 Server or Ubuntu 24.04
- Core: 2 or More
- Memory: 2 GB or Higher
- Disk Space: At least 10 GB Space Required
- A stable internet connection
Software Components:
- Web Server: Apache or Nginx
- Database: MySQL or MariaDB
- Caching: Redis
- PHP: Version 8.2 or higher (PHP-FPM and CLI)
- NodeJs 20.x.x & NPM 10.x.x
- InsightHub License Key
- SMTP Credentials
- SSL
- Supervisor
Follow this step-by-step guide to set up your InsightHub.
Step 1. System Check
Step 1.1. PHP CLI Version
- Access the ServerAvatar server panel, go to Settings in the sidebar, and change the PHP-CLI version to 8.2 or above.

Step 1.2. Install Node.js
If Node.js is already installed on your server, and the Node.js version is 20.x.x, and NPM version is 10.x.x, then skip this step.
Install Node.js from the Settings tab under General Settings.

If the Node.js and NPM versions are not the latest, Update Node.js and NPM from the Settings tab under General Settings.

Step 2. Create a Custom PHP Application
Locate the Applications tab and Create an application on your primary or temporary domain.
In the application creation form, check the Advanced Option box and change the PHP version to 8.2 or above.
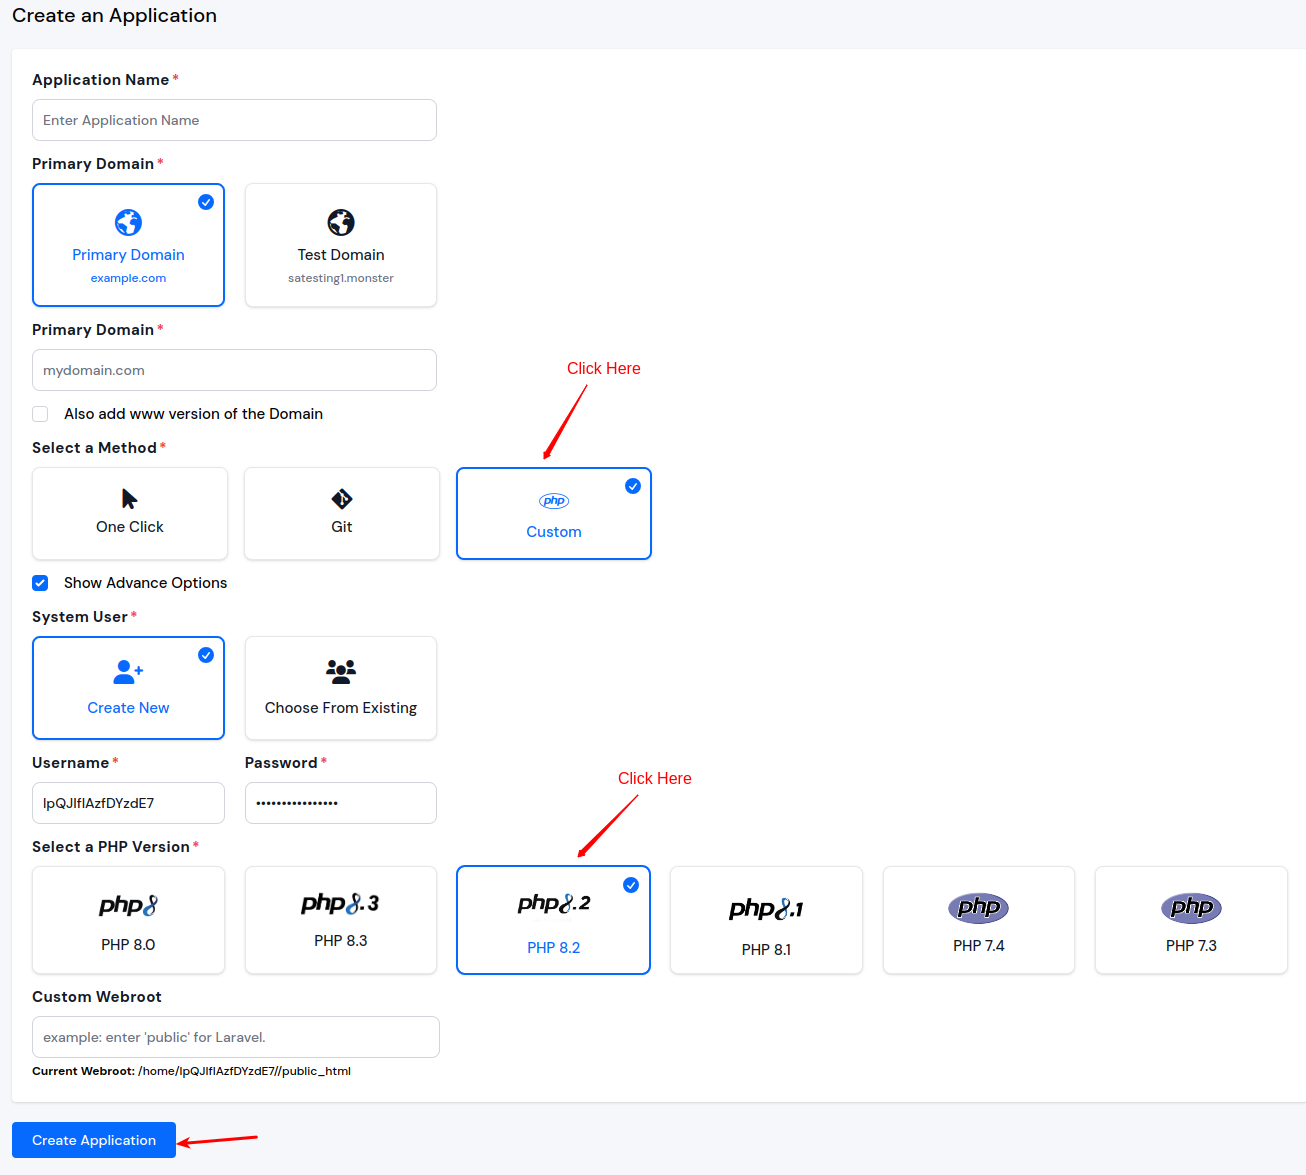
Empty your application's public_html directory before proceeding. This prevents potential conflicts during installation. Access the File Manager tab within your application dashboard to complete this step.
Step 3. Server Login
The script doesn't run when logged in as the root user.
- Login to your server and go to your application directory. Connect using SSH by running the ssh username@host command. You can find credentials from the application panel dashboard as shown below:

Step 4. Script Download and Execution
- Now run the below command outside of your application directory.
wget https://srvr.so/insighthub
chmod +x insighthub
./insighthub
Do not remove the "insighthub" file located outside of your application directory. It plays a crucial role in the update process.
- You can follow the commands in the image below for easy execution:

Step 5. Set Custom Webroot
- After script execution, set the custom webroot to public navigating Settings tab of your application dashboard.

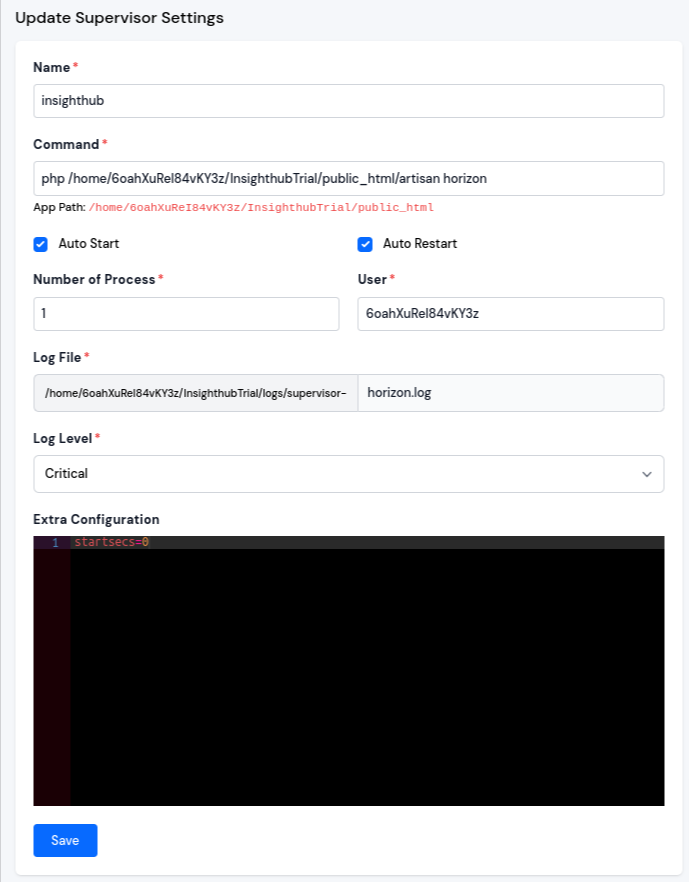
Step 6. Supervisor Configuration
- Navigate to the Supervisors tab within your Application Dashboard and create a supervisor for InsightHub. Follow the image below for the supervisor configuration.
Command
php /home/{application username}/{application name}/public_html/artisan horizon
Step 7. Cronjob Setup
- Navigate to the Cronjob tab within your Server Dashboard and Configure a Cronjob for InsightHub.
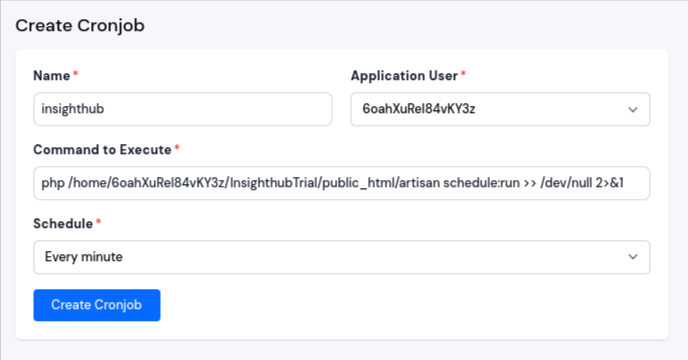
Command
php /home/{application username}/{application name}/public_html/artisan schedule:run >> /dev/null 2>&1