Edit robots.txt is a small, but powerful, text file that lives in the root directory of your website. It’s not something human visitors typically see, but it’s crucial for how search engine bots (like Googlebot) crawl and index your site. Essentially, it tells these bots which parts of your website they can and cannot access.
Properly configuring your robots.txt can help with SEO by ensuring search engines focus their crawling efforts on your important content, and it can also prevent less important or duplicate content from being indexed.
While WordPress doesn’t offer a built-in robots.txt editor, there are a couple of straightforward ways to manage this file.
Understanding the Basics of robots.txt
Before we dive into editing, let’s look at a couple of common directives you’ll encounter:
- User-agent: This specifies which web crawler the rules below it apply to.
- User-agent: * applies to all web crawlers.
- User-agent: Googlebot applies only to Google’s crawler.
- User-agent: * applies to all web crawlers.
- Disallow: This tells the specified user-agent not to crawl a particular URL path.
- Disallow: /wp-admin/ prevents bots from accessing your WordPress admin area.
- Disallow: /wp-content/plugins/ prevents bots from crawling your plugin files.
- Disallow: /wp-admin/ prevents bots from accessing your WordPress admin area.
- Allow: (Less common, but useful in specific cases) This explicitly allows crawling of a sub-directory or file within a disallowed directory.
- Sitemap: This directive points search engines to the location of your XML sitemap, which helps them discover all your important pages.
A typical WordPress robots.txt often looks something like this:
User-agent: *
Disallow: /wp-admin/
Allow: /wp-admin/admin-ajax.php

Sitemap: https://www.satesting1.homes.com/sitemap.xml(Remember to replace https://www.satesting1.homes.com/sitemap.xml with your actual sitemap URL.)
Now, let’s get to editing!
Method 1: Using an SEO Plugin (Recommended for Most Users)
For the vast majority of WordPress users, using an SEO plugin is the easiest and safest way to manage your robots.txt file. Popular plugins like AIOSEO (All in One SEO) offer dedicated tools for this.
Step-by-Step with AIOSEO (All in One SEO):
Step 1: Log in to Your WordPress Admin Dashboard
- Go to: https://satesting1.home.com/wp-admin
- Enter your URL at the place of “https://satesting1.home.com/“. Enter your username and password to login.
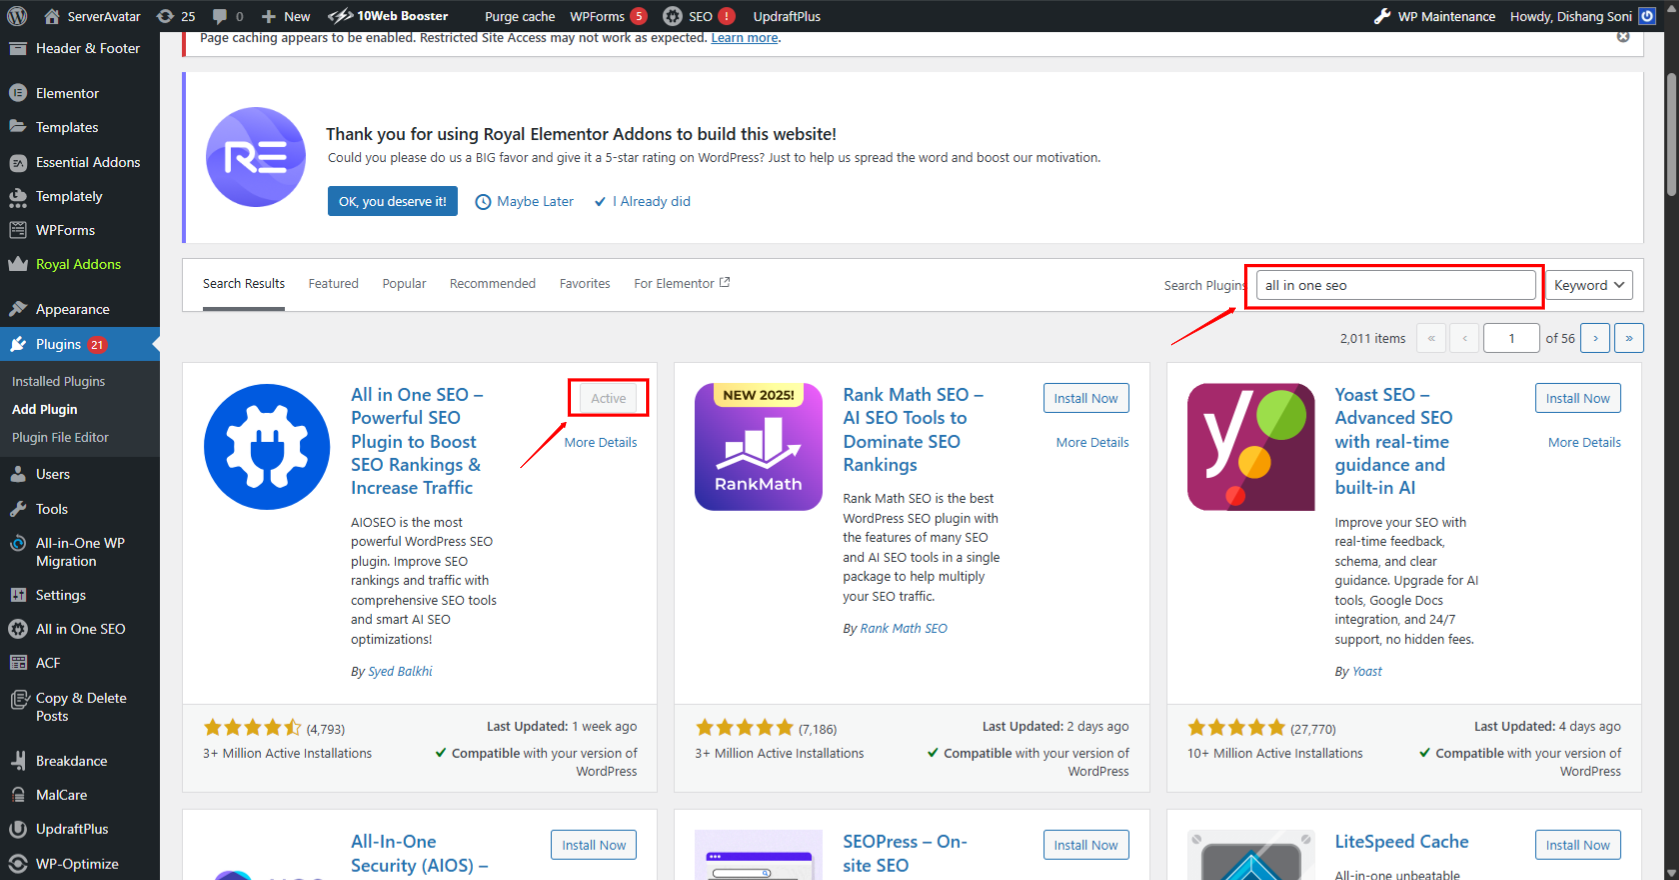
Step 2: Install and Activate AIOSEO Plugin
- Go to Plugins > Add New.
- Search for All in One SEO.
- Click Install Now and then Activate.
Step 3: Open AIOSEO Settings
- In the left sidebar, click on All in One SEO.
- Then go to Tools.
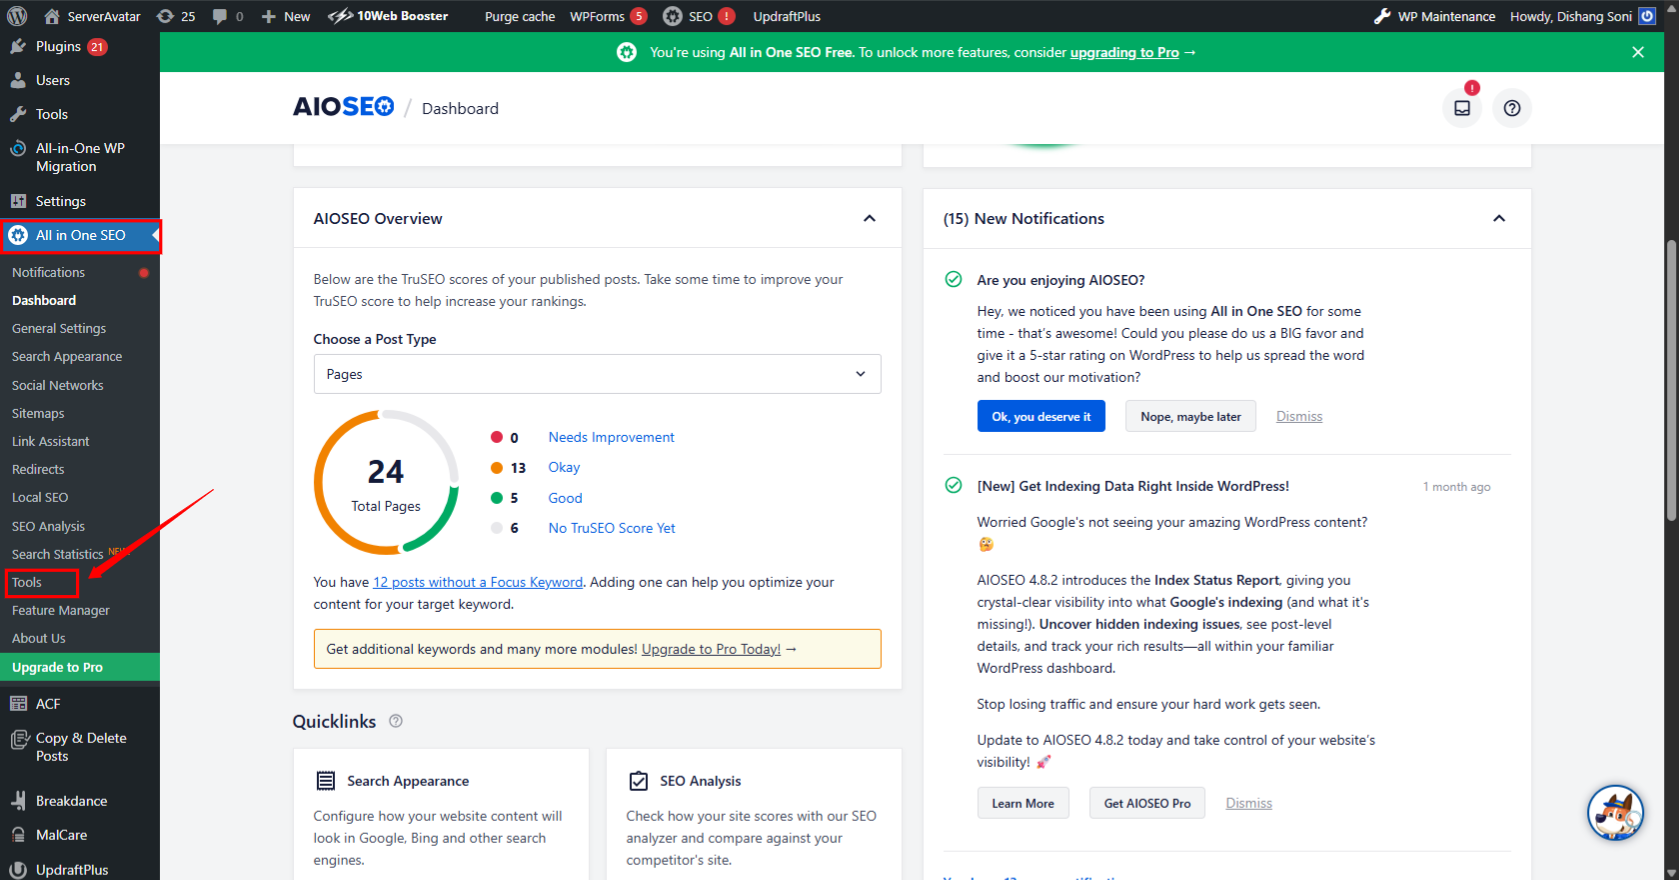
Step 4: Navigate to the robots.txt Editor
- Under Tools, click on Robots.txt Editor From Top bar
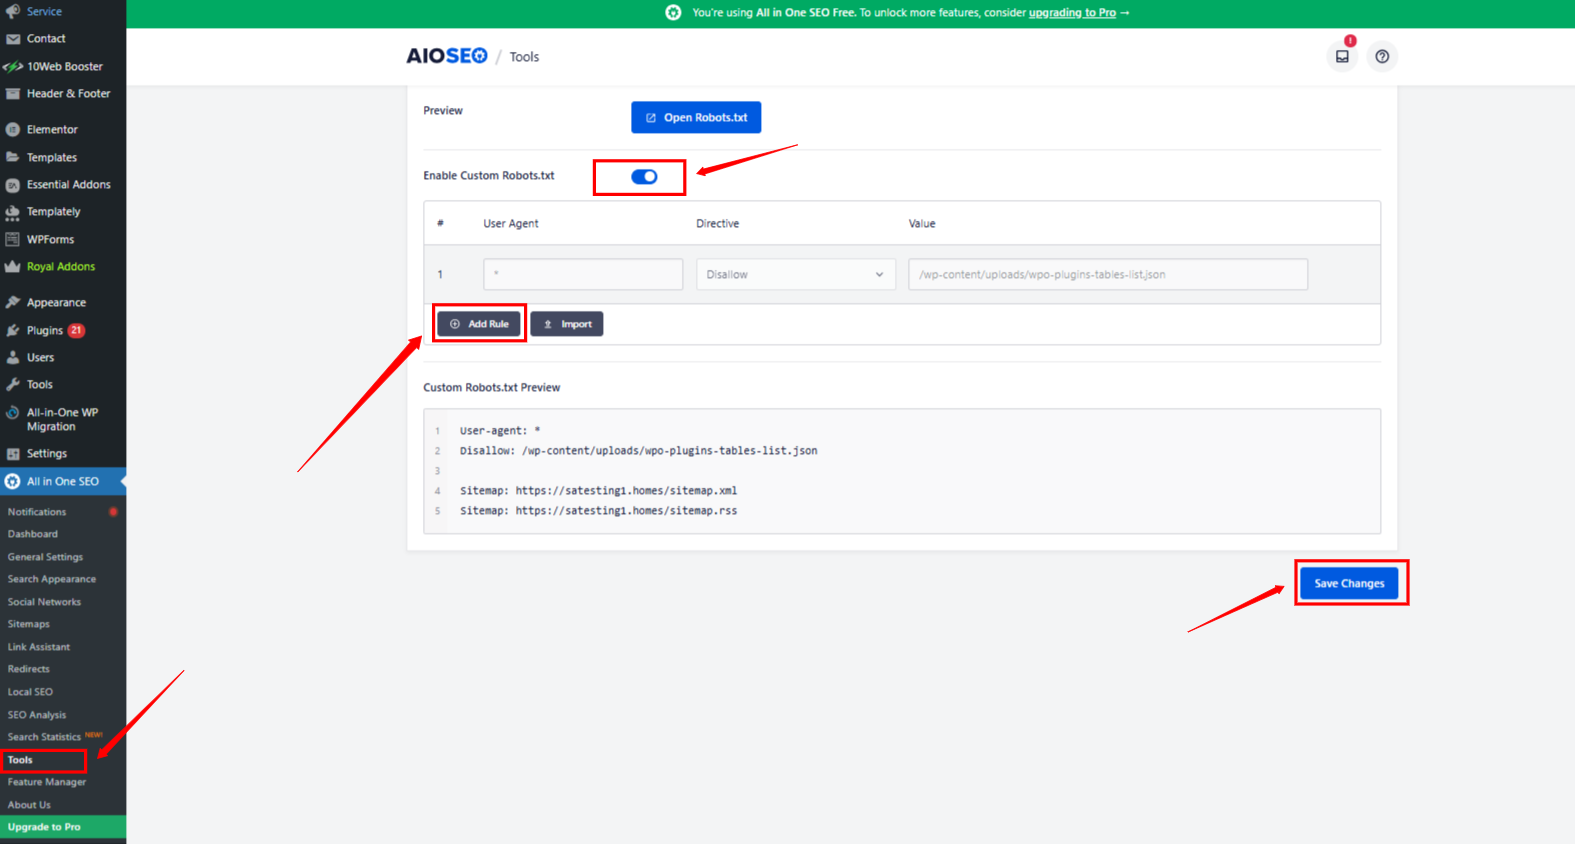
Step 5: Enable Custom robots.txt (If Not Already)
- You’ll see an option to Enable Custom Robots.txt.
- Toggle it ON to start editing your custom robots.txt file.
Step 6: Add or Edit Rules
Here’s an example of a standard robots.txt file for a WordPress site:
Note:- Enter the User-Agent, Directive, and Value to create and apply a new rule.
User-agent: *
Disallow: /wp-admin/
Allow: /wp-admin/admin-ajax.php

Sitemap: https://satesting1.homes/sitemap.xmlIn the editor, you can:
- Allow or Disallow bots from accessing specific folders.
- Add User-agents (e.g., Googlebot, *).
Example:
User-agent: Google bot
Disallow: /private-folder/
Allow: /wp-admin/admin-ajax.phpExplanation of the above rules:
- User-agent: * — Applies the rule to all bots/crawlers.
- Disallow: /wp-admin/ — Blocks bots from accessing the admin area.
- Allow: /wp-admin/admin-ajax.php — Lets bots access AJAX calls needed for some plugins.
- Sitemap: — Helps bots find your sitemap for better indexing.
Step 7: Save Changes
- After editing, scroll down and click Save Changes.
Step 8: Verify Your robots.txt File
- Open your URL in browser and enter “/robots.txt” at the end of the URL, in my case it will be: https://satesting1.homes.com/robots.txt
- Confirm your edits are reflected live.
Method 2: Manually Editing via File Manager (For Advanced Users)
This method requires more technical comfort and direct access to your server. Only use this if you’re comfortable navigating server files and have a backup plan.
What you’ll need
- Web Hosting Control Panel: (e.g., ServerAvatar, cPanel, Plesk) which typically includes a “File Manager” that you can use instead of FTP.
Here We Used ServerAvatar File Manager Step-by-Step:
Step 1: Log in to ServerAvatar Dashboard
- Go to https://app.serveravatar.com
- Enter your email and password to log into the ServerAvatar dashboard.
Step 2: Select Your Server
- On the main dashboard, you’ll see a list of your servers.
- Click on the server where your WordPress website is hosted.
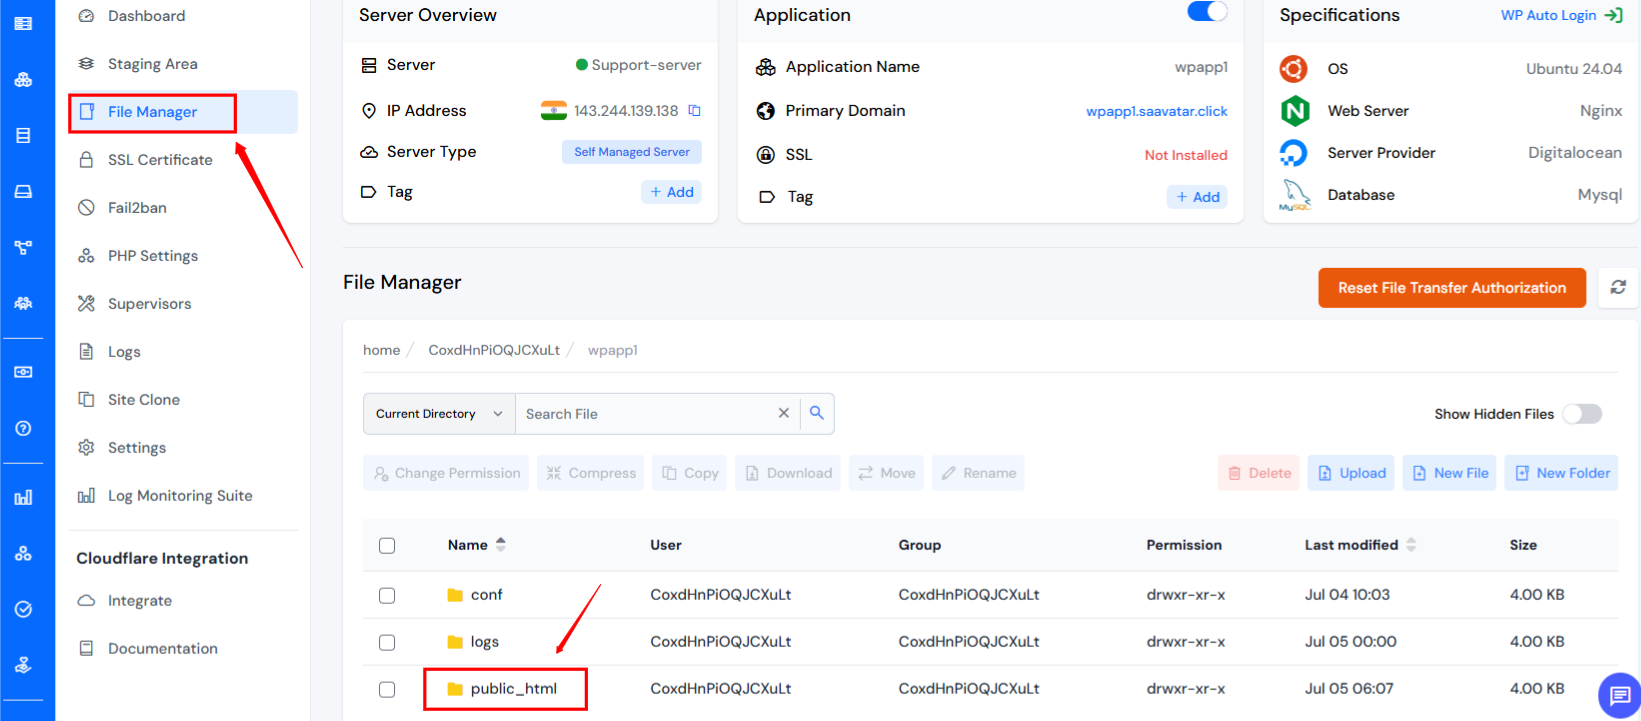
Step 3: Access the File Manager
- On the left-hand sidebar, find and click “File Manager.”
- This opens the file management system where all server files are organized.
Step 4: Locate Your Website Directory
- Go to the “Public_html” directory from file manager.
- public_html is the root folder where your website files are stored. This is the correct place for your robots.txt file.
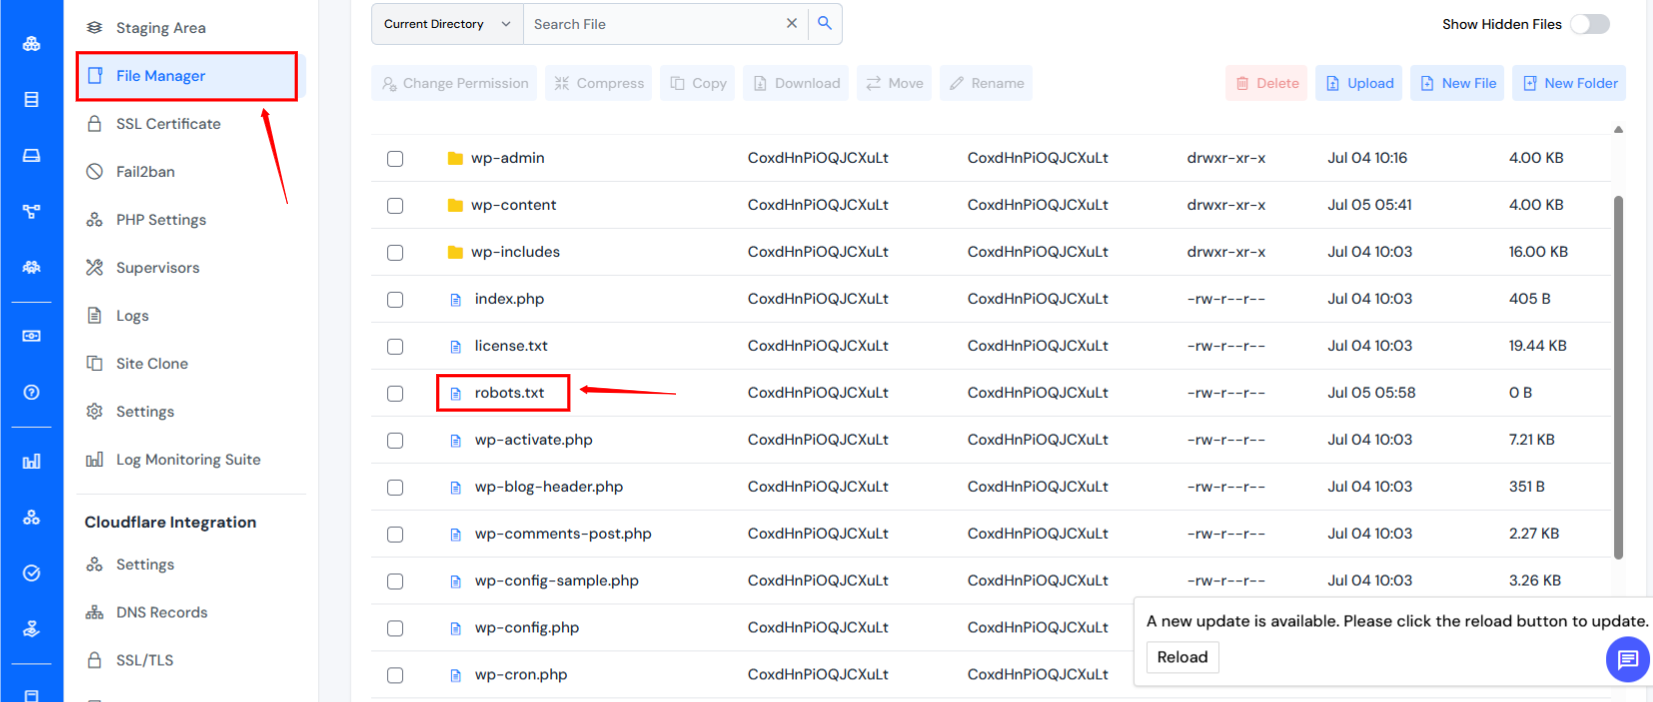
Step 5: Locate or Create the robots.txt File
Option A: If robots.txt already exists
- Navigate to robots.txt File in File Manager
- Click On robots.txt file
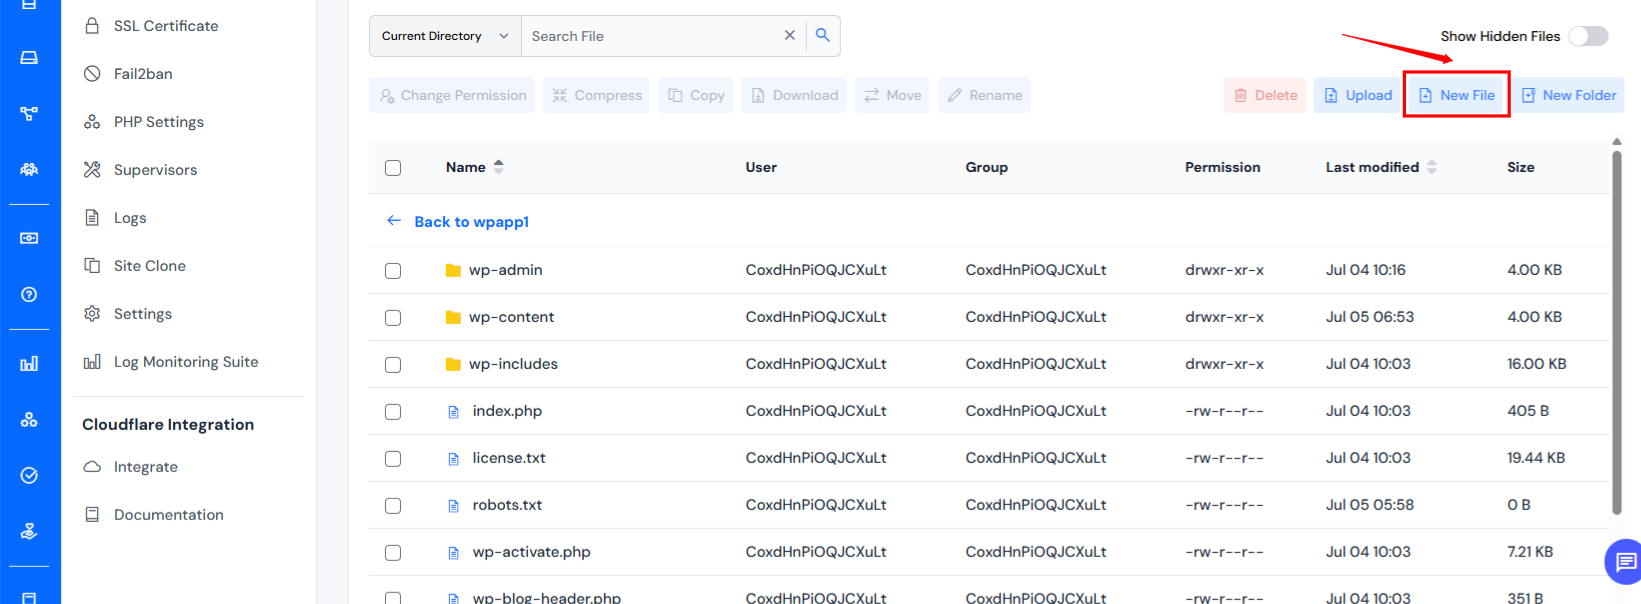
Option B: If robots.txt does not exist
- Click on “New File” in the top menu.
- Enter the filename as: robots.txt (must be lowercase and without extra extensions).
- Click Create and then open the file for editing.
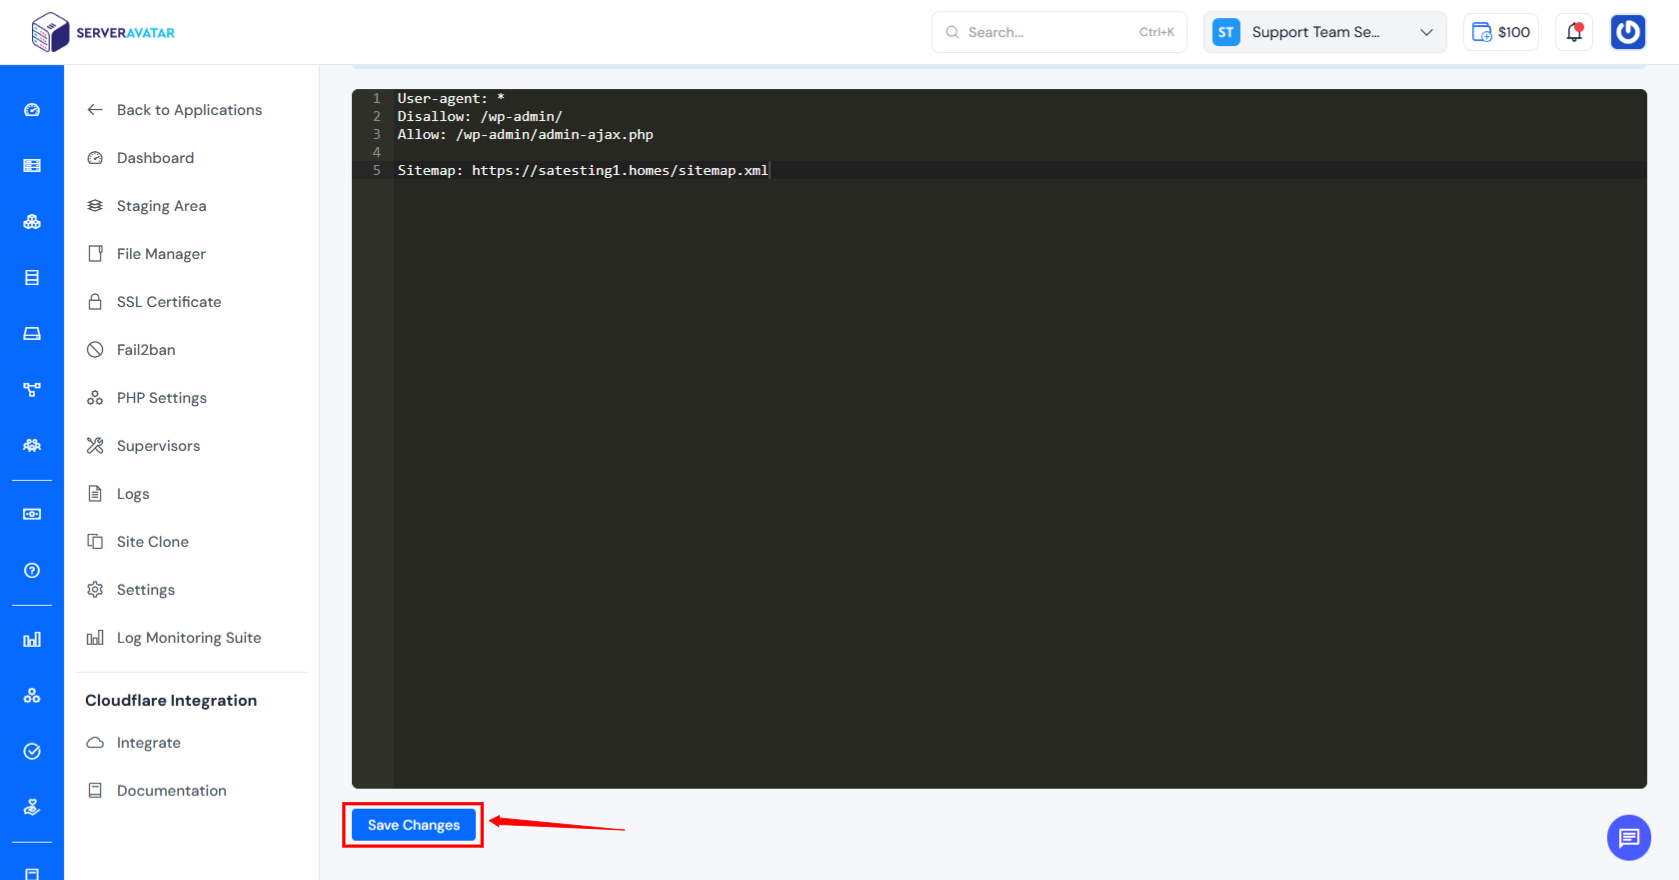
Step 6: Add or Update the Rules
Here’s an example of a standard robots.txt file for a WordPress site:
User-agent: *
Disallow: /wp-admin/
Allow: /wp-admin/admin-ajax.php

Sitemap: https://satesting1.homes/sitemap.xmlExplanation of the above rules:
- User-agent: * — Applies the rule to all bots/crawlers.
- Disallow: /wp-admin/ — Blocks bots from accessing the admin area.
- Allow: /wp-admin/admin-ajax.php — Lets bots access AJAX calls needed for some plugins.
- Sitemap: — Helps bots find your sitemap for better indexing.
You can customize this based on your needs. For example:
To block an entire folder:
Disallow: /private-data/To block a specific file:
Disallow: /secret-page.htmlStep 7: Save the File
Once you’ve made your edits, click Save or Update to apply the changes.
Step 8: Verify the robots.txt File in Your Browser
- Visit your application URL in your browser with “/robots.txt” at the end of the URL:
- https://satesting1.homes/robots.txt
- check with your domain here i used my domain
- You should now see the file and all the changes you’ve made.
Important Considerations:
- Cache Clearing: After making changes, especially if you’re using a caching plugin (like WP Super Cache or W3 Total Cache), clear your website’s cache.
- Google Search Console: After editing your robots.txt, it’s a good idea to use the robots.txt Tester tool in Google Search Console (under “Legacy tools and reports” > “robots.txt Tester”) to ensure your changes are working as intended and aren’t blocking anything vital.
- Don’t Overuse Disallow: Only Disallow what you genuinely don’t want search engines to crawl (e.g., admin pages, draft content, plugin files). Disallowing important content can severely impact your SEO.
- Subdomains: Each subdomain often requires its own robots.txt file.
Conclusion
Editing your robots.txt file in WordPress might seem technical, but with the right tools and understanding, it’s a manageable task. Whether you opt for the user-friendly interface of an SEO plugin or prefer the direct control of FTP/File Manager, correctly configuring this file is a small but significant step in optimizing your website’s search engine visibility. Remember to always proceed with caution, verify your changes, and prioritize allowing search engines to access your valuable content. A well-configured robots.txt file is a silent workhorse, helping to ensure your site is crawled efficiently and indexed effectively, ultimately contributing to your overall SEO success.
FAQ
Q1: What is robots.txt and why is it important for WordPress?
The robots.txt file is a plain text file that instructs web crawlers (like Googlebot) which pages or files they can or cannot request from your site. It’s important for WordPress because it helps control what search engines crawl and index, preventing private or less important areas (like your admin login) from being unnecessarily crawled, and guiding bots to your important content, which can improve SEO.
Q2: Do I really need a robots.txt file for my WordPress site?
While not strictly mandatory for a site to be indexed, having a robots.txt file is highly recommended. WordPress automatically generates a basic virtual robots.txt if one isn’t present, but creating and optimizing your own (especially via an SEO plugin) gives you more control over how search engines interact with your site. It’s particularly useful for larger sites or those with content you wish to exclude from search results.
Q3: Can robots.txt block a page from appearing in search results?
robots.txt can prevent search engines from crawling a page, but it doesn’t guarantee the page won’t appear in search results. If other sites link to the disallowed page, or if Google finds it through other means, it might still appear in search results, often without a description. To definitively prevent a page from being indexed, use the noindex meta tag in the page’s HTML, along with disallowing it in robots.txt (though disallowing might prevent the bot from seeing the noindex tag).
Q4: What’s the difference between robots.txt and the noindex tag?
robots.txt: Tells crawlers not to visit (crawl) certain parts of your site. It’s a suggestion, not an absolute block on indexing if the page is found elsewhere.
noindex tag: Tells crawlers not to index a specific page, even if they crawl it. This is a stronger directive for preventing indexing. A page must be crawled for the noindex tag to be seen.
Q5: What should I NOT disallow in my robots.txt file?
You should not disallow any content that you want search engines to crawl and rank. This includes:
Your XML sitemap (you should actually point to it using the Sitemap: directive).
All your main pages, posts, and categories.
Your CSS and JavaScript files, as Google needs to crawl these to properly render your pages and understand their mobile-friendliness and user experience.
Q6: How do I know if my robots.txt file is working correctly?
The best way is to use Google Search Console’s robots.txt Tester tool. This tool allows you to input your robots.txt content and test how Googlebot would interpret it for specific URLs on your site. You can also simply type yourdomain.com/robots.txt into your browser to view the live file.
Q7: I made a mistake in my robots.txt file. What should I do?
Immediately correct the error using either your SEO plugin’s editor or by manually editing via FTP/File Manager. A mistake, especially a broad Disallow: /, can de-index your entire site. After correcting, clear your website’s cache and re-test with Google Search Console.
Q8: Can I use robots.txt to block spam bots?
While robots.txt can deter well-behaved search engine bots, it’s not effective against malicious or spam bots. These bots often ignore robots.txt directives. For spam protection, you need other security measures like firewalls, CAPTCHAs, and security plugins.