
OctoberCMS Deploy can feel like solving a Rubik’s cube blindfolded when working with a content management system (CMS). If you have selected OctoberCMS for your projects, great choice! It’s powerful, flexible, and it is not complicated.
But here’s the thing, many people get stuck during deployment process. However, the good news for you? We’ve got you covered.
In this article, we’re going to make deploying OctoberCMS as easy as brewing a cup of coffee. Whether you’re setting it up on a personal project, client site, or production server, we’ll guide you every step of the way. No headaches, no complex configurations, just a straightforward approach to get your website live and running.
What is OctoberCMS?
OctoberCMS is a free, open-source CMS built on the Laravel PHP framework. Think of it as the “Lego set” of content management; modular, intuitive, and developer-friendly. You get full control of your code while still benefiting from user-friendly features.
Why Choose OctoberCMS?
Why OctoberCMS, you ask? Imagine WordPress and Laravel had a combined version. You get the robustness of Laravel and the content handling power of a CMS. Here are some reasons that every user like about it:
- Built on Laravel (clean, elegant code)
- Backend made for any people, not just coders
- Flexible for small sites or large-scale applications
- Great for custom development without headaches
Prerequisites Before Deployment
Before you start, make sure you’ve got these in place:
- A VPS or Shared Hosting account
- Domain name and access to DNS settings
- PHP version 8.0 or higher
- Composer installed
- MySQL or MariaDB
- Web server (Apache, NGINX, or LiteSpeed)
If you’re using ServerAvatar, most of these are handled for you automatically!
Choosing the Right Environment (Local vs Live Server)
You can install OctoberCMS either locally (for testing) or directly on a live server (for production) as per your requirements.
Local Setup Pros:
- Safe testing without breaking anything live
- Easy to roll back changes
Live Setup Pros:
- Ready for the world
- Immediate deployment
If you’re planning client work or business sites, skip local, and you can directly go live with ServerAvatar.
Why Choose ServerAvatar for OctoberCMS?
When it comes to deploying OctoberCMS easily and efficiently, ServerAvatar is a game-changer. It bridges the gap between raw VPS power and beginner-friendly control, offering the best of both worlds.
Here’s why ServerAvatar is the perfect match for OctoberCMS users:
1. Easy OctoberCMS Installation
ServerAvatar makes the installation process very easy and hasslefree. No need to depend on command lines for manual setup. With ServerAvatar, you can deploy OctoberCMS easily with ServerAvatar’s user-friendly interface within minutes.
2. Fully Managed Server Stack
Choose your preferred tech stack, Apache, NGINX, with PHP, MySQL, MariaDB. ServerAvatar handles server configuration, optimization, and software updates so you can focus on your project.
3. Easy SSL and Domain Configuration
Install automatic SSL with auto-renewal feature and easily add your domain without touching DNS files manually. Everything is managed from an intuitive panel.
4. Resource Monitoring and Auto Backups
ServerAvatar constantly monitors your server’s health. You can also take instant backups and schedule automated backups, so your site stays protected even if something goes wrong.
5. Lightweight and Affordable
Compared to other platforms, ServerAvatar is cost-effective and doesn’t add unnecessary bloat. It’s ideal for freelancers, startups, and agencies looking to manage multiple OctoberCMS projects easily.
6. Developer-Friendly Tools
With SSH access, Git deployment support, staging environments, and server and application logs, ServerAvatar is packed with tools developers need.
Using ServerAvatar for your OctoberCMS projects means faster setup, smoother performance, and peace of mind, all in one platform. Whether you’re building a personal blog or a complex web app, ServerAvatar makes the deployment process simple and stress-free.
Step-by-Step Installation of OctoberCMS:
Let’s make the OctoberCMS setup deployment easy and straightforward.
Step 1: Connect your VPS with ServerAvatar
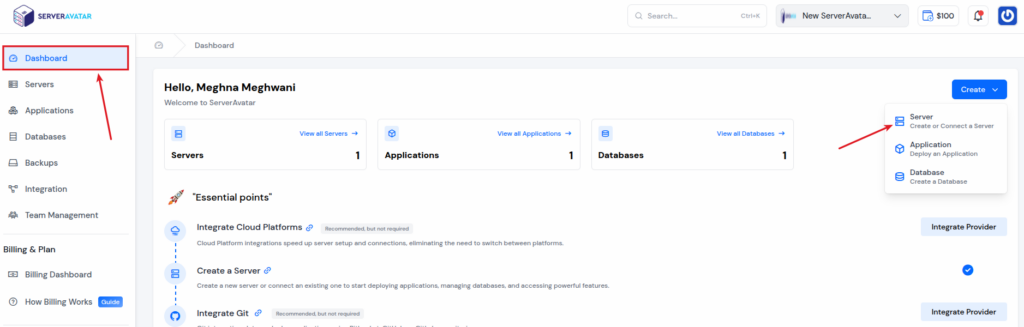
- Log in to your ServerAvatar account and navigate to the ServerAvatar Dashboard.
- Click on Create >> Server option.
Using Self-Managed Server:
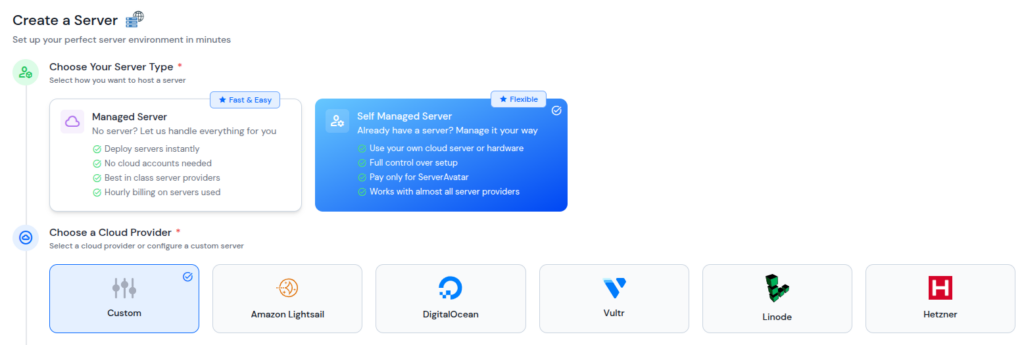
- Select your server type as a “Self Managed Server” (you can connect your own custom VPS from any cloud provider with ServerAvatar by using this option)
- Select your preferred cloud provider from given options. You can select “Custom” option and connect your VPS with IP Address and Root Password.
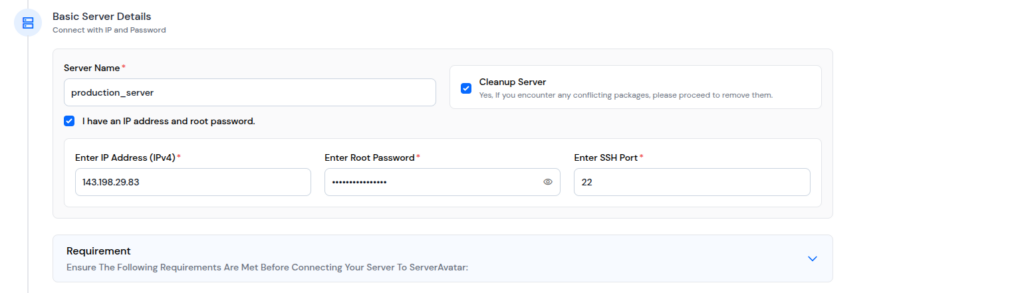
- Enter basic details of your server such as server name, IP address, root password, and SSH port (if you don’t have the IP address and root password, ServerAvatar will provide you the script to run in your server to connect your server with ServerAvatar)
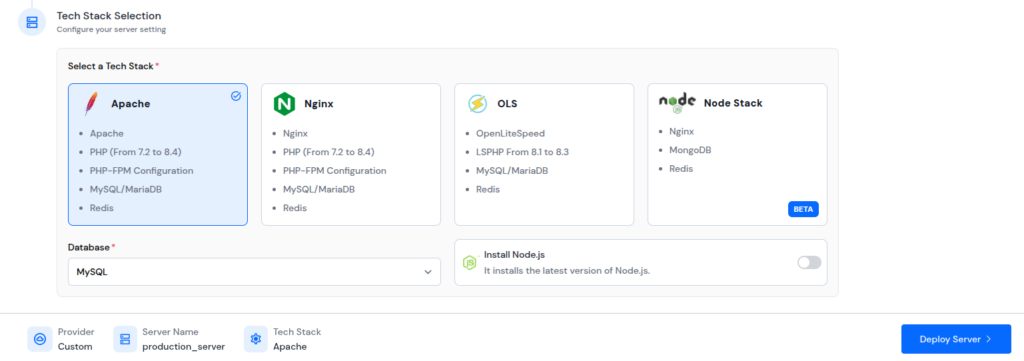
- Select your preferred tech stack as I’m selecting here Apache
- Select your preferred database as I’m selecting MYSQL here
- Click on the “Deploy Server” button
ServerAvatar will automatically deploy your VPS
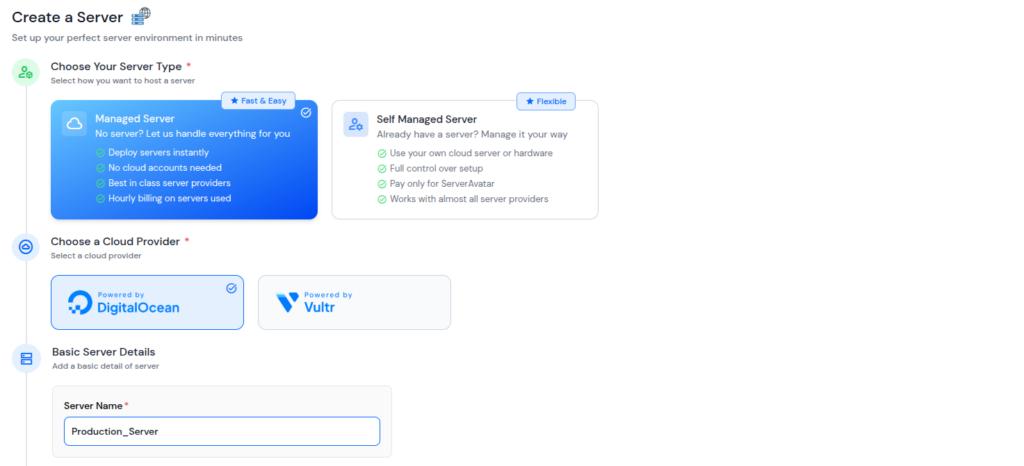
Using Managed Server:
- Select your server type as a “Managed Server” (You can directly create a server as per your requirements on DigitalOcean or Vultr by ServerAvatar, no need to add your own custom VPS from any cloud provider)
- Select your preferred cloud provider
- Enter your required server name
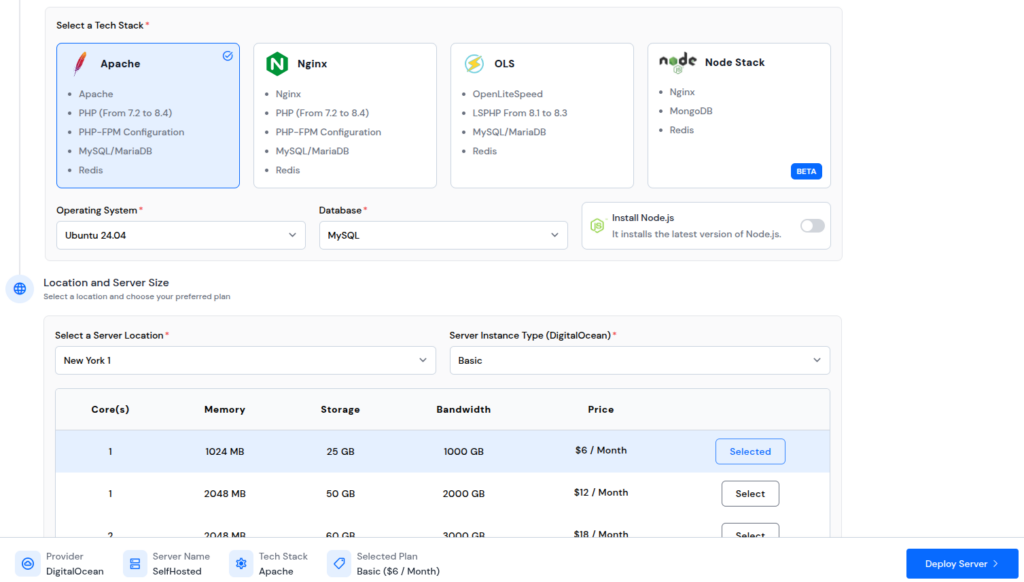
- Select your preferred tech stack, operating system, and database
- Select your server location and instance type
- Click on the “Deploy Server” button
It will take about 10-15 minutes to complete the server deployment and setup
Each web server has its perks:
- Apache: Great compatibility, especially with .htaccess
- NGINX: Lightweight, high-performance

Step 2: Create Custom PHP app
- Click on “Server Dashboard” icon for the server you want to host your October CMS.

- Once you’re inside your Server panel, click on “Applications” tab from the left side bar. Then click on “Create an Application” button.

Fill out the form for creating the application:
- Enter your application name
- Select the domain from primary and test domain (as ServerAvatar providing test domains to create application without your own domain)
- Enter the domain name
- Select the method as “Custom PHP”
- Click on “Create Application” button
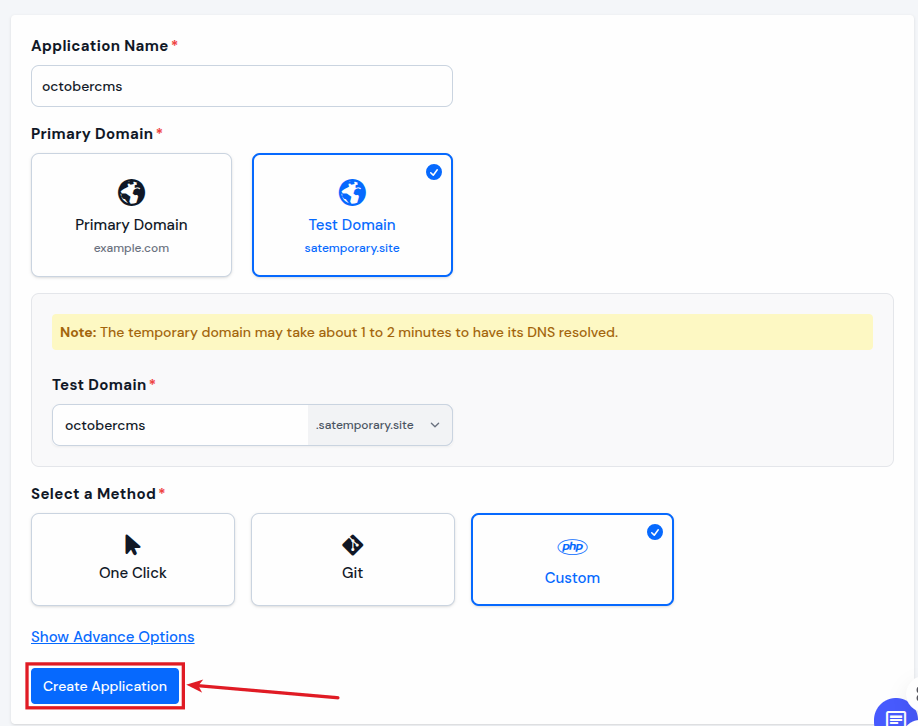
That’s it, your Custom PHP application for October CMS is created successfully.
Step 3: Create Database for October CMS

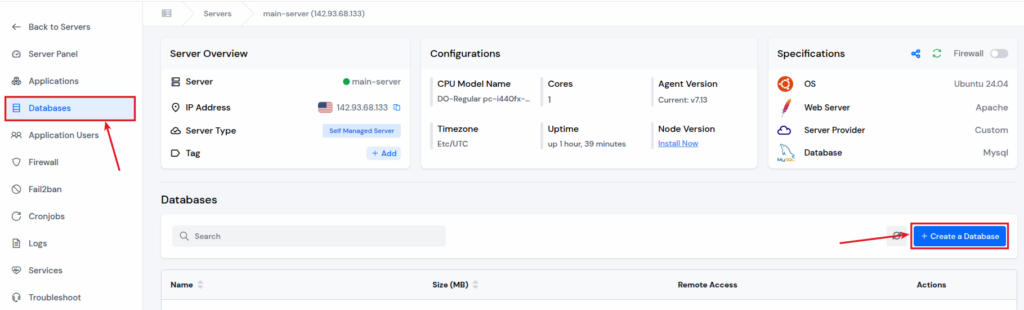
- Once you’re inside your Server panel, click on “Database” tab from the left side bar. Then click on “Create a Database” button.
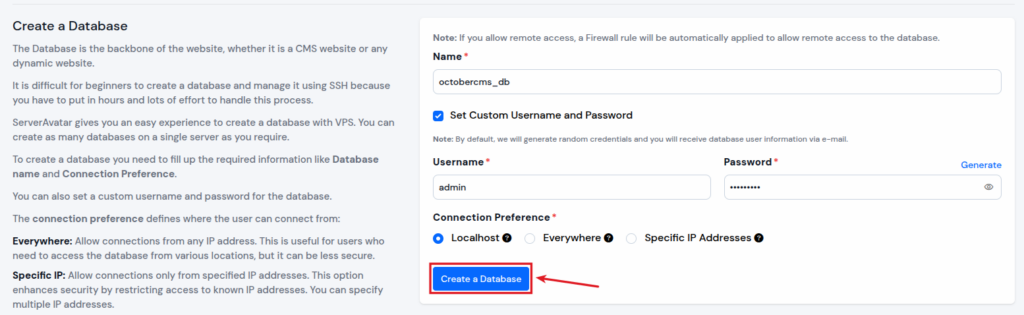
Fill out the details for creating the database:
- Enter your database name
- Usually, ServerAvatar sets credentials for your database. However, you can set your Custom Username and Password for Database by selecting the checkbox for it. Enter your Username and Password.
- Select your connection preference for your database that from where you want to allow connections to your database
- Click on “Create a Database” button
Step 4: Pre-Setup for October CMS
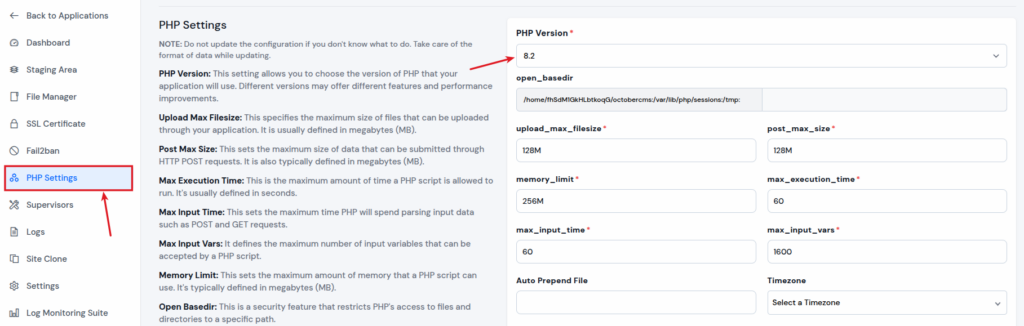
Make sure to check out the PHP version by navigating to your Application Dashboard >> PHP Settings. As mentioned above, PHP 8.0 or higher version is required.
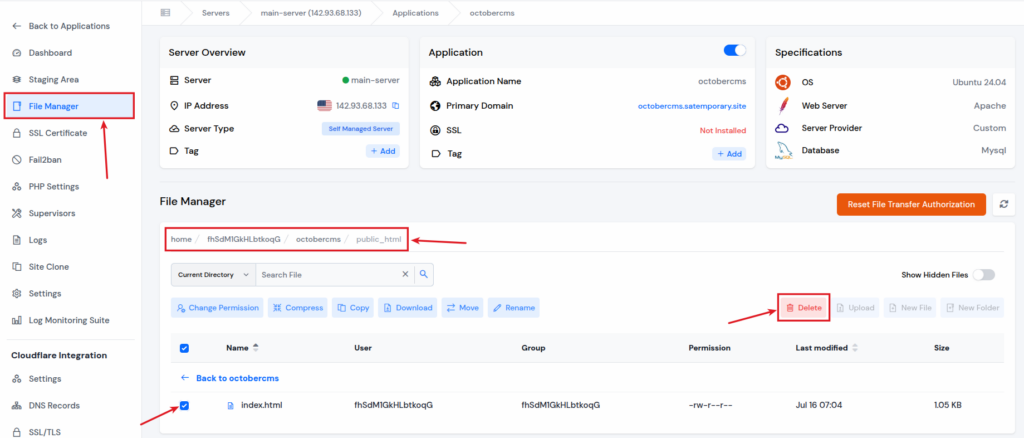
Navigate to the “File Manager” from the application panel. Go to the “public_html” directory, select and delete the “index.html” file by using delete button.
Enable the “SFTP/SSH Credentials” for your application from ServerAvatar. Navigate to the “Application Dashboard”.
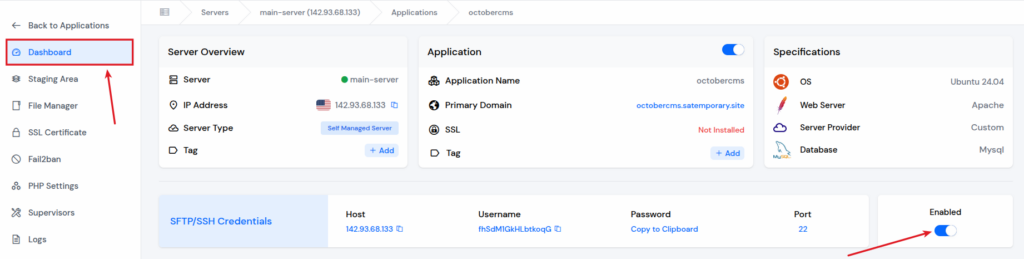
Open the Terminal and connect your server via SSH using these credentials.
ssh username@IP_address- Enter username mentioned in the ServerAvatar Dashboard.
- Enter the IP address mentioned in the ServerAvatar Dashboard.
- Enter the password mentioned in the ServerAvatar Dashboard when prompted for it.

Step 5: Install October CMS
Now, let’s start the process to download and install the October CMS.
- Navigate to “public_html” directory in the application directory. Use “cd” command to change the directory and “ls” command to list out the content for the directory. use the command to navigate:
cd application_directory/public_htmlEnter the below command for downloading the October CMS.
composer create-project october/october .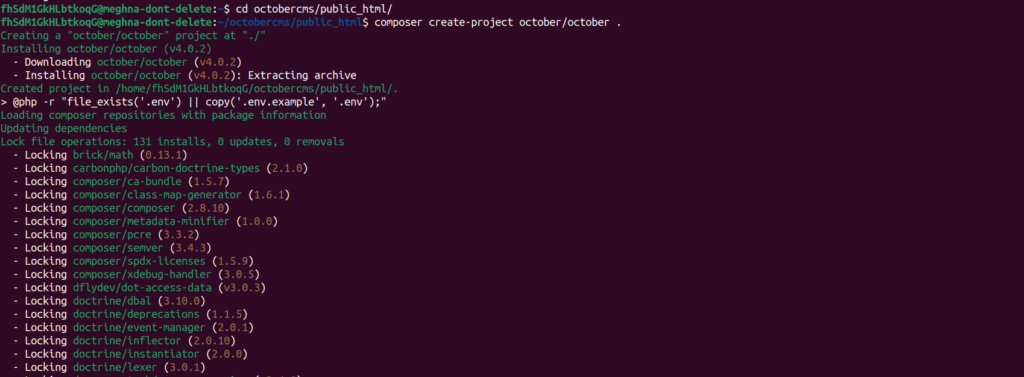
Install the downloaded October CMS by using the command below.
php artisan october:install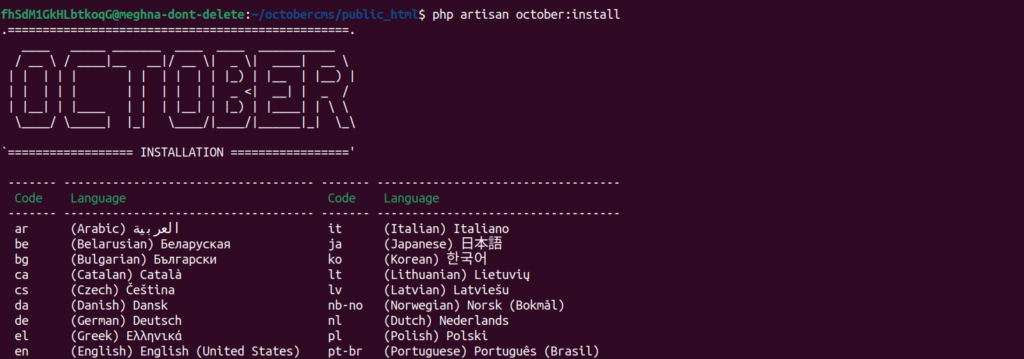
Navigate to the “File Manager” from application dashboard in ServerAvatar Panel. Click on the “public_html” folder, and enable the toggle button for “Show Hidden Files” from top right corner.
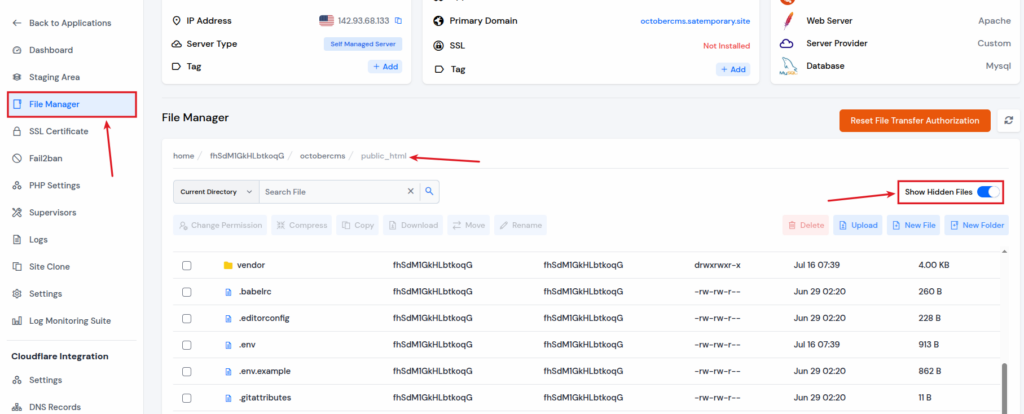
- Find and open the “.env” file from the public_html directory. Find out the “Database Details” and “App_URL” and enter the appropriate details.
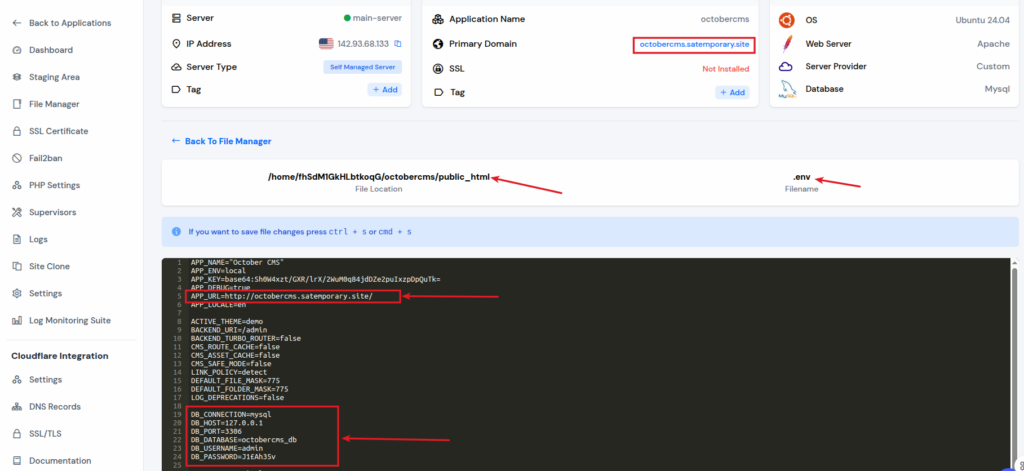
- APP_URL: Enter your application URL next to the “APP_URL” field. You can copy your application URL from the details given above.
- DB_CONNECTION: Usually, it is pre-entered. Check for it and change if it is not correct.
- DB_HOST: Enter your host as you have entered before while creating a database. (127.0.0.1 is for localhost)
- DB_PORT: Enter the Database port (Usually, it is 3306)
- DB_DATABASE: Enter your database name
- DB_USERNAME: Enter your database username
- DB_PASSWORD: Enter your database password
Click on the “Save Changes” button after adding your appropriate details from the bottom of the panel.
Open the Terminal again and connect your server using SSH as we did before. Navigate to the “public_html” directory for your application as we did before.
- Run below command to run database migrations in October CMS (October CMS will look for migrations that are pending in the database and will execute them to update the database schema):
php artisan october:migrate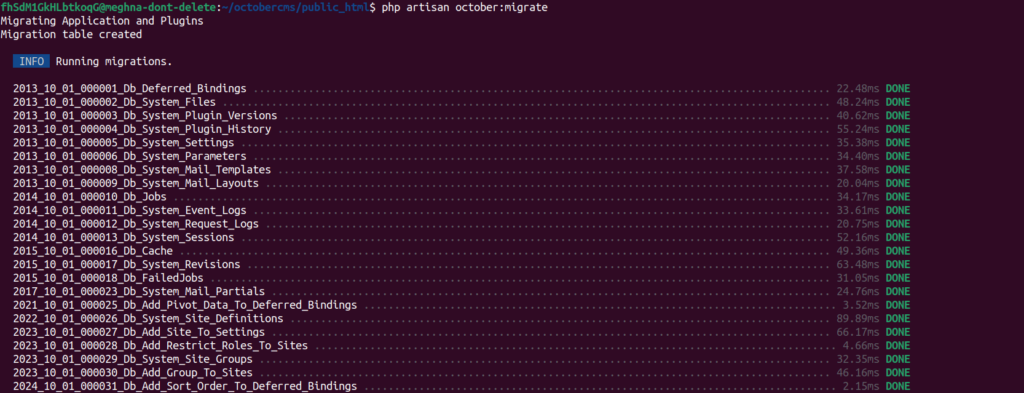
Step 6: Open October CMS and Create Account
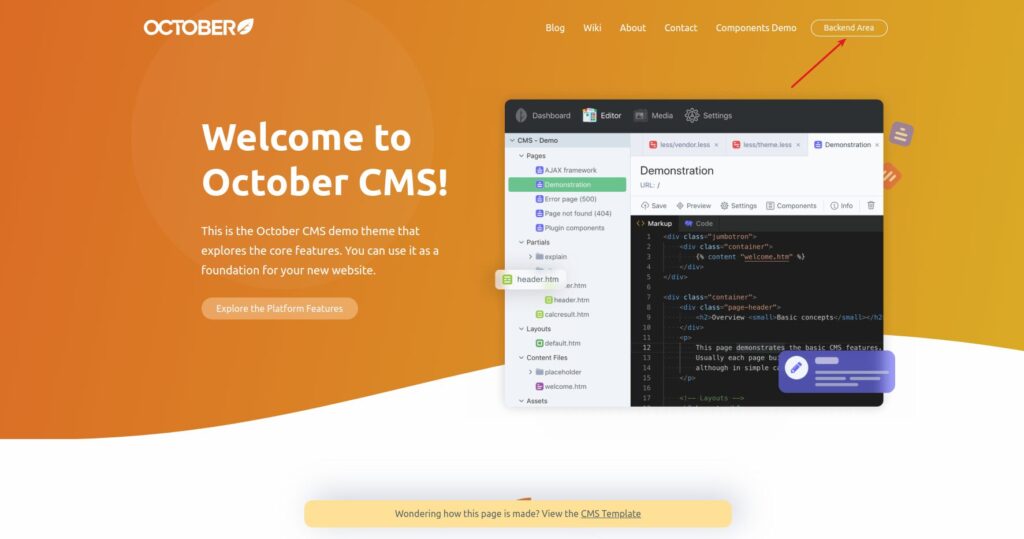
- Open your application URL from the application dashboard of the ServerAvatar panel, and you will see your October CMS deployed successfully.
- Click on the “Backend Area” button from top right corner of the October CMS main page.
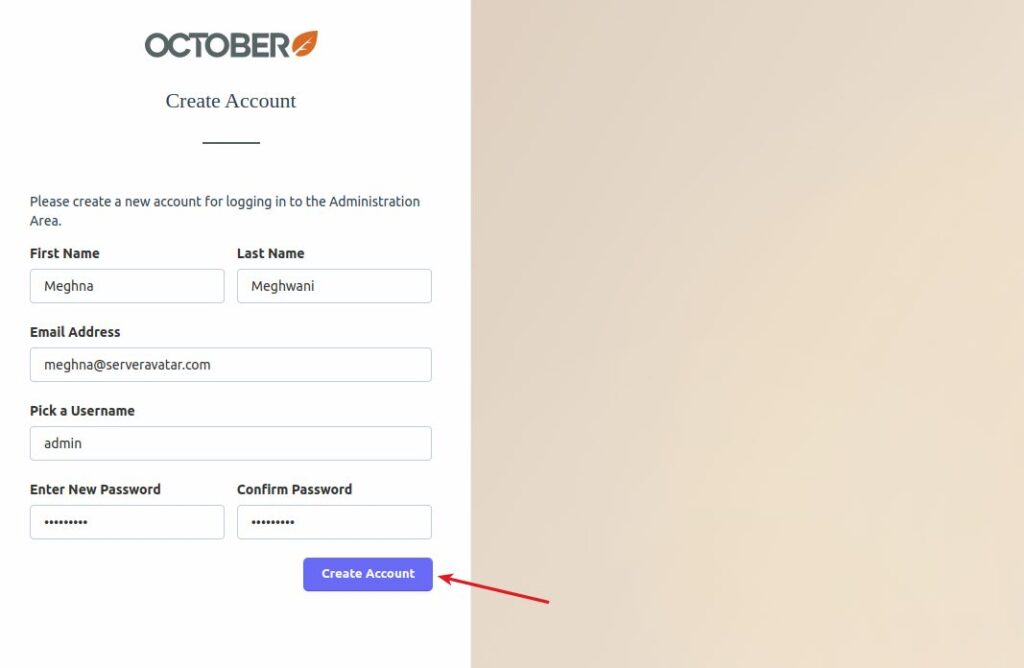
- Fill up the details such as, First Name, Last Name, Email Address, Username, and Password.
- Click on the Create Account button.
After creating an account, you will see the October CMS Dashboard as you can see in the image below.
Troubleshooting Common Deployment Issues
- White screen? – Check file permissions and PHP version.
- Database errors? – Double-check .env settings and user privileges.
- SSL not working? – Clear browser cache and reissue certificate.
- Pro Tip – Use ServerAvatar’s Logs tab to quickly diagnose problems.
Conclusion
Deploying OctoberCMS doesn’t have to feel like decoding alien language. With the right tools, especially with ServerAvatar, you can go from zero to live in minutes, not hours.
Whether you’re a freelancer, agency, or a beginner who is just starting out, take the stress out of deployment. Focus on building amazing content, and let the tech part be smooth and stress-free.
FAQs
1. Can I use OctoberCMS on shared hosting?
Yes, but for better performance and flexibility, VPS hosting (like ServerAvatar) is recommended.
2. Is OctoberCMS beginner-friendly?
Absolutely! The backend is clean, and the community is super helpful.
3. Do I need to know Laravel to use OctoberCMS?
Not necessarily. Laravel knowledge helps, but it’s not required to get started.
4. How can I update OctoberCMS safely?
Use the built-in updater, make sure to always back up your data first!
5. Does ServerAvatar support staging environments?
Yes! You can create a staging setup easily to test before pushing to live.