DigitalOcean is one of the best and most affordable cloud service providers used by more than 600K customers within 185 countries. It helps you make infrastructure management easier so you can spend more time on the business than any setup process, making it popular among others.
With DigitalOcean, you can quickly deploy your droplet/cloud server with the custom configuration you need, even if you are not a techie person. You just need to choose the specification that meets your requirements and easily deploy the droplet with one click.
But deploying a droplet is not enough for you to start. You need to manage it accordingly. And that’s why SeverAvatar came on the market. You can deploy WordPress or any PHP site within a server in a matter of seconds.
If you are new to Digitalocean or want to learn Digitalocean droplets in-depth, We recommend you to refer ultimate digitalocean droplet guide.
Create a DigitalOcean Droplet
DigitalOcean offers $100 free credit for a new user so if you don’t have an account on DigitalOcean, grab it.
You can integrate your DigitalOcean account with ServerAvatar to eliminate the process of creating a droplet without going to DigitalOcean.
Once you are logged in, you’ll see the dashboard like the image below.
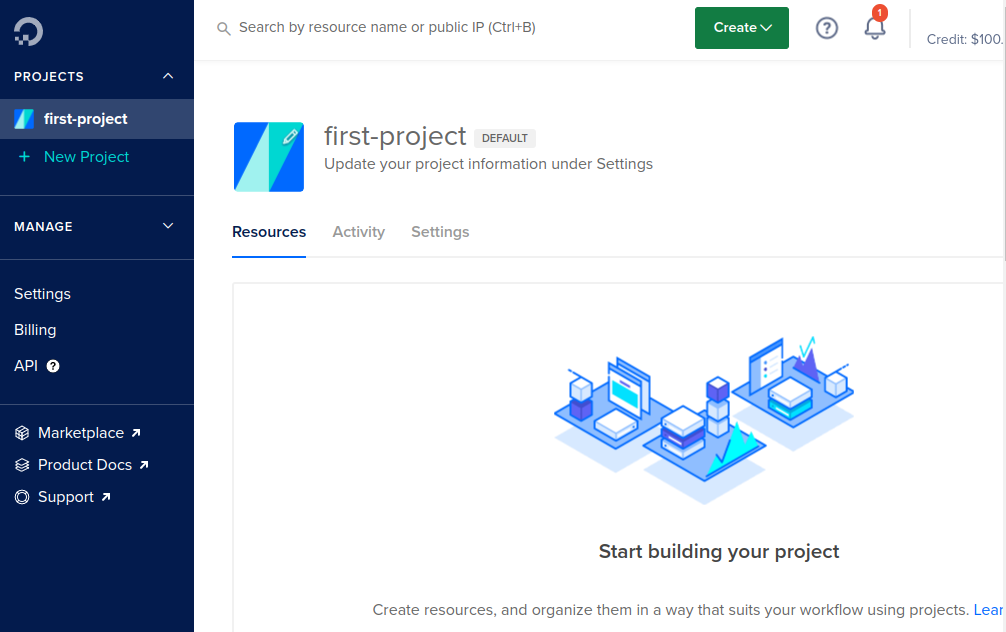
Now click the green-coloured Create button on top of the screen, and you’ll see the first option, Droplets, from the dropdown. Click on it, and the server configuration process begins to start.
Configure a server
Choose an image
Ubuntu is the best operating system for PHP development. ServerAvatar supports 64-bit Ubuntu 18.04, 20.04, and 22.04 .
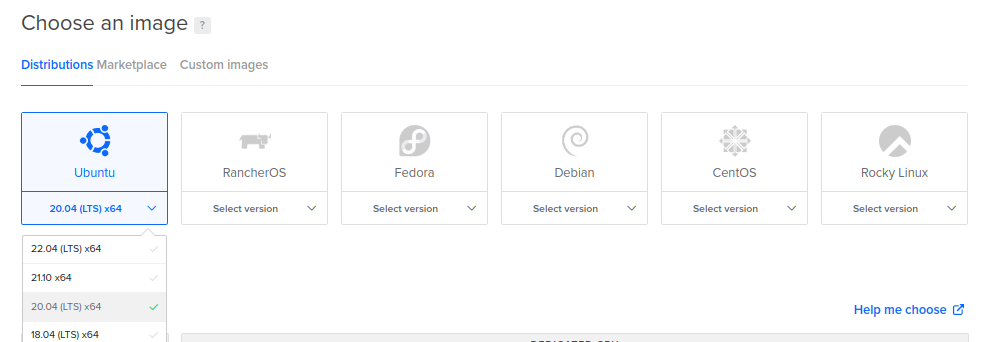
You can select an operating system from the dropdown on the Ubuntu image like above.
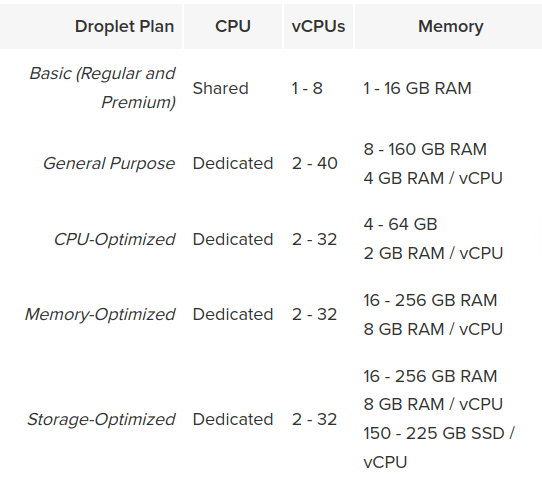
Choose a plan
Choose the right droplet plan according to your workload.
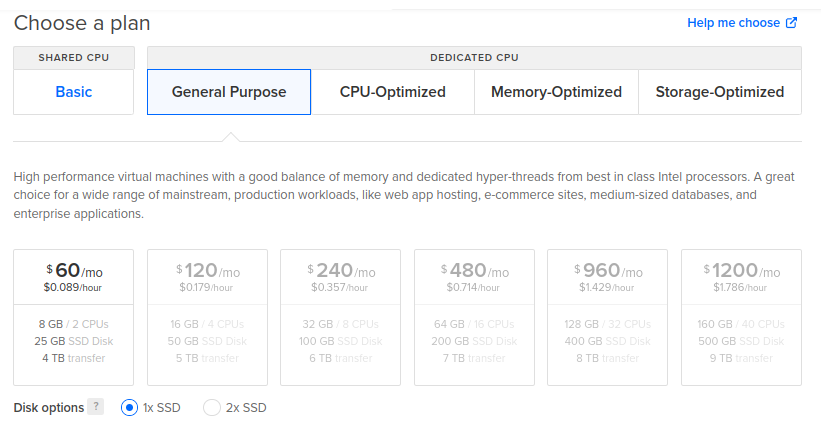
Plans include Basic: a shared CPU droplet, meaning the hyperthreading assigned to the droplet is shared between multiple other droplets. And with dedicated CPU, plans included are General Purpose, CPU-Optimized, Memory-Optimized, and Storage-Optimized.
Here is a detailed overview of the plan.
Add Block Storage
Adding block storage is to keep your data separate from your droplet and replicate across different racks, so data remains accessible even in the event of failure.
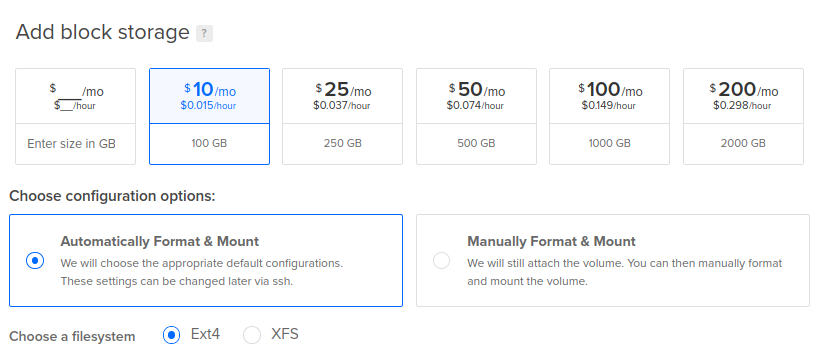
You scale block storage from 1GB to 16TB and resize them if you need more space.
Choose a datacenter region
Choose a datacenter region according to your needs.
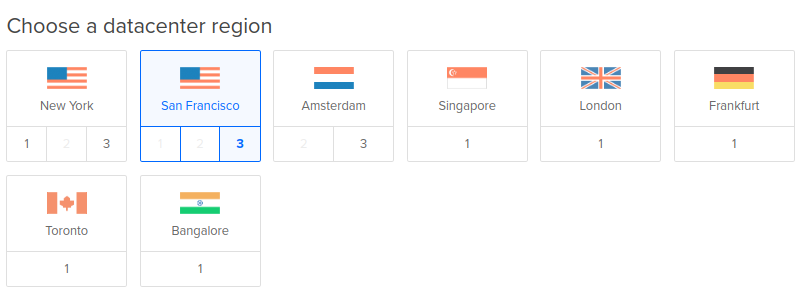
Here is the Regional Availability Matrix of data centers across multiple countries.
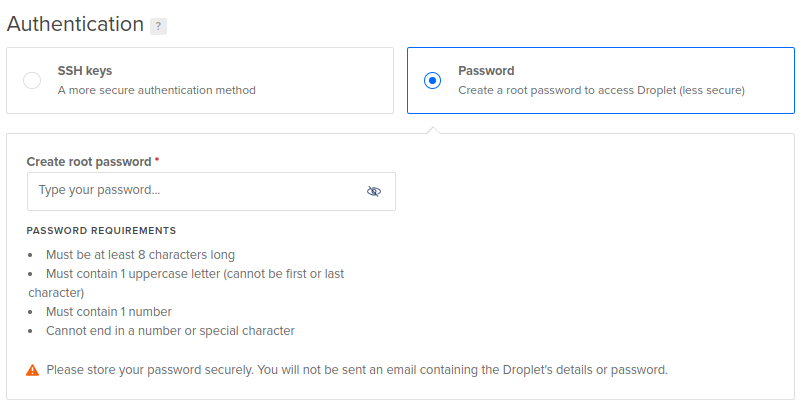
Authentication
You can either Add SSH keys or set a root password to access droplets. We recommend adding SSH Keys because it’s a more secure authentication method.
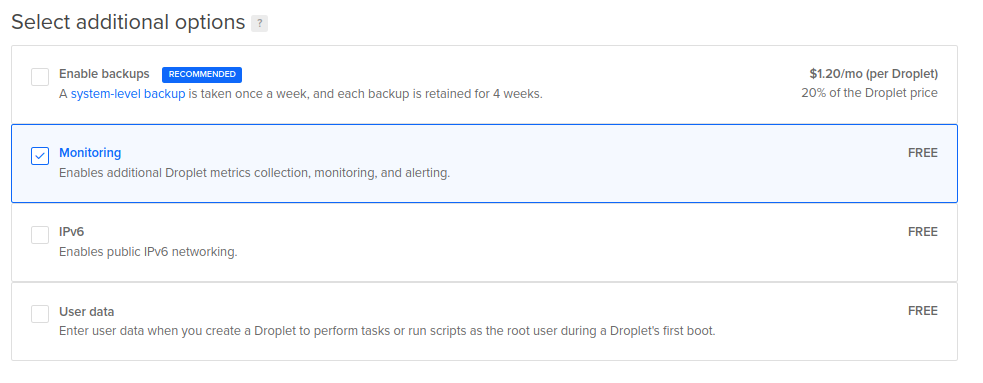
Select additional options
Additional options include Enable Backup, Monitoring, Enable IPv6, and more.
Finalize and create
It’s a final step toward creating a droplet. Add tags to your droplet, choose hostname, and select how many droplets you want to deploy with the same configuration.
Click on the Create Droplet button, and that’s it. Your droplet is now ready to rock. You can see all the details related to the droplet on your digitalOcean dashboard.
Connect a DigitalOcean droplet with ServerAvatar
If you’re a new user , you can register here.
Once you are on the server panel, you can start connecting a server by using relevant details. The server connection process is the same for all the servers you are willing to connect with ServerAvatar. You can easily connect to a server without accessing the command line.
follow this link If you want to connect a server with an IP address and root password.
And, if you want to connect a server with an IP address only, follow this link.