Hostinger is a reliable web hosting company that offers the best uptime and customer service, as well as cloud-based hosting for agencies to create multiple websites for clients. its provide an easy to use interface to create VPS server with the configuration you need. More than half million people have given Hostinger the privilege to be their Cloud hosting provider.
Let’s say, for example, you are the owner of multiple websites, then it might be possible that you will exceed the limit of shared hosting at one time. So Hostinger provides multiple VPS plans that suit your business needs. A virtual private server is a space you can use by installing available popular OS like Ubuntu with complete control. Of course, you can install your own software or OS also.
Having a VPS to host multiple websites is not enough. You need to manage it accordingly. And that’s why ServerAvatar is the best option to choose from. With ServerAvatar, you can easily manage multiple VPS/VM/Cloud Instance/Dedicated or Bare Metal servers. Along with multiple applications within it.
This article will look at how to connect a Hostinger VPS with ServerAvatar.
Choose Hostinger VPS Server Plan
Hostinger provides 8 different VPS plans that suit your business requirement. Here, for example, we will select the minimum Hostinger Vps Server plan and connect it with ServerAvatar.
You can see all the available plans for VPS here. It also provides a 30-day money-back guarantee, so if you are not 100% satisfied with the plan, you will get a refund within 30 days.
Once you choose an appropriate plan and pay, you can redirect to the Hostinger hpanel. You can see your selected server plan in the panel like the image below.
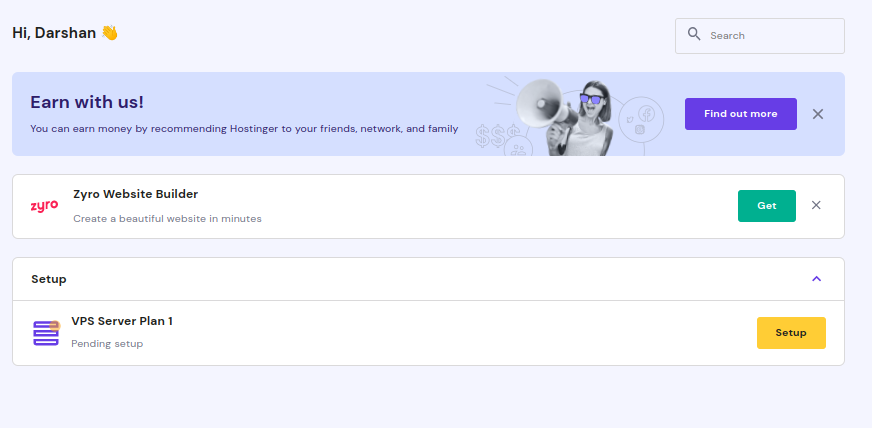
Click on the yellow-colored Setup button to set up the server in a few easy steps.
Setup Hostinger VPS server
You will see the Start Now Button on the screen. Click on it, and the server configuration process will begin.
Select location
VPS is created on the server, so location makes a big difference in speed. Select the appropriate location that is close to you/your users.

After selecting, click on the continue button.
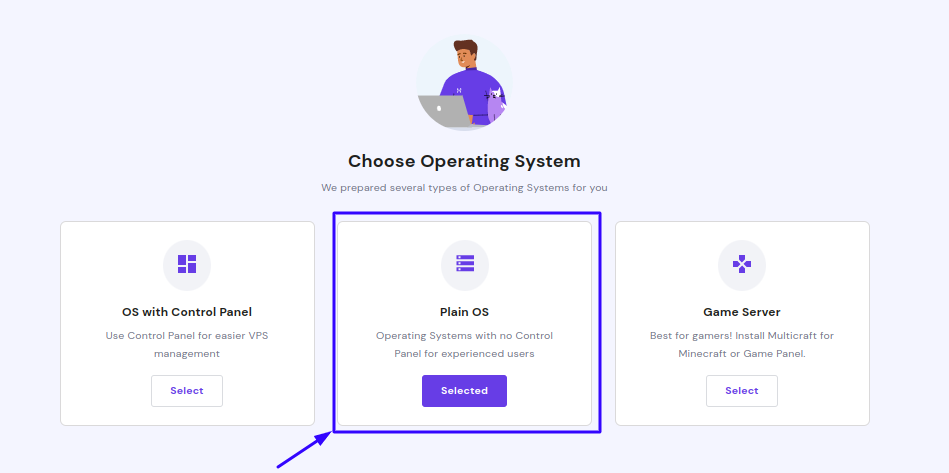
Choose Operating System
Hostinger prepared several types of operating systems for you to choose from. Here, select Plain OS to install an Operating system with no control panel.
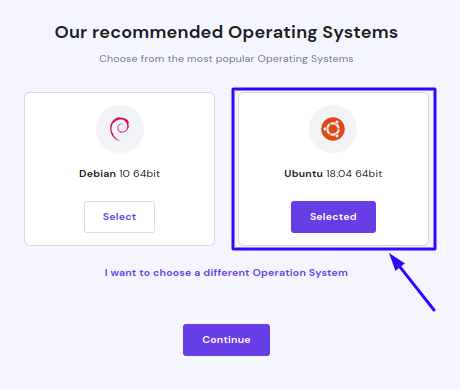
After selecting a plain OS, Hostinger shows the recommended operating system that is popular, like the below image. Select Ubuntu 18.04 64bit.
Create a Hostname, Password, and SSH key for your server
Give Hostname to your server. Hostinger allows only Domain or Subdomain as a hostname; However, in this case, the domain name does not affect connecting your server with ServerAvatar so you can type any domain like test.com, for instance.
Set Root Password, and add an SSH key (optional) to access your server remotely.
Finish Setup
In the next step, review your server configuration, change it if needed, and click on the Finish setup button.
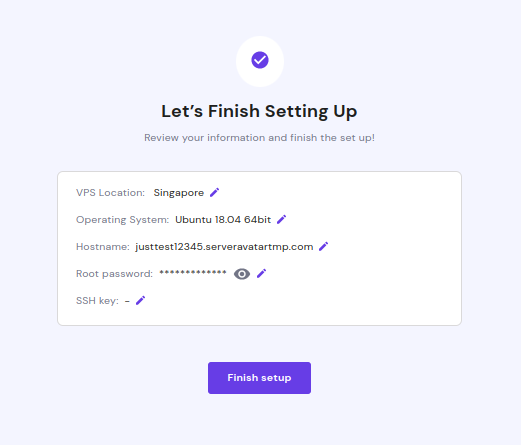
Now sit back and relax until the setup is completed. It takes just a few seconds to complete the process.
Completing the setup process will take you to the Hostinger hpanel.
Reinstall OS
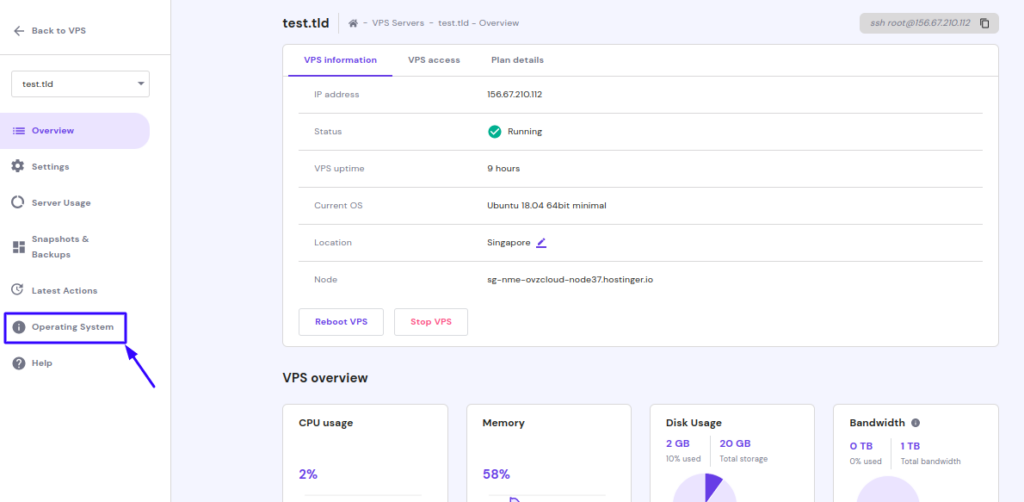
On the panel, you will see all of your services, including VPS servers in use or pending set-up. To avoid conflict, you need to change your server’s OS and for that, access your VPS server by clicking on the Manage button.
Now on the sidebar of the panel, click on the Operating System tab.
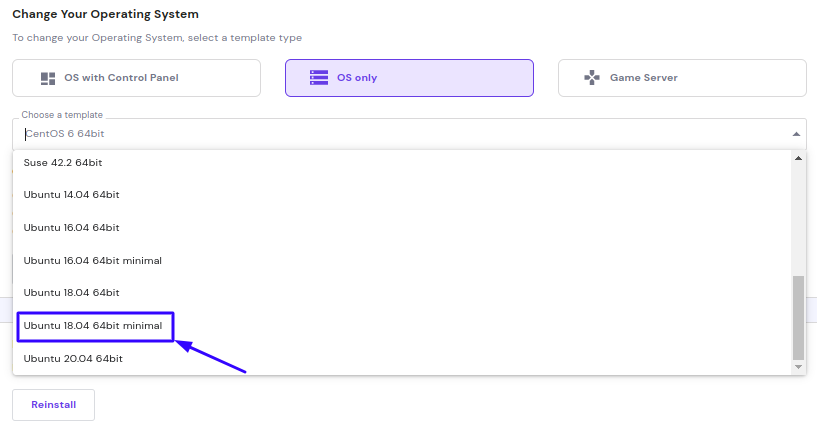
Select OS Only as a template type and choose Ubuntu 18.04 64bit minimal from the dropdown. After selecting, click on the Change OS button. It will take a few minutes to set up the new OS.
Connect your Hostinger VPS server with ServerAvatar
Access the server panel of ServerAvatar. If you are a new user, you can log in by registering here.
Connecting a server is an easy process. You need to enter the IP address and the Root Password of your VPS server and that set.
You can connect a server with an IP address and Root password by following the documentation using the given link.
And, If you want to connect a server without root password, follow this link.