Nowadays, social media is a key platform to increase your market reach, no matter in which profession you are, right? Because it’s trending. But as you have a website, your users also want to connect with you to give feedback about your service, check updates, and debate about the part of the profession that helps better understand critical ideas.
Having a forum on your website makes it easy for you and your users to discuss any aspects of your service. It will increase user engagement and grow your online community.
Forum offers honest advice from real people who care enough about your business or services. It also helps bring your website more views by sharing important content. If you want to start a forum or are a beginner on it, Flarum free software is a great option. You may ask, what are the reasons for choosing Flarum for my website? Let’s have a look at what Flarum is and its features.
What is Flarum?
Flarum is a fast, free and reliable forum solution to host a forum online. It made it simple to enlarge and run a thriving community. It’s PHP-based community software used by many big companies, including Hacksnation, WebDeveloper, and more.
Flarum is open-source, so that you can use plenty of free and paid extensions. And that approach makes it highly customizable. You can also enable/disable forum features if you want to update your forum to the new version. And with that, you can change its default color and CSS via the admin panel.
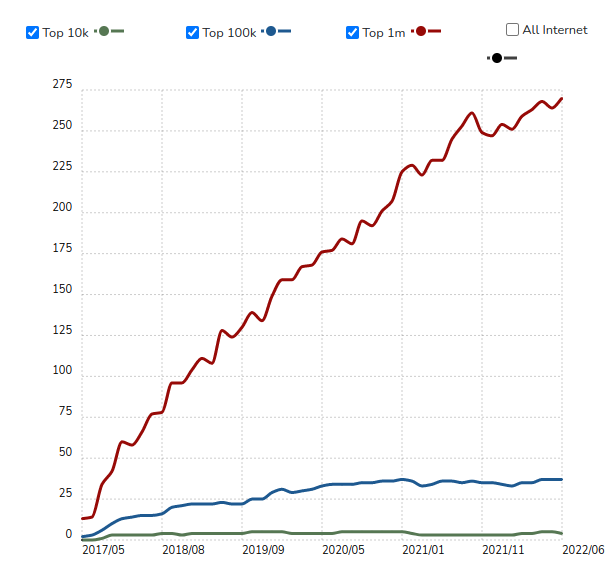
One fabulous thing about the Flarum is it supports more than 30 different languages. Here are the Flarum usage statistics to see how its boom in the market continues over the years.
Features
- Fast, Lightweight, and reliable – Flarum is very quick, with no extra bloat in the codebase. It’s the fastest-loading community builder out there.
- Extensible – You can use lots of free extensions to enhance the power of your forum. Popular extensions include Flarum SEO, Flarum Analytics, Flarum Upload, and much more. Its architecture is amazingly flexible.
- Mobile Responsive – Forum’s smooth animation and gestures make it easy to use on any device.
- Instant Notification – Flarum includes a robust notification system that helps you/users alert every time whenever new activity happens on the forum.
- Real-time discussion – users can discuss live topics in real-time. This powerful feature makes users active all the time.
How to Install and Setup Flarum on a Ubuntu server
Installing Flarum on a server using ServerAvatar takes just 10-15 minutes. ServerAvatar provides a feature-rich panel to manage multiple servers and applications within it at an affordable price than any management panel.
ServerAvatar panel gives you a list of features that is ideal for managing the server perfectly, which includes
- Setup Firewall rules and Cronjob with one click
- Migrate sites automatically
- File manage to upload, edit and download files
- Secure SSH access
- Server level support
Still, there are so many features to use using managing your server.
You can connect a fresh Ubuntu 18.04, 20.04, or 22.04 server with ServerAvatar. You can easily manage multiple VPS/VM/Cloud Instance/Dedicated or Bare metal servers. Let’s connect a server, then.
Connect a server
The server connection process is effortless. Just run below three commands as a root user to download an inspect script. It checks server configuration and starts the installation process.
wget https://srvr.so/install
chmod +x install
./install
Upon executing, it will ask you which web server you want to install: Apache, Nginx, or OpenLightSpeed.You can Select Apache or Nginx with Flarum. It will take 5-6 minutes to connect your server with ServerAvatar.
After the installation is complete, on the terminal/console area, you will find a link to claim your server. Just copy the link and paste it on your browser. And that’s it. Your server is now connected with ServerAvatar.
The server panel looks like the image below.
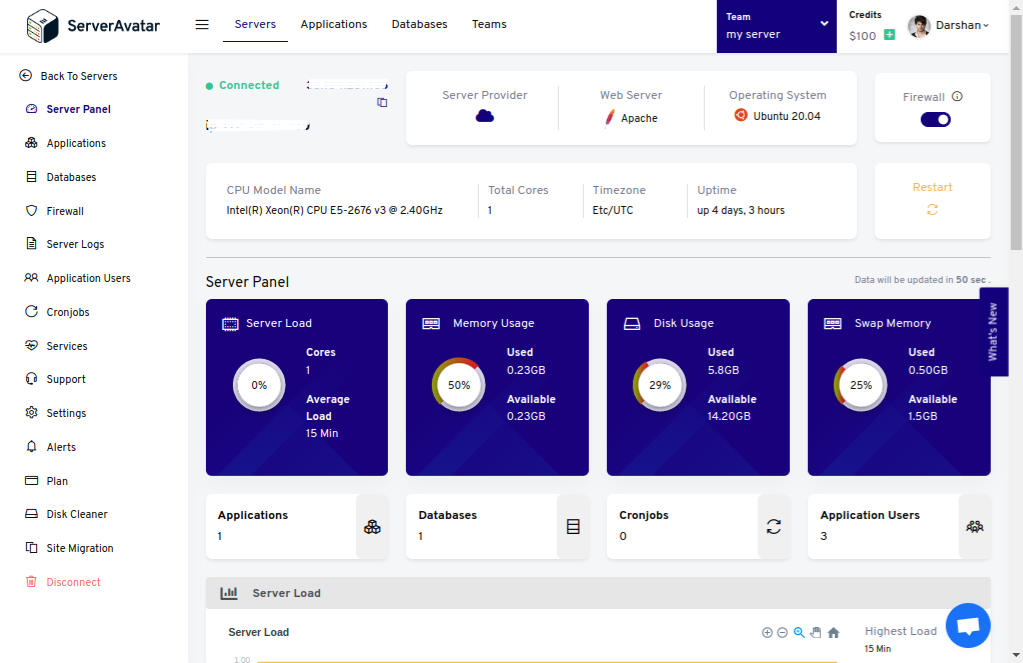
Create a database for Flarum
Once you are on the server panel, you can see all the features on the panel’s sidebar.Navigate to the Database tab from the sidebar and click on the Create button.
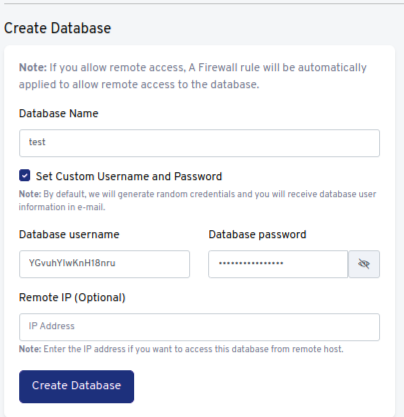
You can see more information on the database creation page, as seen in the above image. You can also set a custom database Username and Password by clicking on the checkbox. Database information is required during installing Flarum.
Create a PHP application
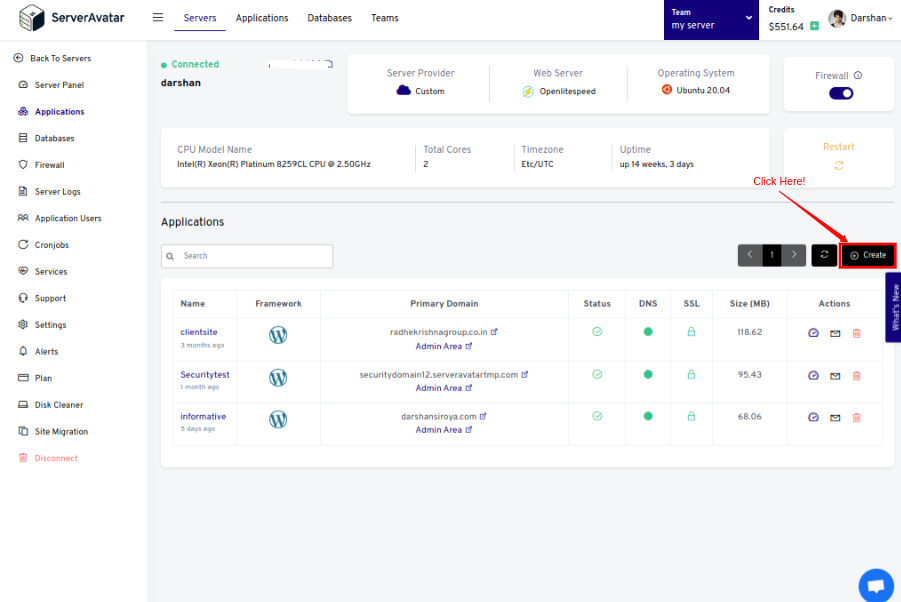
Once you are on the server panel, you can see all the features on the panel’s sidebar. For creating an application, navigate Applications and click on the Create button like the image below.
Edit a Host Record:
If you host Flarum on your domain, then make sure that the domain name points to the IP address of your current server. And for that:
1. Log in to your hosting provider site where you buy your domain
2. Access DNS Manager to edit your DNS records(contact the support team if you don’t find them)
3. Change the IP address of A Record of your website to the current server’s IP address.
Fill in the necessary information in the application creation form, like the Application Name and Domain Name.
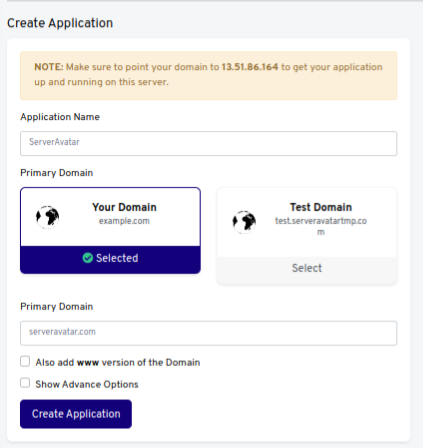
After filling in, click on the Create Application button, and your application is ready for installing Flarum on it.
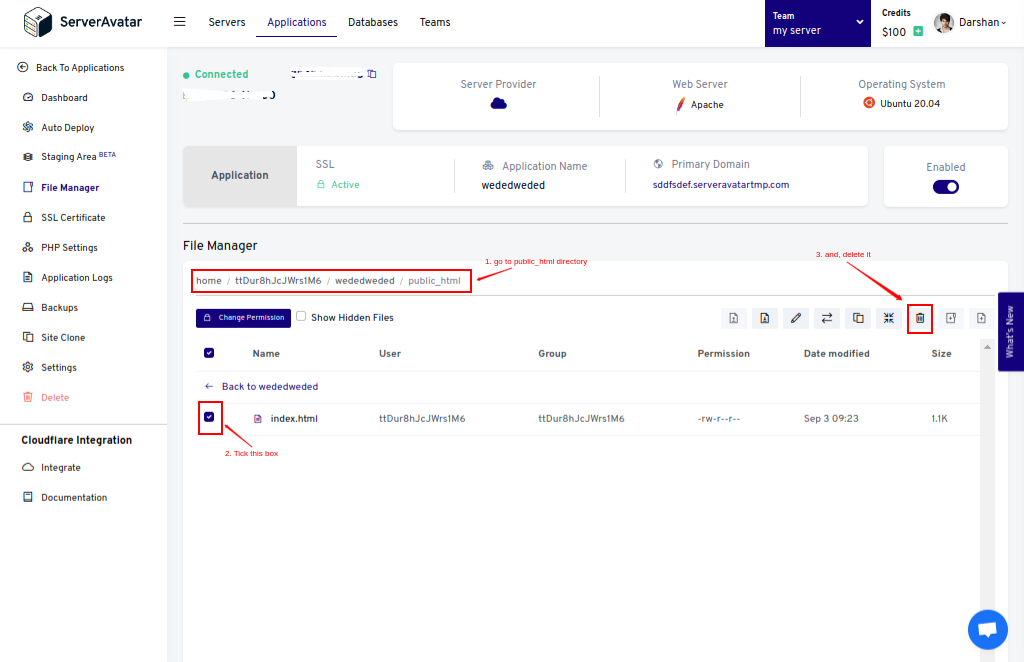
Before that, we need to Delete the Index.html file to avoid forbidden errors happening on the site. And for that, access the File Manager of your created application and delete it like the following image.
Install Flarum
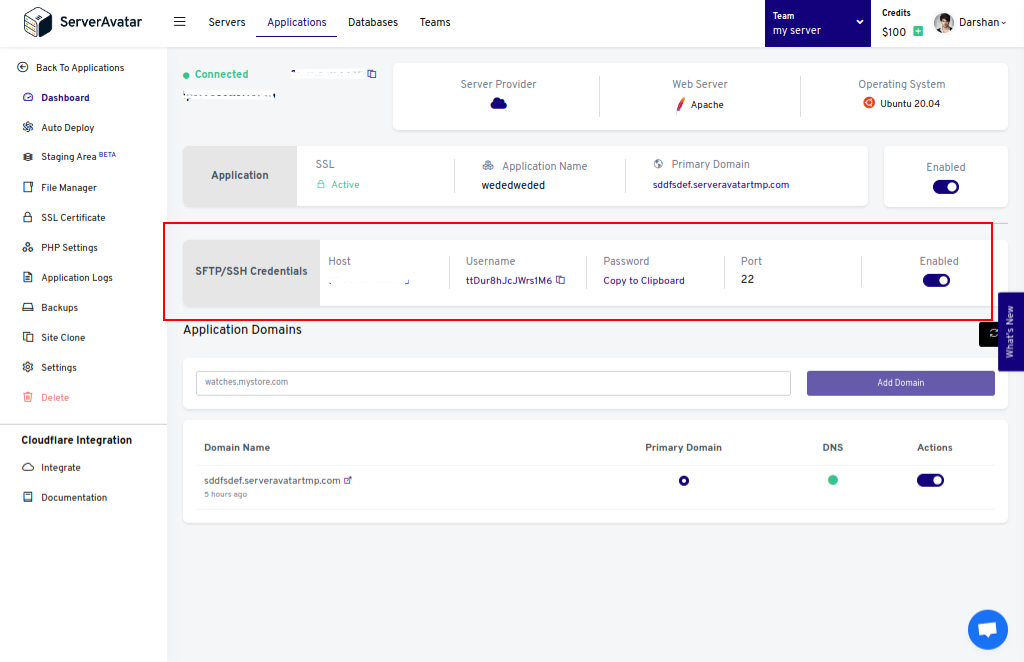
Creating a project using composer requires SSH access to your website. So, Enable SSH credentials from your application dashboard and run the below command on the terminal/console to log in to your website.
ssh Username@Host Copy the password from the panel, paste it, and hit the enter button. You can see the credentials in the image below.
After login into your site using ssh, access the public_html folder. It’s a public folder where we will create the Flarum project. Run the below command to access the public_html folder.
cd Application_name/public_htmlOn the public folder, run the below command to install Flarum.
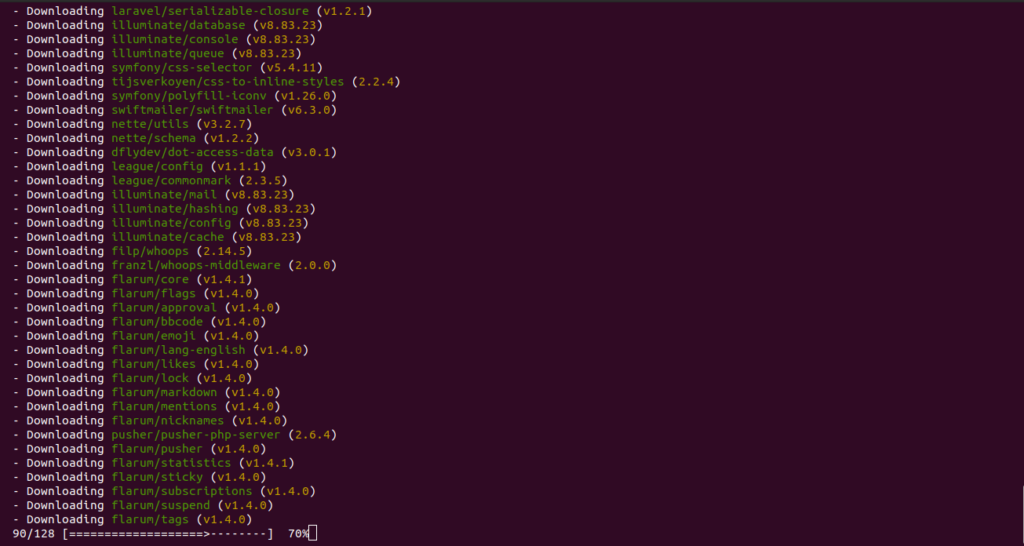
composer create-project flarum/flarum .You will see the process of the installation and updating dependencies.
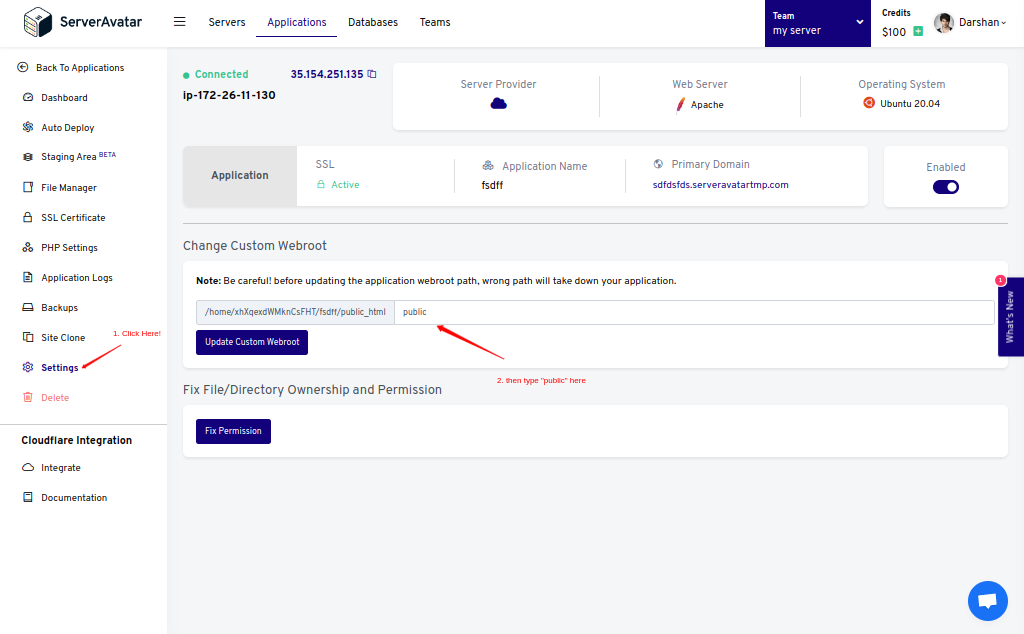
Change the Web Root of an Application
To redirect Flarum forum to your domain, it is necessary to change the webroot of your application. Otherwise, the forum will be hosted on a URL like Yourdomain.com/public.
For changing a webroot that redirects Flarum forum to your domain, go to Settings on your application panel and type Public under the Change Custom Webroot field.
Later in this article, we will also look at how to host Flarum on a subdomain like forum.yourdomain.com.
Flarum web Setup and Configuration
Once the installation process is complete, it’s time to set up Flarum on the web using the necessary information.
You can access the setup page on your domain. The page will look like the following image.
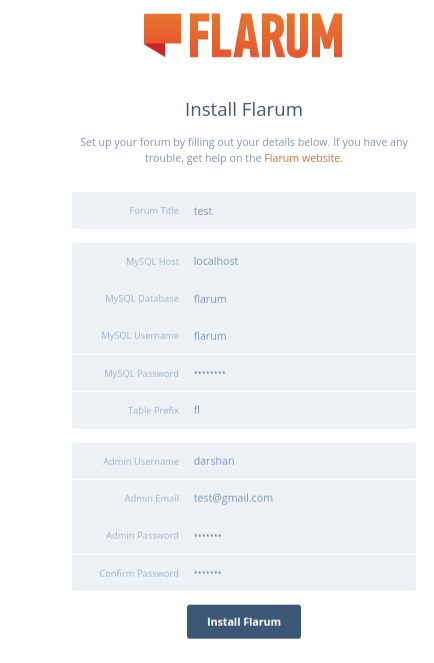
As you can see, you need to fill in database details which you can find on the Database tab on the admin panel, and admin details, including Username, Email, and Password.
Click on the Install Flarum button after you fill up. It will point you to the Admin Dashboard.
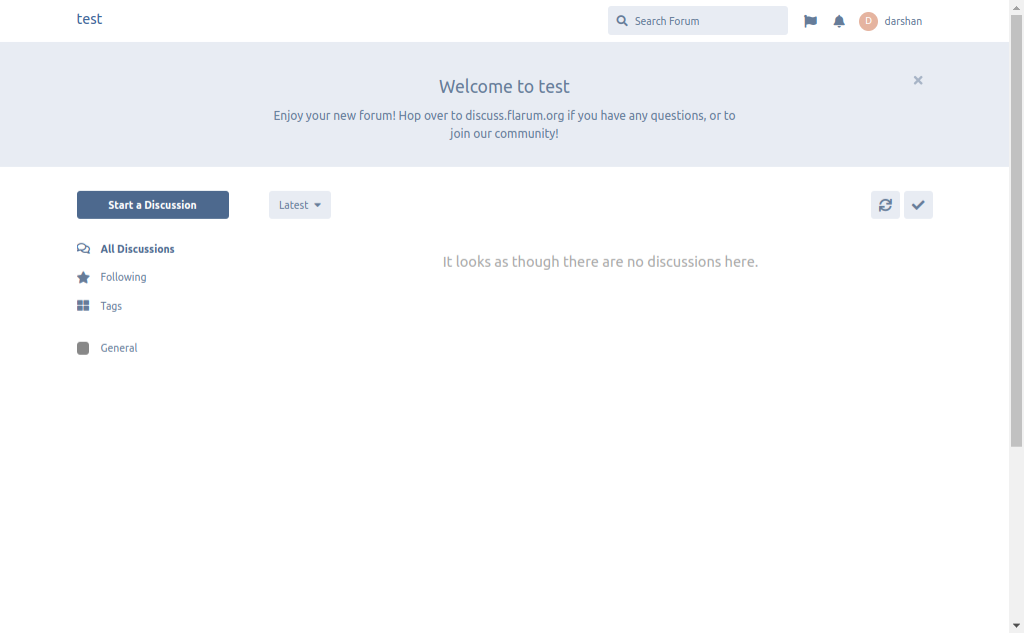
Admin dashboard includes relevant information and usage statistics. You can also configure Email settings and set other basic options such as Forum Name, Description, and Welcome Banner.
How to host Flarum on Subdomain
With ServerAvatar, it is easy to host Forums on a subdomain. Let’s do it step-by-step.
- Edit a CNAME Record that maps a subdomain ‘forum’ to the domain. Editing CNAME Record can take up to 72 hours to resolve.
- Once resolved, you can create an application on your subdomain, as we created on a domain in the above article. Delete the index.html file after creating an application.
- Login using SSH and access the public folder on the terminal/console.
- Create a project on the public directory of your subdomain and change the webroot to ‘public’ to redirect forum on subdomain( forum.example.com) rather than redirect on subdomain with directory(forum.example.com/public).