It stands to reason that having a website for a business makes a presence in the market. It provides online visibility as well as brand recognition. But, a website is not only a factor in escalating your company’s or business growth chart.
Maintaining a public image by offering them actual value is also necessary. It increases loyalty towards your company brand and will more likely attract new customers.
Data shows that, after a positive customer service experience, 89% of customers are more likely to become repeat customers. It might be possible that you have already used the ticketing system for your site.
But if you are looking for an open-source and scalable customer support platform, then osTicket is the best option to choose. It’s the tool with which you can manage, track, and organize queries of your customers.
Let’s look at what osTicket is and its key features.
What is osTicket?
osTicket is an open-source tool that makes your support system more manageable than ever. What makes it different is you can set automated actions such as ticket rejection, department/client-wise auto assignments, or even send an automated canned email instead of writing the exact email version over and over.
With an easy-to-use interface, you can manage, organize, and archive all your users’ support requests/responses in one place.
With over five million active users, this tool has credibility in over 190 countries. osTicket is a perfect option for small and midsize enterprise customers.
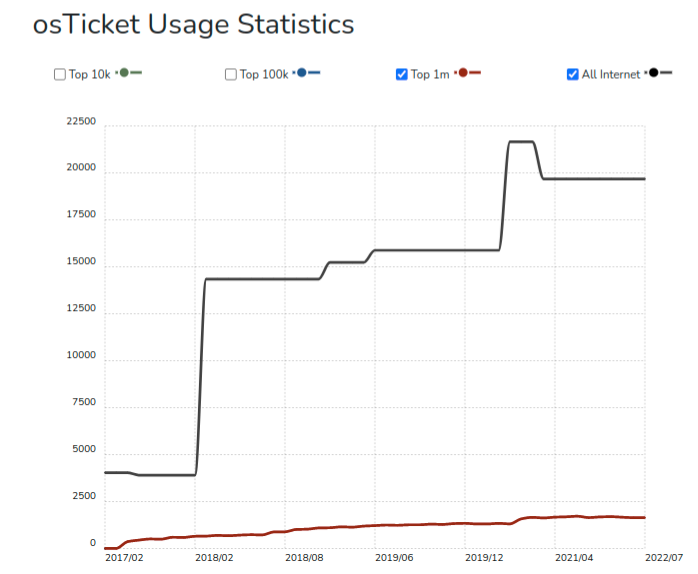
The above data shows how osTicket has continuously boomed in the market over the years. Belew red line is the total sites in the top one million that use osTicket as a support system for their business.
osTicket Key Features
- Custom Fields:- You can set custom topic fields in the ticket creation form to help get straight to the issue. With that, users/clients won’t be confused when creating a ticket.
- Filter System:- It allows you to categorize tickets to your agents or departments. So they have to solve only the queries assigned to them.
- Help Topics:- You can configure predetermined topics in the ticket creation form to route inquiries to the correct department. You can design a particular layout for each help topic for additional information to each new request.
- Agent Collision Avoidance:- Your staff member or agent can lock the ticket to avoid multiple agents responding to the same ticket simultaneously.
- Auto-Responder:- Reply automatically to your customers whenever you receive a ticket. It can be formatted to pull specific information from the ticket to personalize the email.
- Thread Entry:- agent can simply create a thread task or ticket to expand the same ticket on the same topic.
- Service Level Agreement:- SLA plans allow you to track the tickets and due dates of tickets or ticket closing times without any effort.
- Custom Portal:- users can log in or register a profile for full access to all tickets they are associated with. This tool provides a robust platform for users to self-service their issues.
Install and Set up osTicket on a Ubuntu Server
You can install and set up osTicket on cloud with ServerAvatar with just a few clicks. ServerAvatar gives one month free trial for new users.
With that, Almost every server provider gives you free credit for the new users to kick start with.
Serveravatar enables you to connect VPS/VM/Cloud Instance/dedicated or Bare Metal servers. The predominant thing is you can manage multiple servers and their applications at a price lower than any other management panel, including tons of features.
Step 1. Connect a Server with ServerAvatar
You can connect a fresh Ubuntu 18.04, 20.04, or 22.04 server with ServerAvatar. Once you have a server, run the below three commands as a root user to download and inspect the script and start installing if it meets all requirements.
wget https://srvr.so/install
chmod +x install
./install
After that, it will ask you which web server you want to install, whether it is Apache, Nginx, or OpenLiteSpeed.
Note that:
you need to install Apache to install osTicket on the server. So type Apache and hit enter.
It will take 3-4 minutes to complete the process. Once done, you’ll see a link to claim your server. Click on that link, which will redirect you to the panel interface, claim your server, and see the management panel like the following image.
Step 2. Download the latest release of osTicket
You can download the latest release of osTicket from the GitHub resources. You can also check the osTicket repositories from here.
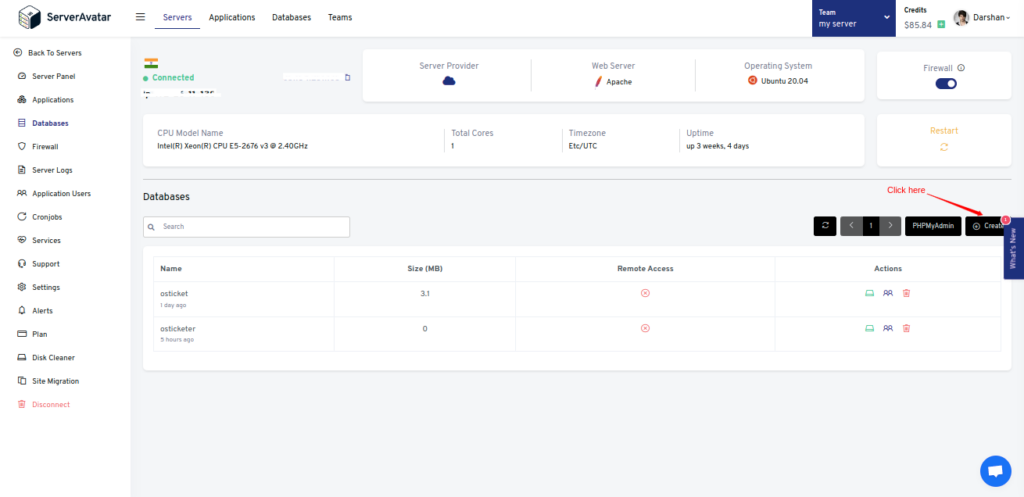
Step 3. Create osTicket Database
To create an osTicket database, go to your server panel and click on the Databases tab and follow the Create button like the below image.
It will ask you for basic information regarding database creation, including Database Name, Database user, and Password.
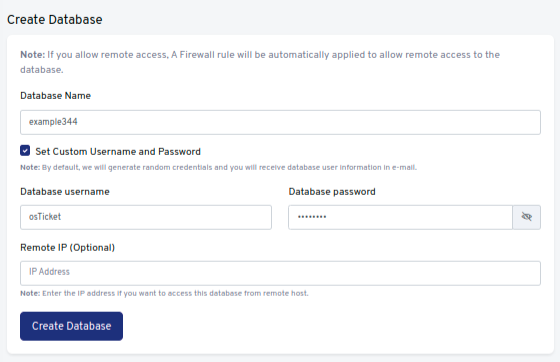
Click on the Create Database after filling it up.
Step 4. Create a PHP application
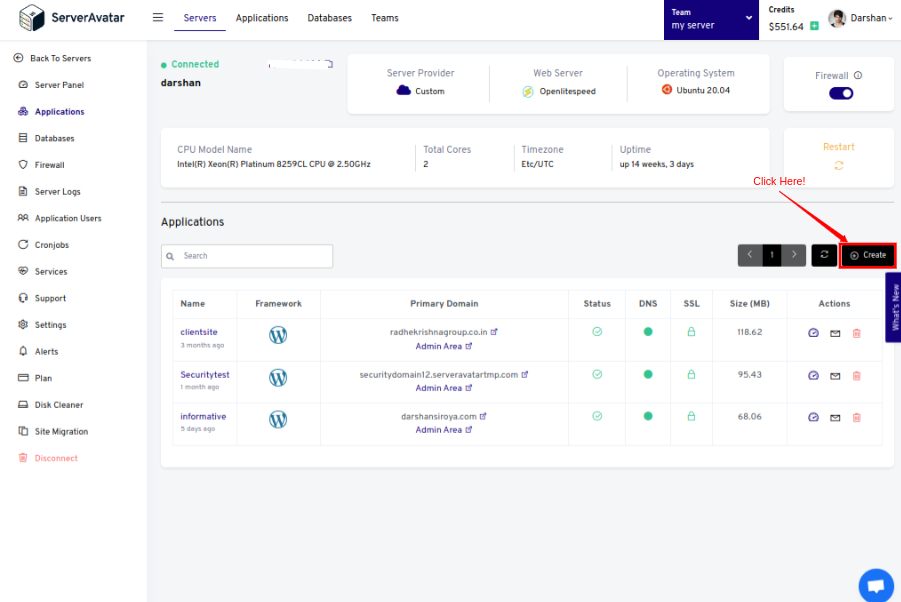
To create an application, go to the Application tab on the server panel and click on the Create button, like the following image.
Fill up the necessary information required to create an application. It includes the Application Name, Domain Name, and other Advanced PHP Settings.
If you want to host Matomo analytics on your domain, then make sure to point your domain to the current IP address of your server, and for that:

1. Log in to your hosting provider site, where you buy your domain. Click here for more info about your domain name.
2. Access DNS Manager to edit your DNS records(contact the support team if you don't find them)
3. Change the IP address of A Record of your website to the current server's IP address.
To host osTicket on your subdomain, for example, support.yourdomain.com, create a new application with the subdomain as your primary domain and follow the same procedure.
For accessing osTicket on the subdomain, you need to add your subdomain on A Record that points to the current IP address of your server. To point to an IPV6 address, you would need to use an AAAA record.
It is recommended to host osTicket on a subdomainso that users can access support without any trouble.
Note that:
osTicket runs on PHP version 8.0 or above, so on the application creation form, click on the Show Advanced Option and change the PHP version like the below image.
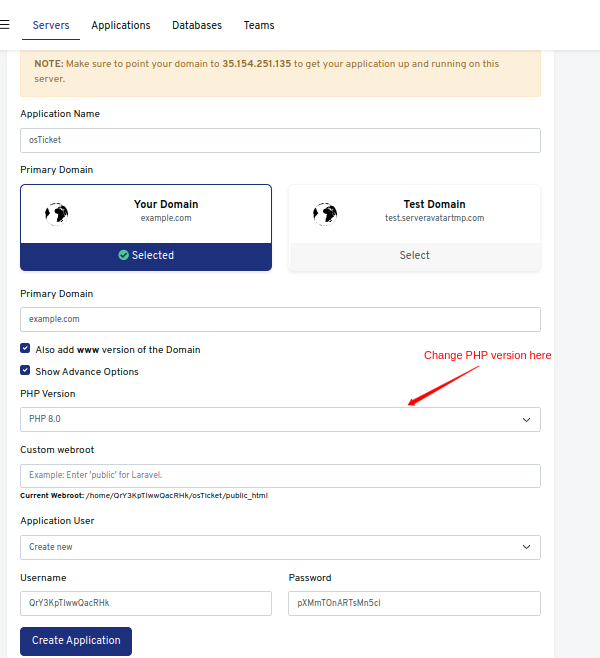
Once it is done, click on the Create Application button.
Step 5. Upload the osTicket zip file
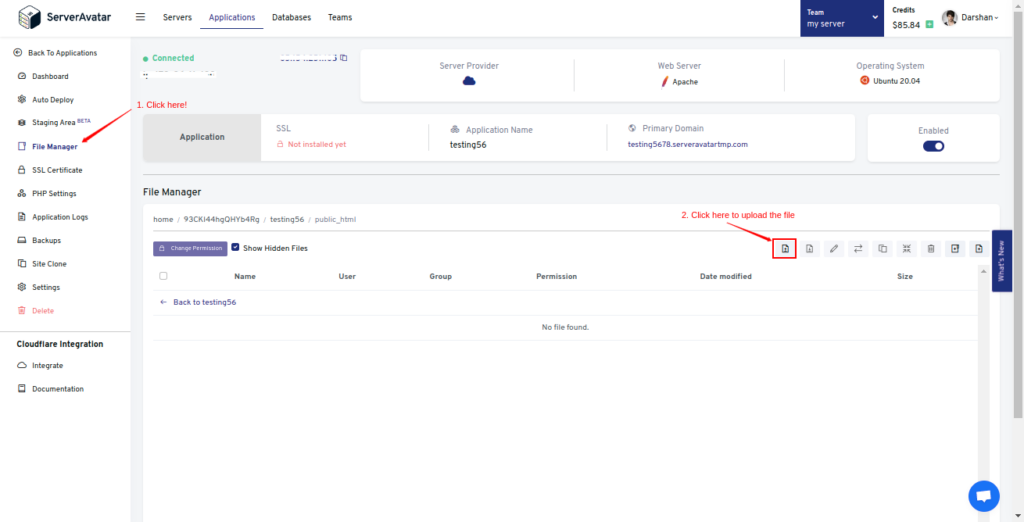
After creating an application, we need to upload a file on your application’s web root.
Go to the File Manager and access the public_html directory. Here you need to delete the index.html folder to avoid forbidden errors on the site.
Drag and drop the osTicket zip file on the file manager or upload it using the upload button icon like the following image.
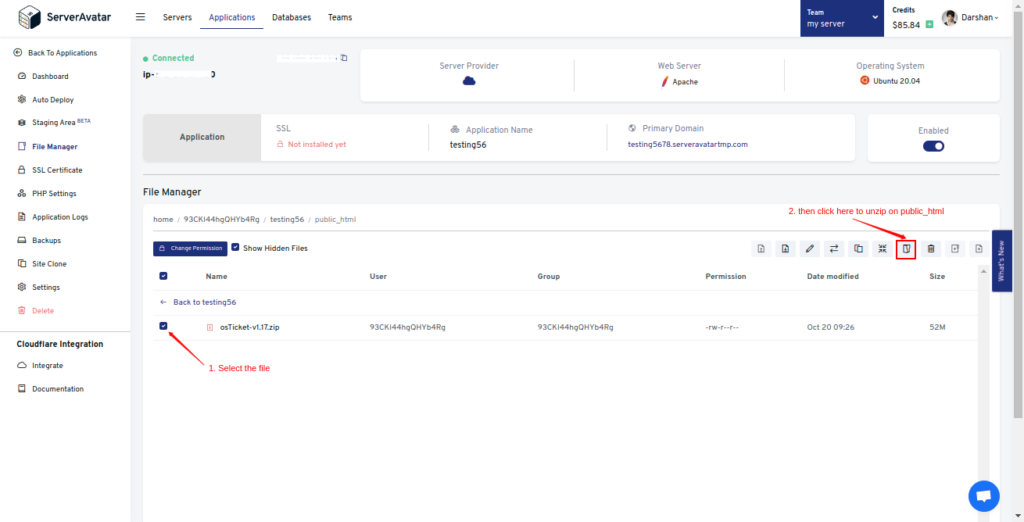
Now select the uploaded file and unzip it like the following image.
Once you unzip it, you need to rename the sample file include/ost-sampleconfig.php to ost-config.php. Follow the below image to rename the file name.

Step 6. Change the webroot of an application
Changing webroot is necessary to host osTicket on your domain/subdomain rather than with a subdirectory.
And to do that, on your application panel, click the Settings tab and set upload on the webroot field.
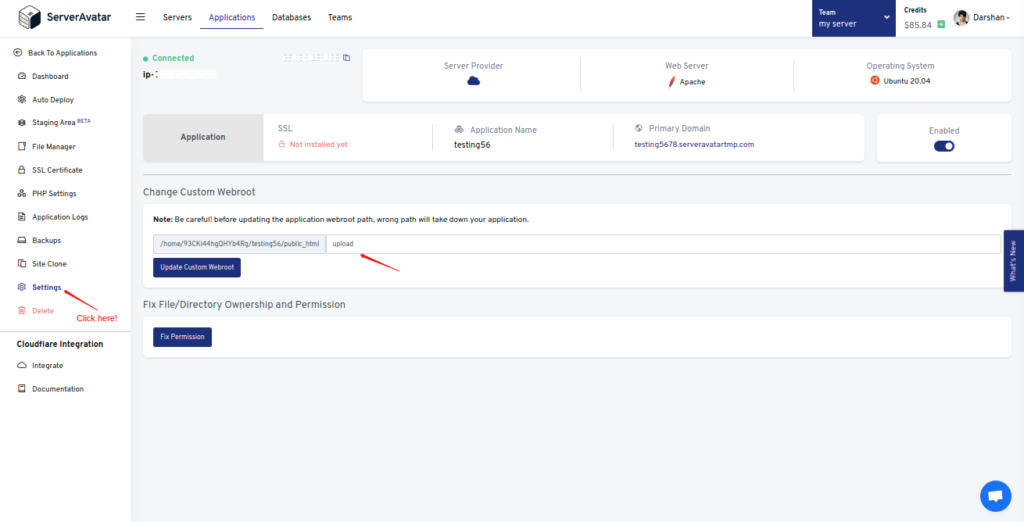
Changing webroot allows your user to access support on “Support.example.com” rather than the “Support.example.com/public” URL on a web browser.
Step 7. Deploy osTicket on your server
To keep your site and data secure, you can install an Automatic SSL certificate on your domain with ServerAvatar.
By opening the URL on the browser, you’ll see the screen like the following image.

Click on Continue for the next step of the setup process.
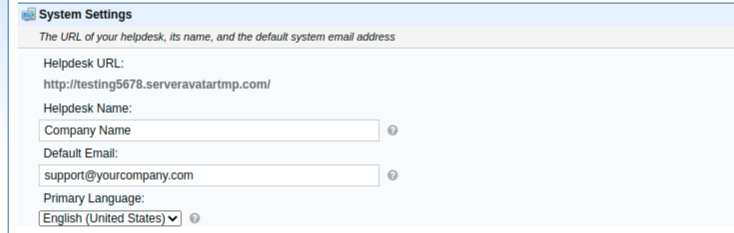
System Settings
Enter the helpdesk name and default email of your company.
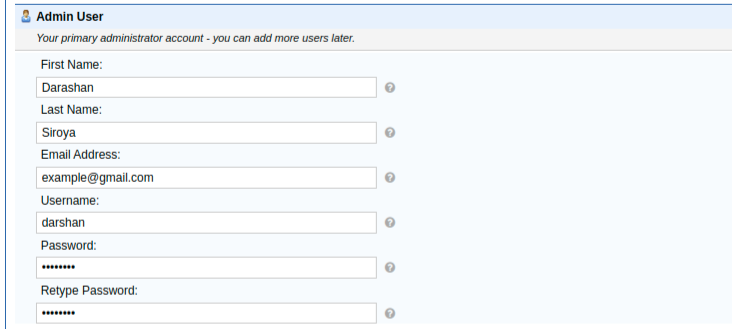
Admin User
Set up your primary administrator account. You can add more admin users later directly from the admin dashboard.
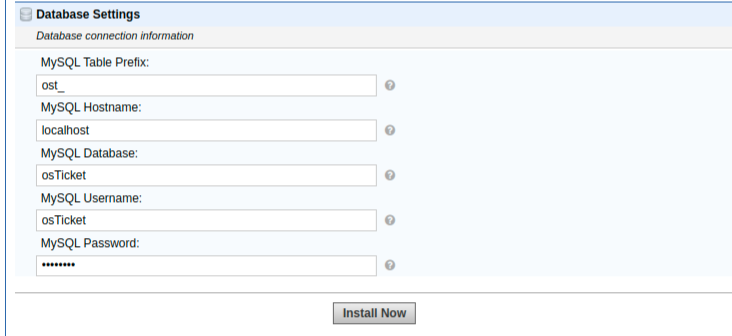
Database settings
Enter the database credential which we created above in step 3.
Click on the Install button after completing the setup process.
Access admin panel
Your osTicket installation has been completed successfully. You can now change the permission of ost-config.php file to remove write access.
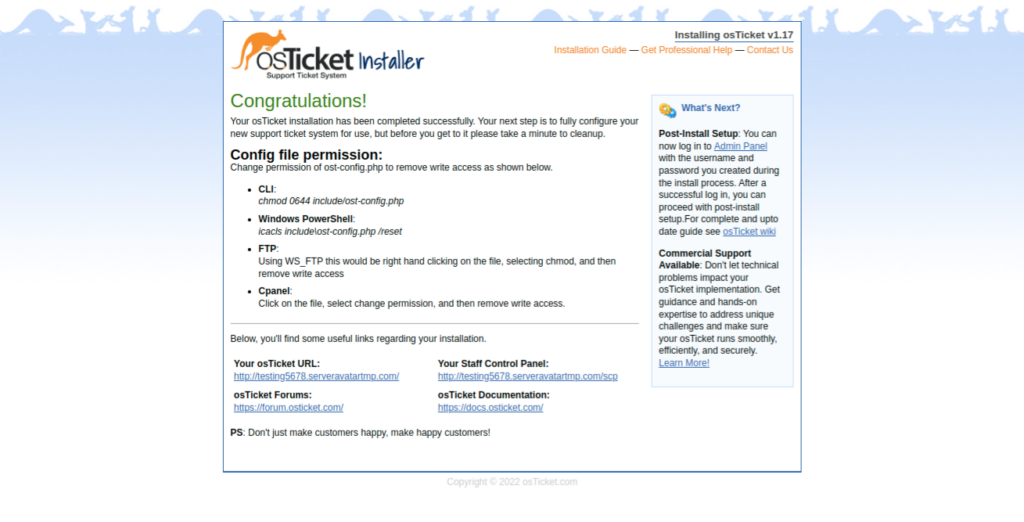
You can now log in to the admin panel with the username and password you created during installation. By logging in, you’ll see the admin panel below.
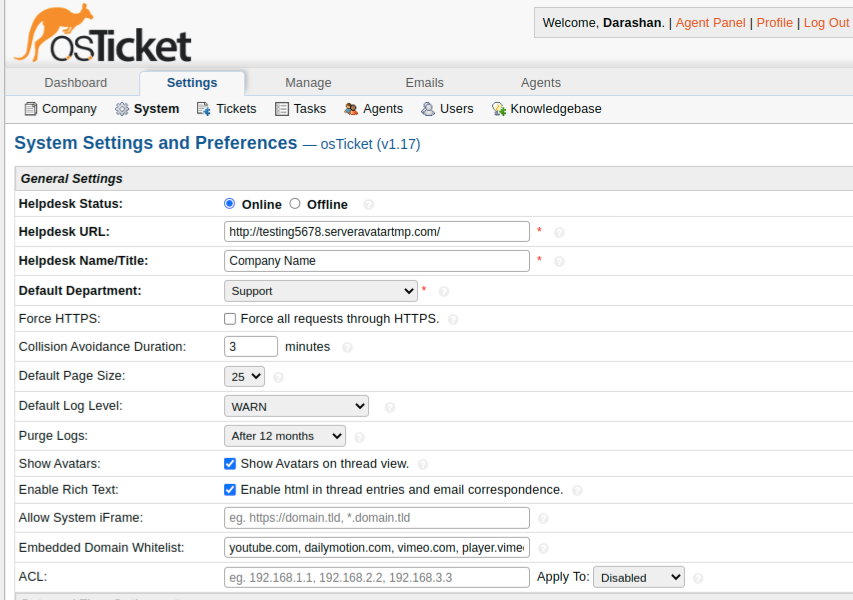
Once you access the admin panel, delete the setup directory for security reasons. It does not affect any part of osTicket system.
That’s it. Now you can customize all the settings of osTicket that suits your company requirements.