
When you think about managing your WordPress website, using FTP to upload files might not be the first thing that comes to mind, usually, logging into the dashboard is. But what happens if you cannot log in? Or maybe you’re looking for a faster, more direct way to move files around your WordPress site? That’s where FTP (File Transfer Protocol) comes into play, a powerful tool that lets you manage your website files without ever logging into WordPress.
ServerAvatar makes server and application hosting and management incredibly easy, even when things go sideways. Whether you’re locked out of your WordPress dashboard or want a faster way to upload files, using SFTP is a reliable and effective solution.
In this guide, we’ll walk you through everything you need to know to upload files to WordPress without logging in, using FTP, also from the perspective of someone managing their server through ServerAvatar.
What is FTP and Why Use It?
FTP that is a short form of a File Transfer Protocol, it is like a digital delivery for your website. It lets you send, receive, and organize files on your server, just like moving folders around on your computer.
So why use it? Because sometimes, you can’t access your WordPress admin area, or you simply need a quicker way to work with files. FTP gives you that backstage pass.
When Do You Need to Upload Files Without Login?
Did you ever find yourself locked out of your WordPress dashboard due to a faulty plugin or any theme update? Or maybe you’re building a site and don’t want to keep logging in every time to upload files? FTP is your backup plan.
You’ll find it especially useful when:
- Your WordPress login isn’t working
- A plugin breaks the site
- You need to upload large files quickly
- You want to restore or modify files manually
How FTP Works (In Simple Terms)
Think of your hosting server as a warehouse and FTP as the forklift that helps you move boxes (files) in and out. Instead of dragging and dropping on your desktop, you’re doing it over the internet between your computer and the web host.
You just need three things:
- FTP software (a client)
- Login details (from your hosting provider)
- A stable internet connection
Step 1: Choosing the Right FTP Client
The FTP client is tool that you will use to connect to your servers. There are several options, but here are a few popular and beginner-friendly ones:
- FileZilla (Free and open-source): It is well-regarded, widely used, and available for Windows, macOS, and Linux.
- Cyberduck (Mac-friendly): It is an easy to use with the feature of drag and drop within the interface.
- WinSCP (Great for Windows): It is a free and popular open-source tool.
All of them offer drag-and-drop features, which make life easier.
Step 2: Getting FTP Credentials
For connecting via FTP, you need your FTP login credentials. If you’re using ServerAvatar, managing and retrieving these credentials is incredibly simple.
When creating a new application or user in ServerAvatar, SSH/SFTP access is disabled by default to enhance security. However, you can enable SSH/SFTP access for a specific user directly from your ServerAvatar server panel.
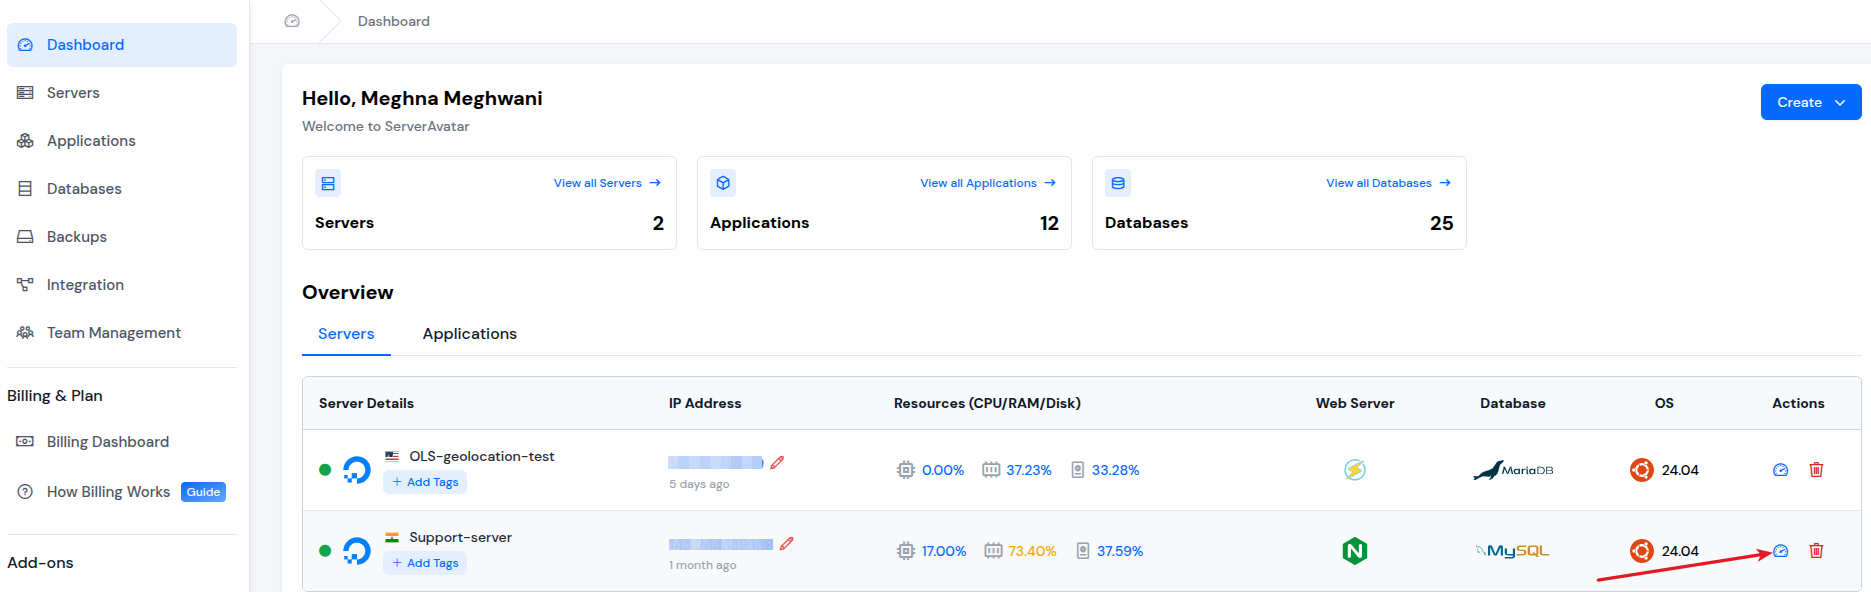
- Simply go to the ServerAvatar panel and click on the dashboard icon for the server you want to go to the server panel.
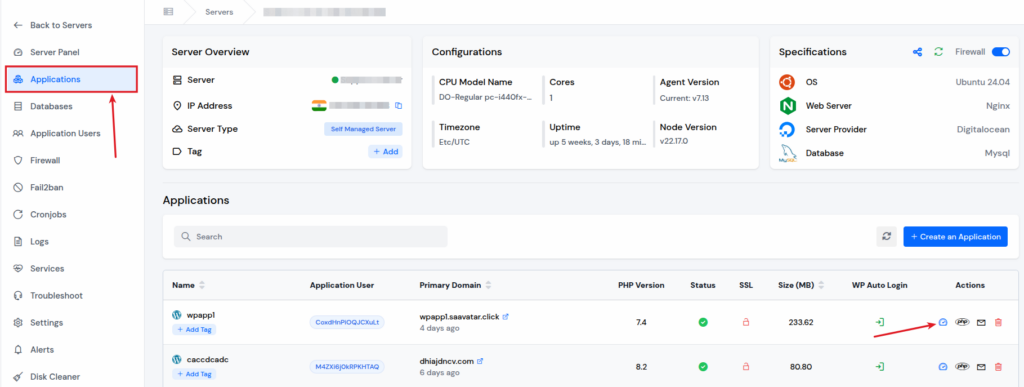
Navigate to the “Applications” section. Click on the application dashboard icon for the application you want to share the SFTP access.
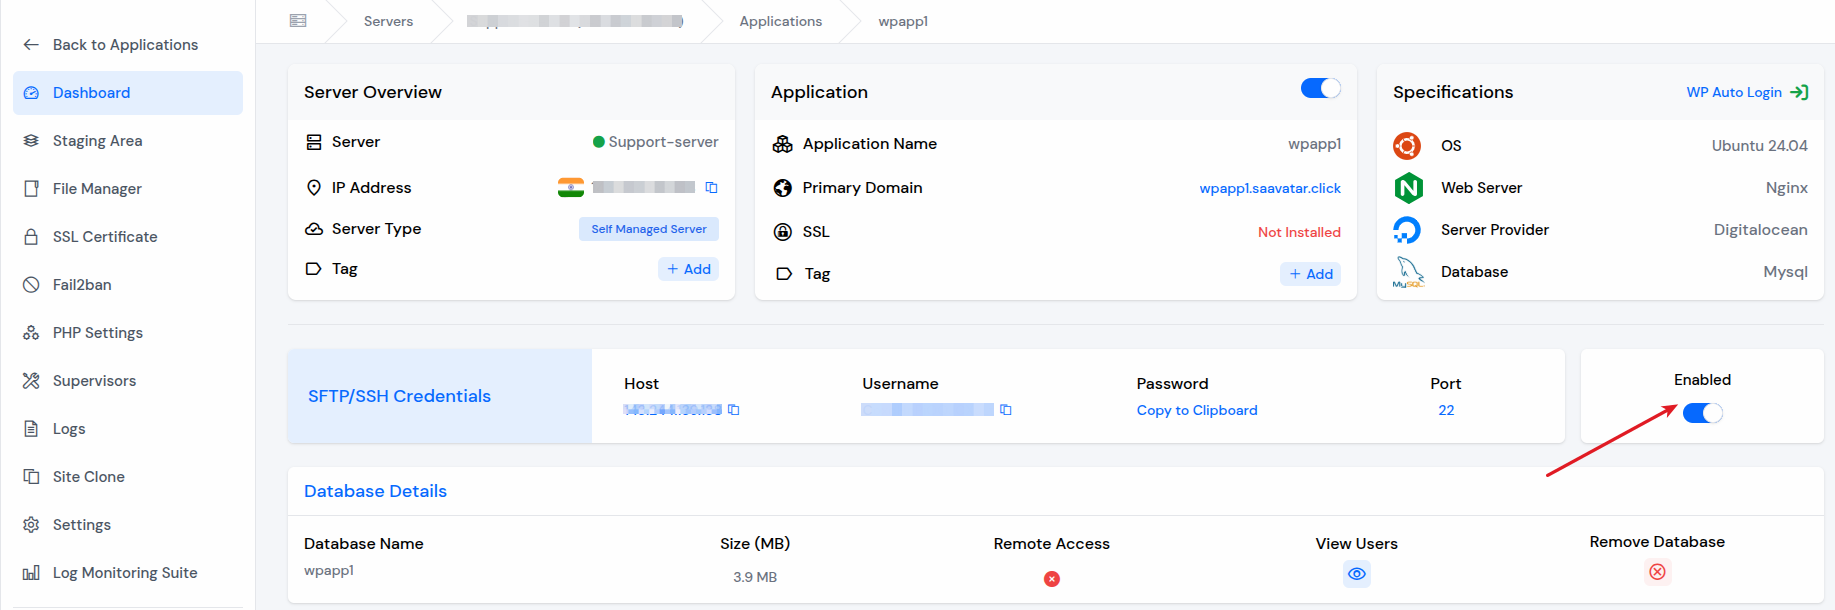
Enable the SFTP access credentials by enabling the toggle button, and you can easily copy the username and password from there.
This makes it easy to provide secure access on demand while maintaining full control over who can connect to your server.
Additionally, you can set SSH Key for your application user directly from ServerAvatar panel. SSH key is a highly recommended method of authentication.
If you want to set an SSH key for an application user, you can do it by following the steps below.
- Navigate to the server panel by clicking on the server dashboard icon, and click on the “Application Users” section.
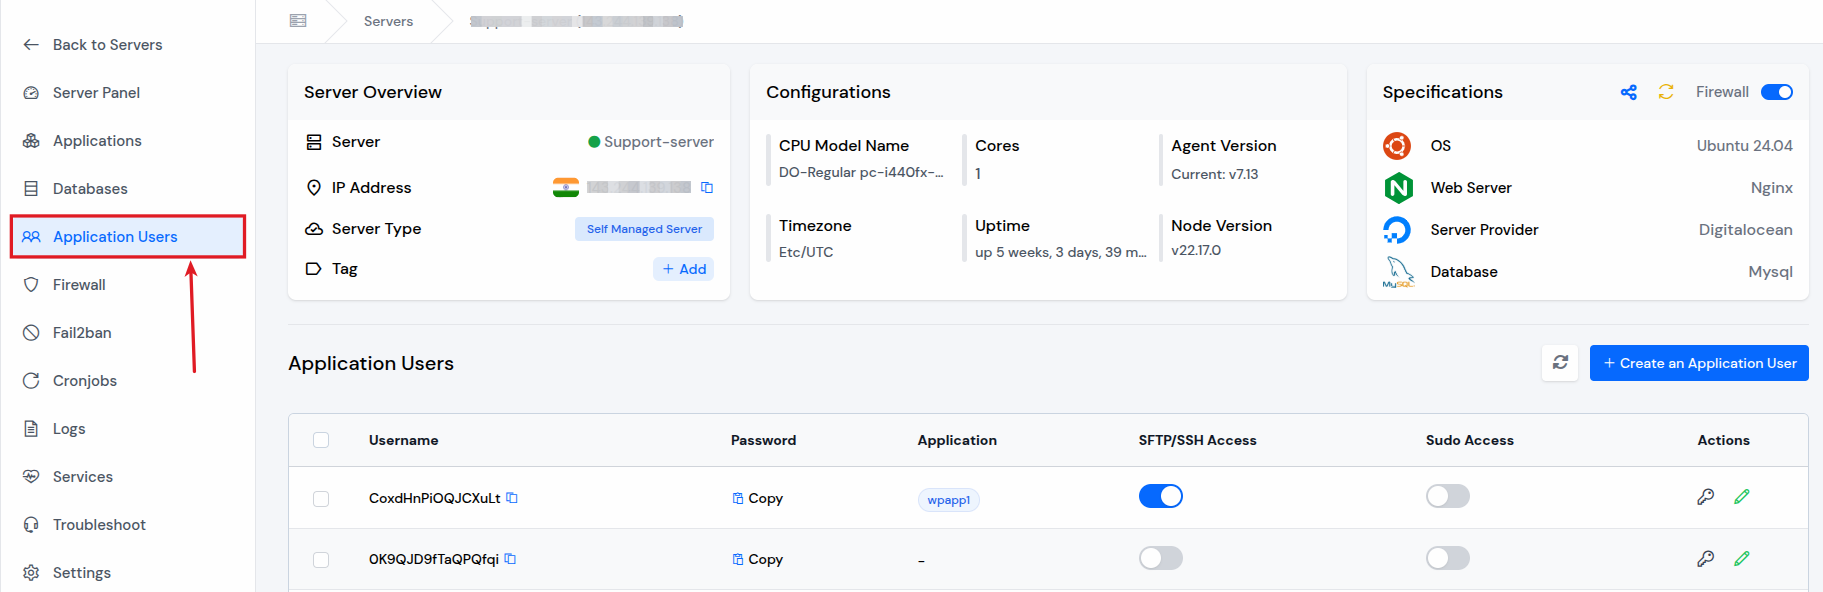
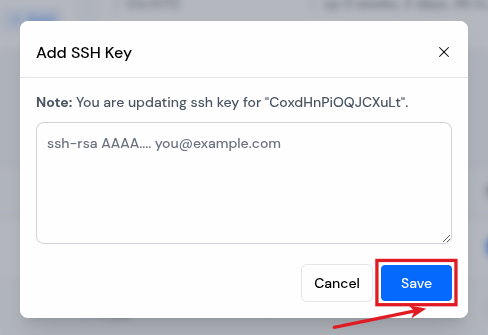
Enable the toggle for SFTP Access and Click on the “Set SSH Key” icon from the actions for the application user.

After that, the pop-up will appear on your screen to set your SSH Key. Add the key and click on the “Save” button.
If you are not using ServerAvatar, you can find them in your Cloud provider’s panel. You will need following details:
- Hostname: It is a domain name or an IP address of your server.
- Username: It is an SFTP username, or a specific username of a web hosting account or a user you have created on your server.
- Password: The password is associated with your SFTP username.
- Port: The port will be 21 for FTP and 22 for SFTP connection.
If you are not able to find the credentials, you can contact your host’s support team, and they’ll help you out to find it.
Step 3: Installing and Setting Up an FTP Client
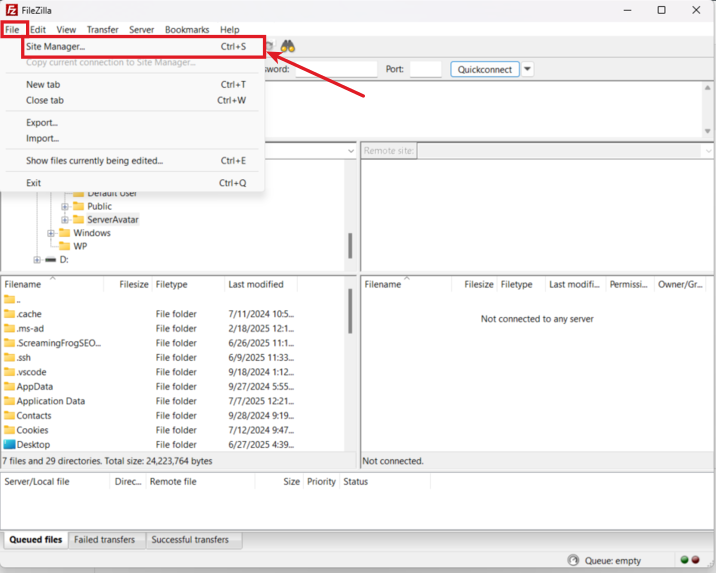
Once you have all the details for your FTP client, download and install it. Let’s move forward with using FileZilla (since it’s the most popular).
- Open FileZilla on your system. Click on File > Site Manager.
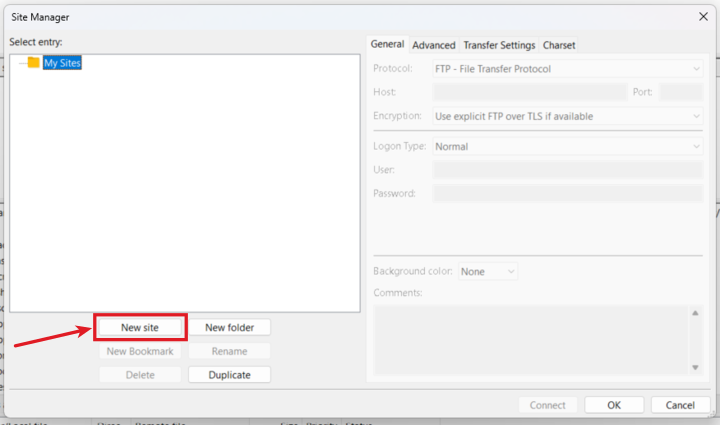
- Enter your FTP details here.
- Set protocol to “FTP”, enter your “IP address” in the Host section, enter the appropriate “port number”, and the select encryption as “Only use plain FTP”.
- Click on “Connect” button.
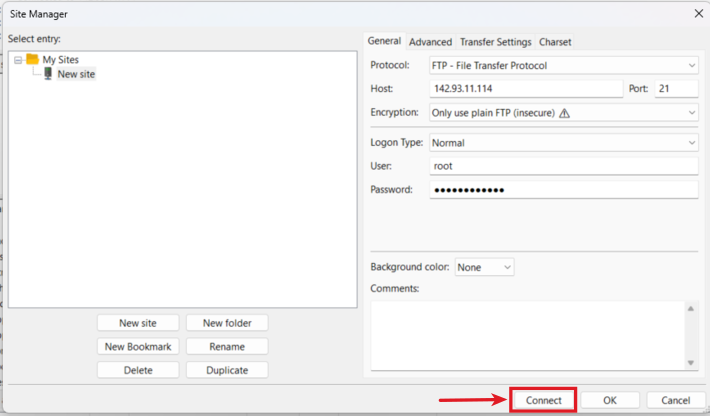
If everything’s correct, you’ll be connected to your server.
Understanding the WordPress File Structure
Here’s a quick overview of what you’ll see when you access your WordPress site:
- wp-content/ – themes, plugins, uploads
- wp-admin/ – dashboard files
- wp-includes/ – WordPress core files
When uploading files or making edits, you’ll mostly be working within the “wp-content/” folder.
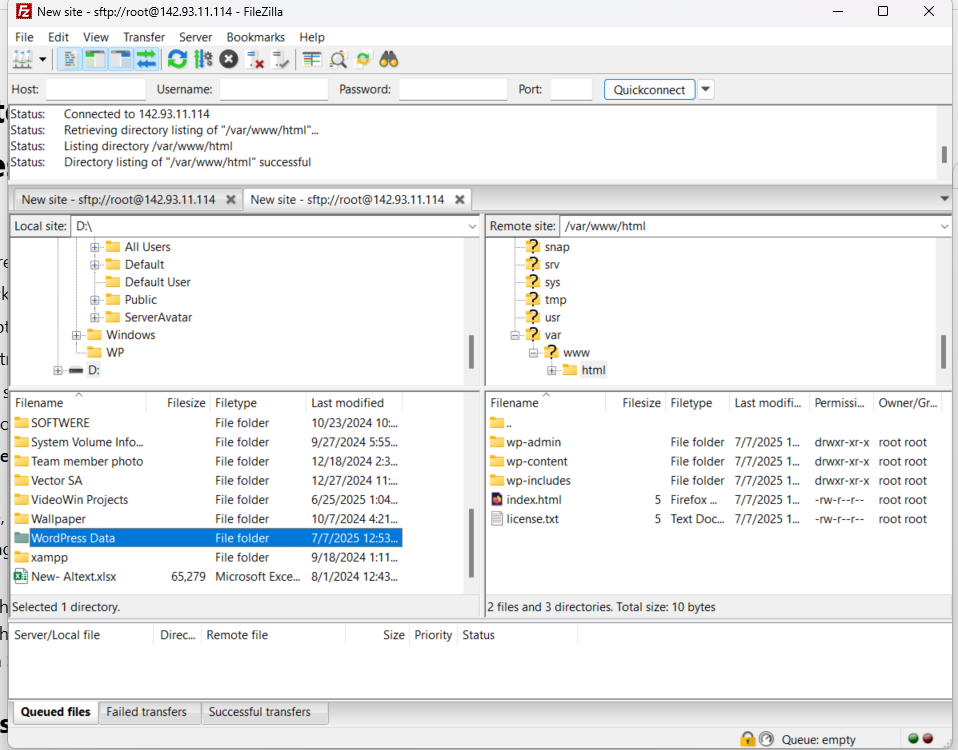
Step 4: Upload Files to WordPress Without Login
Here’s how simple it is:
- Navigate to your destination folder in the server window from right side
- Find the file on your PC from left side
- and just Drag and drop
As you can see the file has been uploaded after just drag and drop.
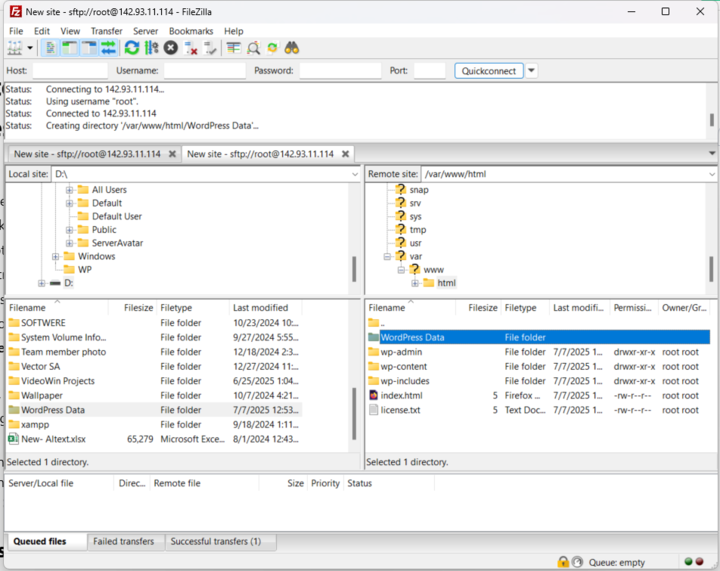
This is perfect when your dashboard isn’t available or you need faster uploads.

Uploading Media Files via FTP
To upload images, PDFs, or other media:
- Go to wp-content/uploads/
- Choose the correct folder
- Upload your file
Adding Themes Using FTP
Installing a new theme without dashboard access:
- Extract the theme ZIP
- Go to wp-content/themes/
- Upload the extracted folder
- Once access is restored, activate it from Appearance > Themes
Installing Plugins Without Dashboard Access
Just like themes:
- Extract the plugin ZIP
- Upload it to wp-content/plugins/
- Activate it later when you regain access
Fixing Common WordPress Errors with FTP
Using ServerAvatar, FTP, you can solve many common issues:
- 500 Internal Server Error – Fix .htaccess or re-upload core files
- White Screen – Disable the themes or plugins
- Memory Limit Errors – Edit wp-config.php
Being able to do this without WordPress login access is a real lifesaver.
Security Tips for Using FTP
Security is a top priority at ServerAvatar. To ensure safe FTP usage:
- Always use SFTP
- Never share credentials
- Change FTP passwords regularly
- Use secure and encrypted connections
Conclusion:
FTP is easy and trusted way to manage your WordPress website when you can not open the dashboard. Whether you need to upload files, install a new theme, or fix a broken plugin, FTP gives you direct access to your website’s files without going through WordPress.
You can easily get your FTP login details and connect to your server using tools like FileZilla. It’s a quick and effective way to make important changes, upload content, or resolve common issues when your WordPress admin panel isn’t working.
In the end, FTP isn’t just a workaround, it’s a best practice. And with the right tools at your disposal, you’re never truly locked out of your website.
FAQ
1. Is it safe to upload my WordPress files via FTP/SFTP?
Yes, especially when using SFTP, which encrypts your connection. ServerAvatar always recommends using SFTP for all file transfers.
2. How can I see my media has uploaded via FTP in WordPress?
You can use a plugin like “Add From Server” or any other to import the files to your Media Library.
3. What if my FTP credentials don’t work?
Double-check your server IP, username, and password. If needed, reset or create a new FTP user from your ServerAvatar panel.
4. Can FTP help if my WordPress site crashes?
Yes! FTP is the best way to disable plugins/themes, fix configuration files, and restore site functionality when WordPress is down.
Stop Wasting Time on Servers. Start Building Instead.
You didn’t start your project to babysit servers. Let ServerAvatar handle deployment, monitoring, and backups — so you can focus on growth.
Deploy WordPress, Laravel, N8N, and more in minutes. No DevOps required. No command line. No stress.
🚀 Try ServerAvatar Free – No Credit Card NeededTrusted by 10,000+ developers and growing.