sysPass is a free and open-source tool that provides password management in a highly secure and collaborative way.
The tool makes it easy for you to share passwords across teams, departments, clients, or any individual user, Including passwords, without worrying about security issues.
Configuration made via the admin panel. You can set multiple options like LDAP auth, auditing, mail, backup, import/export, and more.
It uses 256-bit AES(Advanced Encryption Standard) technique for password encryption and RSA to send data securely. No use of any third-party app means the admin can have total control over all the data.
sysPass builds using the latest HTML5 and PHP technologies to provide a better UX experience.
sysPass Key Features
- LDAP authentication to store user information, including passwords, in one location
- ACLs to manage the user privileges in a more specific way
- Activity notification system via Email and in-app
- Account edits history and restores point
- Account-wise File management with image preview
- multi language support
- Enable to export encrypted XML backup format
- Action and event auditing
- CEF format for log management and interactive security-related information
- API integration
Install and Setup sysPass password manager on Ubuntu Server
If you are new to ServerAvatar, you can use one month of free credit to use full features for a quick start. And for the server side, many providers give free server credit, including Vultr and many more.
Step 1. Connect a server with ServerAvatar
Run the below three commands on your server console as a root user to start the server connection process.
wget https://srvr.so/install
chmod +x install
./install
1. Install Web server
The running script asks which web server you would like to install: Apache, Nginx, or OpenLiteSpeed.

2. Claim your server
Once the process is finished, the link is displayed on your console to claim the server; click on it to access the server panel like the image below.

Step 2. Download sysPass latest release zip file
You can download the application zip file from the link below.
https://github.com/nuxsmin/sysPass/releases/
Step 3. Create Database for sysPass
Access the Database tab on the ServerAvatar server panel to create a MySQL Database.
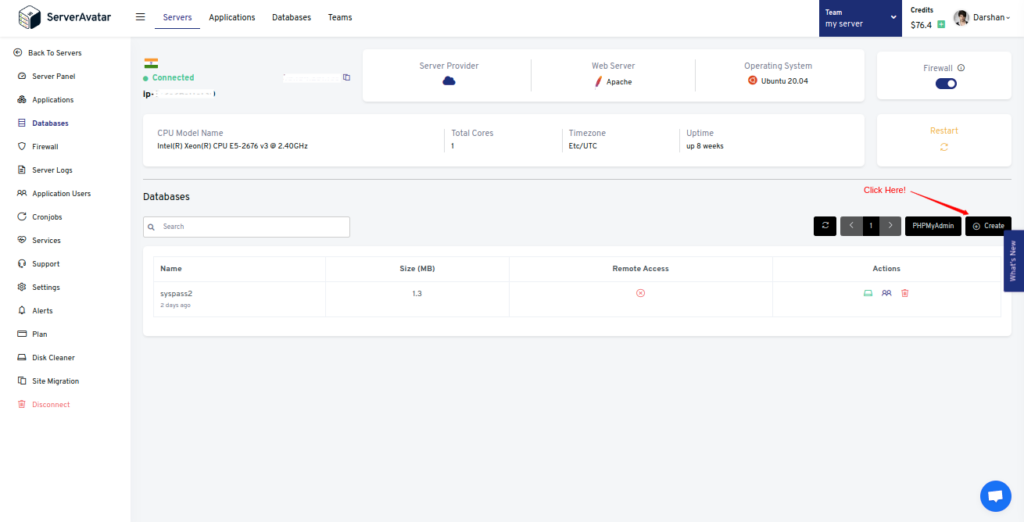
Enter the credentials and click on the Create Database button.
Step 4. Create PHP application
Access the Applications tab from the server panel to create a new PHP application.
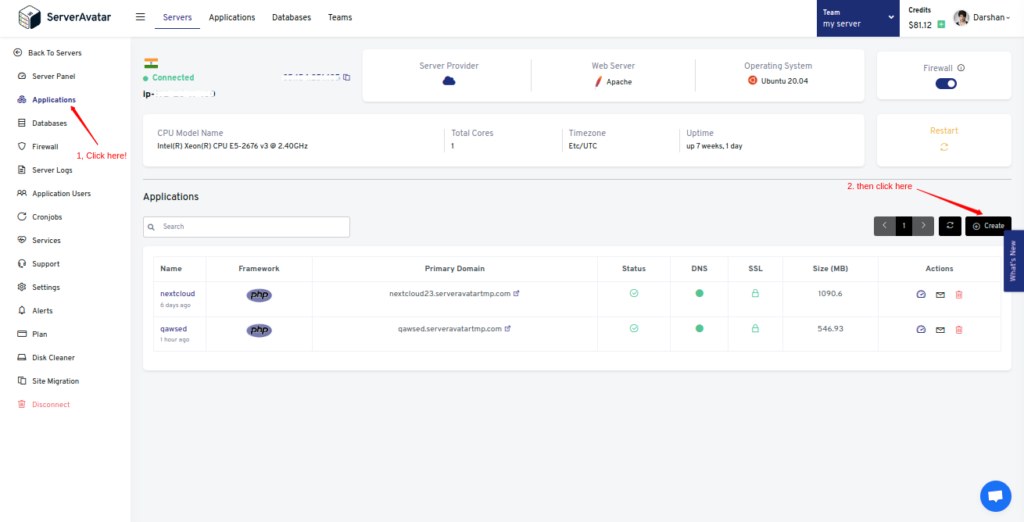
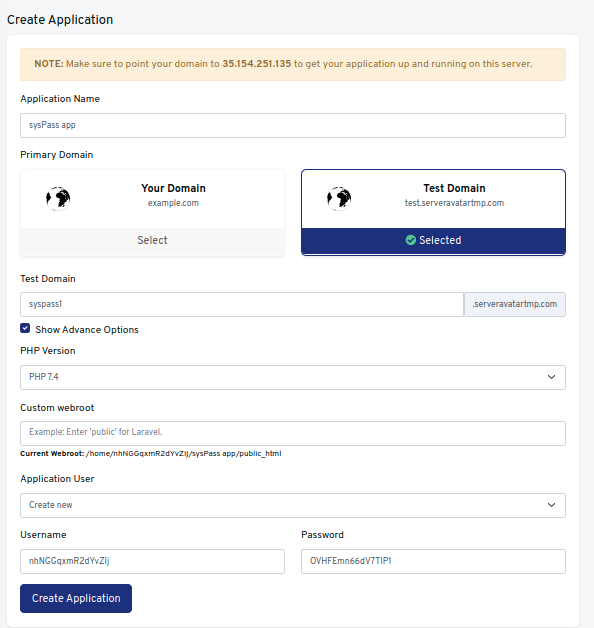
Fill up the required information, including the Application Name, Domain Name, and Advanced Options for more PHP settings.
Note that:
If you want to host sysPass on your domain, then make sure to point your domain to the current IP address of your server, and for that:
1) Log in to your domain provider site, where you buy your domain. Click here for more info about your domain name.
2) Access DNS Manager to edit your DNS records(contact the support team if you don’t find them)
3) Change the IP address of A Record of your website to the current server’s IP address.
To host sysPass on your subdomain, for example, syspass.yourdomain.com, create a new application with the subdomain as your primary domain and follow the same procedure.
Note that:
For accessing sysPass on the subdomain, you need to add your subdomain on A Record that points to the current IP address of your server. To point to an IPV6 address, you would need to use an AAAA record.
Click on Create Application after entering the required information.
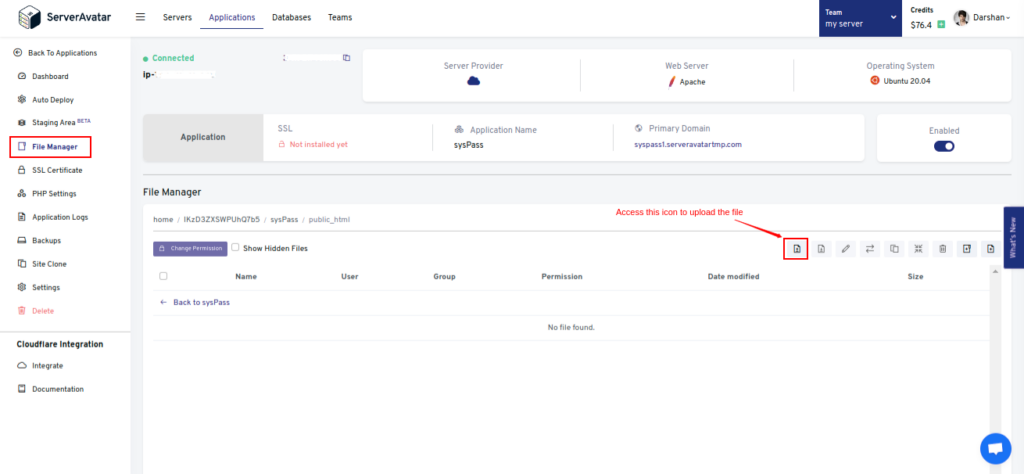
Step 5. Upload sysPass zip file to the root directory
With ServerAvatar, you don’t need third-party FTP Clients to Upload the file on the server.
Click on the File Manager feature on the application panel and access the public_html directory.
Delete the Index.php file to avoid forbidden errors on the site, and upload the sysPass zip file like the image below.
Uncompress the uploaded zip file in the public_html folder.
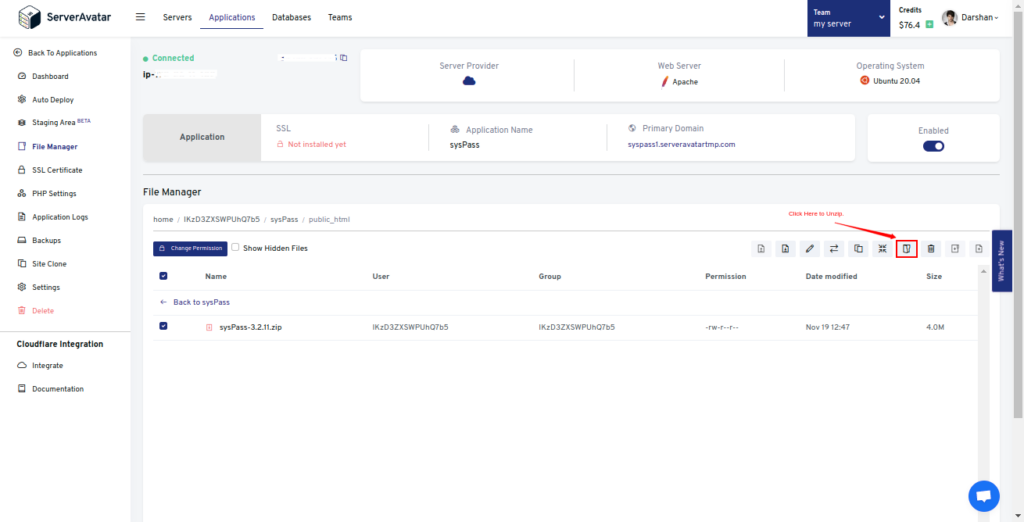
Delete the uploaded zip file after successfully uncompressing it.
Step 6. Move all files to the public folder
Select all files inside the sysPass folder and move them to the public_html directory.

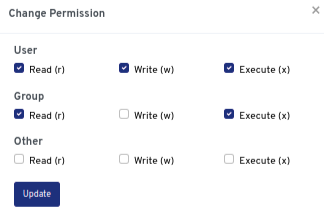
Step 7. Change File Permission
Change the ownership and permission of the sysPass directory. And for that, select config and backup file from the app folderand change the file permission to 750.
Now give it the following permission.
Step 8. Install SSL
Access SSL Certificate to install SSL for your application.
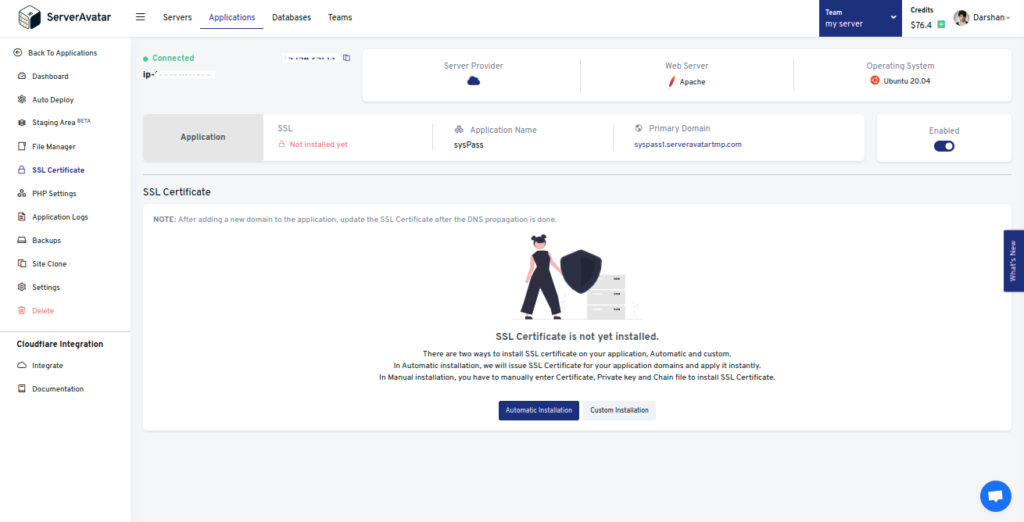
You can also force HTTP to HTTPs after installing an SSL Certificate.
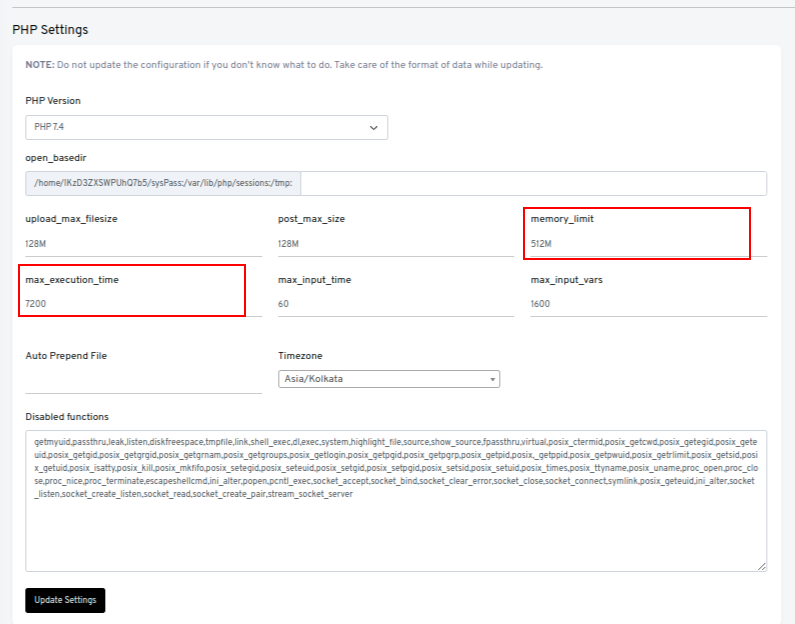
Step 9. Change PHP Settings
On the application panel, click on the PHP Settings to change the following settings.
max_execution _time = 7200
Memory_limit = 512M
Step 10. Install and update the composer
Access SSH credentials from the dashboard of the application panel.
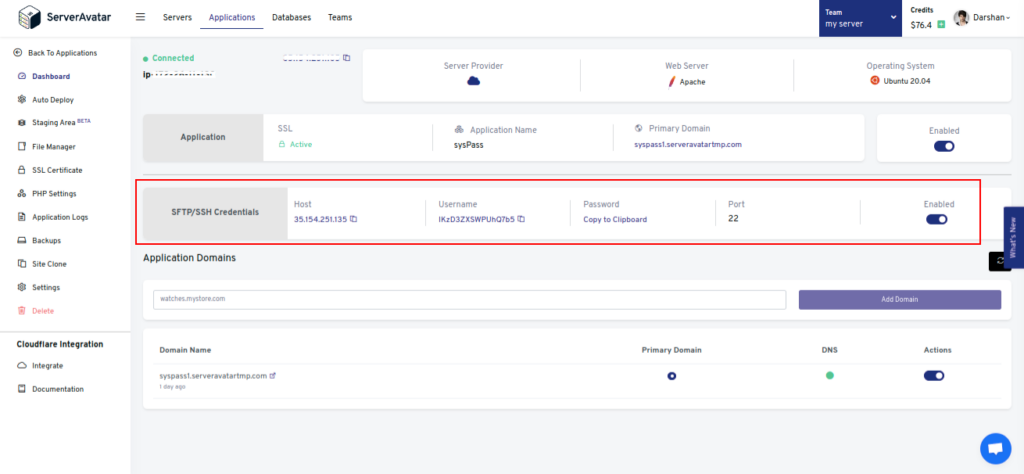
Execute the below command to log in to the root user on your application.
SSH Username@HostReplace Username and Host with your value. And enter the SSH Password to log in.
Go to the Public_html directory and run the below two commands line by line.
composer install
composer update
Step 11.Install and Set up sysPass
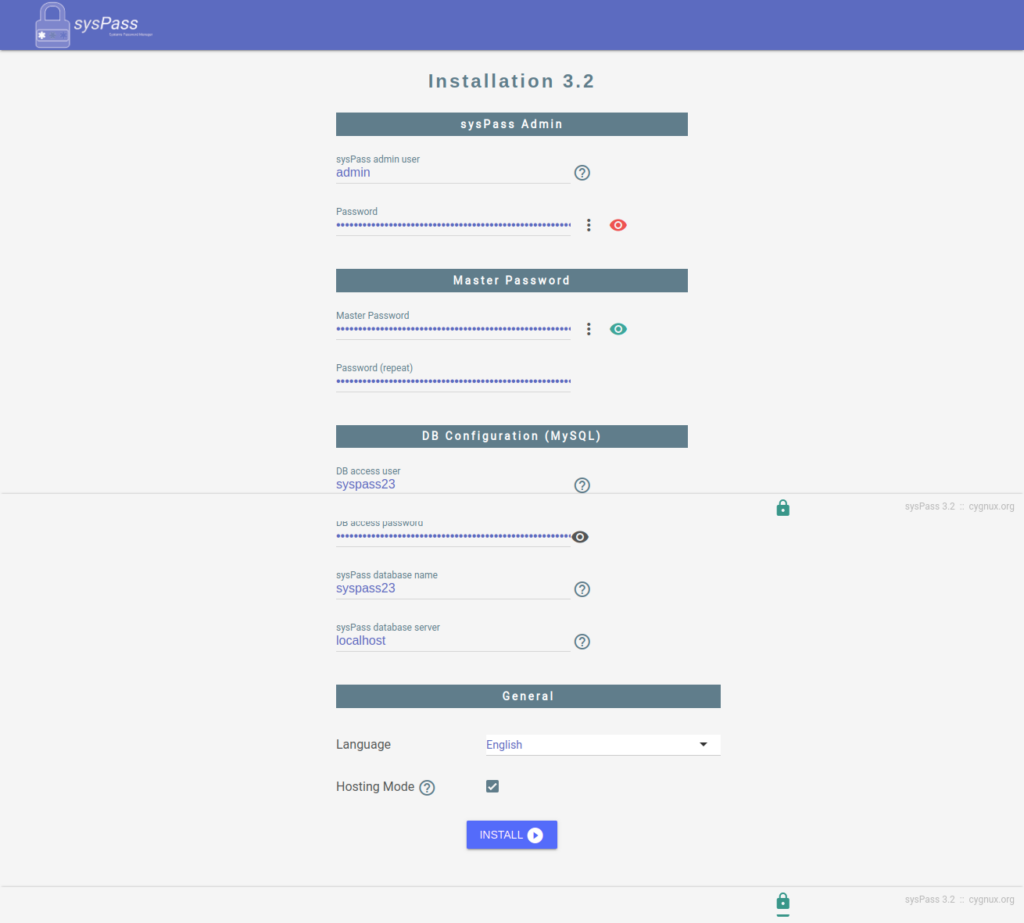
Access your domain/subdomain on the browser to install and set up SysPass. In include,
- sysPass Admin: enter admin name and password.
- Master Password: Type the master password for your application.
- MySQL DB Configuration: Enter the database information we created in step 3. Leave the sysPass database server field as it is if your database is on the same server as the application.
- General Settings: Select the appropriate Language, check right on the Hosting Mode field, and hit the Install button.
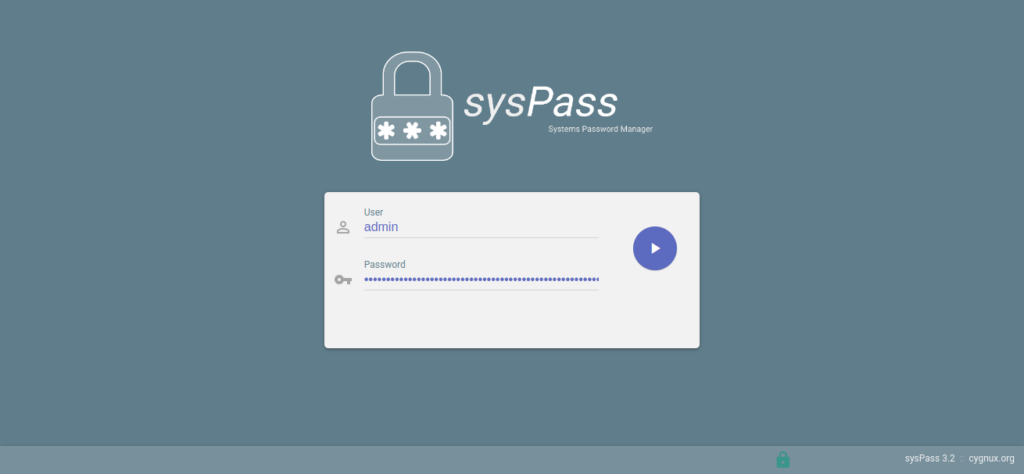
Now login with the admin credential on the next screen.
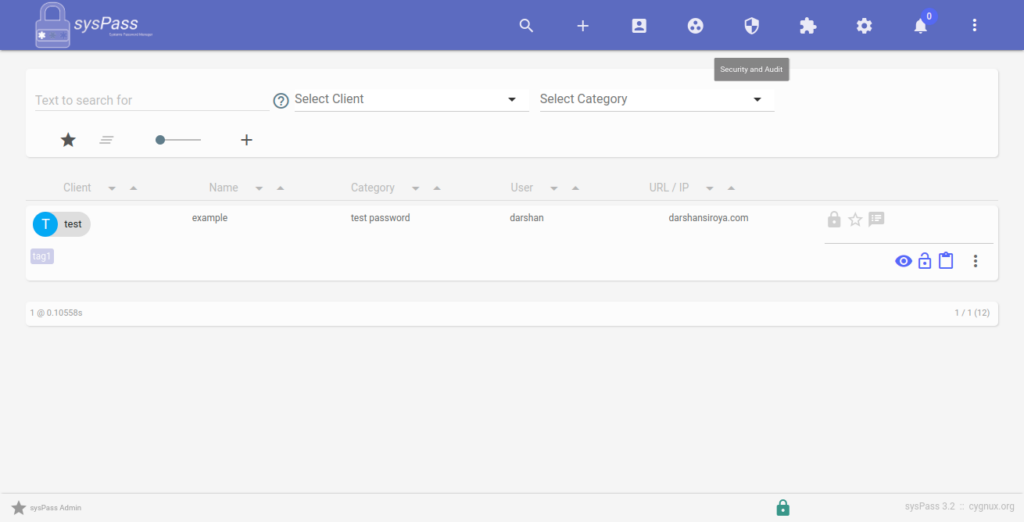
On the next screen, you’ll see the admin panel, where you can manage all the users and passwords with an easy-to-use interface.
You Can also check sysPass documentation for more details regarding installation and other queries.