OpenCart is an open-source eCommerce platform allowing you to manage an online store with an easy-to-use interface. This free software helps you customize the store easily with tons of powerful extensions.
OpenCart powers up more than 400,000 entrepreneurs worldwide, from individuals to business owners. Including over 13,000 modules and themes, you can easily extend the functionality of your site and grow your business effortlessly.
With OpenCart, it is easy to manage products, customers, coupon codes, orders, text rules and much more together with built-in SEO. No coding skill is required.
Integrate more than 35 payment methods with OpenCart; you can accept payment from any corner of the earth. Pretty good.
OpenCart Key features
- Allows you to set advanced permission and privileges
- Set multiple customizable stores from a single dashboard.
- Set affiliate programs, coupons, discounts, and offers, with backup and restore with powerful extensions
- List unlimited products and categories
- Sell digital products as well with one click download option
- Multi-currency, multi-lingual support
- Sell products by subscription with flexible payment options
- Add multiple extensions to extend the functionality of the store
- More than 100 shipping methods to add with OpenCart
- Responsive
Install and Setup OpenCart on Ubuntu Server
New on ServerAvatar, use 1-month free credit to quick start. And if you are at the entry-level from the server side, grab three months of free credit from Vultr, DigitalOcean and more server providers.
Serveravatar enables you to connect VPS/VM/Cloud Instance/dedicated or Bare Metal servers. You can connect clean 18.04, 20,04, or 22.04 Ubuntu servers with ServerAvatar.
Installation and set up OpenCart on your server takes a couple of minutes. But before that, let’s connect a new server with ServerAvatar.
Note:
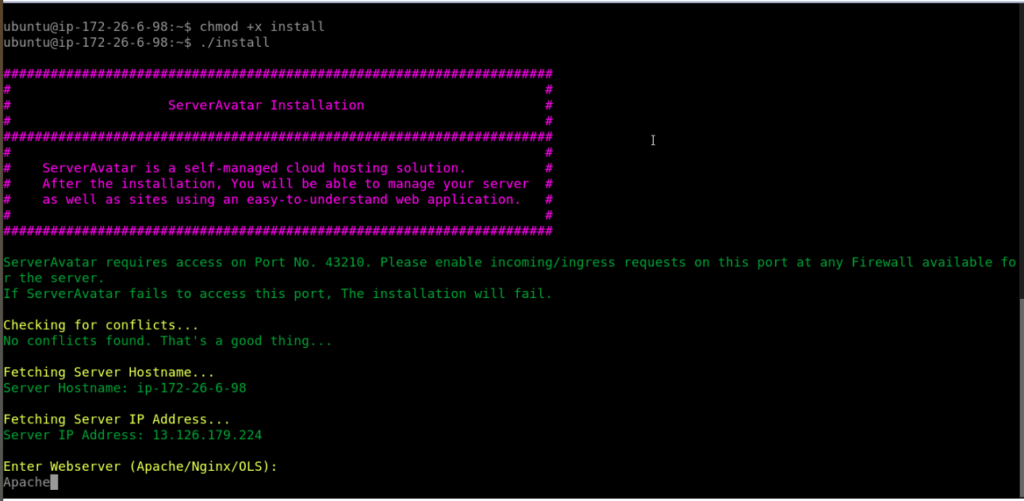
ServerAvatar requires access on Port No. 43210. Please enable incoming/ingress requests on this port at any Firewall available for the server. If ServerAvatar fails to access this port, The installation will fail
Step 1. Connect a server with ServerAvatar
Once you create a server as per requirement, connect using SSH and execute the below three commands as a root user on your server console area.
wget https://srvr.so/install
chmod +x install
./install
Install web server
1. It asks which web server you would like to install on your server: Apache, Nginx, or OpenLiteSpeed.
2. Type one that you want to install (apache recommended) and hit enter.
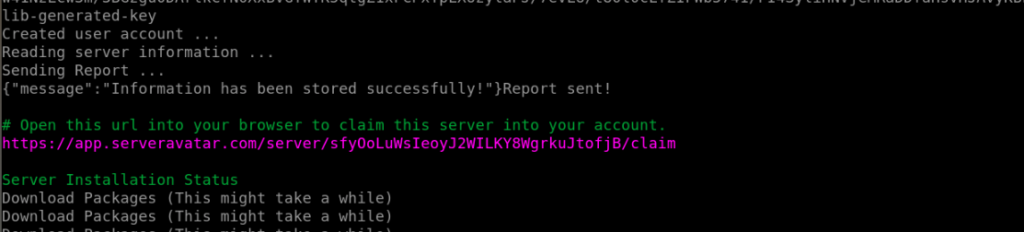
Claim your server
Completing the process gives a link to claim the server. Copy the link and paste it on the browser to access the admin panel.
ServerAvatar server panel
Register and set the admin username and password. Cheaper pricing plan than any other server management provider. It results in accessing the server panel, as in the image below.
Step 2. Create OpenCart database
1. On the server panel, go to Databases >> create to create a MySQL database.
2. Fill in the database details
- Database name
- Database Username
- Database Password
3. Click the Create Database button.
Step 3. Download OpenCart latest release zip file
1. Check the official download page and choose the latest zip file version.
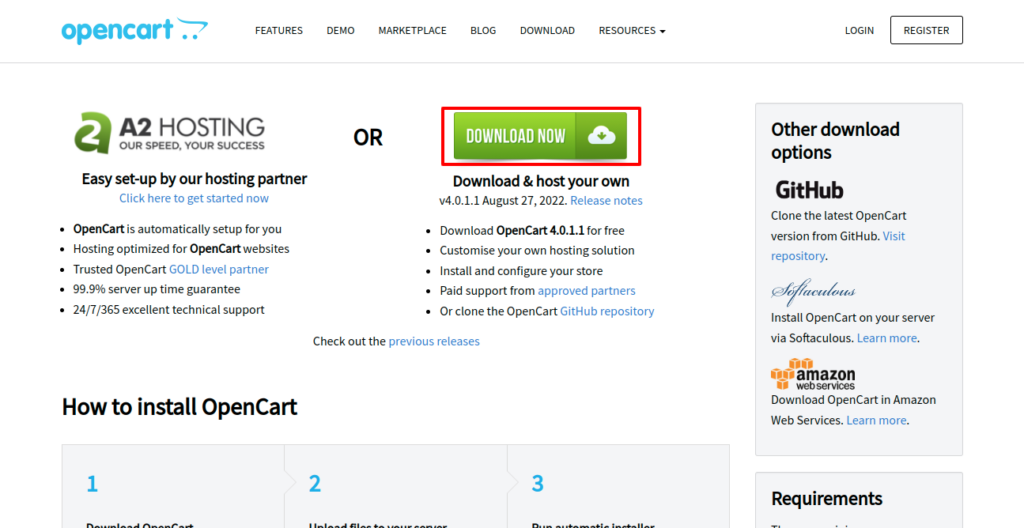
2. You can also check the GitHub opencart releases page to find more information regarding OpenCart downloads.
Step 4. Create a PHP application
1. On the server panel, click Applications and access the Create button like the image below.
2. Enter the details required to create an application and click the Create application button.
Note:
If you want to host an OpenCart store on your domain, then make sure to point your domain to the current IP address of your server, and for that:
1) Log in to your hosting provider site, where you buy your domain. Click here for more info about your domain name.
2) Access DNS Manager to edit your DNS records(contact the support team if you don’t find them)
3) Change the IP address of A Record of your website to the current server’s IP address.
3. To host OpenCart on your subdomain, for example, store.yourdomain.com, create a new application with the subdomain as your primary domain and follow the same procedure.
Note:
For accessing the store on the subdomain, you need to add your subdomain on A Record that points to the current IP address of your server. To point to an IPV6 address, you would need to use an AAAA record.
Step 5. Upload and uncompress the zip file
1. Go to File manager from the application panel and access the public_html directory.
2. Delete the index.html file to avoid forbidden errors.
3. Access the upload file icon like the below image and upload the zip file from your system.
4. Unzip the file in the public_html directory.
5. Delete the zip file after unzipping.
Step 6. Define Web Root path
1. Access settings from the application panel and type upload(or the folder name containing all files)on the field.
2. Save the changes.
Step 7. change PHP settings
1. Click on the PHP Settings tab from the application panel.
2. Change to the 8.1 PHP version and select a timezone.
Step 7. Rename files
1. On the file manager, go to the upload folder and check the Show Hidden Files box and rename the .htaccess.txt file to .htaccess
2. Similarly rename,
- config-dist.php to config.php
- admin/config-dist.php to config.php
Step 8. change file permissions
1. Select both config.php files one by one and click the Change Permission button.
2. Change the permission to 0755, like the following image.
Step 9. Change file code
1. Open upload/system/storage/vendor/twig/twig/src/Loader/FilesystemLoader.php
2. On line 90, replace
$checkPath = $this->isAbsolutePath($path) ? $path : $this->rootPath.$path;With
$checkPath = $this->rootPath.$path;3. Save the changes(ctrl + s).
Step 10. Install SSL Certificate
Click File Manager from the application panel to install automatic SSL or custom SSL certificates.
Note:
You can install SSL after the DNS propagation is done.
Step 11. Install OpenCart
1 Access the URL of your application on the browser to initiate the installation process.
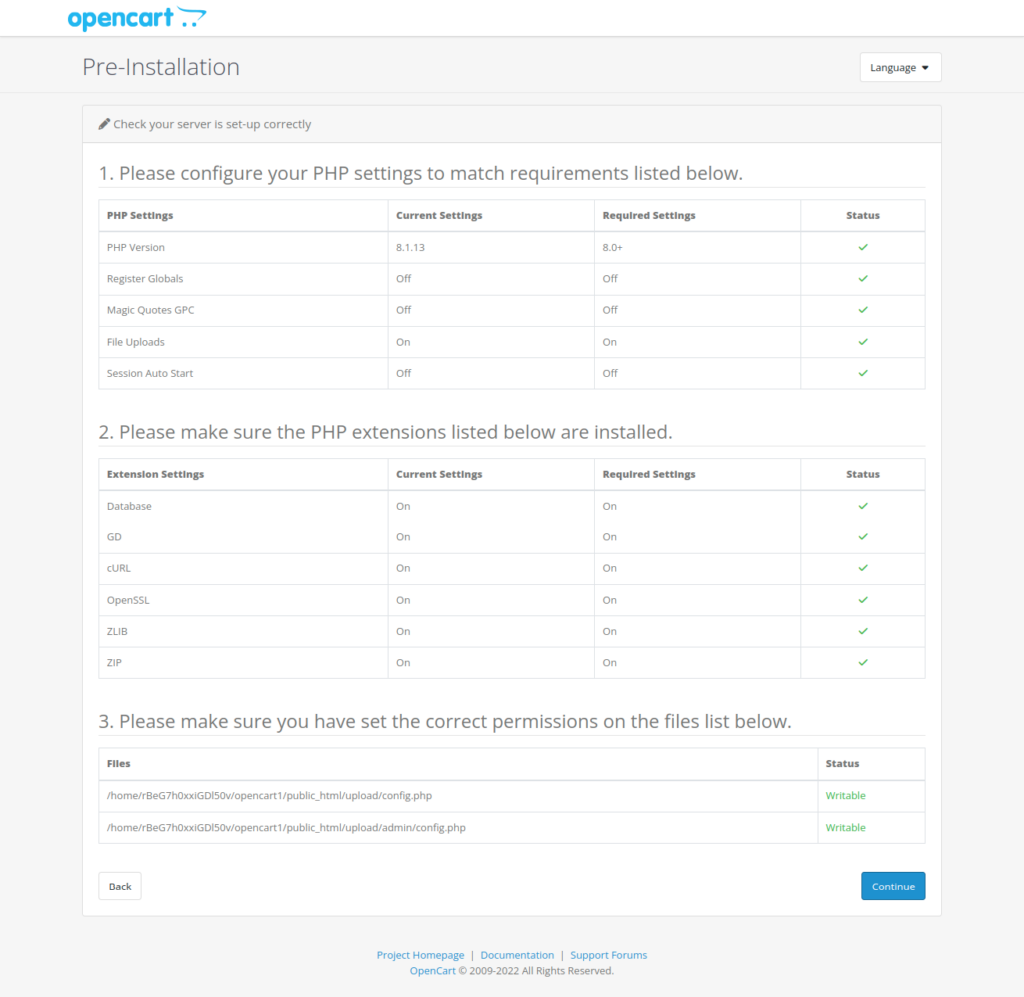
2. Click on Continue.
Configuration
1. Enter the database credentials that we created in step 2.
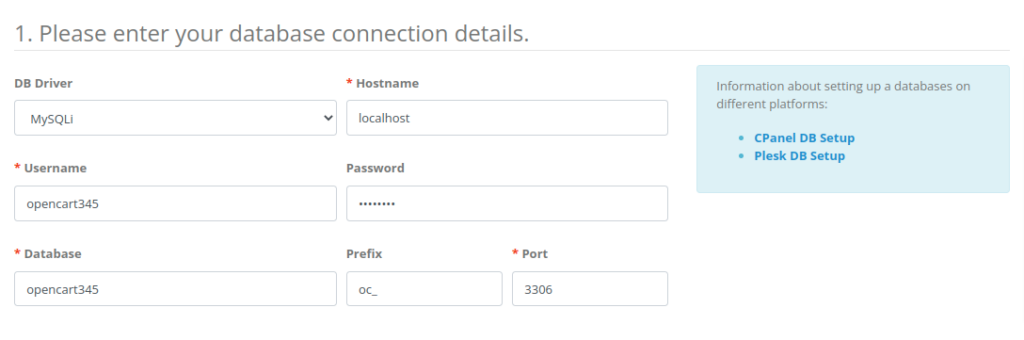
- Username: Enter database username
- Password: Enter database password
- Database: Enter database name
- Prefix: change the database table prefix as you want
2. Leave the other field as it is.
3. Admin details
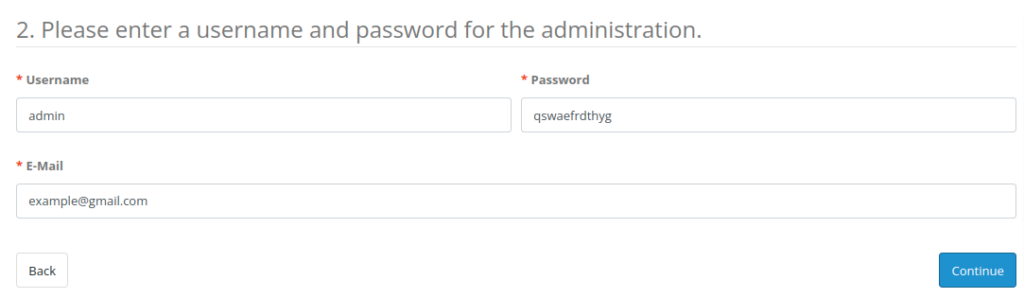
- Username: Enter admin username
- Password: Enter admin password
- Email: Enter the admin email
4. Click Continue.
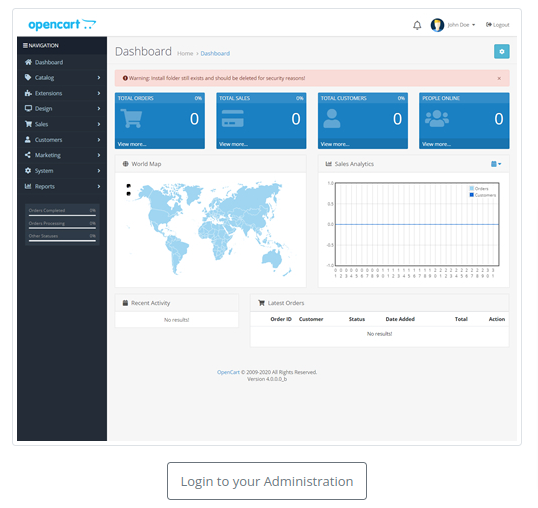
5. Login as admin with admin username and password on the next page to access the admin panel.
Step 12. Secure OpenCart admin panel
Follow the Security Notification popup to the admin panel. It points-
- To delete the installation directory after accessing the store admin panel.
- To move the storage directory outside of the web directory(e.g. public_html)
- To rename the admin directory to your choice
That’s it. Use the power of an open-source tool flexibly to make an impressive eCommerce store.
Check OpenCart documentation for more information related to installation and functionalities.