
Imagine driving on a highway with zero traffic, smooth, fast, and efficient. Now, imagine your WordPress website running just as fast. That’s exactly what Redis Object Cache can do for your WordPress site. It stores frequently used data in memory, so your website doesn’t have to repeatedly fetch the same data from the database again. The result? Lightning-fast page loads and happy visitors.
In this guide, I’ll walk you through the process of installing the Redis Object Cache plugin into WordPress, no technical hassles, just a clear, step-by-step guide that anyone can follow.
What is Redis, and why use Redis with WordPress?
Redis (Remote Dictionary Server) is a powerful tool that acts like a super-fast memory storage for your website. It temporarily saves frequently accessed data like settings, posts, and user sessions, so WordPress doesn’t have to fetch it from the slower MySQL database every time.
Think of it like your browser’s autocomplete, saving you from typing the same thing again and again. Redis does that for your website!
How Does Object Caching Work?
Every time someone visits your WordPress site, WordPress runs several database queries. This can slow down things, especially when you have many visitors.
With Object Caching, those repeated queries are stored in memory (RAM). When the same data is needed again, it’s pulled from Redis instead of the database, much faster!
Benefits of Using Redis Object Cache
- Faster Page Loads: Speed improves user experience and SEO.
- Reduced Server Load: Fewer database hits mean more efficient resource use.
- Scalability: Perfect for busy websites or e-commerce stores.
- Improved User Experience: Faster loading times and happier visitors.
Prerequisites Before You Start
Before starting the installation, make sure you have:
- A VPS or dedicated server
- Root or sudo access for installing packages on server
- PHP version 7.2 or higher
- A WordPress site
Here is the Step by step guide:
Step:1 Install Redis on Your Server
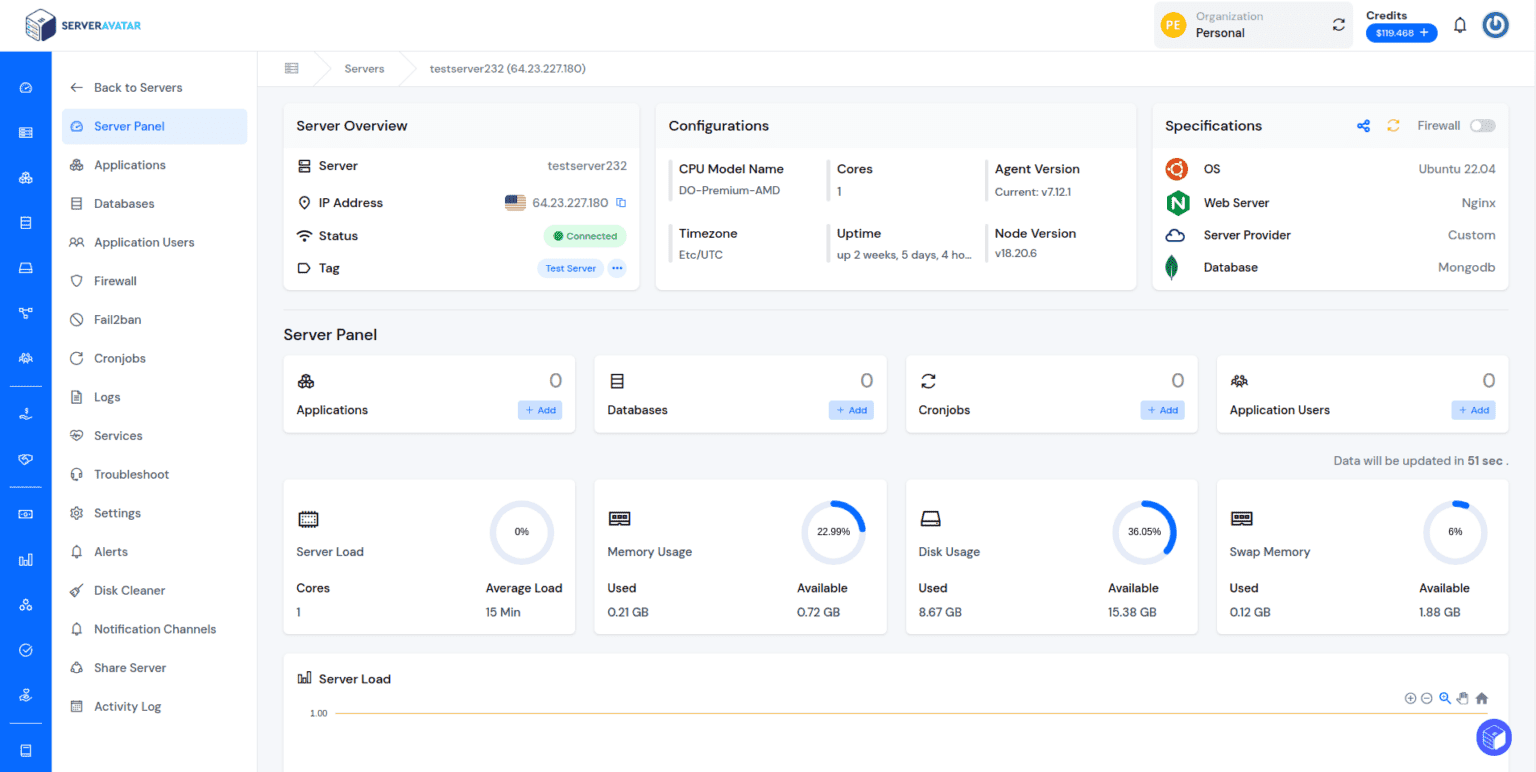
For ServerAvatar Users:
If you’re using ServerAvatar, you don’t need to install or configure Redis manually.
Redis comes pre-installed and fully configured with every new server you connect to ServerAvatar.
That means Redis is already running and ready to use for caching or any other purpose.
No extra setup or commands are required — just use it directly in your application.
For Manual Installation:
If you’re managing your own server, you can install Redis manually on Ubuntu. Check out our detailed guide here: Step-by-Step Redis Installation Guide
Redis needs a PHP extension to work with WordPress. Let’s install the PHP Redis extension. I’m installing here for PHP 8.1, adjust it based on your version:
sudo apt install php-redisThen restart web server. Use the below command to restart apache web server:
sudo systemctl restart apache2Or, if you’re using Nginx:
sudo systemctl restart nginxStep 2: Install Redis Object Cache Plugin on WordPress
Now it’s time to install redis object cache for your WordPress application.
- Go to your WordPress admin dashboard.
- Navigate to Plugins > Add New.
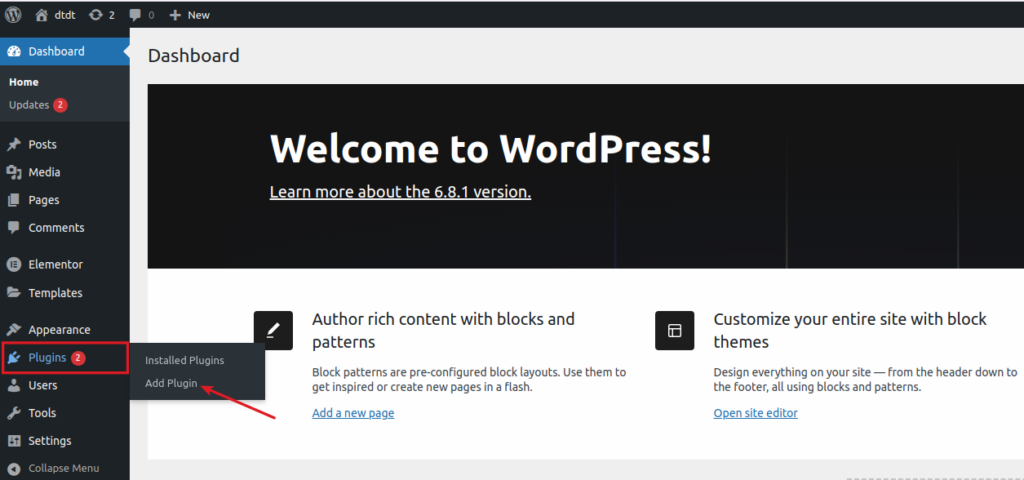
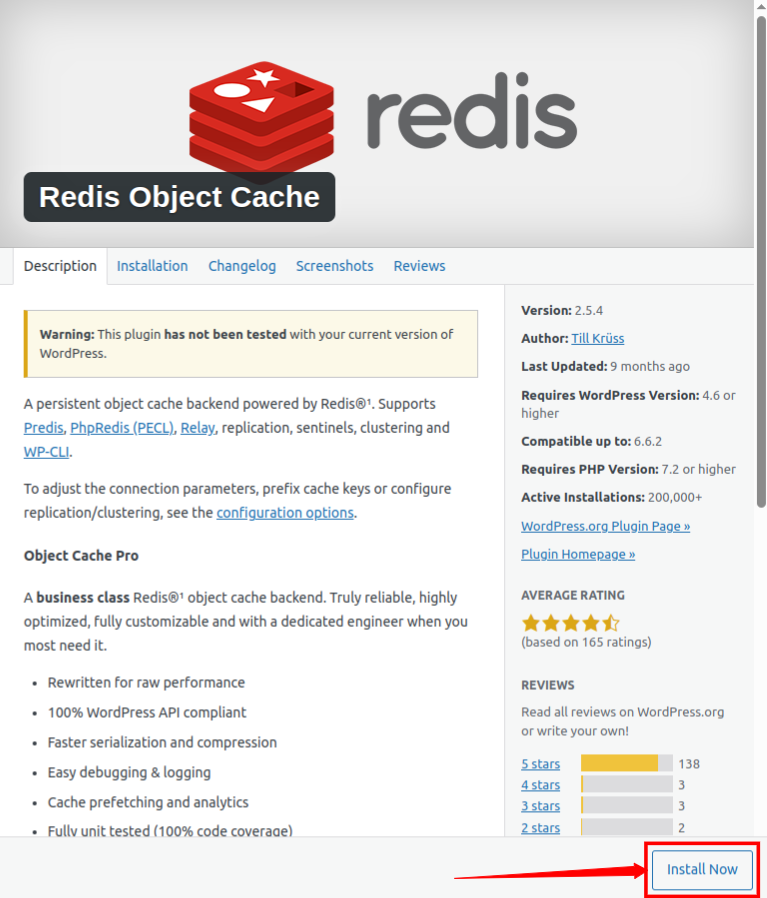
- Search for Redis Object Cache.
- Click Install Now button. Once installed, click on the Activate button to activate the plugin.
That’s it! You’ve installed the plugin.
Step 3: Configure the Plugin Settings
Let’s add the Redis Password to your WordPress application’s wp-config file. If you are using ServerAvatar to manage your servers and applications, it is very easy to add the Redis password. Just follow the steps below:
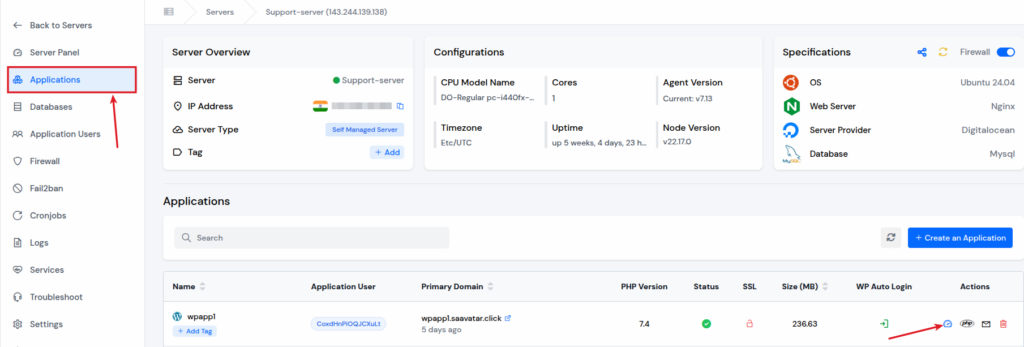
- Navigate to the application panel by clicking on the dashboard icon next to your WordPress application.
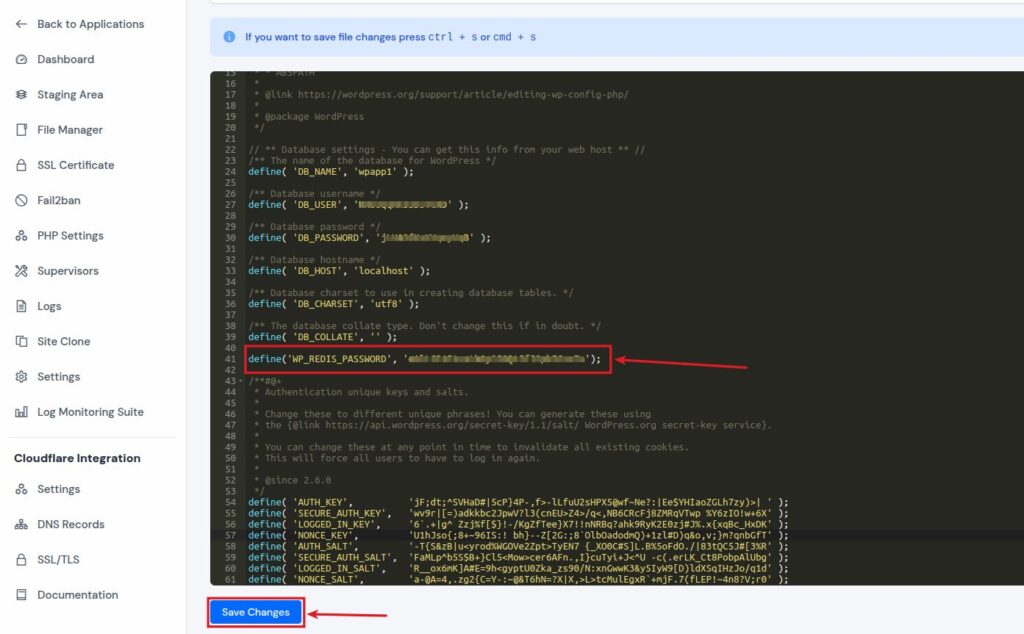
- Click on the “File Manager” from the left-hand sidebar. Go to the “public_html” directory and open the “wp-config.php” file.

- Add your redis password in config file:
define('WP_REDIS_PASSWORD', 'YOUR_REDIS_PASSWORD'); - Enter your redis password at the place of YOUR_REDIS_PASSWORD; Click on the “Save Changes” button after adding.
That’s it!
Step 4: Enable the Object Cache Plugin
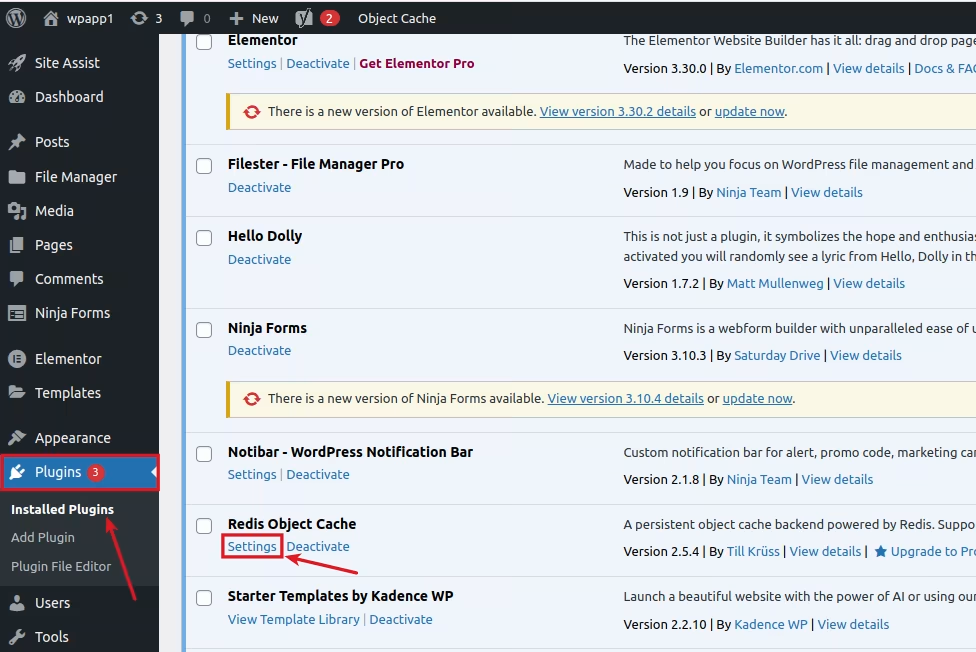
Once the plugin is installed and activated, navigate to your WordPress application Dashboard >> Plugins >> Installed Plugins, and click on the “Settings” for Redis Object Cache Plugin.
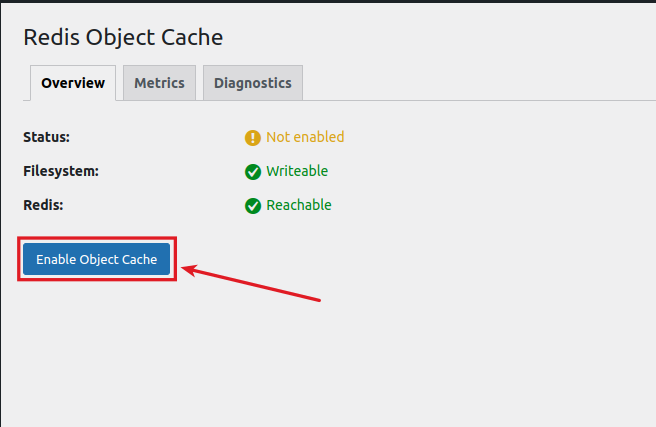
Now, the plugin will connect to your Redis server and start caching immediately.
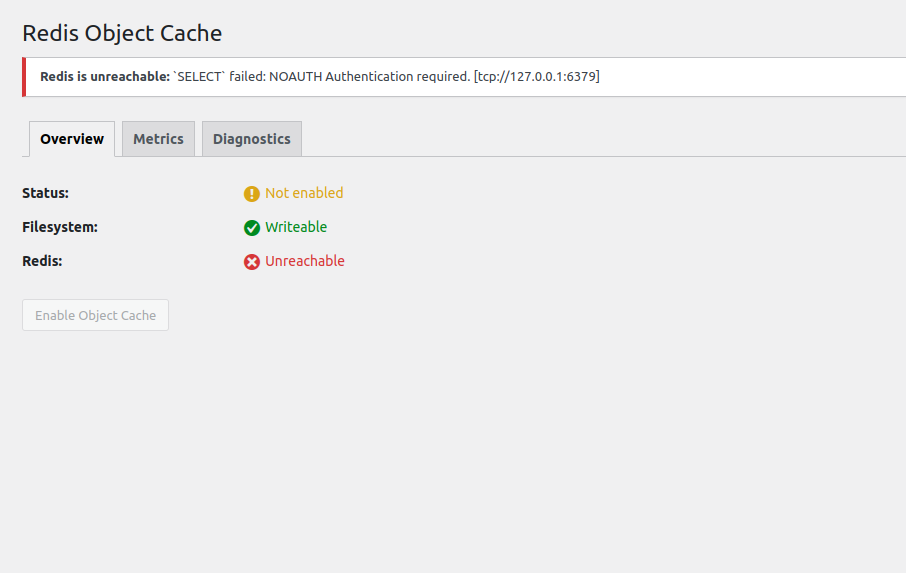
Note: If your Redis Password is not defined in your wp-config file, you will not be able to enable the Object Cache, and you will see the error message ‘Redis is unreachable’, as you can see in the image below.
Step 5: Test the Redis Connection
Once you enable the Redis Object Cache, you will see a green message at “Status” that says: “Connected”, Redis is active, and object cache is enabled.
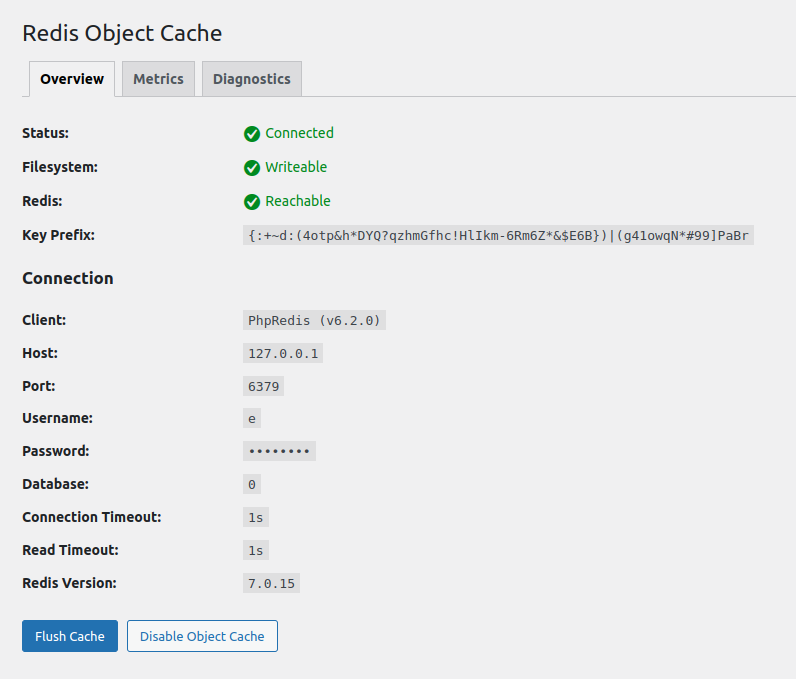
If you see this, Congratulations! You’re now officially using Redis!

How to Know If Redis Is Working Properly
You can verify Redis usage with this command on your server:
redis-cliThen type the below command and enter your Redis password at the place of “REDIS_PASSWORD” to authenticate.
AUTH REDIS_PASSWORDThen write “monitor” to see the entries.
monitorAs you can see in the following image:
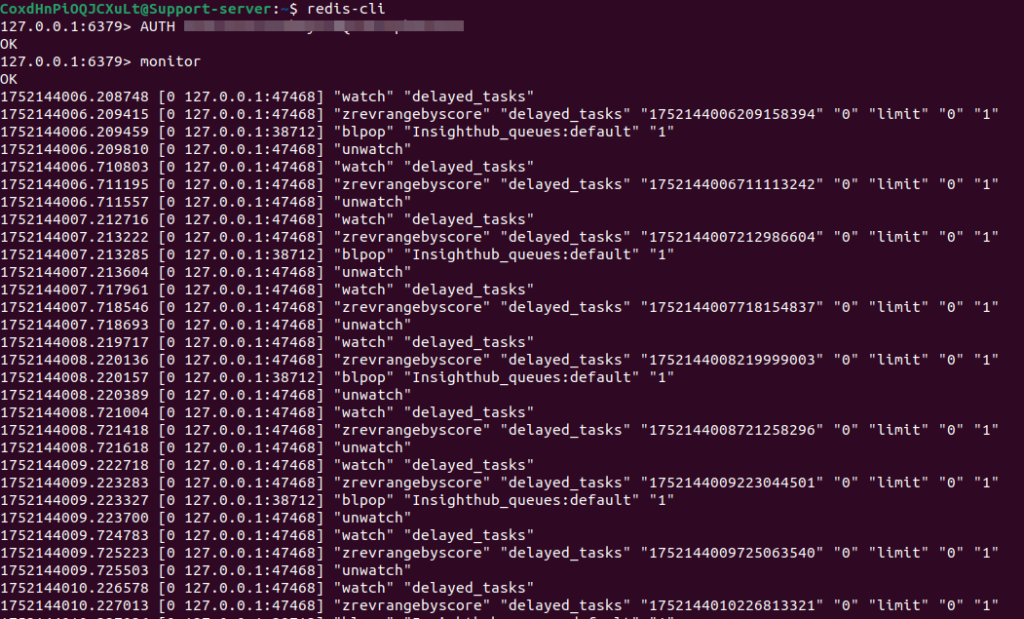
Then browse your website in another tab. You’ll see live entries popping up, which means Redis is actively caching data.
Common Issues and How to Fix Them
Issue 1: Plugin Can’t Connect to Redis
- Make sure that Redis is running by using the command “sudo systemctl status redis”
- Check that the PHP extension is installed and active.
Issue 2: White Screen After Activation
- Disable the plugin. You can use FTP or File Manager to do that.
- Check PHP error logs for clues.
Issue 3: Redis Stops Working After Server Reboot
- Make sure that Redis is enabled, or you can use the command “sudo systemctl enable redis” to enable redis.
How to Clear Redis Cache in WordPress
Sometimes, you might need to manually clear the cache:
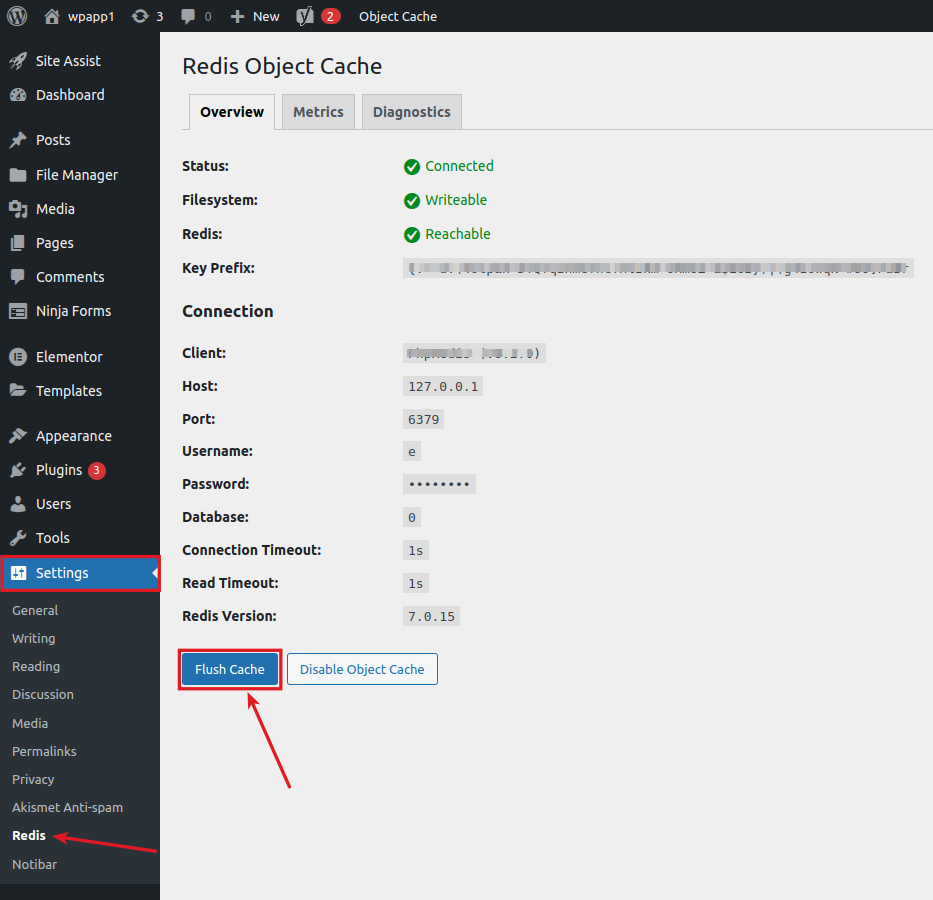
- Go to the Settings tab in your WordPress admin dashboard and then to Redis
- Click on the Flush Cache
You can also run this command from your server:
redis-cli flushallUse this command with caution, as this removes all cached data.
Alternatives to Redis Object Cache
Not a fan of Redis? Here are a few other options:
- Memcached: It is a memory-based cache solution.
- W3 Total Cache: It includes object caching and more.
- LiteSpeed Cache: Great if you’re using a LiteSpeed server.
Each tool has its pros and cons, but Redis remains a top performer for object caching.
Conclusion
If you want your WordPress website to run faster and handle more traffic, Redis Object Cache is a no-brainer. It’s lightweight, powerful, and surprisingly easy to set up.
Throughout this guide, you’ve seen how easy it is to get Redis up and running, from installing it on your server to enabling it through a simple WordPress plugin. With just a few steps, you can significantly cut down page load times, reduce server strain, and create a faster, more reliable experience for your visitors.
Whether you’re managing a high-traffic blog, a growing WooCommerce store, or a content-heavy business site, Redis Object Cache helps your site handle more users with less stress on your infrastructure. It’s scalable, efficient, and works seamlessly alongside other performance tools like CDNs.
And if you’re using ServerAvatar, the entire process becomes even simpler with an intuitive interface and built-in support for Redis management, making it accessible even for users without deep technical knowledge.
Don’t be intimidated by the technical stuff; once Redis is set up and running, you’ll barely have to touch it again. Your website visitors will enjoy faster pages, and you’ll enjoy fewer headaches.
Frequently Asked Questions (FAQs)
1. Do I need a VPS to use Redis with WordPress?
Yes, Redis typically requires a VPS or dedicated server. Most shared hosting providers don’t support it.
2. Will Redis work with WooCommerce?
Absolutely! Redis can speed up your WooCommerce store by caching product pages, user sessions, and more.
3. Is Redis Object Cache safe to use?
Yes, it’s safe and widely used by developers and hosting companies. Just make sure your Redis server is secured if it’s publicly accessible.
4. Can I disable Redis Object Cache after enabling it?
Yes, simply go to Settings > Redis in your WordPress dashboard and click Disable Object Cache.
5. Will Redis make a difference if I already use a CDN?
Yes, Redis complements a CDN. While a CDN caches static files (like images), Redis caches database queries, so they work great together.
Stop Wasting Time on Servers. Start Building Instead.
You didn’t start your project to babysit servers. Let ServerAvatar handle deployment, monitoring, and backups — so you can focus on growth.
Deploy WordPress, Laravel, N8N, and more in minutes. No DevOps required. No command line. No stress.
🚀 Try ServerAvatar Free – No Credit Card NeededTrusted by 10,000+ developers and growing.