We built the 5th version of ServerAvatar keeping the public API in mind. We launched it 9 months ago. It was not possible to make the API public in that version because we had a lot on a plate and making an API public is not something you can take lightly.
So, we launched the 6th version of ServerAvatar in February 2020. It is faster, more reliable and awesome! Finally, we made ServerAvatar API documentation live on 7th March 2020.
Today, I am creating an official post regarding the launch. So, Let’s see what I am going to cover in this article.
- Possibilities!
- How the billing part is handled?
- How to create an API Token?
The first part is the main reason why many of our customers were asking for API access. So, Let’s get started with the possibilities.
Possibilities
So, What is an API? If you don’t know, API stands for Application Program Interface. It simply allows you to use a 3rd party service programmatically from your application.
In the case of ServerAvatar, You can do stuff like creating an application, installing WordPress, Managing Databases programmatically from your application without actually logging in to the ServerAvatar.
So, If you are thinking about creating an online portal to manage your web hosting clients, You can! It requires a bit of programming knowledge but with a good idea, you can create a profitable product too.
Let’s see some examples.
- Managed WordPress Hosting
- Customized Server Management Panel
ServerAvatar API allows you to deploy new WordPress applications on your servers without any manual work. You can also update essential PHP settings and perform actions like install SSL Certificates instantly.
How the billing part is handled?
The billing is the same as the regular ServerAvatar application. It means that you can send us the plan you want to purchase for a specific server with a server creation request.
The pricing per server is as follows.
- Newbie: $2.36/month
- Pro: $4.72/month
You can also have 1 free server in your account. You must have enough credits to create a server. And, you can also select a team while creating a server.
To use our API, you need an API token for your account. You can generate the API token from the account section on the ServerAvatar application. Let’s see how to generate a new API key.
How to create an API Token?
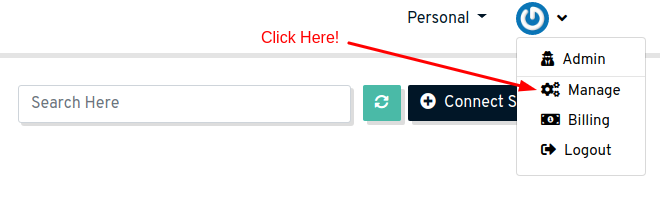
To create an API token, log in to your ServerAvatar account and click on the Account -> Manage option from the top-right corner of the page.
On this page, you will find two cards. The first one will allow you to update your basic account information and the other section one will allow you to enable/disable API token.

Once the API is enabled in your account, you will see your API token just like this.
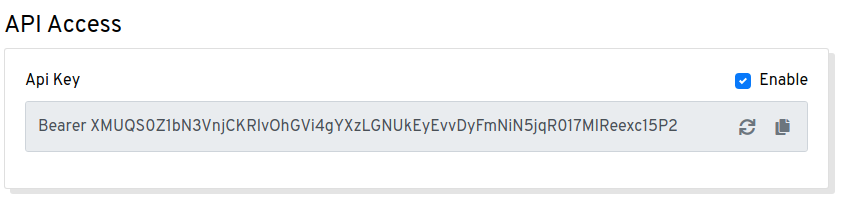
Click on the Reload button to refresh your API token. Refreshing an API token might break the application running on this API token. So, make sure to update the API key in your application too!
You can also disable the API access if you don’t want to manage your ServerAvatar account programmatically.
Conclusion: So, the ServerAvatar API is out! Now, as a developer, you can automate the processes and work on new ideas! Please let us know in the comment section if you have any questions regarding this topic. We will get back to you as soon as possible with the answer.