Images and other media files can help make your WordPress site look more stunning and engaging for users. Adding more media files on WordPress results in an unorganized structure of your media library. You might have faced this problem, I think. This makes it difficult for you to find the files you need. In addition, it slows your site down at one time.
Google search data shows that the Bounce rate – the percentage of visitors that do not take any action on web pages can increase by 32% when page load time goes from one to three seconds and by 90% when page load time goes up to five seconds.
If your WordPress media files make you feel disoriented, don’t worry about that. We have a hand-picked free solution to offload your WordPress media to DigitalOcean Spaces, an object storage service that lets you store and serve large amounts of data at an affordable price.
Let’s look at why you should offload your WordPress media to any storage space, especially DigitalOcean WordPress integration. Offloading your media to DigitalOcean WordPress can reduce load times, improve organization, and keep your site running smoothly. When you use DigitalOcean WordPress, you gain an affordable and efficient solution to manage large amounts of data while optimizing your website’s performance.
Benefits of offloading WordPress media to cloud Storage
- Improve site speed: This speeds up your WordPress Website by offloading your media to any cloud storage.
- Offload heavy media work: easily offload WordPress heavy media work, including Transcoding and streaming.
- Download your library media easily: you can quickly find and download any WordPress media straight away using your storage provider space.
- Reduce server storage space: Offloading media to another space reduces server storage and increases site speed.
Offload WordPress media files to DigitalOcean space
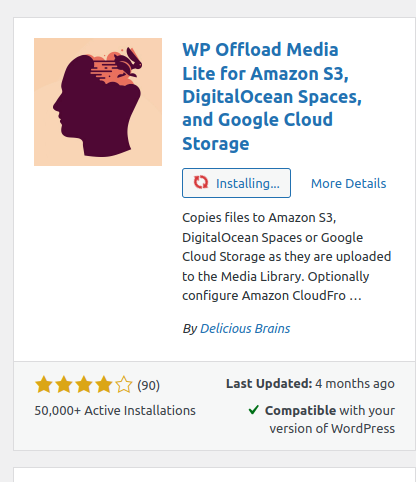
To offload WordPress media, you’ll need WP Offload Media Lite Plugin installed on your WordPress site.
With ServerAvatar, you can deploy a WordPress site with just one click. Don’t have an account, click here to register and use the feature-rich panel.
Create Your DigitalOcean Account
To get started using DigitalOcean space, you’ll need to Sign up for an account. It gives you a two-month free trial for Spaces. It will ask you for credit card information, but you will not be charged during your free trial.
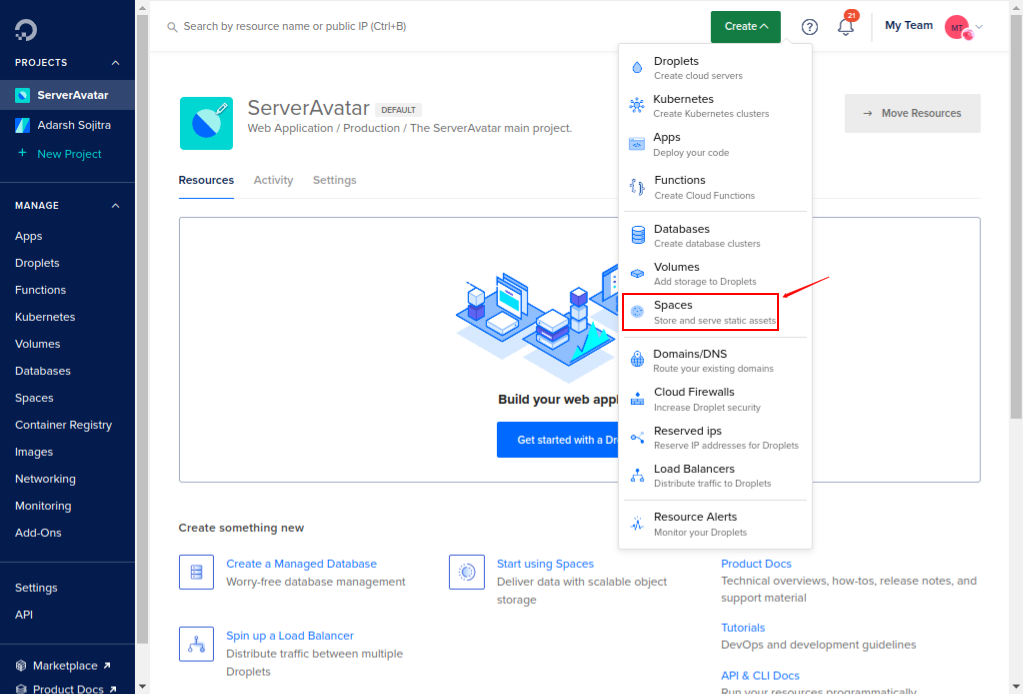
Create a DigitalOcean Space
Once you signed up for DigitalOcean, click on the Create dropdown button and access Spaces option like the image below.
Now on the next screen:
Select Datacenter region
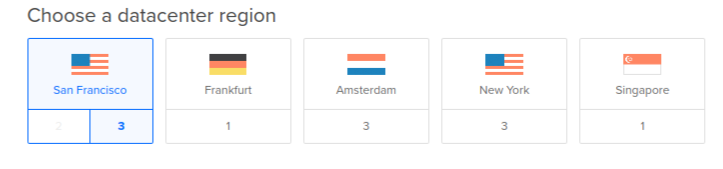
There are more than ten locations to choose from. Select the location closest to your end users to face low latency and a positive user experience.
The data center region you select becomes part of the Space’s endpoint URL.
CDN(Content Delivery Network)
CDNs help deliver web assets up to 70% faster. It also provides a layer of redundancy for websites.
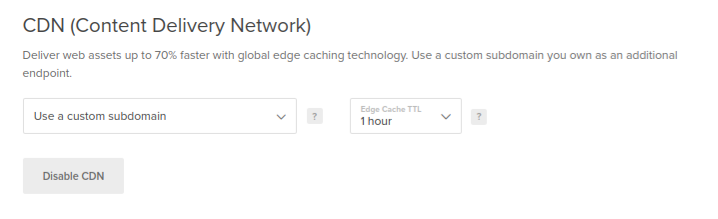
By enabling CDN, you’ll see an Edge Cache TTL dropdown menu. It specifies the amount of time that the content is cached. TTL is default set to 1 hour, but you can change it as needed.
File Listing
As an owner of a Space, you can set permission for the file listing. Which can be –
- Private: only those users can connect to the Space with an access key.
- Public: anyone can view the listing by accessing the base URL of the Space.
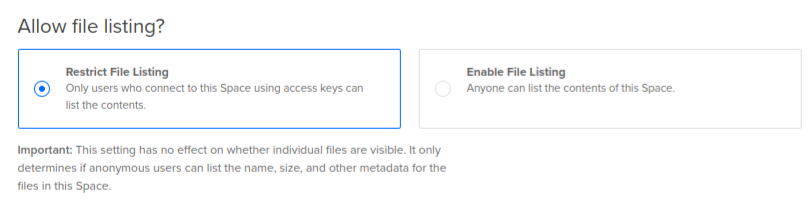
Note that file listing settings do not affect individual file permission. This setting only determines whether anonymous users can list the name, size, and other metadata for the files or not.
Choose a unique name
The Space name adds up to the part of your Space’s endpoint URL, for example-
Space-name.datacenter-name.digitaloceanspace.com
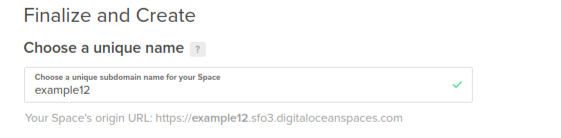
Note that you can not change the Space name once it is created.
Select project
Select your project from the dropdown in which you want to add Space.
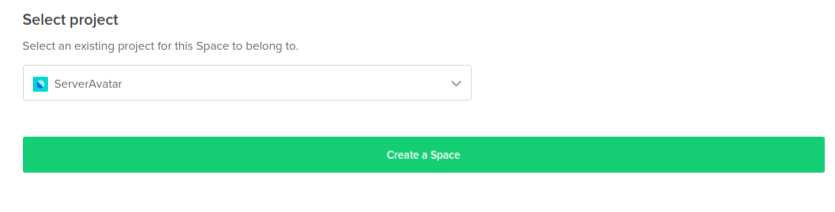
Once it is done, Click Create a Space button. And your Space/Bucket is ready to store media files.
Create DigitalOcean Space Access Key
To connect Space with the WordPress media library, we need to generate Private and Public Keys.
And for that, access the API option from the sidebar and click Generate New Key option. Or you can directly go to https://cloud.digitalocean.com/account/api/tokens.
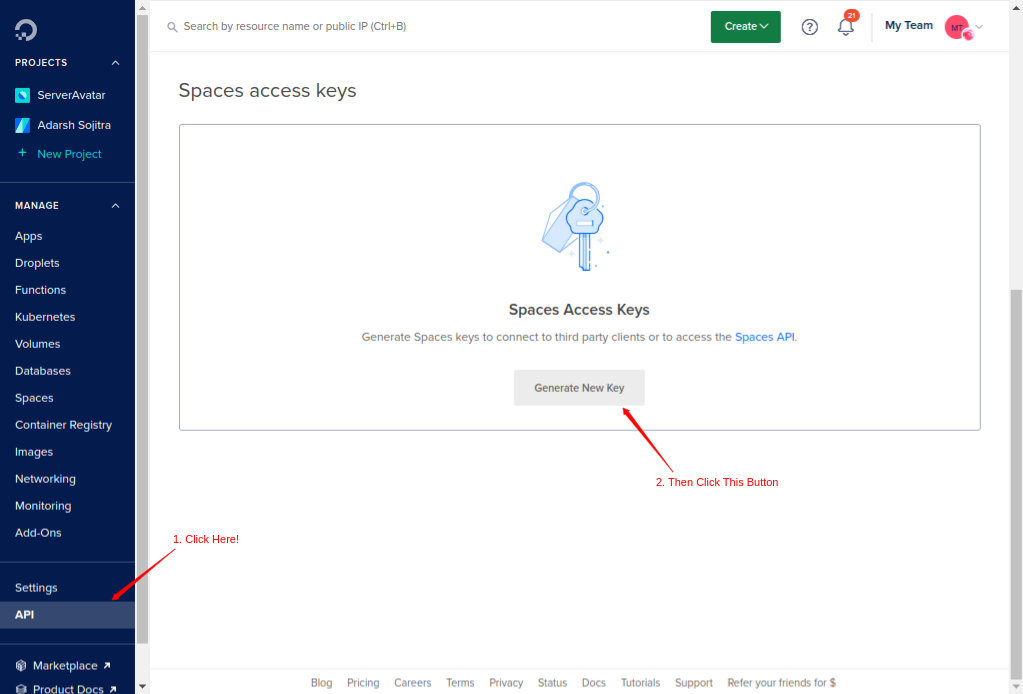
Give a proper name to your Space and hit enter. You’ll see the credentials in the following image.
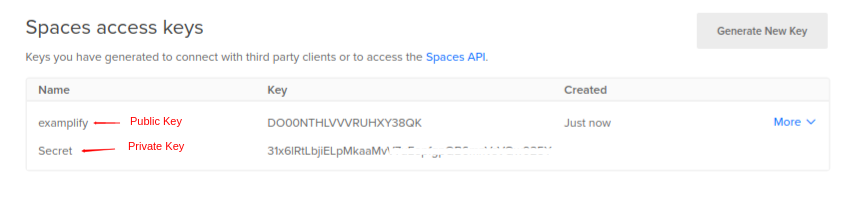
Copy those keys and paste them into a safe place. You will require it in the next step. Once you leave the page, you can’t access the Private key anymore.
Add code snippet to wp-config.php file
As I said early in this article, install and activate the WP Offload Media Lite plugin in your WordPress.
If you use ServerAvatar, you don’t need to connect with any FTP Clients to add/edit the code of WordPress File.
Once you have installed the plugin, click on Settings and access Offload Media Lite like the image below.
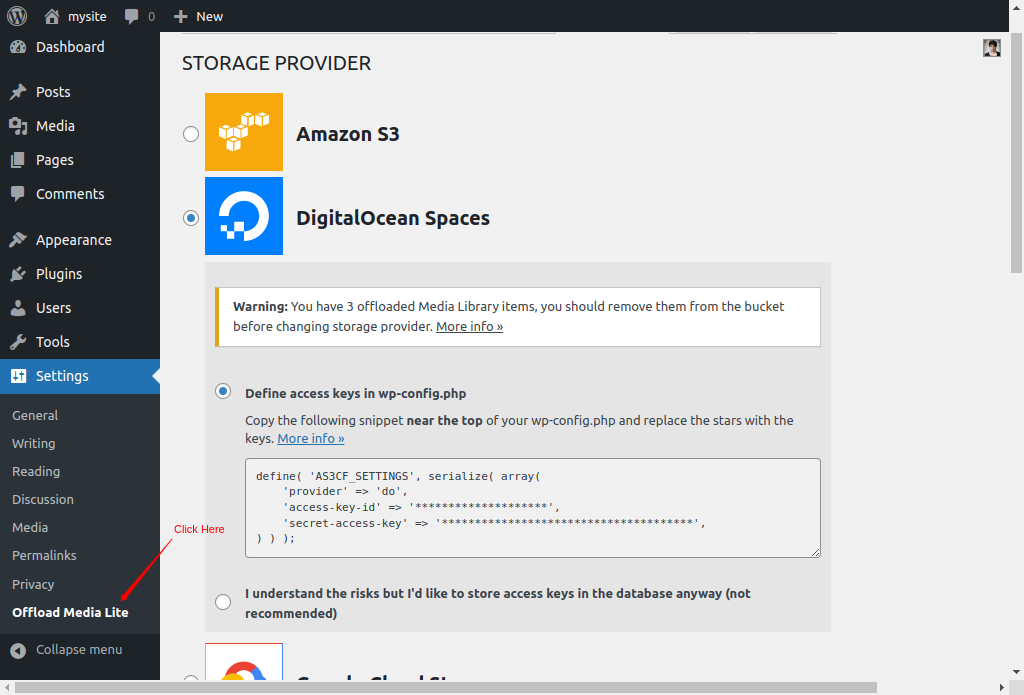
As you can see in the above image, selecting DigitalOcean Space will provide you with a code snippet to connect with Space.
Access the wp-config.php file and add the given code snippet just above the –
“/* That’s all, stop editing! Happy publishing” line, just like the image below.

Make sure to replace the starts with your Public and Private keys in the code snippet. Save the changes once you are done.
Configure settings in WordPress Dashboard
On your WordPress dashboard, Go to Settings >> Offload Media Lite page.
On that page, enter the Region and Space/bucket name you had set up while creating a Space.
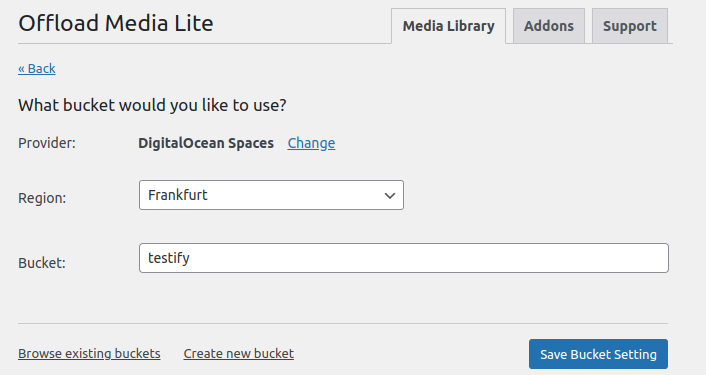
Click on the Save Bucket setting once you fill-up the information.
And that’s it. You can successfully connect your WordPress media library with DigitalOcean Space.
Offload Media Lite Plugin Settings
You can access all the plugin settings once you connect the media library with any cloud provider.
Settings including Storage Settings, Delivery Settings, and Advanced Options
- Storage Settings: This setting allows you to edit the Files Path by adding Year/Month to the end of the path and allows you to enable/disable Copy Files to Bucket.
- Delivery Settings: You can enable/disable Rewrite Media URLs and Force HTTPS options. It is recommended to enable both options.
- Advanced Options: This option allows you to remove files from the local server once it has been copied to the bucket. Note that some plugin or WordPress functionality depends on the file being present on the local server, and it may not work if you removed it from the local server.
Conclusion
Offloading WordPress media has lots of benefits. We hope you were successful at off-loading WordPress media on Digitalocean spaces. It also allows you to add load balancer in future.
FAQ
Why should I offload my WordPress media to DigitalOcean Spaces?
Offloading your WordPress media to DigitalOcean Spaces improves site speed by reducing the load on your hosting server. It also helps organize large media libraries more efficiently while providing scalable and cost-effective storage. This ensures your website performs better, especially as media files grow over time.
How does offloading media to DigitalOcean Spaces affect my website’s speed?
y using DigitalOcean WordPress integration, media files are stored and served from a separate storage space, reducing the load on your WordPress hosting server. This results in faster page load times, which is critical since a slow-loading site can increase bounce rates and hurt user engagement.
What plugin should I use to offload my media files to DigitalOcean Spaces?
To offload your media, you can use the WP Offload Media Lite plugin. This plugin allows you to easily connect your WordPress media library to DigitalOcean Spaces and manage your media files without slowing down your site.
Is it possible to delete media files from my server after offloading to DigitalOcean Spaces?
Yes, the WP Offload Media Lite plugin has an option under “Advanced Settings” to remove files from the local server once they’ve been copied to DigitalOcean Spaces. However, some plugins or WordPress functions may require the media files to remain on the server, so proceed with caution.
What is a CDN, and should I enable it when offloading media to DigitalOcean Spaces?
A CDN (Content Delivery Network) delivers your website’s assets, including media files, faster by caching them on servers closer to your users. Enabling a CDN when using DigitalOcean WordPress integration can improve load times and provide better redundancy, ensuring a faster and more reliable user experience.