Website analytics is crucial to understanding your audience in terms of how they behave and react, respecting your site. Right? It might be possible that you already use a website analytics tool, primarily Google Analytics.
Data becomes more powerful to find new opportunities using data analysis as your business grows. Unlike remote web analytics services(like Google Analytics) that control your data, you can host analytics on your server. In addition, data can be tracked inside your MySQL database. This thing is way better, isn’t it?
As Matomo is installed on your server, you can have total control over your data. Matomo is a cookieless( no use of any third-party cookie) alternative to any other remote analytics services.
Let’s dive deep into what Matomo is and its features.
What is Matomo Analytics?
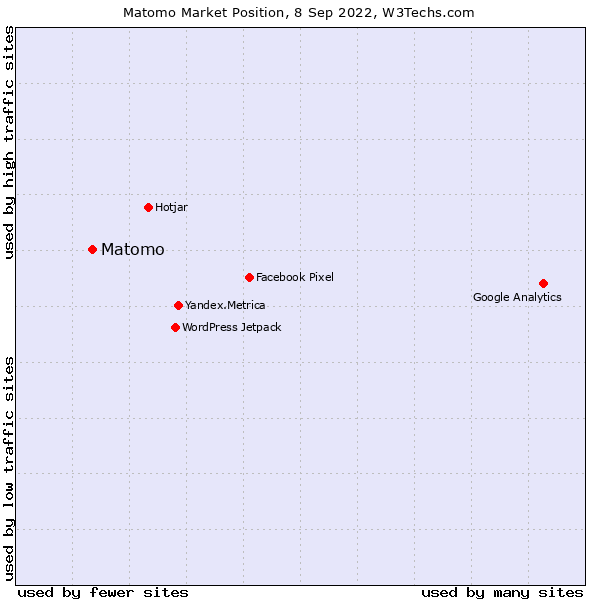
Matomo(Piwik) is an open-source PHP-based analytics software used on more than 1 million websites in over 190 countries. What makes it different from other analytics platforms is you can keep your data in your hands and use it flexibly.
Suppose you are currently using Google Analytics and thinking about shifting to Matomo in case, then there is no need to worry about your historical GA data. Matomo gives you a functionality to import Google Analytics data directly into your Matomo.
Check the Matomo analytics Live Demo here.
You may think that is why I repeatedly pointed you out about data privacy and 100% data ownership of things. Indeed, you can track your data limitlessly. You do whatever you do with your data by conventional business analytics.
Key features
- Customizable Dashboard: Matomo dashboard is fully customized. You can use different widgets to create a task-oriented dashboard as per your need. Like, the digital marketing team will deliver a dashboard with specific matrices and data points on the screen; likewise, the dashboard layout is different for the business director.
- Content Tracking: You can track content by measuring clicks, CTR(clickthrough rate), banner images, impressions, and even text images on the webpage.
- Goal Tracking: Track your website performance against business objectives such as online sales, brand exposure, and lead generation.
- Custom Variables: This is a name-value pair you can assign to visitors. It helps you visualize the different events that happen for each custom variable. For example, you can set the name “user status” and value “logged in users’ ‘ so it can count how many users were logged in to the web page. Likewise, you can set different functionalities.
- Segmentation: This functionality enables you to analyze reports on smaller groups of people based on their country or other common events.
- Site Search Tracking: Site search tells what type of content people are looking for on your website. It allows you to identify the keyword that visitors search for the most.
- Ecommerce Tracking: This reporting shows you specific website actions and traffic sources that lead to sales.
- Cookieless Tracking: Matomo detects unique visitors using his IP address and other footprint event id even if the cookie is disabled on the browser.
Install and Set up Matomo on a Ubuntu Server
Installing and setting up Matomo analytics on a server with ServerAvatar takes only 15-20 minutes. You can connect a fresh Ubuntu 18.04, 20.04, or 22.04 server with ServerAvatar.
You can easily manage multiple VPS/VM/Cloud Instance/Dedicated or Bare metal servers.
ServerAvatar gives you a feature-rich control panel to manage multiple servers and applications within it at an affordable price than any other management panel.
You can use $100 free credit from multiple hosting provider companies.
Connect a server with ServerAvatar
Connecting a server with ServerAvatar is very easy. Just execute the below three commands on your server as a root user. It will check server configurations and start connecting with ServerAvatar if it meets requirements.
wget https://srvr.so/install
chmod +x install
./install
It will ask which web server you would like to configure: Apache, Nginx, or OpenLiteSpeed. Type anyone that you want and hit enter.
It takes 3-4 minutes to connect to the management panel. Once it is done. Copy the link at the end of your console area and paste it into your browser to claim your server.
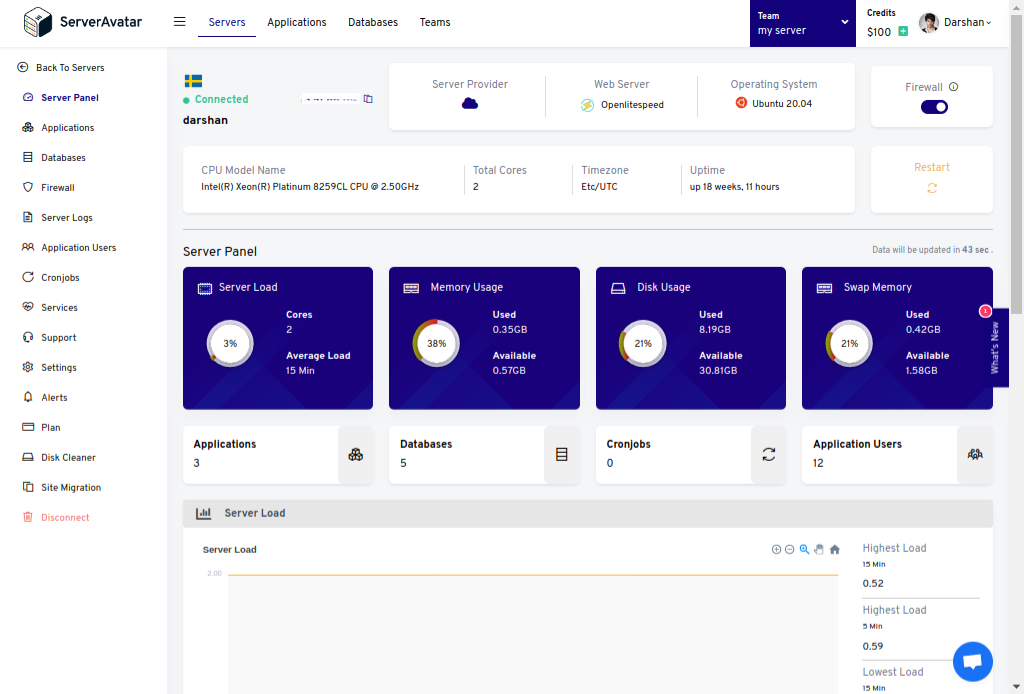
You’ll see the server management panel like as below.
Download the latest Release of Matomo
You can download the Latest stable release of Matomo from the given link:
https://builds.matomo.org/matomo-latest.zip
Check the Matomo download page for more info.
Create Matomo Database
When you install Matomo, it is necessary to specify MySQL information like DB Hostname, User, and Password.
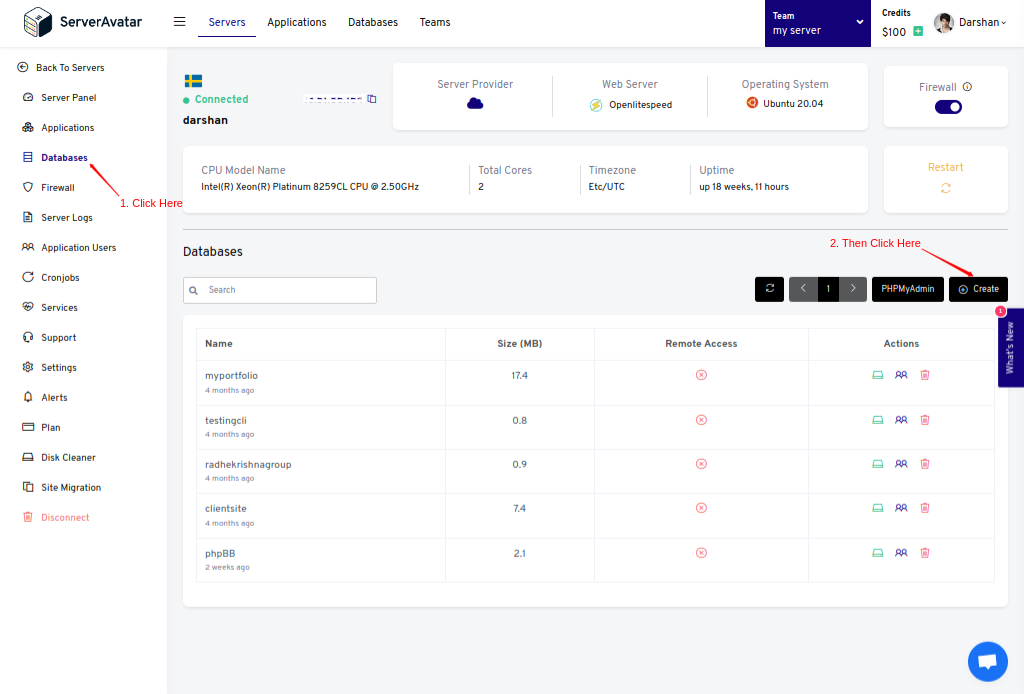
To create a database, click on the Databases tab on your server panel, like the image below.
You’ll see the database creation form. Fill up the required information. You can also set a custom Username and Password for the database.
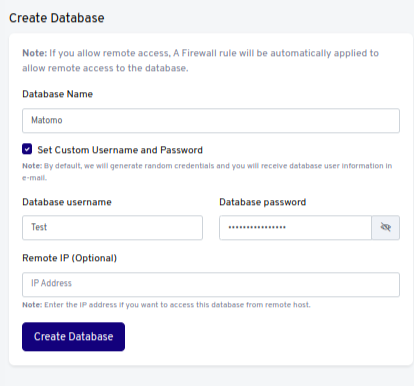
Click on the Create Database after filling in.
Create a PHP application and Upload the Matomo file
On your server panel, access Applications from the sidebar.
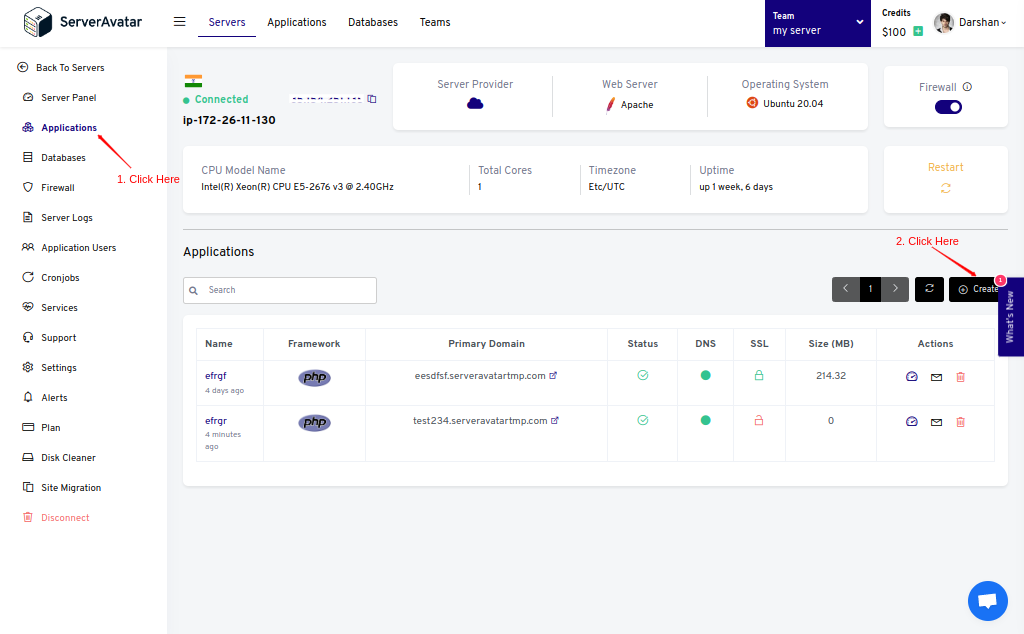
Creating an application requires basic information such as the Application Name and Domain Name.
Note that:
If you want to host Matomo analytics on your domain, then make sure to point your domain to the current IP address of your server, and for that:
1. Log in to your hosting provider site, where you buy your domain. Click here for more info about your domain name.
2. Access DNS Manager to edit your DNS records(contact the support team if you don’t find them)
3. Change the IP address of A Record of your website to the current server’s IP address.
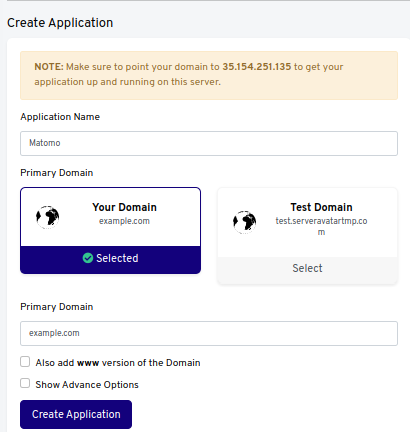
Click on the Create Application button after filling it up. To upload the file,
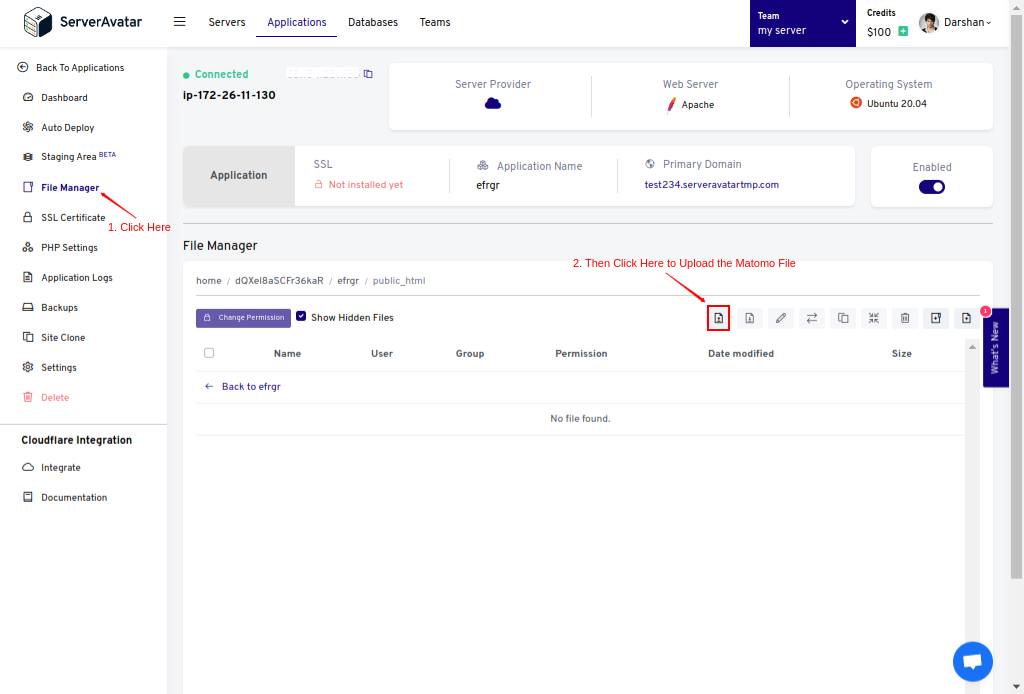
Go to the File Manager from the sidebar and access Public_html Folder. In the public folder you need to delete the index.html file to avoid forbidden errors on the site.
Access the upload icon from the list of icons like the following image and upload the zip file from your system
Select the zip file by clicking on the check box and unzip it like the image below.
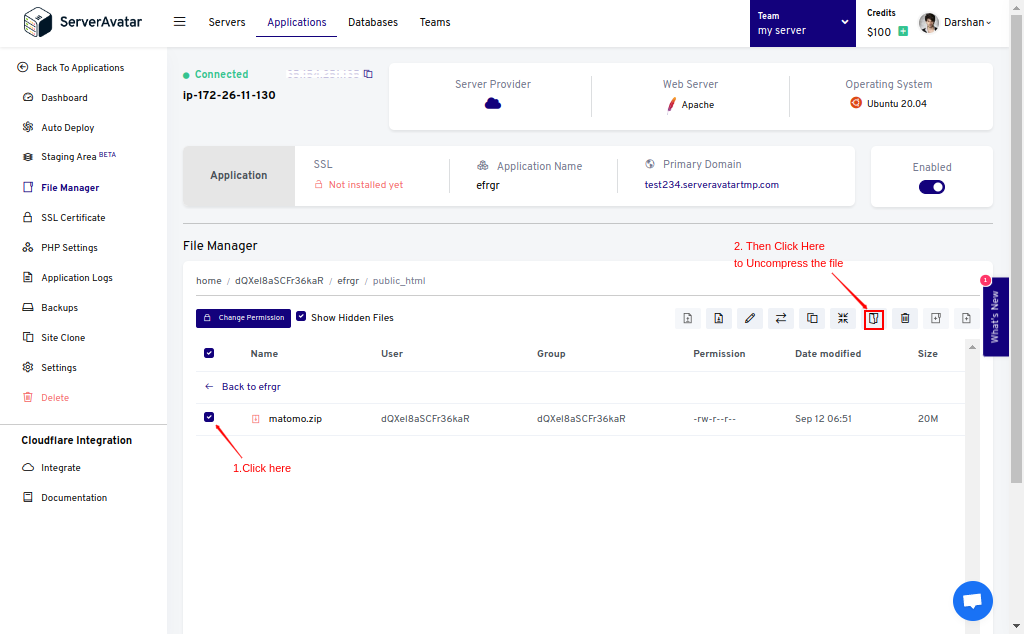
Once it is uncompressed, you’ll see the Matomo folder in the public_html directory.
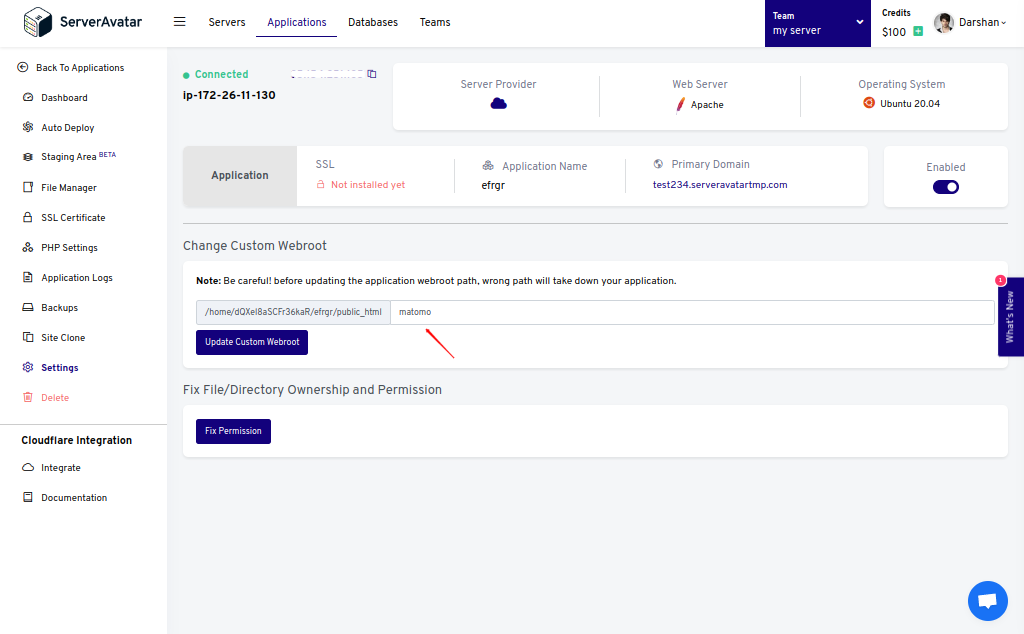
Change the Webroot of an application
If you want to host your analytics on your domain rather than the domain with a subdirectory, go to the Settings tab from the application panel and set matomo on the Custom Webroot field. Click on the Update Custom Webroot button after setting up.
Host Analytics on a subdomain
To host analytics on your subdomain, for example, analytics.yourdomain.com, create a new application with the subdomain as your primary domain and follow the same procedure of the above two steps.
Note that:
For accessing analytics on the subdomain, you need to add your subdomain on A Record that points to the current IP address of your server. To point to an IPV6 address, you would need to use an AAAA record.
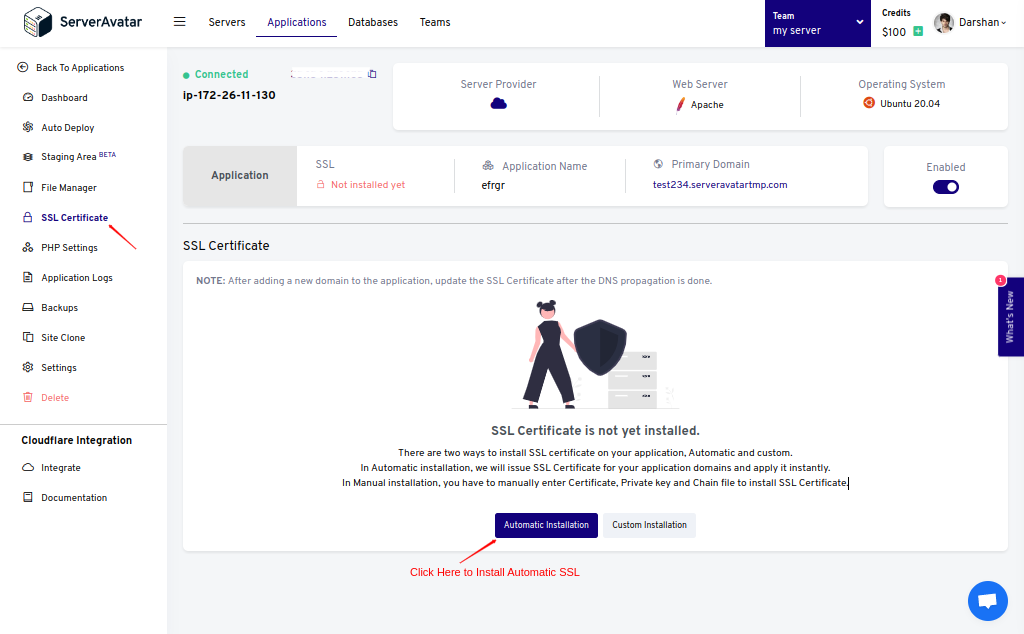
Install SSL Certificate for your application
Access the SSL Certificate tab from the sidebar on your application panel to install Automatic/Custom SSL to your application.
Click on the Force HTTP to HTTPs check box that will appear on the above page after installing SSL certificate.
Note that: after adding a new domain to the application, update the SSL Certificate after DNS propagation is done.
If you installed SSL using the Custom method, the screen looks like the following image.

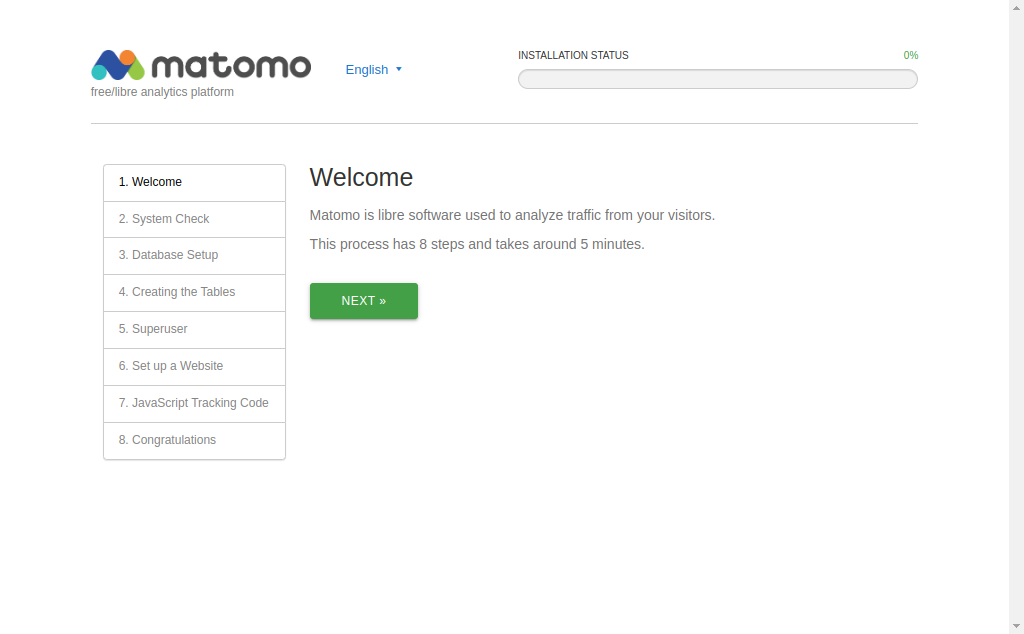
Install and Setup Matomo
Access your domain/subdomain URL on your browser to access the setup page. It’s an eight-step process and takes up to 5 minutes.
System Check
Matomo differentiates between three kinds of checks: A Required Check that checks specific PHP extensions and functions that will be required for Matomo, An Optional Check that is useful to improve the functionality and experience, and An Informational Check for developers to troubleshoot issues.
Click on the Next button.
Database Setup
Type the information of the database that we created before in this article. You’ll also see the database credentials by accessing the Database tab. If you set up the database on the same server as the application, then leave the Database Server field as it is.
It is recommended to Change the Table Prefix of the database.
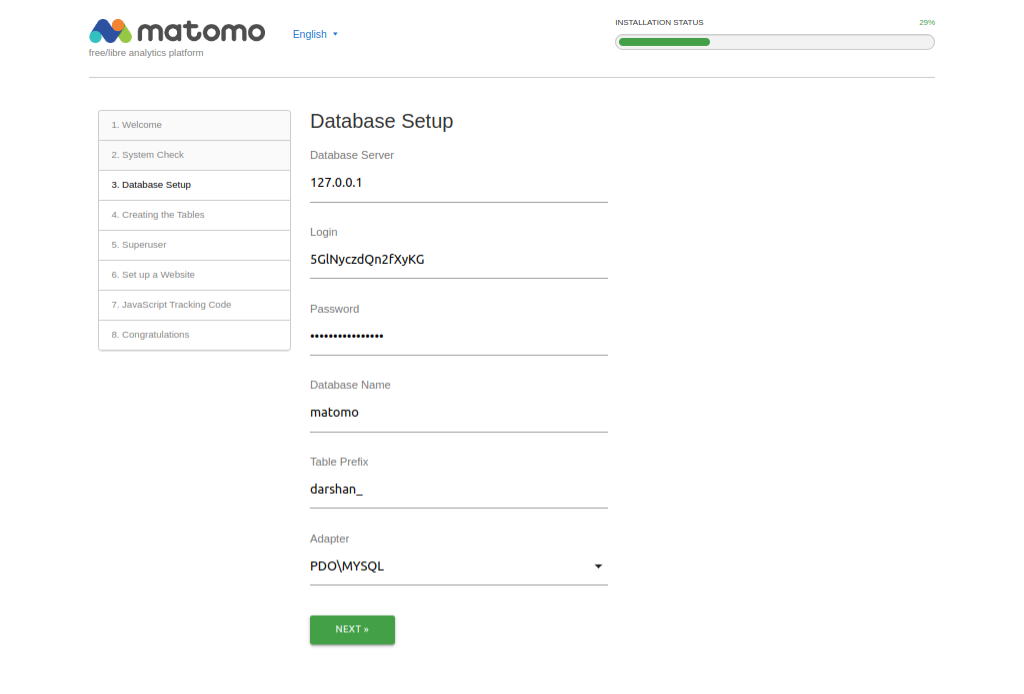
Click on the Next button after filling it up.
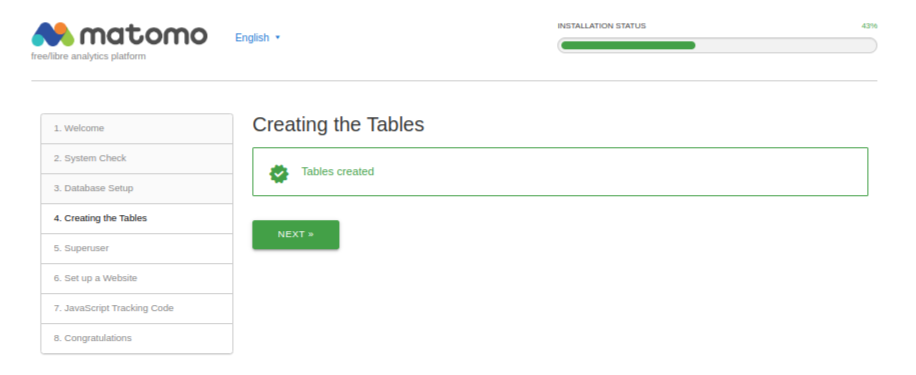
Creating the table
Matomo creates tables on your database. Once it can be done, you’ll see the screen like the following image.
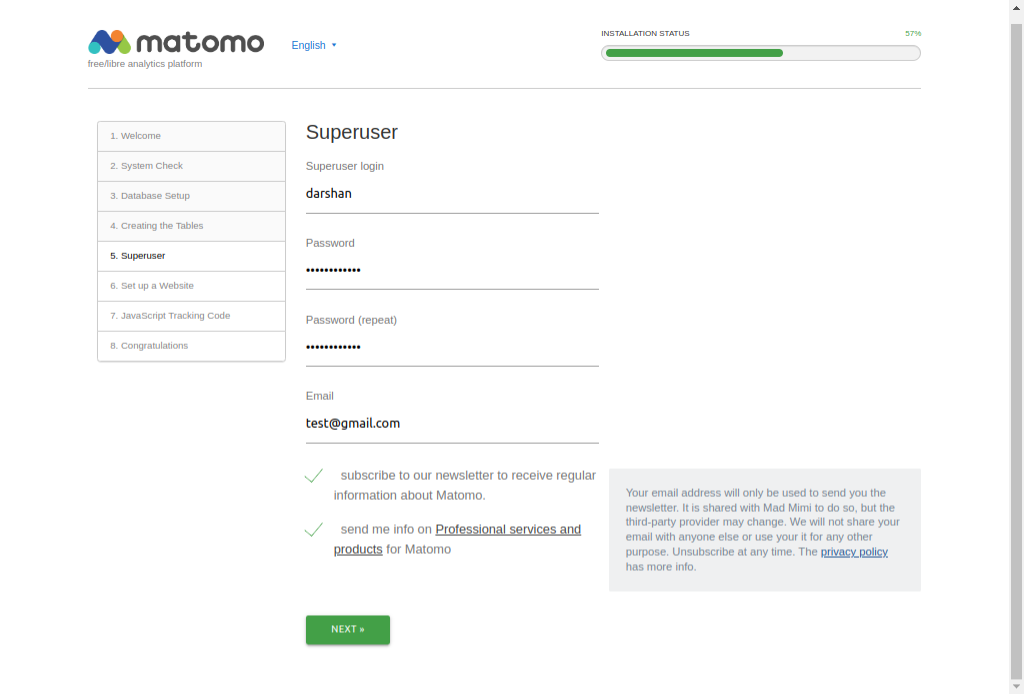
Create Superuser
Super users are the only users that can perform all administrative tasks. Fill in all the necessary details such as Username, Password, and Email. Tick right on the check box to receive regular Matomo updates and professional services and products.
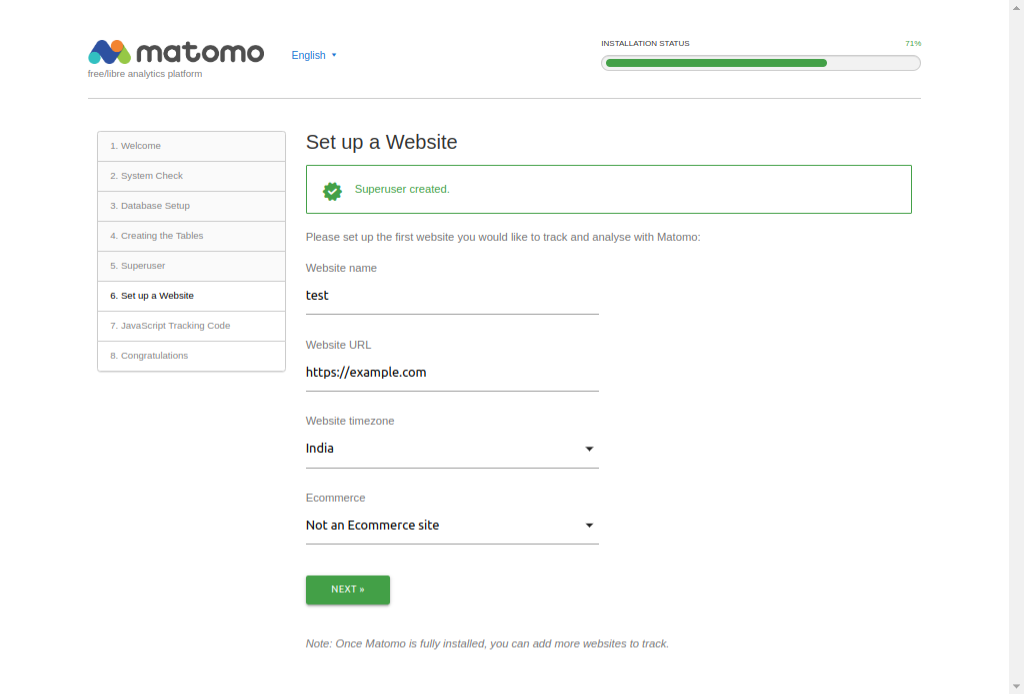
Set up a Website
Set up your website for which you want to track and analyze with Matomo analytics.
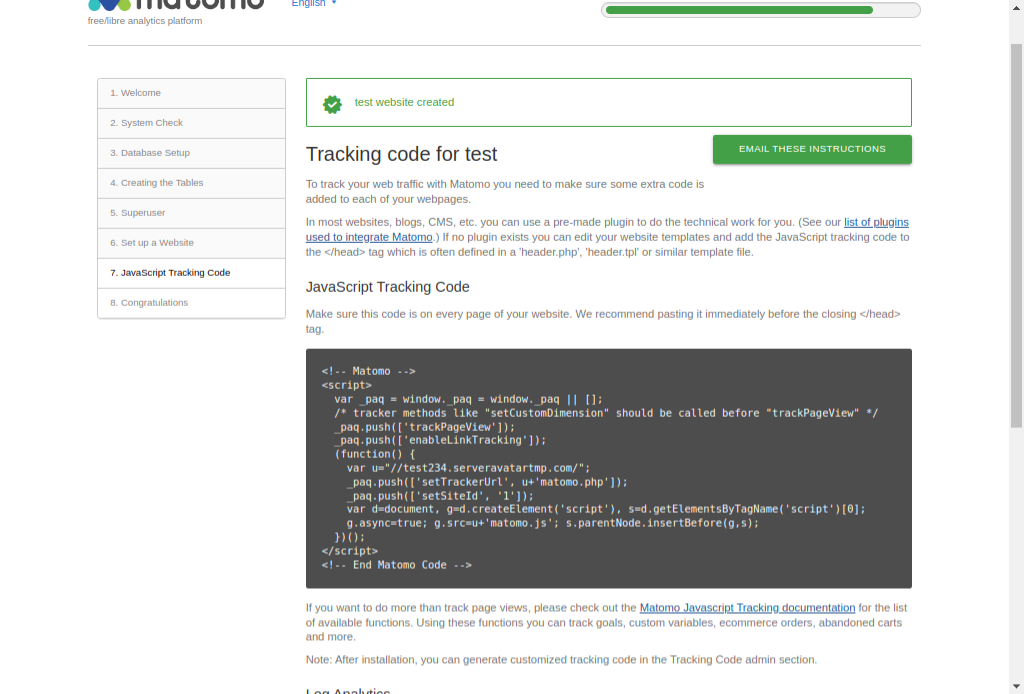
Insert JavaScript Tracking code
You can add provided code to each and every page of your website so that it can track all your website web pages and give you real-time statistics all the time. Follow the instructions provided on the page to add Javascript code to your site.
Click on the next button, and that’s it. You have successfully installed Matomo analytics on your server. If you are stuck or want more information about Matomo, you can visit the Matomo guide here.