
Imagine you are building your dream website, it’s same as crafting a house brick by brick. But instead of hammer and nails, you just need a keyboard and a little guidance. If you’re ready to get your hands dirty (virtually) and install WordPress with Apache on Ubuntu, you’re in the right place.
This guide is designed with simplicity in mind. No complex technical headaches, no prior server experience required. Whether you’re launching a blog, business site, or portfolio, we’ll walk you through every step to get your WordPress site up and running using Apache, the trusty web server.
WordPress is the most popular content management system in world. Think of it as the brain of your website, managing everything from blog posts to images. Apache, on the other hand, is like the waiter at a restaurant. It takes your visitor’s request and serves them your site, fast and efficiently.
Ubuntu is the latest version of the Ubuntu operating system, providing stability and modern tools to make web hosting easier than ever.
Prerequisites: What You Need Before Starting
Before we dive into commands, here’s a checklist of what you’ll need:
- A VPS or local machine running Ubuntu
- A root user or any user with sudo privileges
- Internet connection
- A domain name (optional but recommended)
Step by Step Guide to install WordPress:
In this guide, we will provide you steps to install and configure WordPress on a fresh Ubuntu server.
Step 1: Update Your Ubuntu Server
Before installing anything, it’s best practice to update your system. Open your terminal and type:
sudo apt update && sudo apt upgrade -yThis ensures all your software is up to date, it’s like updating your phone before downloading a new application.
Step 2: Installing LAMP Stack
To install WordPress on your server, it is required to install needed stack. I’m installing the LAMP stack here: Apache, MySQL, and PHP.
- Apache is a web server that processing and delivering web content to visitors.
- MySQL is a database management system that stores all your application content, user details, and settings data.
- PHP is the scripting language that used by WordPress, and is built on, allowing for content generation.
Step 3: Install Apache Web Server
Apache is our web server of choice. It’s reliable and widely supported.
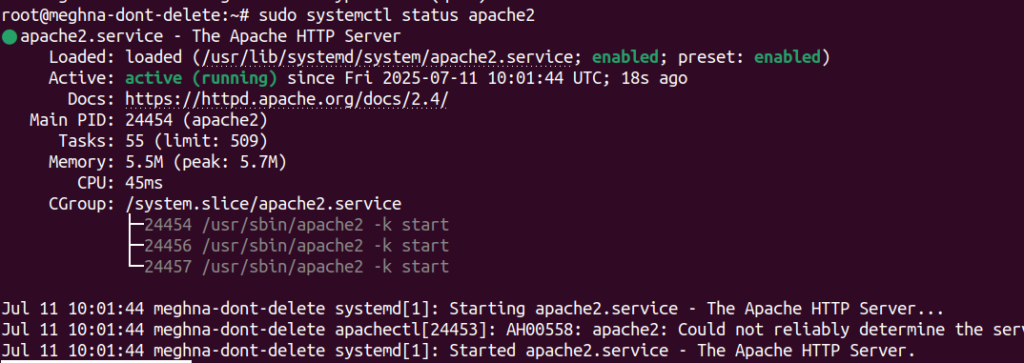
sudo apt install apache2 -yOnce installed, check if it’s running:
sudo systemctl status apache2You can see the status as active (running) as you can see in the below image.
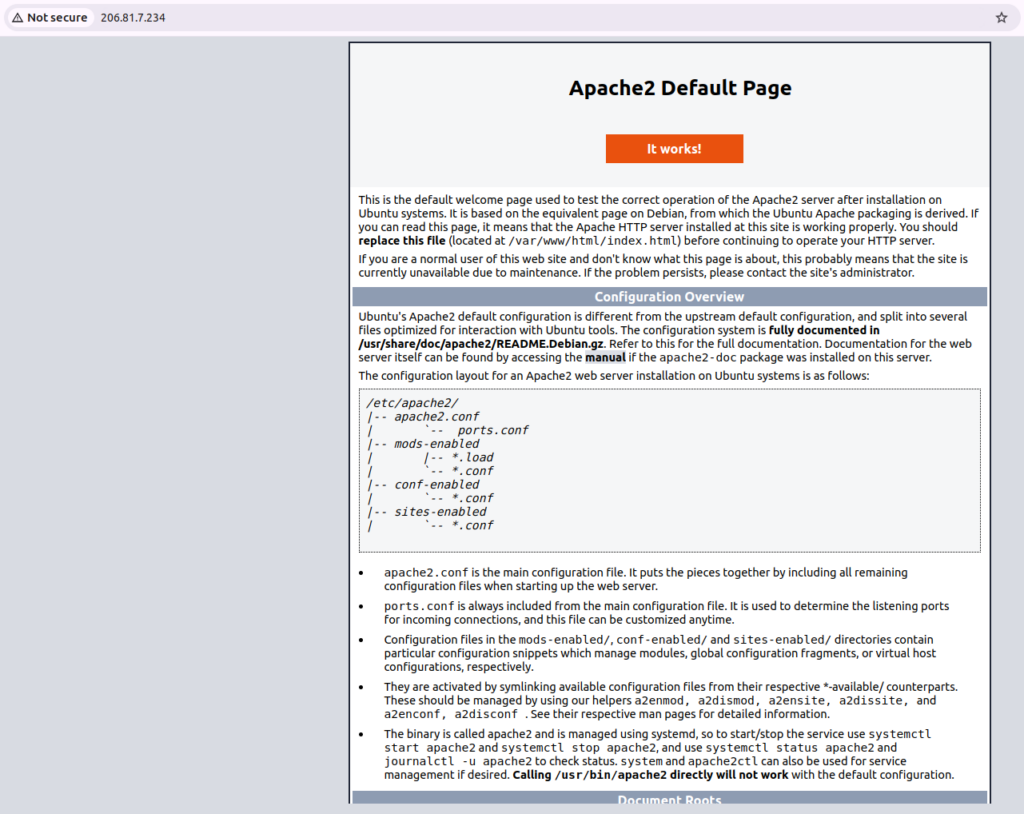
You can also visit your server’s IP in a browser to see the default Apache page.
Step 4: Configure Firewall
It’s necessary to setup server’s firewall to allow incoming HTTP traffic. This step is required if you want your website to be accessible on the internet. Run the below command to enable the firewall:
sudo ufw allow in "Apache"This command allows the Uncomplicated Firewall (UFW) to create a rule allowing incoming connections to Apache. To confirm that the firewall rule has been properly applied, you can check the status of UFW at any time by running the below command:
sudo ufw statusStep 5: Install MySQL
Any application requires a database to store content of your website. Let’s install MYSQL database for WordPress:
sudo apt install mysql-server -yLet’s secure it:
sudo mysql_secure_installationFollow the prompts asked during the installation process to complete the secure installation of MYSQL database.
- Password Validation: First, you will have to set up the “VALIDATE PASSWORD”, just reply with ‘Y’ and select a strong password policy (you can select level 2 as it is most secure).
- Set up Root Password: If you have not set up root password previously, you’ll see the prompt to set up root password. Select a strong, unique password for the MySQL root user.
- Remove Anonymous Users: It’s recommended to remove anonymous. Select ‘Y’ as a reply. This will prevents unauthorized database access.
- Disallow Root Login Remotely: You can disallow root user login from remote machines for single server setups. Answer ‘Y’ to this prompt.
- Remove Test Database: The test database is not needed. You can remove it by answering ‘Y’.
- Reload Privilege Tables: To reload tables, simply select ‘Y’ to this prompt to ensure all changes to take effect immediately.
Step 6: Create MySQL Database
Let’s create a database for your website that stores WordPress content.
sudo mysql -u root -pOnce you entered MySQL, enter the below prompt to create a new database:
CREATE DATABASE wordpress_db;Enter your database name at place of “wordpress_db”
Step 7: Create MySQL User
Now, as we have created a database it’s time to create a user.
CREATE USER 'wp_user'@'localhost' IDENTIFIED BY 'your_password';- Enter your preferred username at the place of “wp_user” for creating a new user.
- Enter your preferred password for user at the place of “your_password”.
Run the below provided command to grant all the permissions to the user.
GRANT ALL ON wordpress_db.* TO 'wp_user'@'localhost';Enter your username at the place of “wp_user” and database name at the place of “wordpress_db” that we have created.
To apply the changes and exit MySQL, run the below commands:
FLUSH PRIVILEGES;
EXIT;Note down and keep the database name, username, and password safe, as you’ll need them soon.
Note: While using the ServerAvatar for creating and managing your server and applications, you don’t have to create a separate database for your WordPress application. However, when you create a new WordPress application with ServerAvatar’s one-click application deploy method, the database will be automatically created.
We will see more about this while following the guide.
Step 8: Install PHP and Required Extensions
WordPress is written in PHP, so let’s install the PHP. Without PHP, your site will only have static HTML files and can not function. PHP is essential for WordPress:
sudo apt install php libapache2-mod-php php-mysql php-curl php-gd php-xml php-mbstring php-zip php-soap php-intl -yLet’s check out the PHP version by using below command:
php -vYou should see something like PHP 8.x.x as you can see in the below image.

Configure Apache for WordPress
Let’s create Apache virtual host file for WordPress. First let’s use below command to create a directory.
sudo mkdir -p /var/www/mywordpressapp.comI’m using “mywordpressapp.com” as my domain. You can use your own domain at the place of “mywordpressapp.com”.
Let’s setup the relevant permissions by using below command:
sudo chown -R $USER:$USER /var/www/mywordpressapp.comLet’s now create the Apache virtual host file for WordPress site by running the following command:
sudo nano /etc/apache2/sites-available/mywordpressapp.com.confPaste the following configuration in new file and replace “mywordpressapp.com” with your domain for your WordPress website:
<VirtualHost *:80>
    ServerName mywordpressapp.com
    ServerAlias www.mywordpressapp.com
    ServerAdmin webmaster@localhost
    DocumentRoot /var/www/mywordpressapp.com

    <Directory /var/www/mywordpressapp.com/>
        AllowOverride All
    </Directory>

    ErrorLog ${APACHE_LOG_DIR}/error.log
    CustomLog ${APACHE_LOG_DIR}/access.log combined
</VirtualHost>Save the file and exit by using “Ctrl+X” key and “Y” for yes to the confirmation popup to save the file.
After configuring the virtual host file, let’s enable the WordPress config and disable the default config:
sudo a2ensite mywordpressapp.com.conf
sudo a2dissite 000-default.confEnable Apache Rewrite Module and Restart Server
The rewrite module is essential for permalinks and clean URLs.
sudo a2enmod rewrite
sudo systemctl restart apache2Install and Configure WordPress Application
Navigate to your web root directory:
- Generally, the webroot directory is at “/var/www/” path, but it might be different in your case. As it is “/var/www/mywordpressapp.com” in my case.
- Use “cd” command to go to your directory path
cd [your web root directory for WordPress Application]Let’s download and unzip the latest version of WordPress file:
- Use the below command to download the latest WordPress zip file
wget https://wordpress.org/latest.tar.gz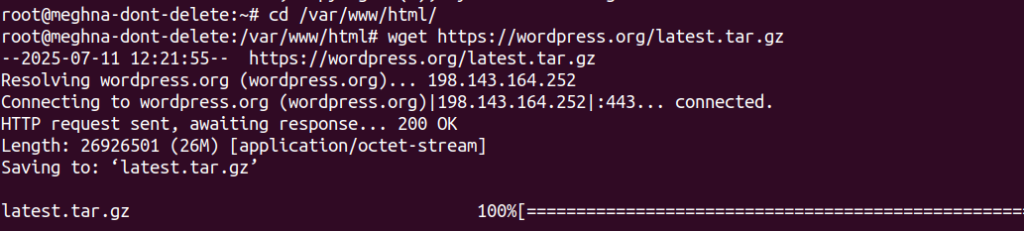
Extract the contents of a .tar.gz file that is a compressed archive. Use the below command, that will extract the contents of tar.gz file, in which “-x” stands for “extract”, it will showing you the progress of extraction (because of -v), and it will decompressed with gzip (because of -z).
tar -xvzf latest.tar.gzMove all the files and directories inside the WordPress folder to the current directory that is “/var/www/mywordpressapp.com”.
mv wordpress/* . Let’s remove the zip file from WordPress directory.
rm -rf wordpress latest.tar.gzRename the sample config file:
cp wp-config-sample.php wp-config.php- Now, open the config file of WordPress to insert the database details that we have created:
- We will use nano command to open the file and edit at the same time.
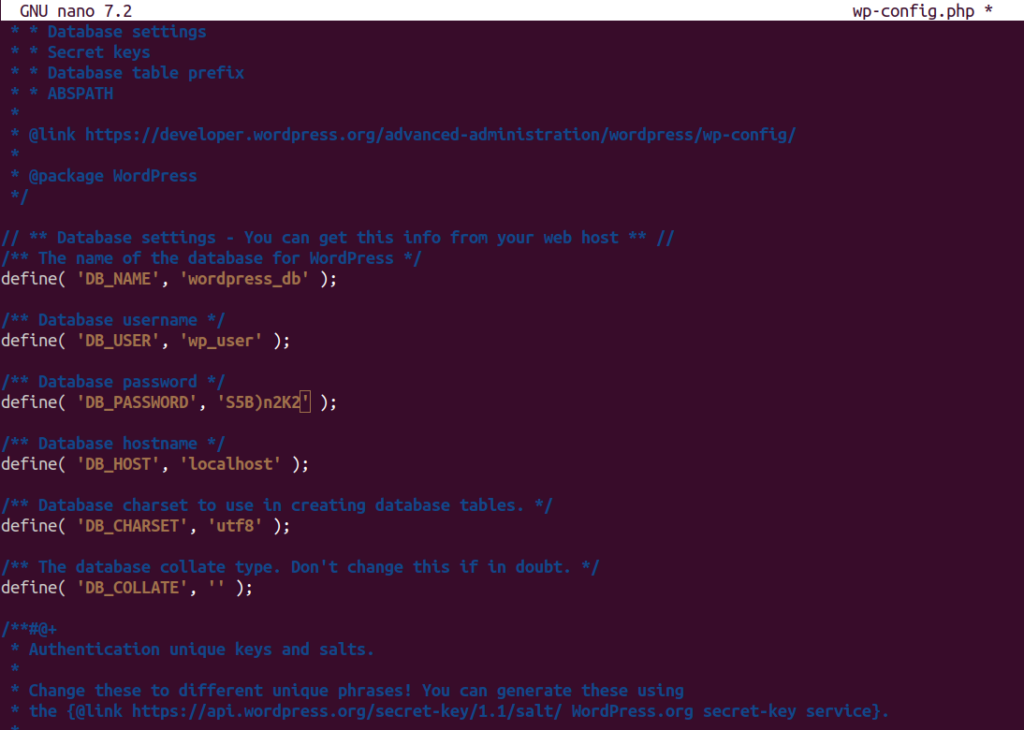
nano wp-config.phpFind out the field that includes the database details as mentioned below and insert your database details in the wp-config file:
define('DB_NAME', 'wordpress_db');
define('DB_USER', 'wp_user');
define('DB_PASSWORD', 'your_password');As you can see in the image below:
Save the file and exit by using “Ctrl+X” key and “Y” for yes to the confirmation popup to save the file.
Setting File Permissions
- Use the below commands to give correct ownership permission.
chown -R www-data:www-data /var/www/mywordpressapp.comThis will ensure your application can manage files without compromising security.

Complete WordPress Setup via Browser
- Now it is the time to check the WordPress application. Let’s not delay and open the browser and enter your server IP: “http://your_server_ip” or “http://your_domain.com” to check out if the application is installed properly or not:
- You will see the WordPress installation page on the browser.
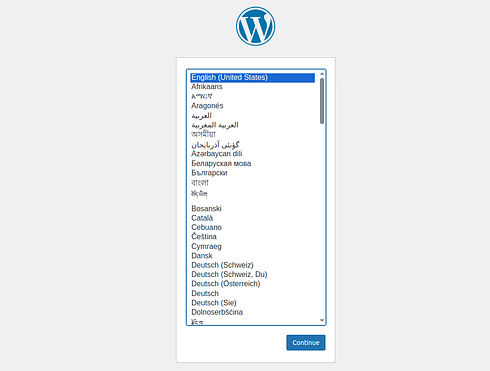
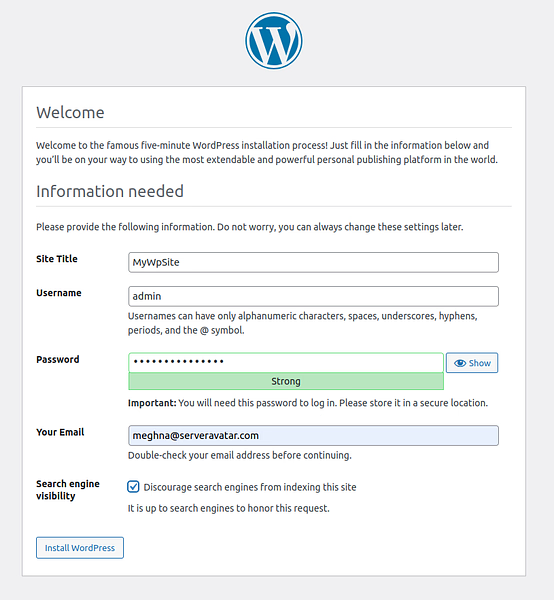
Complete the further process by selecting your preferred language, set your site title, give a username, password, and email id.
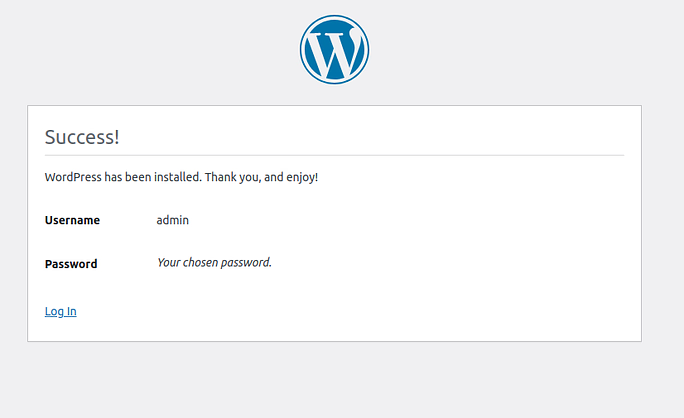
That’s it! You now have a live WordPress site!
As you can see that the manual installation of WordPress site is complex and time taking process, especially if you are new to server management. Users face errors and requires ongoing maintenance to keep the server secure and up-to-date.
Therefore, we advised to use ServerAvatar to efficiently manage your servers and sites. You can easily install WordPress site to your server within just few minutes using ServerAvatar.
Install WordPress Using ServerAvatar:
It is very easy and user-friendly process to install LAMP or LEMP stack using ServerAvatar. Follow the steps below:
Setup server within ServerAvatar usually takes about 10-15 minutes to complete the server deployment and stack setup process. You can use Managed Server Feature to directly create a server within ServerAvatar, or if you have your own VPS, you can select Self Managed Server feature of ServerAvatar.
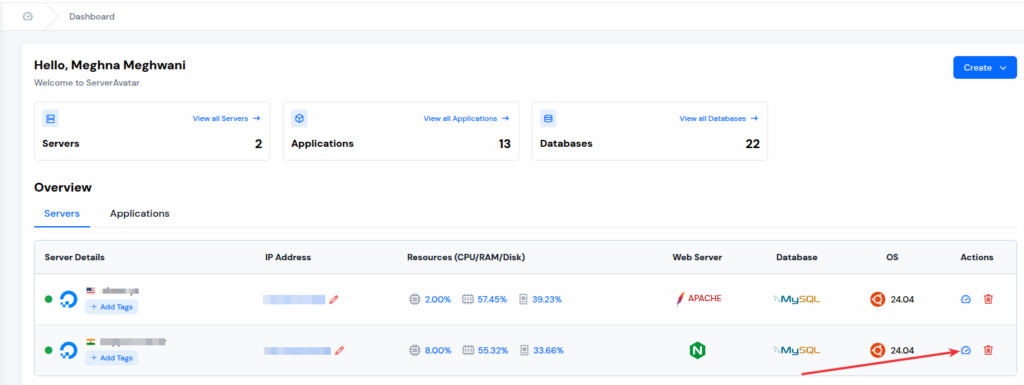
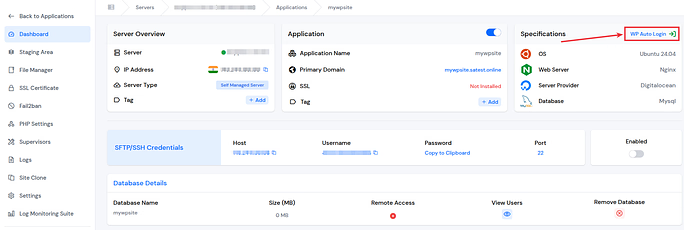
- Click on “Server Dashboard” icon for the server you want to host your WordPress application.
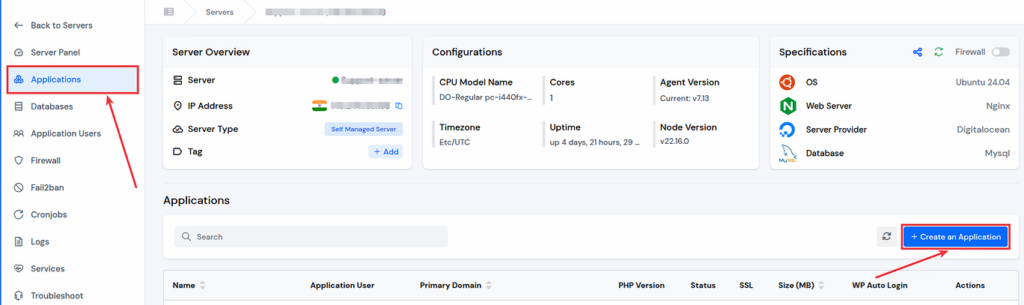
- Once you’re inside your Server panel, click on “Applications” tab from the left side bar. Then click on “Create an Application” button.
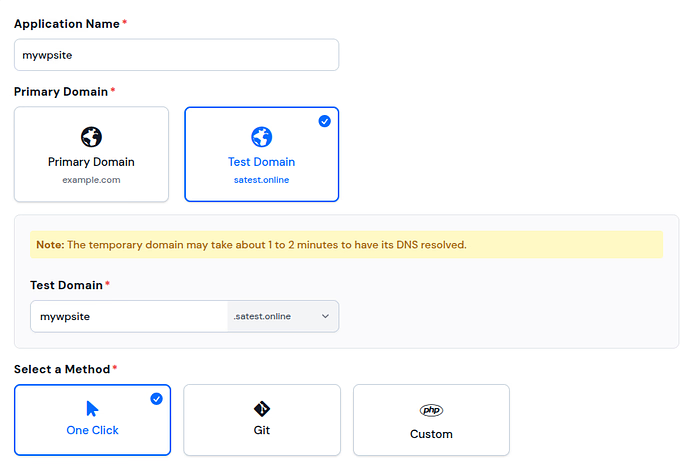
Fill out the form for creating the application:
- Enter your application name
- Select the domain from primary and test domain (as ServerAvatar providing test domains to create application without your own domain)
- Enter the domain name
- Select the method as “One Click”
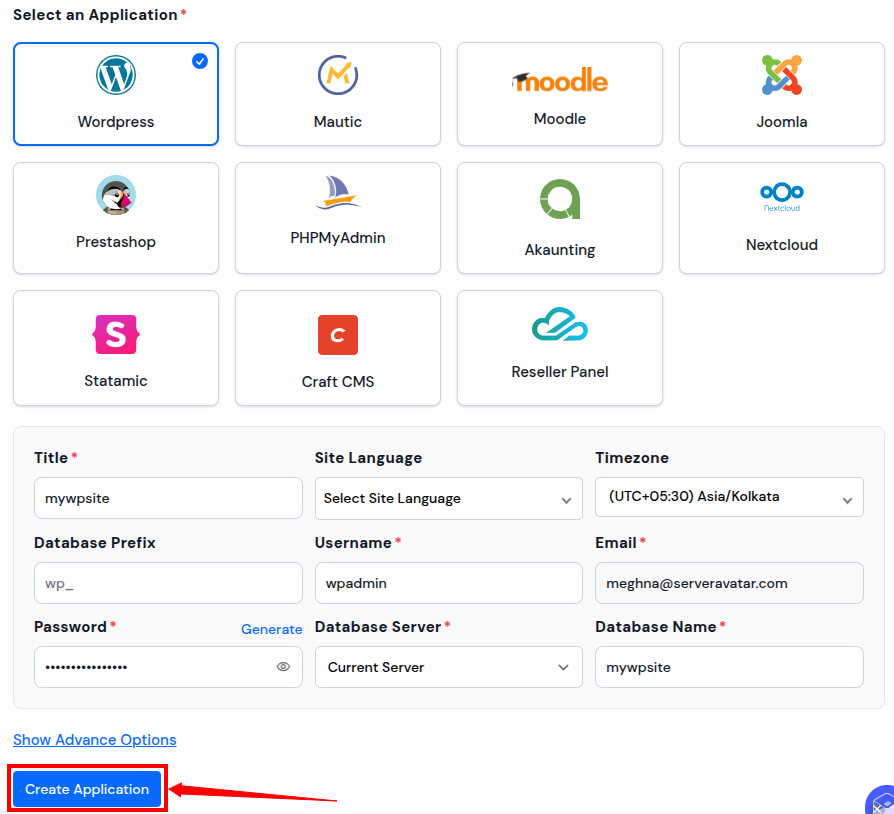
- Select the “WordPress” application from the given options
- Fill in the application details such as title, it’s username, email id, etc.
- Click on the “Create Application” button
That’s it, your application is created successfully. You can check it by opening the application URL provided to you. You can see the application home page, while opening the URL.
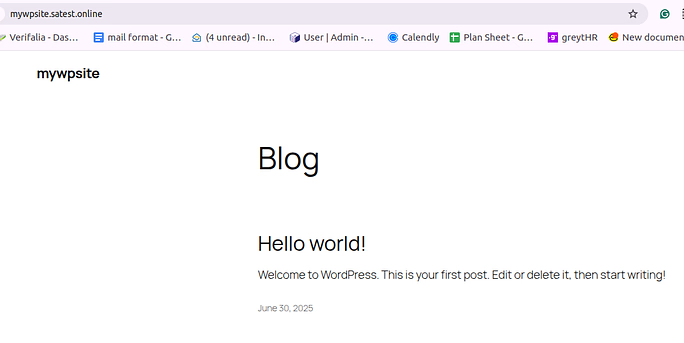
- To navigate to the WordPress admin login, simply click on the “WP Auto Login” button from the ServerAvatar panel.
Securing Your WordPress Site
Security is like locking your doors at night. Don’t skip it!
- Use UFW firewall to allow only necessary traffic
- Install SSL certificate, you can use Let’s Encrypt with Certbot
- Keep WordPress, plugins, and themes updated
- Use a strong admin password
Common Issues and Fixes
- Page not loading? Check Apache status or see if the firewall is blocking it.
- Database connection error? Recheck your credentials in the wp-config.php file.
- Permissions denied? Make sure the files are owned by www-data.
Conclusion
Installing WordPress with Apache on Ubuntu might feel like assembling furniture from scratch. At first, it’s overwhelming, but step by step, everything fits into place. Now that your site is live, start customizing and sharing your ideas with the world!
FAQs
1. Can I install WordPress without Apache?
Yes, you can use Nginx instead. It’s another popular web server, often faster for certain tasks.
2. Do I need a domain to install WordPress?
No, but having one makes your site easier to access and more professional.
3. How do I update WordPress safely?
Always first back up your site, then click “Update” from your WordPress dashboard to securely update your WordPress app.
4. Is Ubuntu stable for hosting?
Absolutely. It’s the latest LTS version, perfect for long-term support and stability.
5. Can I use a control panel instead of doing this manually?
Yes! Tools like ServerAvatar or Webmin can simplify the setup process, especially for beginners.