
Creating a step-by-step guide for a blog post requires providing accurate, actionable instructions. To ensure the content is unique and comprehensive, I need to outline the process of setting up Polylang on a WordPress site. I’ll search for the current best practices and the necessary steps.
Here are the search queries: Absolutely! Creating a multilingual site with Polylang is a powerful, free way to expand your audience. Below is a comprehensive, step-by-step guide formatted as a unique blog post.
How to Build a Multilingual WordPress Site with Polylang: A Step-by-Step Guide
The internet is global, and your website should be too. By translating your WordPress site, you open your content to a new world of readers, dramatically boosting your traffic and authority. Fortunately, you don’t need a massive budget or a complex development team to achieve this.
Polylang is the most popular, free solution for turning any WordPress site into a multilingual powerhouse. It lets you create separate, connected versions of your posts, pages, categories, and tags for each language you support.
Here is the definitive, step-by-step process for building your multilingual site with Polylang.
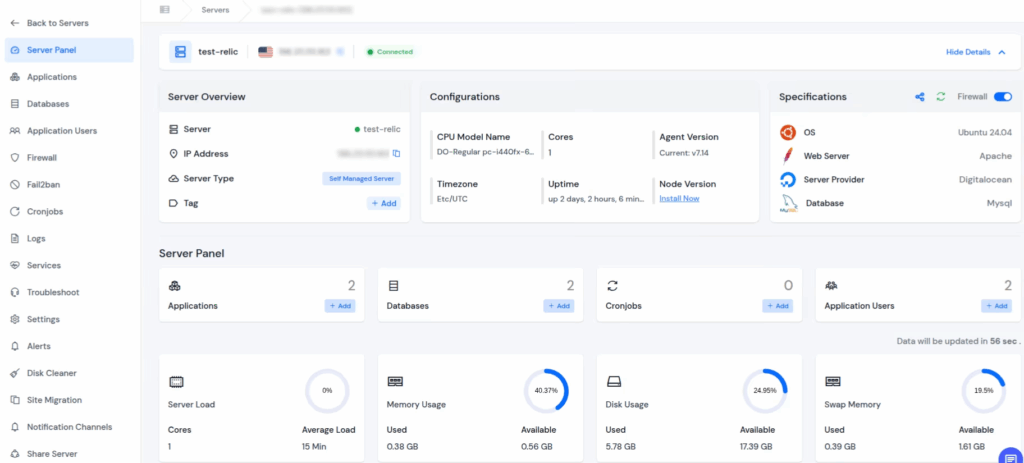
What is ServerAvatar
ServerAvatar is a managed cloud hosting platform that makes it easy to deploy, manage, and monitor servers and apps without technical expertise. You can launch WordPress, Laravel, Node.js, and more on providers like DigitalOcean, Vultr, and Hetzner in just a few clicks, with automation, monitoring, and security built in.
With ServerAvatar, you can:
- Deploy and manage servers directly from ServerAvatar.
- Host and manage multiple applications (WordPress, Laravel, PHP-based, Node.js based, etc.).
- Manage multiple servers and applications from a single dashboard.
- Get built-in monitoring, backups, free automatic SSL with auto-renewal, firewall, fail2ban, and many more features to simplify your routine tasks.
- Supports multiple stacks like LAMP, LEMP, OLS, Node Stack
- Built-in log monitoring suite
- 24/7 support by our technical experts
- Affordable pricing with scalable plans
Install WordPress With ServerAvatar
https://serveravatar.com/install-wordpress-apache-ubuntu/#install-wordpress-using-serveravatar-6
Step 1: Installation and Initial Setup
The journey begins in your WordPress dashboard.
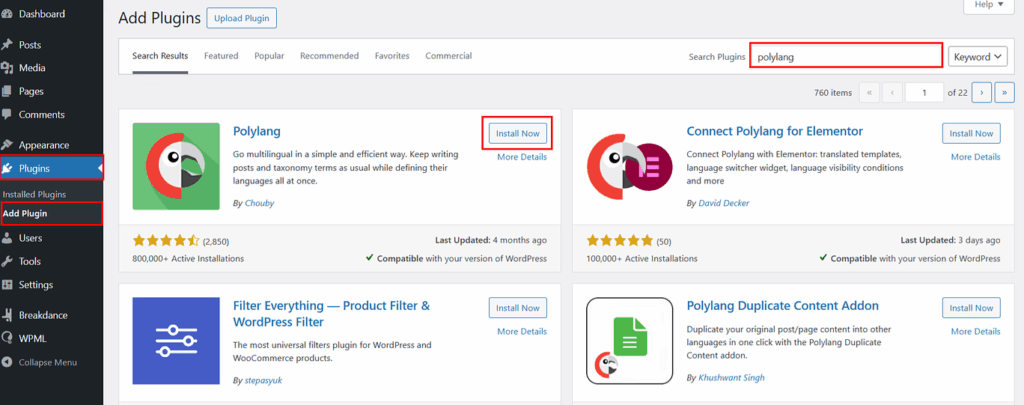
1. Install Polylang
- Navigate to Plugins → Add New.
- Search for “Polylang”.
- Click Install Now next to the Polylang plugin (by Pierre Abogo).
- Click Activate.
2. Run the Setup Wizard
Upon activation, Polylang will prompt you to start a quick setup wizard. If it doesn’t, navigate to Languages in your WordPress sidebar.
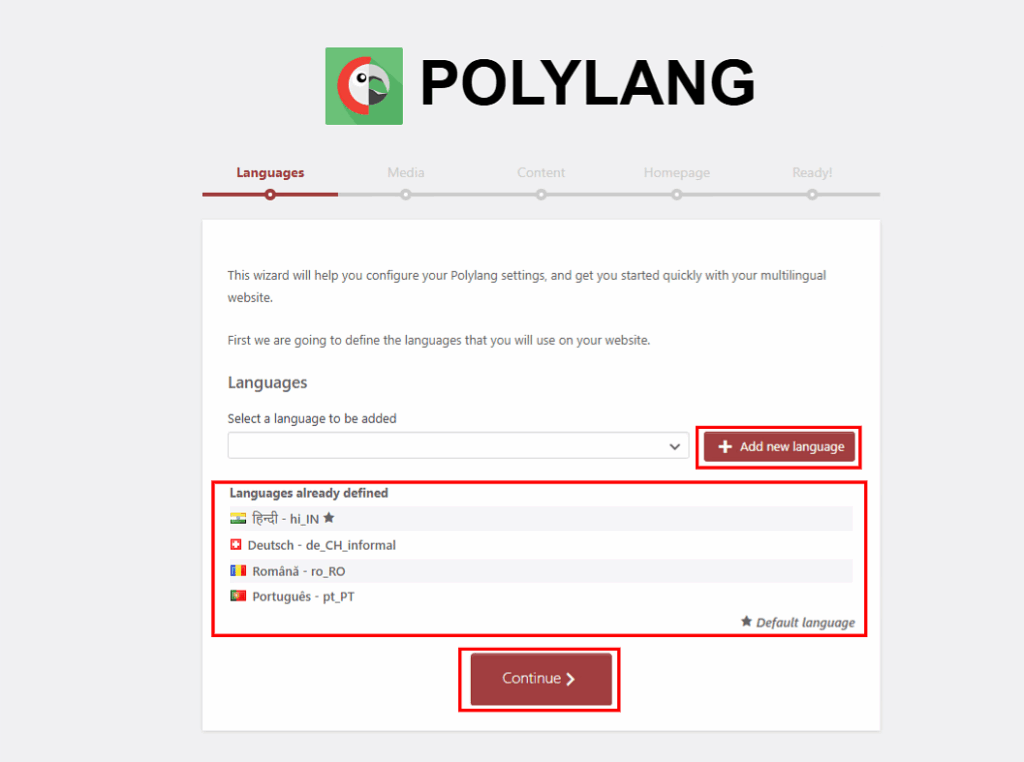
A. Add Your Languages
The first step is selecting the languages you want to use on your site.
- In the dropdown menu, select your base (default) language (e.g., English) and click Add new language.
- Repeat this for every target language you plan to support (e.g., Spanish, German, French).
- Click Continue.
B. Translate Media Settings
Polylang will ask if you want to allow media to be translated.
- Recommendation: Toggle this feature ON. This allows you to translate the title, description, and Alt Text of your images, which is crucial for multilingual SEO.
- Click Continue.
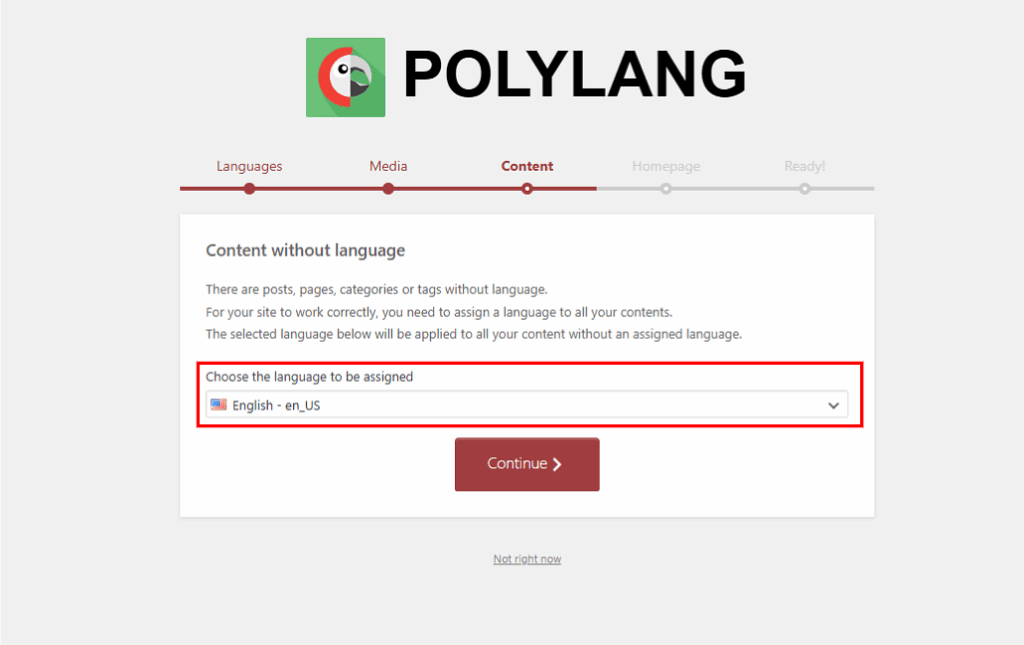
D. Finish Setup
You’re done with the initial configuration! Click Return to the Dashboard.
Step 2: Configuring URL Structure and Settings
Next, we need to finalize the way your new languages will appear in your site’s URLs.
- Go to Languages → Settings → URL modifications.
- Choose a Format: The most common and SEO-friendly option is to use Subdirectories (e.g., yoursite.com/es/ for Spanish). Polylang also offers to use subdomains or unique domains for each language, but subdirectories are the simplest for a standard setup.
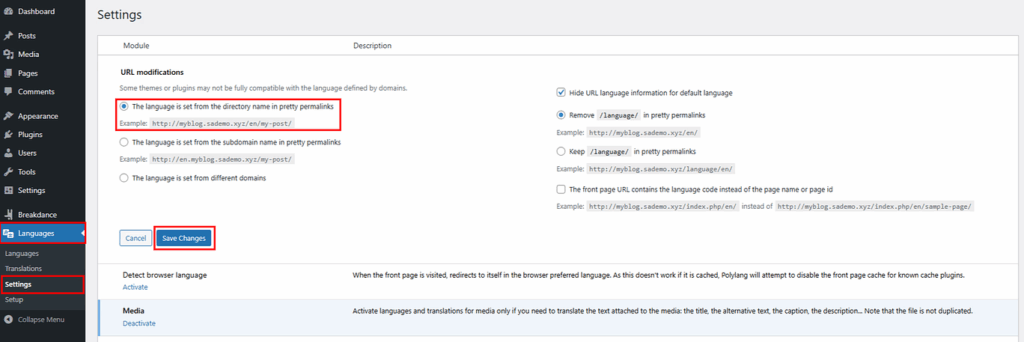
SEO Tip: Ensure the checkbox for Hide URL language information for the default language is unchecked. This forces your default language (e.g., English) to also have a subdirectory (/en/), which helps prevent duplicate content issues in the eyes of search engines.
Save Changes.
Step 3: Translating Content (Posts and Pages)
This is the core of the process: creating your translated content. Polylang links translations together, so you only translate the content once and the platform handles the connection.
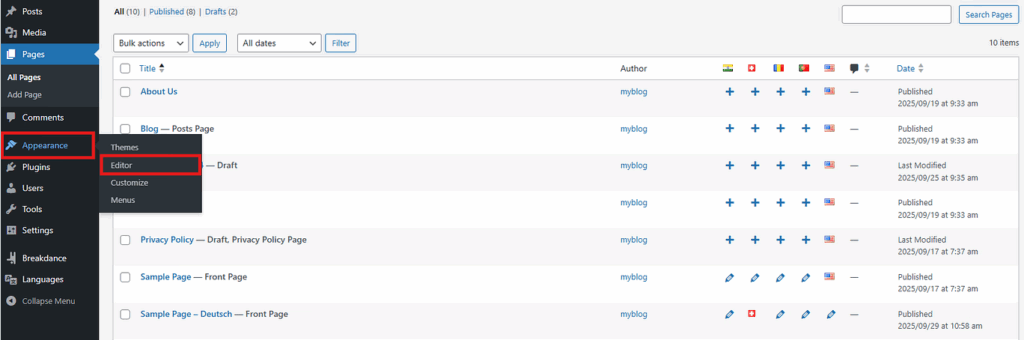
1. Translate a Post or Page
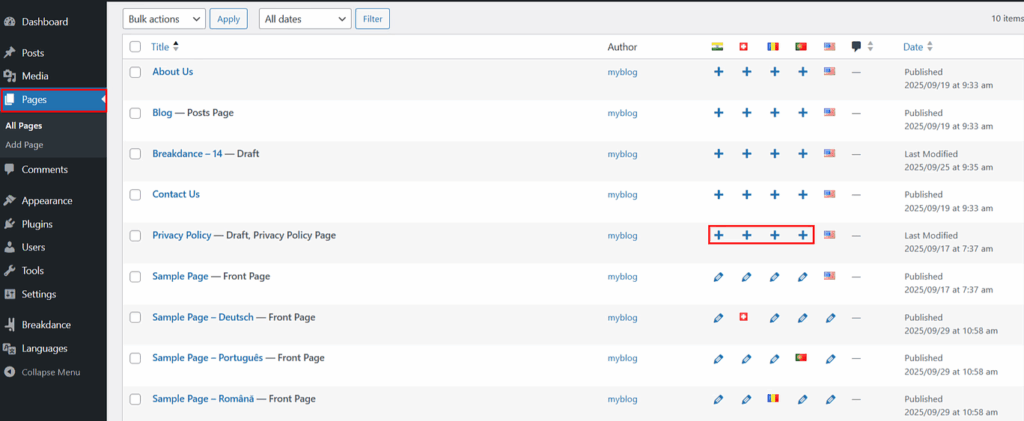
- Go to Posts → All Posts (or Pages → All Pages).
- In the list, you’ll see a column with flags for all your added languages. A checkmark means it’s translated; a plus icon (+) means a translation is missing.
- Click the plus icon next to the post you want to translate for your target language (e.g., Spanish).
4. This will open a new, blank WordPress editor.
5. Translate everything: Manually translate the title, the entire content, the URL slug, the SEO title/meta description (if using an SEO plugin), and the featured image metadata (if you enabled media translation).
6. Once complete, click Publish.
2. Linking the Translations
When you publish the translation, Polylang automatically links it to the original post. In the post editor sidebar under the “Languages” metabox, you will see all languages listed. The one you just translated will show a pencil icon, and the other language(s) will have a plus sign to add a new translation.
Step 4: Translating Taxonomies, Menus, and Widgets
To create a seamless multilingual experience, you must translate all structural elements.
1. Translate Categories and Tags
- Navigate to Posts → Categories (or Tags).
- Similar to posts, you will see a flags column. Click the plus icon (+) to add a translation for each category.
- Provide the translated name and slug, and click Add New Category.

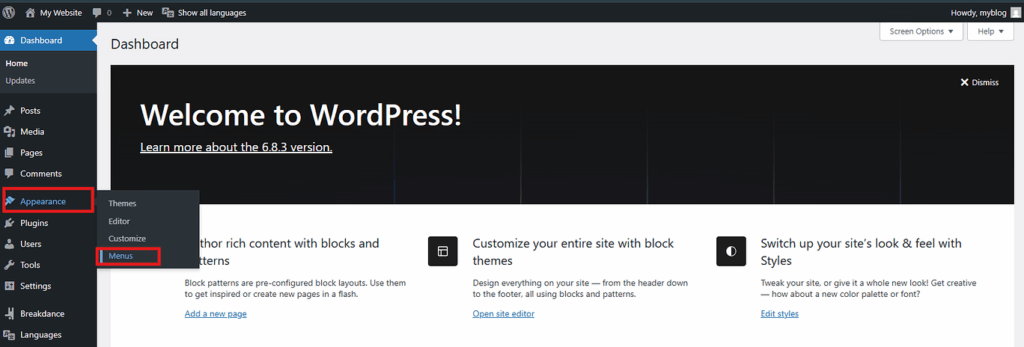
2. Translate Menus
Your navigation menus must also be translated so users see the correct links in their chosen language.
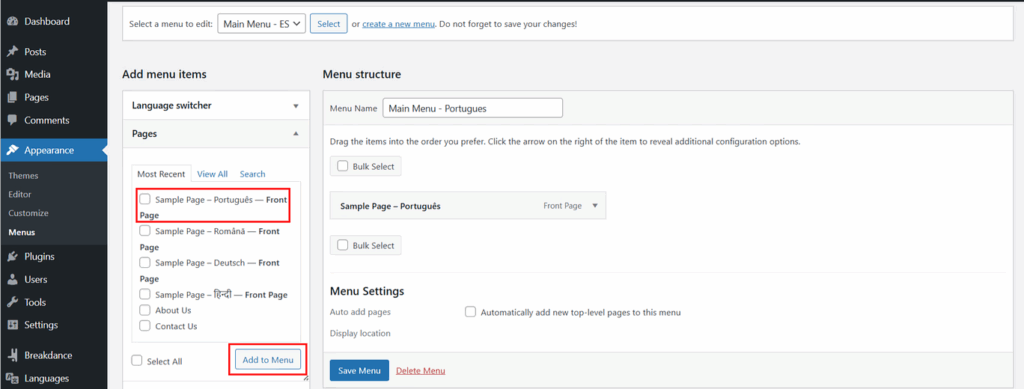
- Go to Appearance → Menus.
- Create your main menu for your default language (e.g., “Main Menu – EN”).
- At the top of the menu screen, you’ll find a new language selector. Switch the language to your target language (e.g., Spanish).
- Click “create a new menu” and name it (e.g., “Main Menu -Portugues”).
- Add the translated versions of your pages/posts to this new menu.
6. Crucial: Assign this newly created menu to the correct theme location (e.g., “Primary Navigation” or “Header Menu”).
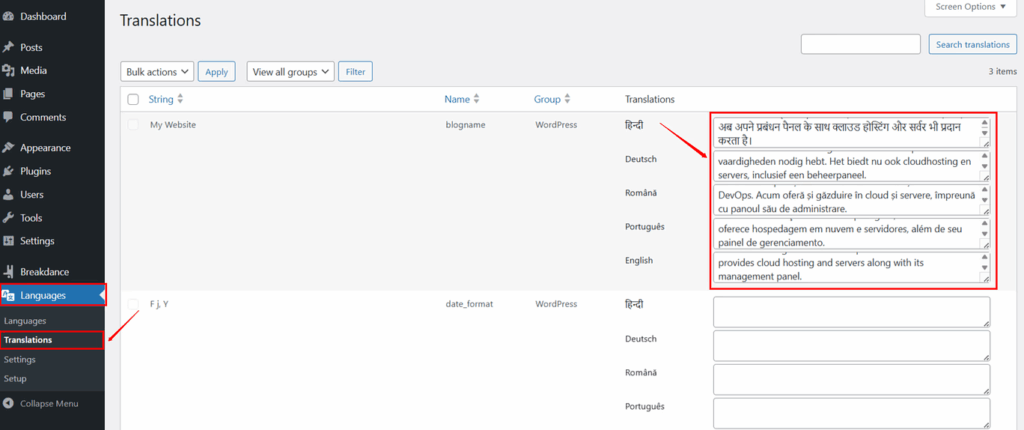
3. Translate Theme and Plugin Strings
Polylang also helps translate static text that isn’t part of your regular posts/pages, such as theme text, widget titles, and footer copyright information.
- Go to Languages → String Translations.
- Here, you’ll find a list of all untranslated text strings from your theme and plugins.
- Enter the translation for each string in the respective language column and click Save Changes.

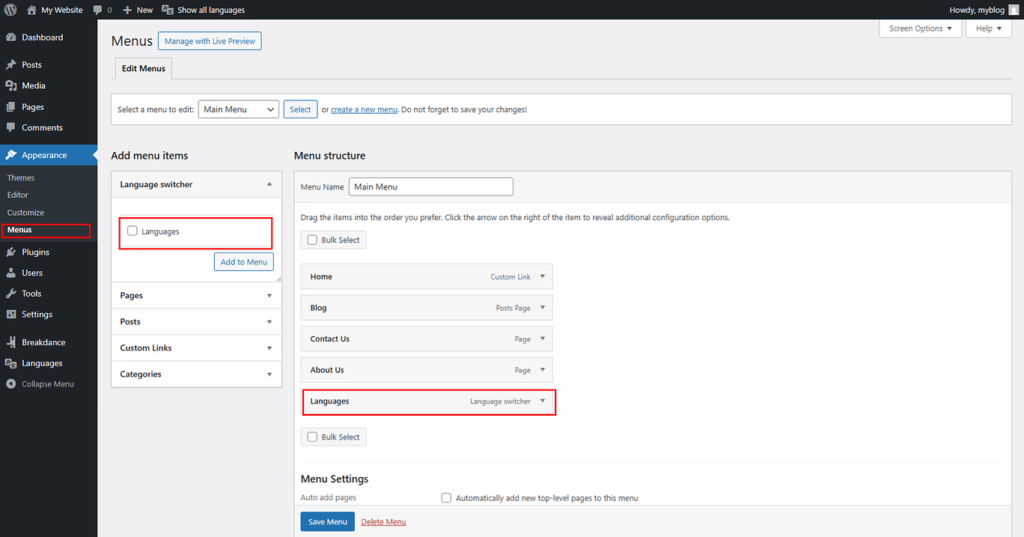
Step 5: Adding the Language Switcher
The language switcher is the bridge that allows users to move between the different language versions of your site.
Go to Appearance Then click on menus
After That Add Language Switcher in Main Menu then click on save
Now Go to Appearance → Editor.
Then Navigate to Patterns where you can find Header and Footer Section
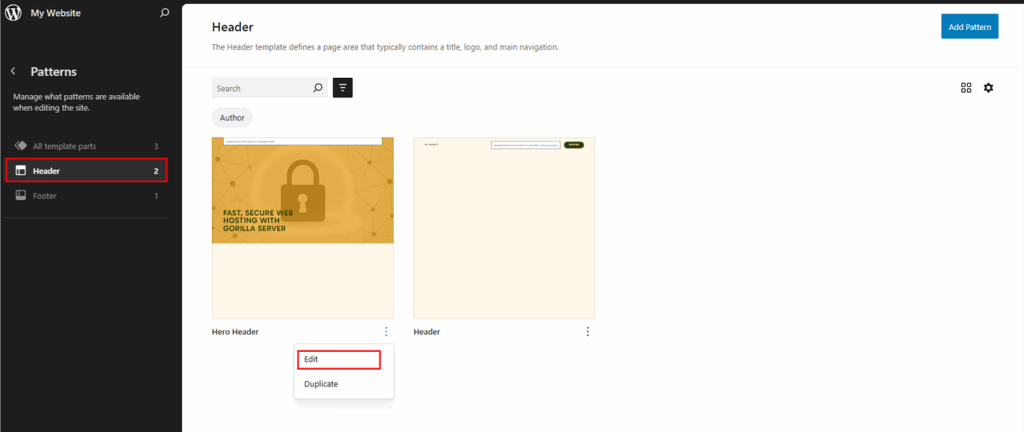
Now go to navigation section then click on 3 dots and select main menu from given list
FAQs
1. Does Polylang translate my content automatically?
Polylang is a translation management system, not an automatic translator. It provides the structure to link your translated pages, but you must manually provide the content translation yourself or integrate with a professional service.
2. Is Polylang good for multilingual SEO?
Yes, Polylang is SEO-friendly. It correctly implements the necessary hreflang HTML tags to tell search engines which language version of a page to show users in different regions, preventing duplicate content issues.
3. How do I translate my main menu and widgets?
You must create a separate menu for each language in Appearance → Menus, containing the translated links. Widget visibility can be controlled or translated via the language settings in Appearance → Widgets.
4. What is the best URL structure for Polylang?
The best and most SEO-recommended structure is subdirectories (e.g., yoursite.com/es/). You can configure this under Languages → Settings → URL modifications in your WordPress dashboard.
5. Can I use Polylang with WooCommerce?
Yes, but you will need the companion plugin, Polylang for WooCommerce (a paid add-on). This allows you to translate products, categories, shipping classes, and synchronize prices across languages.
Conclusion
With Polylang installed and configured, your content is now accessible to a global audience. Remember that creating a truly multilingual site is an ongoing process—ensure you translate every new piece of content and update all menus and strings to keep your user experience flawless for every language. Go global!