
Are you looking for an effective way to connect WordPress to CRM & email marketing platforms and streamline how you manage your contacts and subscribers?
Connecting WordPress to your CRM and email software bridges the gap between your website and your marketing system. It automatically syncs user registrations, form submissions, and membership details to your preferred platforms, saving you time and keeping your contact lists accurate and up-to-date.
In this article, you’ll learn about the benefits of connecting WordPress to CRM and email marketing platforms, as well as the steps to set it up using FuseWP. We’ll also show you how to create optin forms with MailOptin that connect directly to your email marketing account.
Benefits of Connecting WordPress to CRM and Email Marketing Platforms
Automated Data Sync: Once connected, new users, customers, or subscribers from your WordPress site are automatically added to your CRM or email lists. Whether someone registers, fills out a form, or makes a purchase, their details are synced instantly. This automation keeps your contact database clean and always up to date.
Better Audience Segmentation: Syncing data between WordPress and your CRM helps categorize users by actions like purchases, membership levels, or form submissions, enabling targeted campaigns that address their interests instead of generic messages.
Personalized Communication: When your CRM and email platform have accurate user data, you can send more relevant messages, like welcome emails after registration, expiry reminders, or product suggestions based on past purchases.
Increased Efficiency and Accuracy: Manual data entry can lead to mistakes and inconsistencies. With integration, those errors are eliminated. Every contact, subscription, and update is synced accurately between WordPress and your marketing systems, ensuring your data always tells the right story.
Higher Conversion Rates: When your email campaigns are based on accurate, real-time data, they perform better. By sending the right message to the right audience at the right time, you’ll see improved engagement and conversions across your marketing channels.
Steps to Connect WordPress to CRM & Email Marketing Platforms
To begin, you’ll need an automation plugin that helps you connect your WordPress site to your CRM and email marketing platform. For this guide, we’ll use FuseWP, a plugin designed specifically for syncing WordPress users, form submissions, and membership data with CRM and email platforms.
Install and Activate FuseWP
Visit the FuseWP website to buy a license. After purchase, you’ll receive an email with a download link and license key.
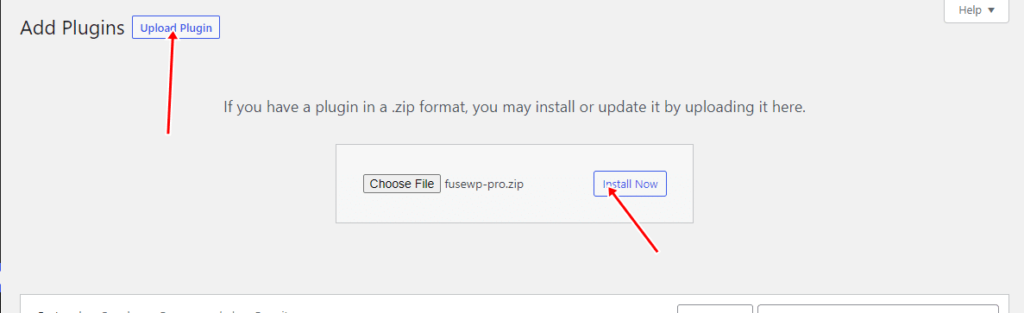
Log in to WordPress, go to Plugins > Add New, and choose Upload Plugin. Select the ZIP file and click Install Now.
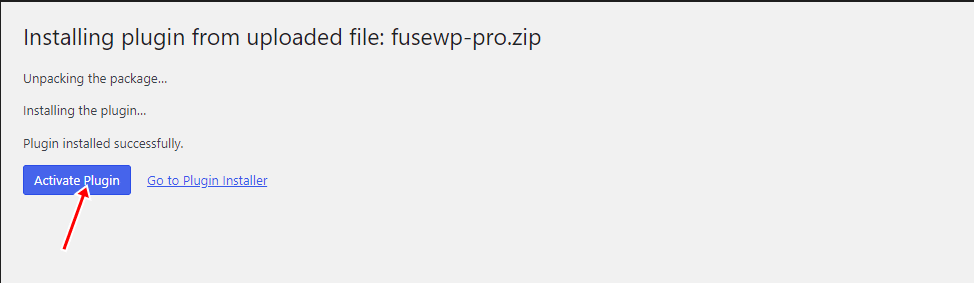
Wait a few minutes for the installation to complete. Once it’s done, click Activate Plugin to enable FuseWP on your website.
Connect Your CRM or Email Marketing Platform
FuseWP integrates with many popular CRM and email marketing platforms, including Mailchimp, ActiveCampaign, Constant Contact, Campaign Monitor, Salesforce, HubSpot, Zoho Brevo, AWeber, Sendy, Klaviyo, Google Sheets, Keap, and many others.
In this section, we’ll show you how to connect your WordPress website to Mailchimp using the FuseWP plugin.
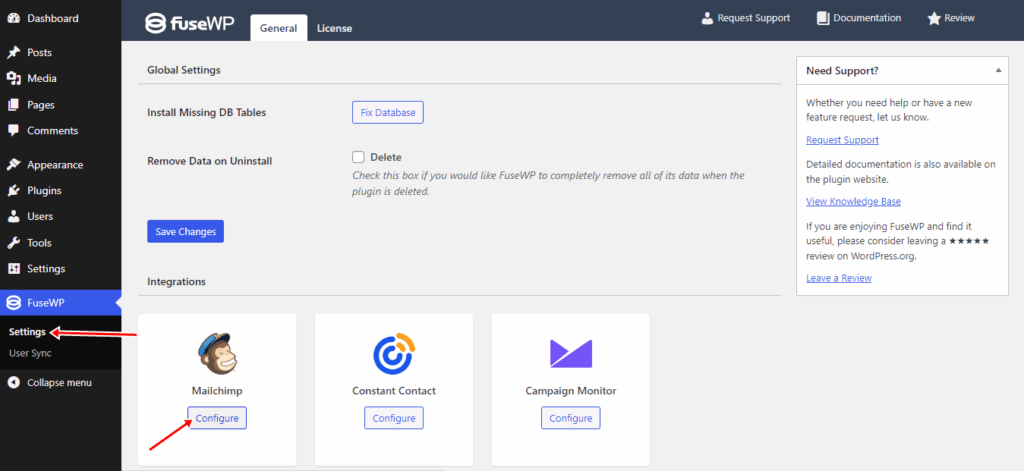
To do this, go to FuseWP > Settings in your WordPress dashboard. Under the Mailchimp logo, click Configure to open the setup window.
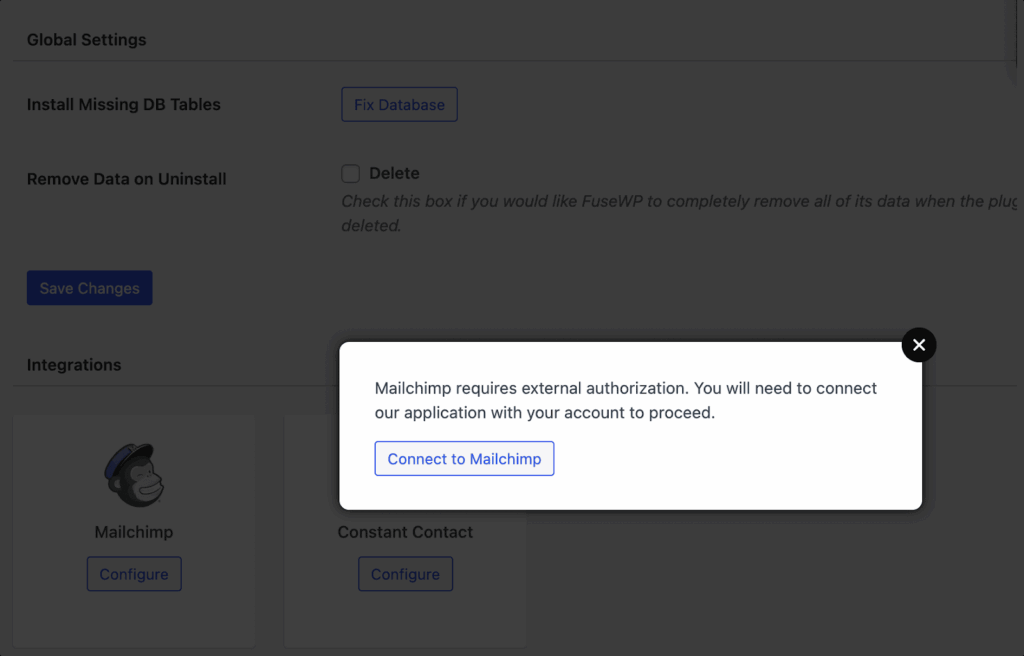
Next, click on the “Connect to Mailchimp” button.
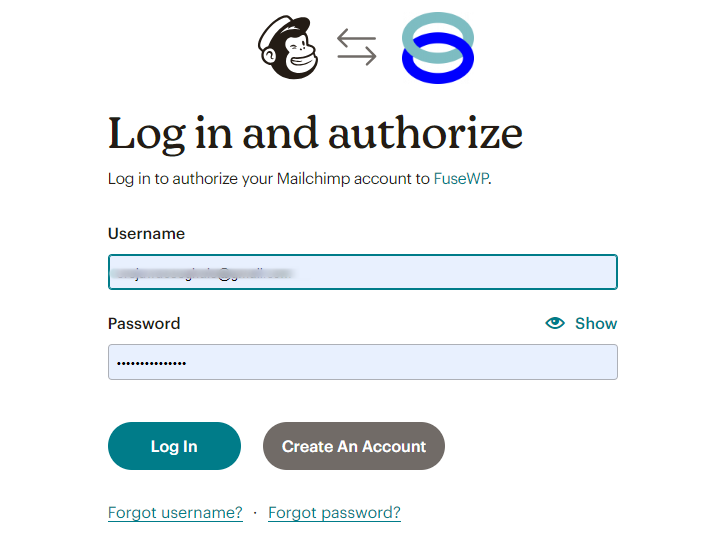
You’ll then be taken to the Mailchimp login page, where you can log in to complete the connection.
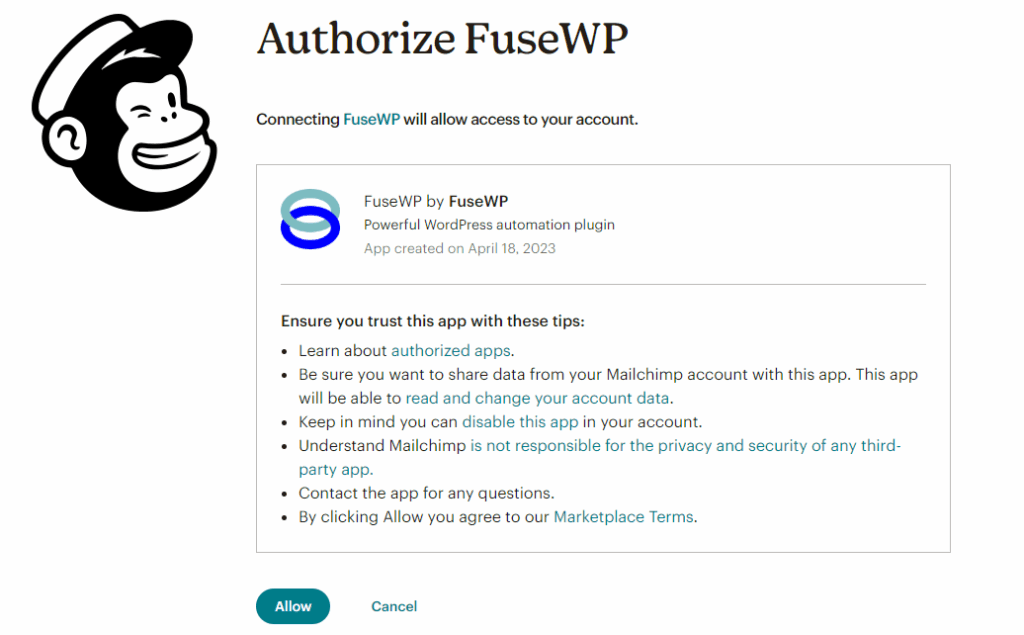
After logging in, you’ll be directed to an authorization page asking you to grant FuseWP permission to access your Mailchimp account.
Once the connection is complete, Mailchimp will automatically redirect you back to the FuseWP integrations settings page.
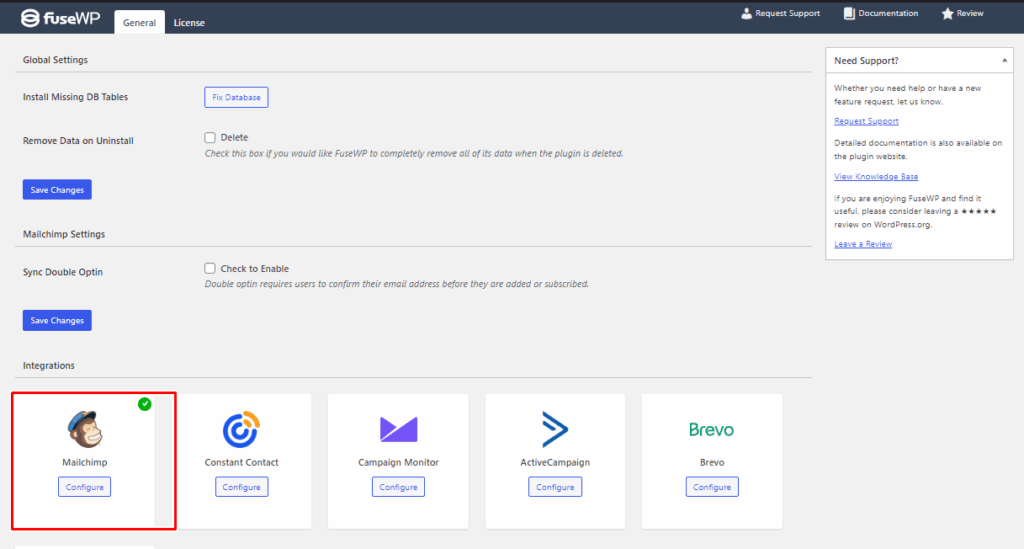
As shown in the screenshot above, a green check mark confirms that Mailchimp has been successfully connected.
One great advantage of FuseWP is that it supports multiple CRM and email marketing connections. This means you can connect to and sync data with several platforms simultaneously. For example, you can send form submissions to both Mailchimp and Keap simultaneously.
To connect additional CRMs and email marketing platforms to your WordPress site, visit the FuseWP Integrations page for detailed setup guides.
Sync Registered WordPress Users to CRM and Email Marketing Platforms
Once FuseWP is installed and connected to your preferred CRM or email marketing platform, the next step is to sync your registered WordPress users.
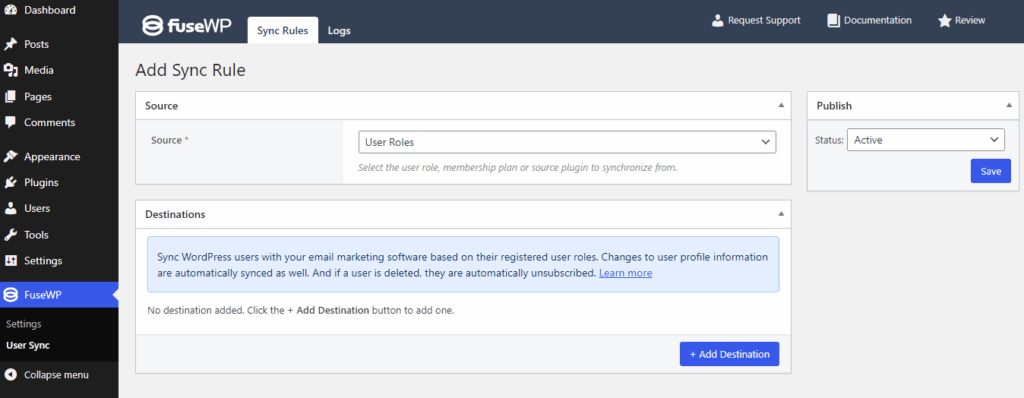
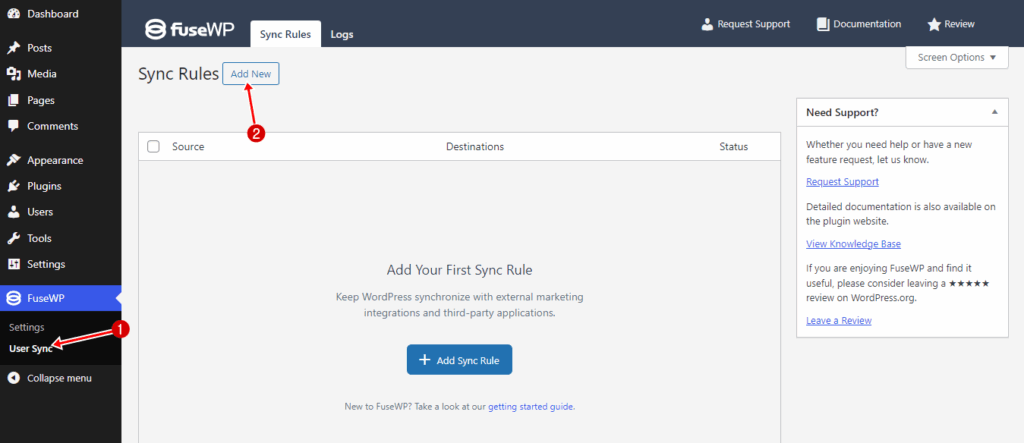
To configure this, navigate to FuseWP > User Sync and click Add New. On the setup page, select User Roles as the source for your sync rule.
Next, click “Add Destination” and select the user roles you want to sync to your email list during registration. Then, select your preferred integration, choose the specific email list where new users will be added, and select tags and map custom fields.
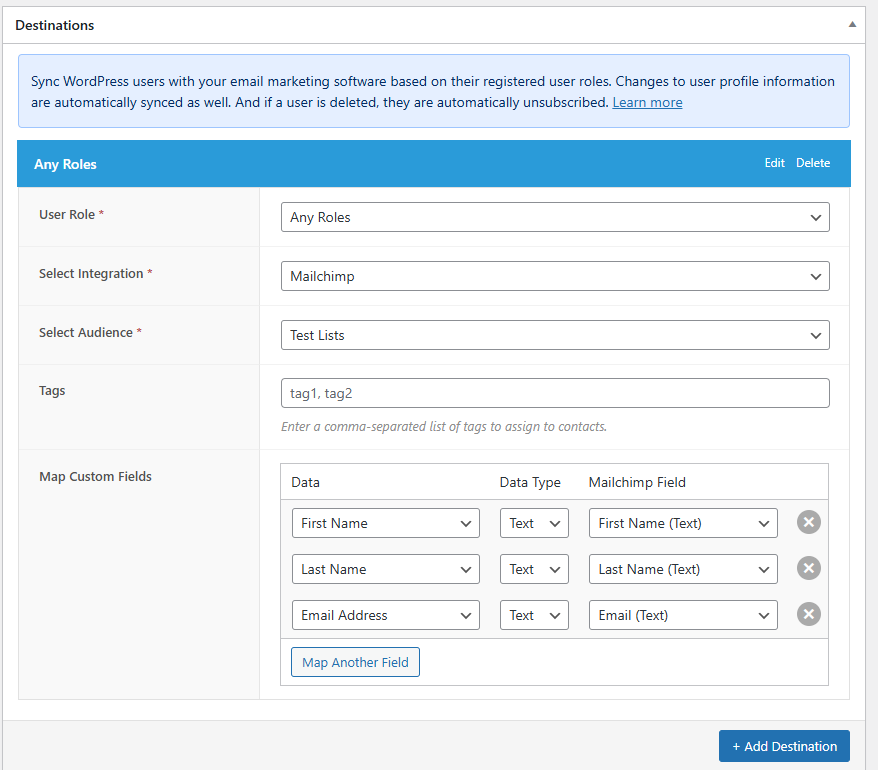
You can repeat this process as many times as needed, depending on the number of user roles and email lists you want to connect. If your CRM or email marketing platform supports tagging and custom field mapping, you can link user data to your custom fields and assign tags to users accordingly.
Once you are done, click on the Save button to activate the rule.
Sync Existing Users in Bulk
If you already have existing users in your WordPress database before setting up FuseWP, you can bulk-sync them to your connected CRM or email marketing service.
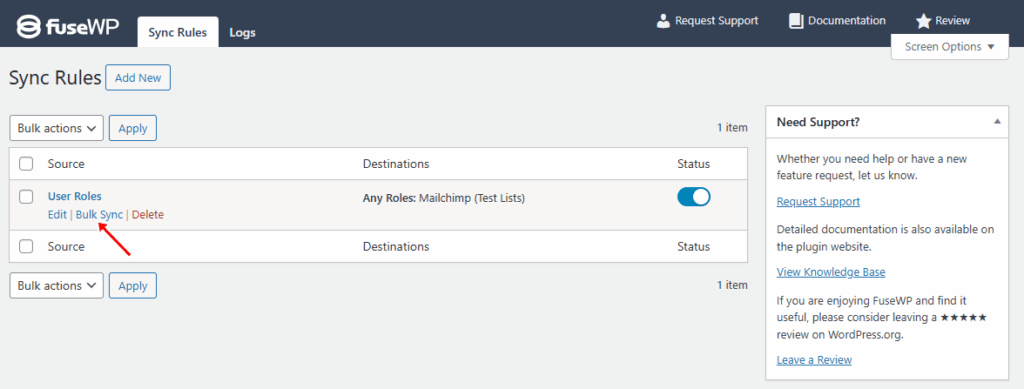
To do this, make sure you’ve already created a sync rule. Then go to the User Sync page and, under the rule you want to apply, click Bulk Sync.
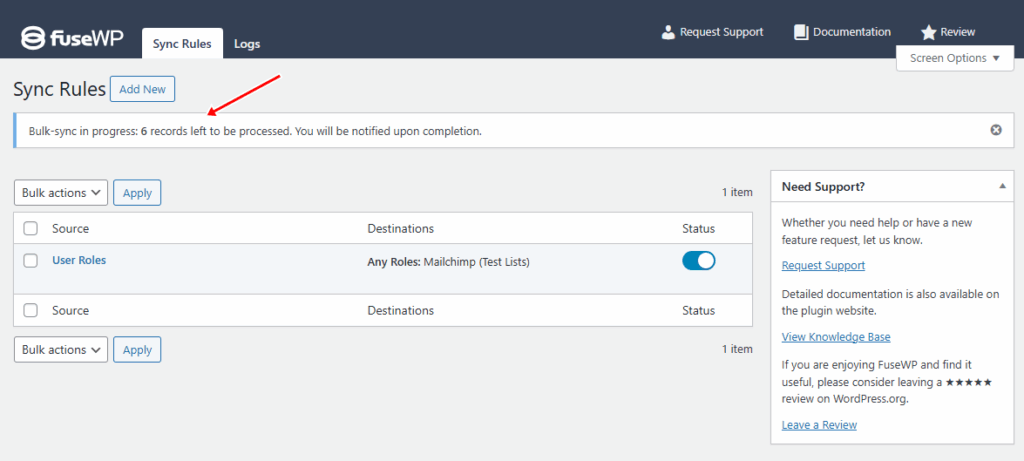
After clicking the Bulk Sync link, a notification will appear indicating that the process has started.
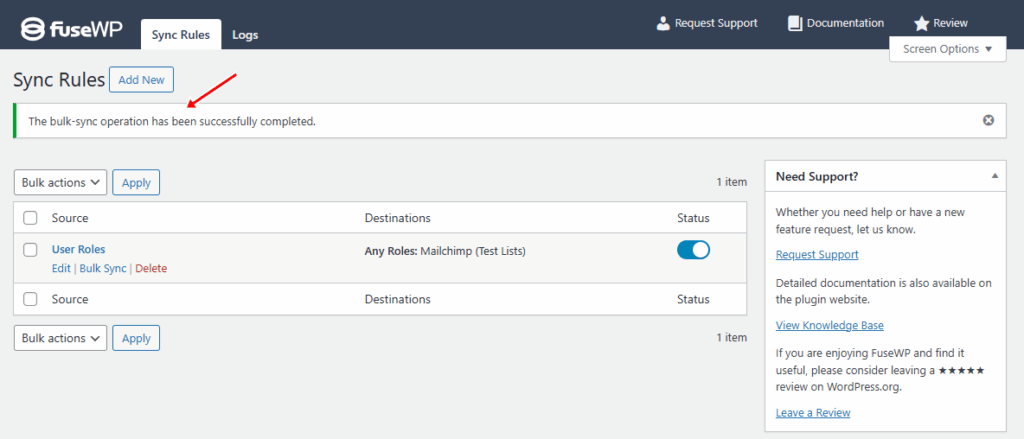
Once it’s complete, you will see another notification saying that the bulk sync is done.
By syncing both new and existing users, FuseWP ensures your CRM and email marketing platforms always have accurate, up-to-date contact information, saving you hours of manual work.
Sync Users in E-commerce and Membership Plugins
FuseWP also connects data from your e-commerce and membership plugins to your CRM or email marketing platforms. This enables you to manage and target customers or members based on their purchasing history, subscription status, or access level.
Below, we’ll show you how to set it up.

Sync WooCommerce Customers Based on Purchased Products
FuseWP allows you to automatically add WooCommerce customers to specific email lists based on the products they purchase.
To do this, go to FuseWP >> User Sync and click the Add New button.
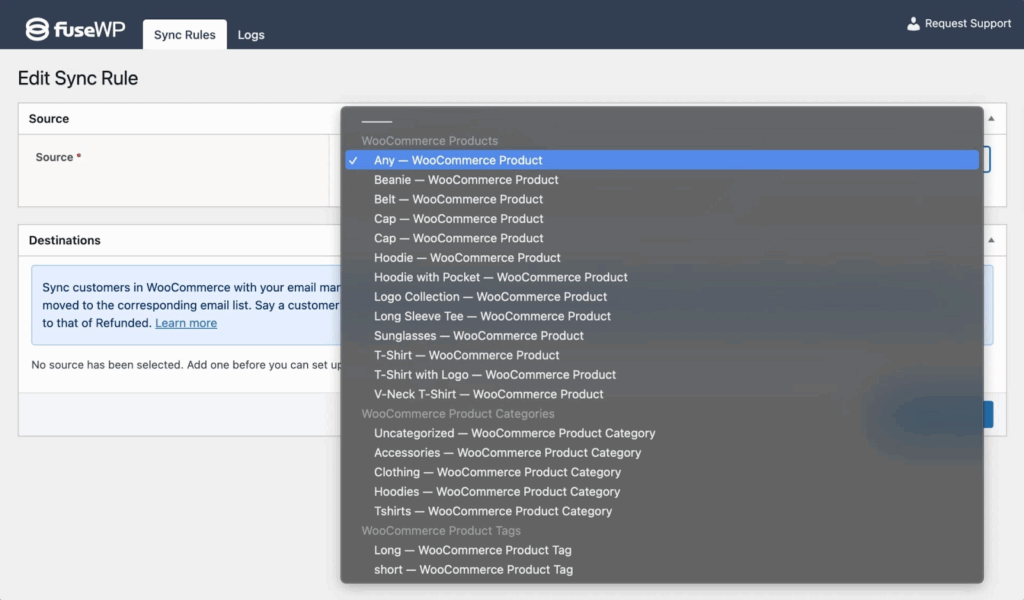
Next, select a WooCommerce product as the source.
Next, let’s configure the destination. For each order status, such as Completed or Refunded, you can specify the list to which customers will be added or removed.
To set this, click the “Add Destination” button. There, you can add the different order statuses associated with the selected WooCommerce product. For each order status, you’ll choose your CRM or email marketing platform and designate the corresponding list.
You can also define which tags to assign to subscribers and map custom fields, ensuring that customer data in WooCommerce aligns correctly with the corresponding fields in your CRM.
For example, in the image below, WooCommerce customers who purchase a Cap product are added to the selected email marketing software or CRM.
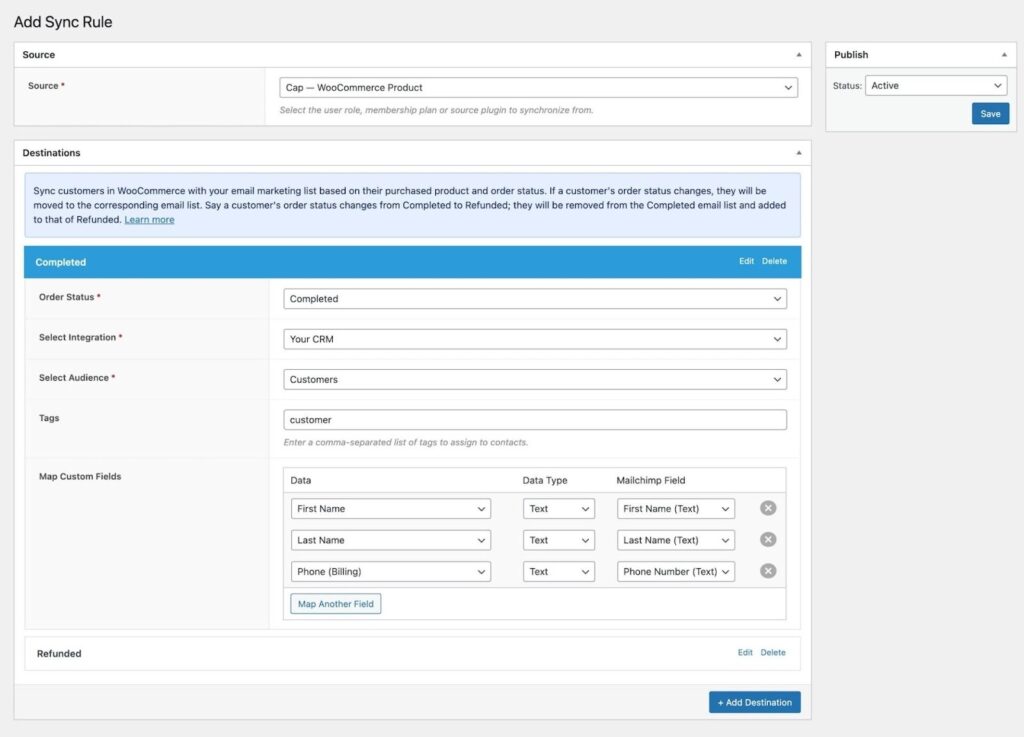
If a customer’s order status is marked as Completed, they’ll be automatically added to the “Customers” list. However, if their order is refunded, they’ll be removed from the Completed list and added to the Refunded list instead.
Once you’ve set this up, repeat the process to add destinations for any other order statuses you want to include, such as ‘Canceled’, ‘Refunded’, or ‘Failed’. When finished, click on “Save” to activate the sync rule.
Sync WooCommerce Customers to Email Lists Based on Product Category
To sync WooCommerce customers to your CRM or email marketing list based on the product category they purchased from, follow these steps:
Go to FuseWP > User Sync and click the Add New button.
Next, choose a WooCommerce category as the source. Then, set up the CRM or email marketing list for every order status.
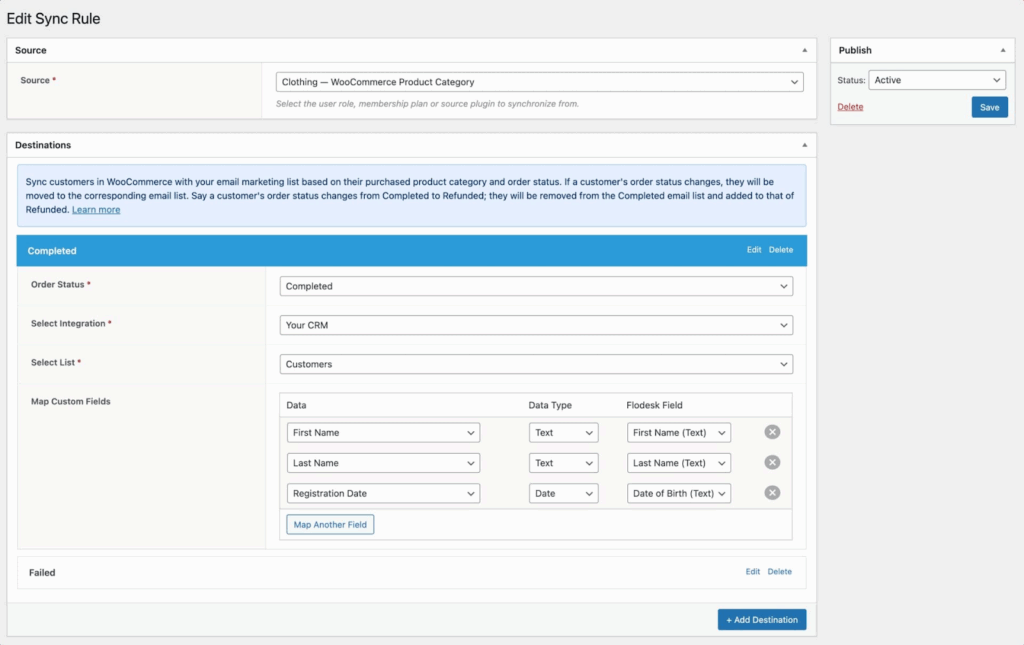
In the image above, customers who purchase products from the Clothing category are automatically added to the “Customers” email list. If their payment fails during checkout, they’ll be subscribed to the list assigned to the failed order status.
After setting this up, you can repeat the same process to add destinations for other order statuses, such as Canceled, Refunded, and Failed.
When done, click on “Save” to activate the sync rule.
Sync WooCommerce Customers Based on Product Tags
FuseWP also supports syncing based on WooCommerce product tags. To do this, navigate to FuseWP > User Sync and click Add New.
Select WooCommerce Product Tag as the source, then configure your preferred CRM or email marketing list for each order status.
When done, repeat the process for adding destinations for additional order statuses you wish to add, such as Canceled, Refunded, and Failed.

As shown in the example above, when a customer purchases a product tagged “Long,” they are added to the “Customers” email list. If the order status later changes to Refunded, they’ll be removed from the Completed list and added to the Refunded list.
Remember to click on the Save button when done to activate the sync rule.
Sync ProfilePress Members to Your Email List
Suppose you run a membership site with MemberPress, ProfilePress, Paid Memberships Pro, or Restrict Content Pro. In that case, FuseWP can automatically add members to your CRM or email marketing platform as soon as they register or subscribe.
You can even sync members based on their membership plans, ensuring that each plan has a corresponding email list or tag. This makes it easier to send updates, renewal reminders, or exclusive offers to specific membership tiers without doing any manual work.
To set this, navigate to FuseWP > User Sync and click the ‘Add New‘ button.
Next, select a membership plan as the source. Then, move to the Destinations metabox to configure the different subscription statuses of the selected membership plan and their respective email marketing integrations.
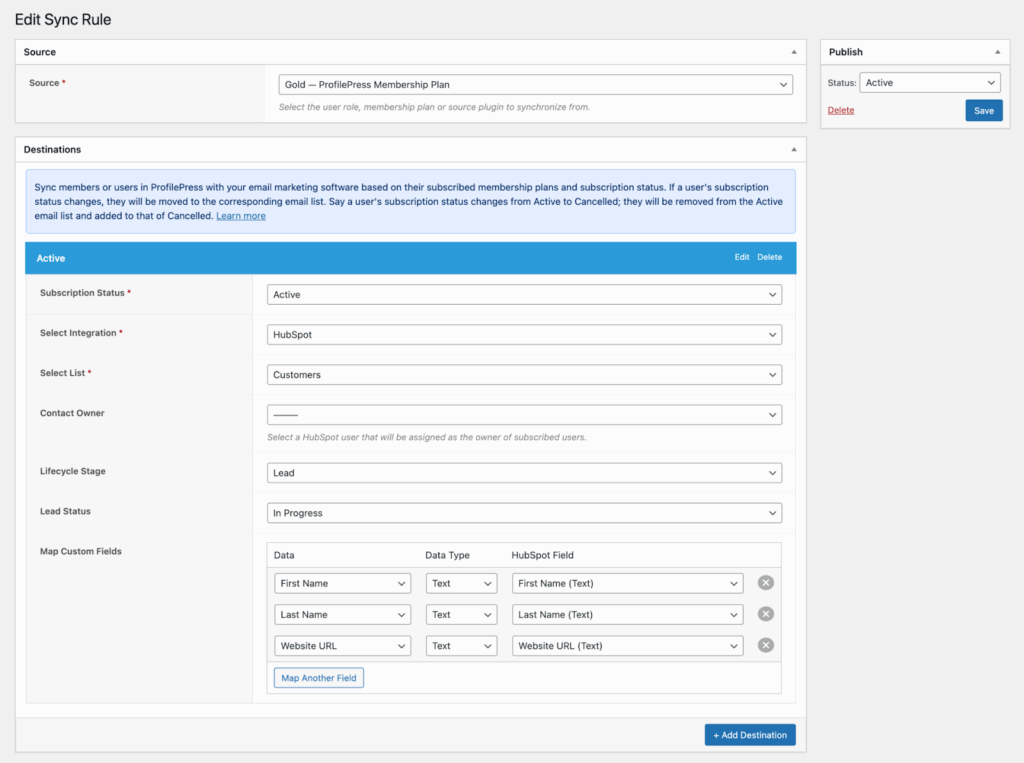
For example, as shown in the screenshot above, ProfilePress members with an active “Gold” membership will be automatically added to the “Customers” list in your CRM or email marketing platform.
If their membership is canceled, they’ll be removed from the Active Subscription list and added to the Cancelled list.
Once you’ve set everything up, remember to save your changes and make sure the rule is active.
Sync Form Submissions to CRM and Email Marketing Platforms
FuseWP can also connect your form submissions from Gravity Forms, WPForms, Ninja Forms, Forminator Forms, Fluent Forms, Formidable Forms, and Everest Forms to your CRM and email marketing platforms.
This means that every time someone fills out a form on your site, their details can be sent directly to your CRM or email list, eliminating the need for manual exporting or copying.
In the next section, we’ll show how to connect WPForms to Mailchimp using FuseWP.
Sync WPForms Submissions to Mailchimp
To do this, navigate to FuseWP >> User Sync and click the Add New button.
Next, on the User Sync Rules page, select WPForms as the source, then choose the specific form whose submissions you want to connect to your CRM or email marketing platform.
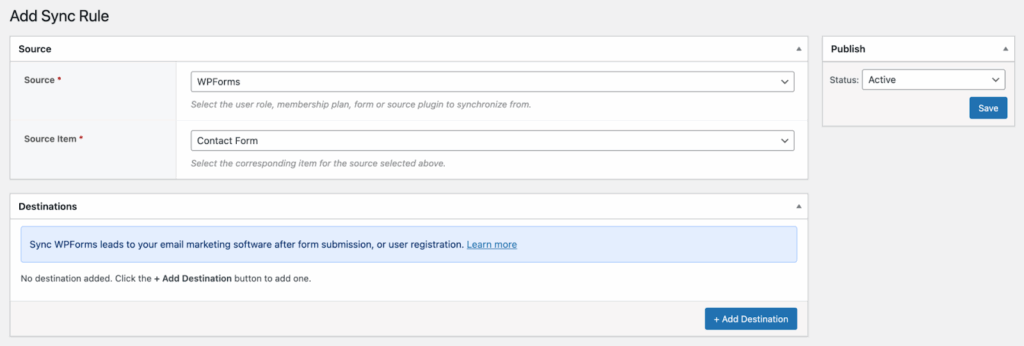
Next, move to the Destinations section, where you can choose the CRM or email marketing platform to which users will be added when they submit a form.
To set it up, click “Add Destination” and select “After Form Submission” as the event. Then, select Mailchimp as your integration, choose the audience to which you want new contacts added, and assign any relevant tags.
You can also map custom fields to make sure the data is transferred correctly.
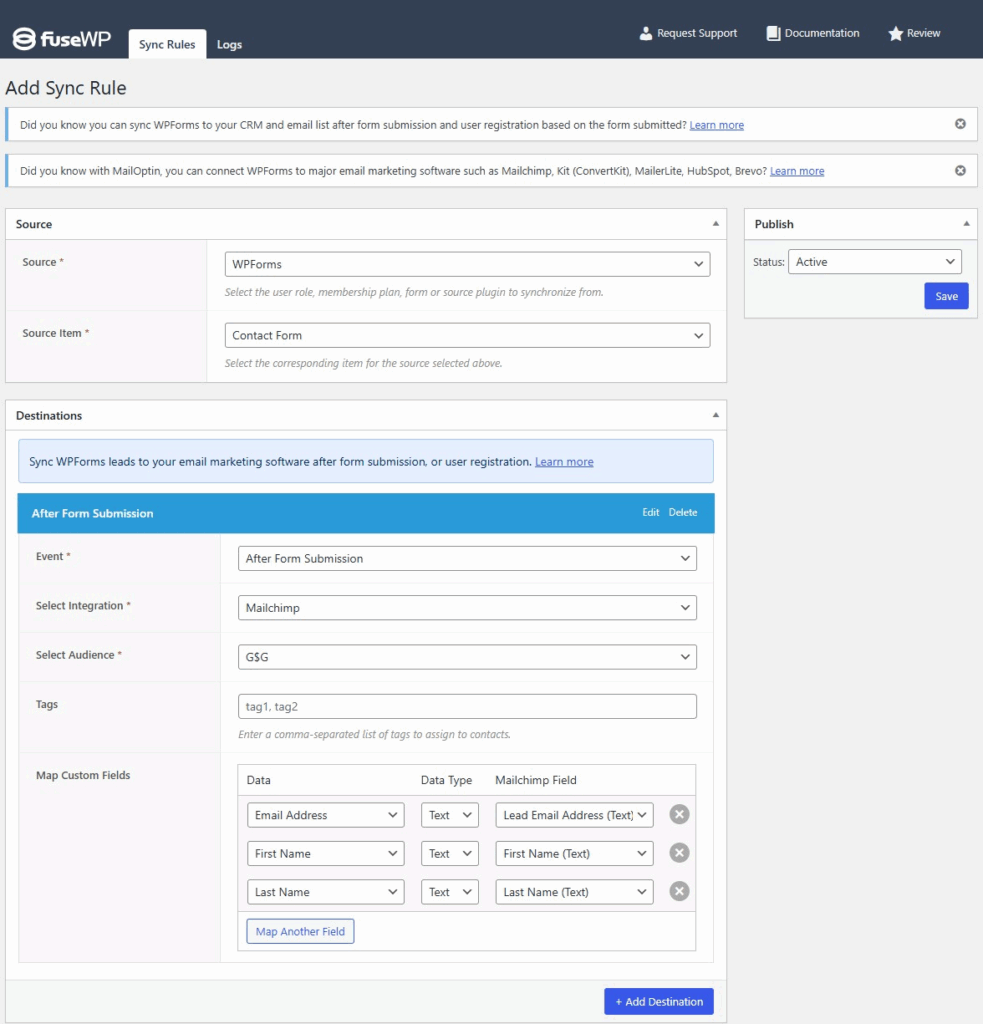
Once you’ve configured everything, click “Save” to activate the sync rule.
From that point on, every new form submission will automatically be added to your selected CRM or email marketing platform.
Bonus: Create Opt-in Forms with MailOptin
Another effective way to connect WordPress to CRM and email marketing platforms is to use MailOptin. This plugin creates high-converting opt-in forms and links them directly to your email marketing service.
With MailOptin, you can create popups, slide-ins, notification bars, and embedded forms that automatically send subscribers’ information to platforms like Mailchimp, ActiveCampaign, Constant Contact, ConvertKit, and many others.
Below, we’ll show you how to create a pop-up form with MailOptin and connect it to Mailchimp.
Install and Activate MailOptin
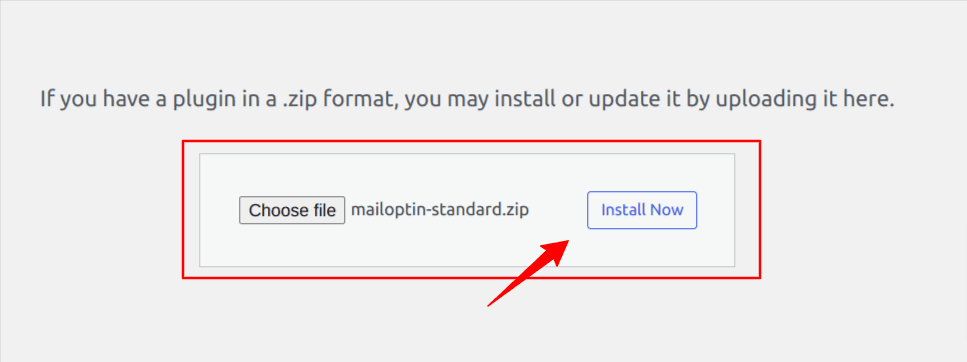
To get started with MailOptin, visit the MailOptin website and purchase a license. Next, log in to your WordPress admin dashboard, navigate to Plugins > Add New, and click ‘Upload Plugin’.
Select the ZIP file you downloaded, upload it, and then click Install Now.
Once the installation is complete, click Activate Plugin to start using MailOptin.
Connecting MailOptin to Mailchimp
Creating a Popup Lead Capture Form
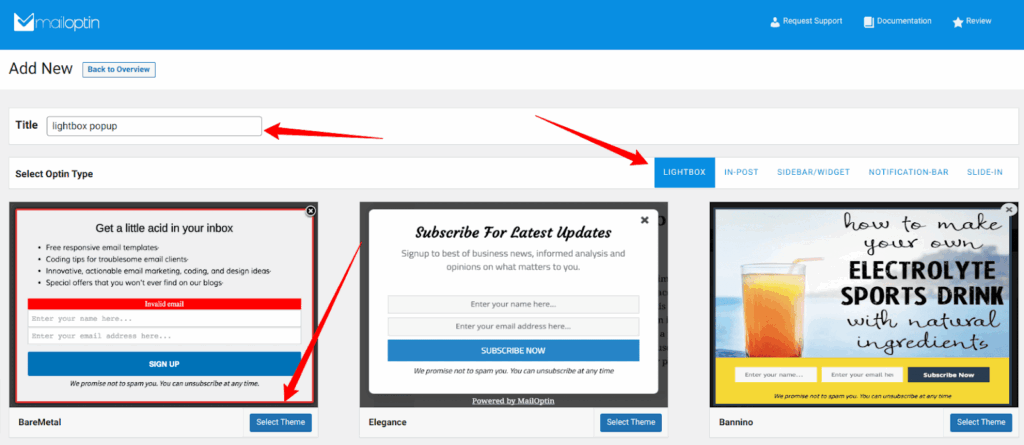
To do this, go to MailOptin > Optin Campaigns in your WordPress dashboard and click Add New.
Next, give your campaign a name, select ‘Lightbox’ as the opt-in form type, and choose a suitable template.
The next step is to customize the design, content, and behavior of your pop-up using the options in the side panel.

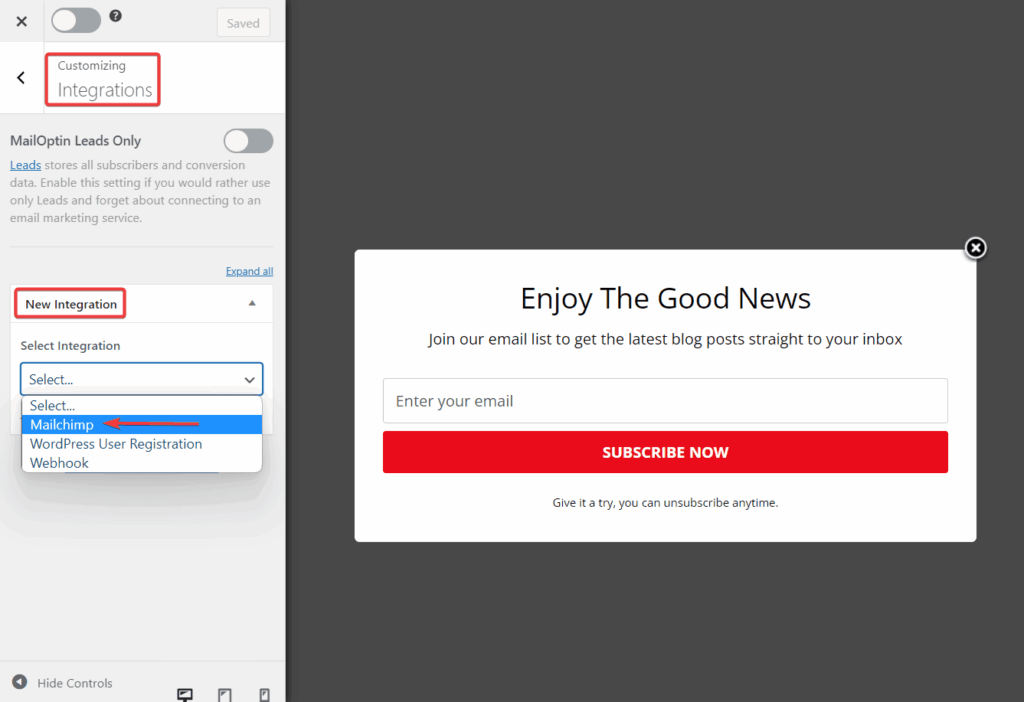
Once you are done customizing your pop-up, the next step is to connect it to your Mailchimp account.
To do this, open the Integrations panel, choose Mailchimp from the New Integration dropdown, and select the Mailchimp list where you want new subscribers to be added.
Next, you need to set where the form should appear on your site. Open the Display Rules panel to configure it.
If you’d like the pop-up to appear on every page, enable the Globally load opt-in option. For more control, use page-level targeting and triggers to specify where and when the pop-up should display.
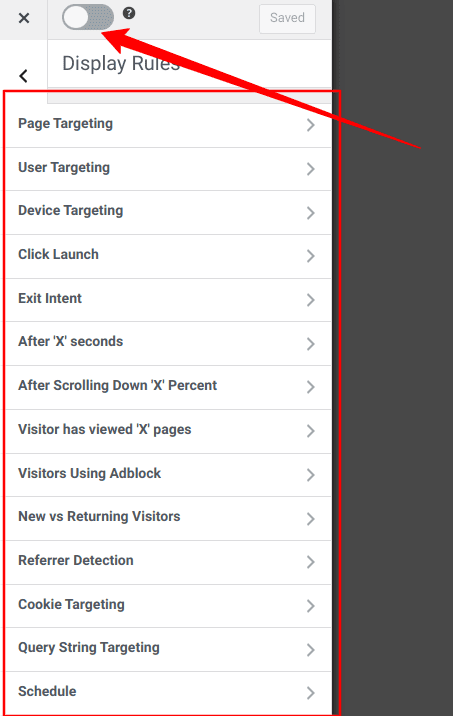
When you are done with your setup, click Save Changes.
That’s it, you’ve successfully created a pop-up form! When visitors subscribe, their details will be automatically synced to your Mailchimp list.
Conclusion
We hope this guide helped you understand how to connect WordPress to CRM and email marketing platforms.
By using FuseWP, you can automatically sync WordPress users, WooCommerce customers, and form submissions with your CRM or email lists, ensuring that your contact data remains accurate and up-to-date.
With MailOptin, you can grow your audience by creating opt-in forms that direct new subscribers to your email marketing platform.
Now it’s your turn to put this into action. Connect your WordPress site today and experience how easy it is to keep your CRM and email marketing perfectly in sync.
Stop Wasting Time on Servers. Start Building Instead.
You didn’t start your project to babysit servers. Let ServerAvatar handle deployment, monitoring, and backups — so you can focus on growth.
Deploy WordPress, Laravel, N8N, and more in minutes. No DevOps required. No command line. No stress.
Trusted by 10,000+ developers and growing.