
Add a Favicon to your WordPress website and instantly give it a more professional and recognizable look. Have you ever noticed that tiny icon sitting next to a website name in your browser tab? It might seem small, but that little symbol plays a big role in how a website feels and looks. That icon is called a favicon, and adding it to your WordPress website is one of the simplest yet most powerful branding steps you can take.
Think of a favicon like a nameplate on a house door. Without it, visitors may still enter, but with it, they instantly recognize where they are. In this guide, I’ll walk you through each step to add a favicon to your WordPress website easily, without technical terms.
What Is WordPress?
WordPress is the world’s most popular open-source content management system (CMS), used to build websites, blogs, and e-commerce stores. It offers flexibility through themes and plugins, making it suitable for beginners, developers, and businesses of all sizes.
How ServerAvatar Simplifies WordPress Deployment & Management
What is ServerAvatar?
ServerAvatar is a platform to simplify the hosting and management of servers and applications. It simplifies the process of deploying and managing PHP and Node.js based web applications on servers.
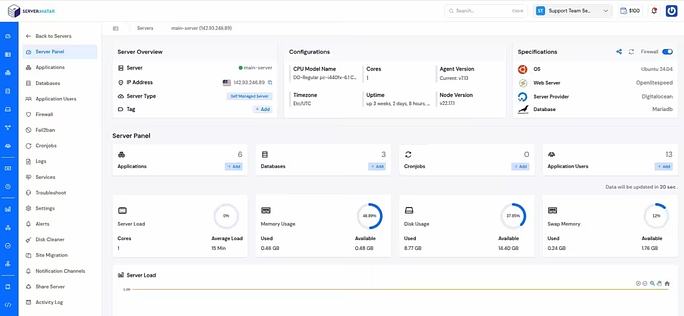
ServerAvatar makes WordPress and other popular applications, such as Mautic, N8N, UptimeKuma, etc, deployment effortless with its one-click WordPress application installer, allowing you to launch a fully configured WordPress site in minutes. It removes the complexity of server setup by providing an intuitive dashboard to manage servers, applications, databases, PHP versions, SSL, and performance settings from one place.
ServerAvatar supports multiple cloud providers and gives users full control over their infrastructure while eliminating the need for deep server administration knowledge. You can refer to the ServerAvatar documentation and the detailed blog to install WordPress effortlessly.
Key Benefits of Using ServerAvatar for WordPress
- One-click WordPress installer: Deploy WordPress instantly without manual configuration.
- Unified management panel: Manage servers and WordPress applications from a single dashboard.
- Performance optimization: Easily configure caching, PHP, and server resources.
- Enhanced security: Includes firewall, SSL management, and secure access controls.
- Easy scalability: Upgrade server resources as your WordPress site grows.
ServerAvatar is an ideal solution for users who want the power of cloud servers without the operational complexity. It simplifies WordPress hosting by automating server setup, streamlining application management, and providing performance and security optimizations out of the box.
Whether you’re a developer, agency, or business owner, ServerAvatar allows you to deploy, manage, and scale WordPress websites confidently while focusing on growth instead of infrastructure management.
What Is a Favicon?
A favicon is a square small image that is represent your website. You usually see it in browser tabs, bookmarks, and sometimes in search results. It’s typically your logo or a simplified version of it.
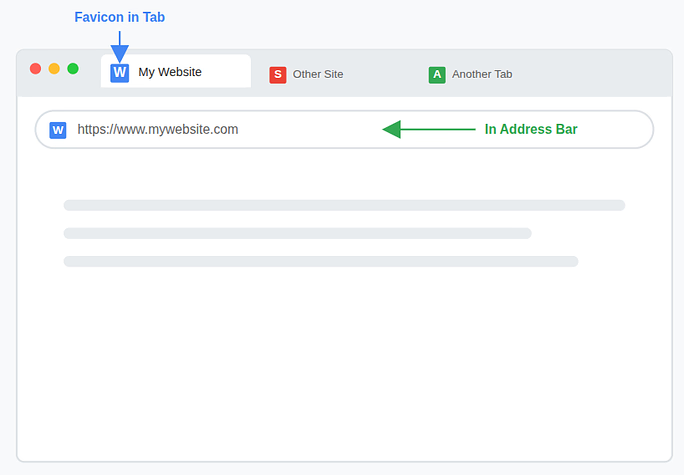
In simple terms, a favicon is your website’s face in the browser crowd.
Why a Favicon Matters for Your Website
You might wonder, does such a tiny image really matter? Absolutely.
A favicon:
- Builds brand recognition: A favicon helps visitors instantly recognize your website among multiple open tabs and repeated visits.
- Makes your site look professional: Having a favicon gives your website a polished, complete appearance that feels well-designed and reliable.
- Helps users find your tab quickly: The small icon makes it easier for users to spot your website tab without reading the full page title.
- Improves trust and credibility: A favicon shows attention to detail, which subtly assures visitors that your website is trustworthy and authentic.
Imagine opening ten browser tabs without favicons. Confusing, right? A favicon helps your site stand out instantly.
What Does a Favicon Look Like?
Most favicons are:
- A logo: Many websites use a simplified version of their logo so it remains recognizable even at a very small size.
- A single letter (like “F” for Facebook): Some brands choose one bold letter from their name to keep the favicon clean, minimal, and easy to identify.
- A symbol or icon: Simple symbols or icons are often used because they stay sharp and meaningful even in tiny browser tabs.
The key is simplicity. Since the image is tiny, too many details won’t be visible.
Recommended Favicon Size and Format
To avoid display issues, follow these guidelines:
Recommended size:
- 512 × 512 pixels (WordPress standard)
Supported formats:
- PNG (best choice)
- JPG
- ICO
- SVG (some themes)
PNG is usually the safest and clearest option.
Things to Prepare Before Adding a Favicon
Before jumping in, make sure you have:
- A square image: Using a perfectly square image ensures your favicon fits properly without getting cropped or stretched.
- Clear visibility at small sizes: The design should remain easy to recognize even when displayed as a tiny icon in the browser tab.
- A clean background or transparent PNG: A simple or transparent background helps the favicon blend smoothly with different browser themes and colors.
If you already have a logo, you can resize it using free tools like Canva or any image editor.
Method 1: Add a Favicon Using Built-in Feature
Step-by-step guide:
- Log in to your WordPress admin panel
- Navigate to Settings >> General section
- Locate the Site Icon section and click the Choose a Site Icon option
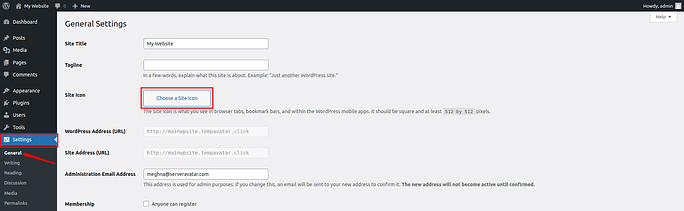
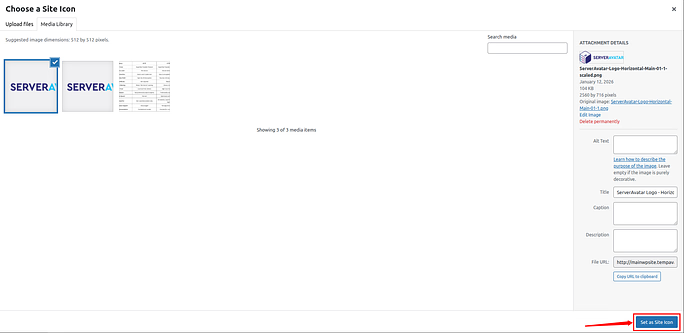
- Upload your favicon image or select your icon from the media library
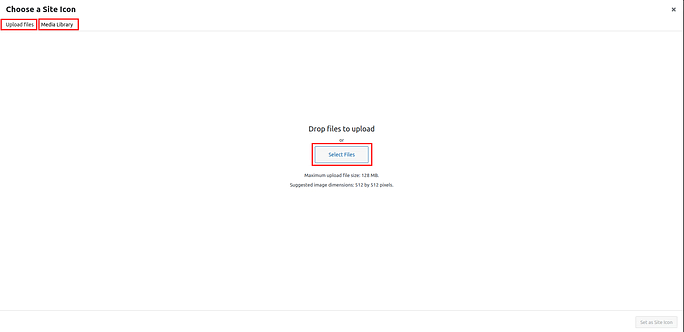
- Click on the Set as Site Icon button at the bottom. You can also crop and adjust the image so it fits perfectly within the favicon space
That’s it! Your favicon is now live.
Method 2: Adding a Favicon via WordPress Theme Settings
Some WordPress themes include a built-in option for adding a favicon directly from the theme settings. This method works well if your theme supports it, though availability may vary depending on the theme.
How it works:
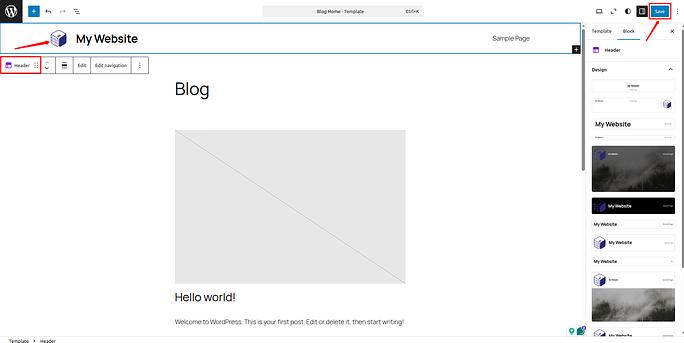
- Log in to your WordPress admin dashboard. Navigate to the Appearance >> Themes section. Click on the Customize button for the currently active theme

- Find out theHeader Settings, and upload your favicon
- Save the changes
If you see this option, you can use it, but the Customizer method is more universal.
Method 3: How to Add a Favicon Using a Plugin
Using a plugin is a great option if you want more flexibility and device-specific control when adding a favicon to your WordPress website. This method is beginner-friendly and works well for users who prefer guided setup steps.
Popular plugin options:
And there are many more plugin options to add favicons.
- Favicon by RealFaviconGenerator: This plugin helps create and manage favicons that work smoothly across different browsers and devices.
- Heroic Favicon Generator: A simple tool that allows you to generate and add favicons without technical effort.
Basic steps:
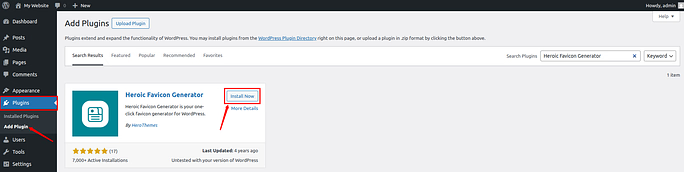
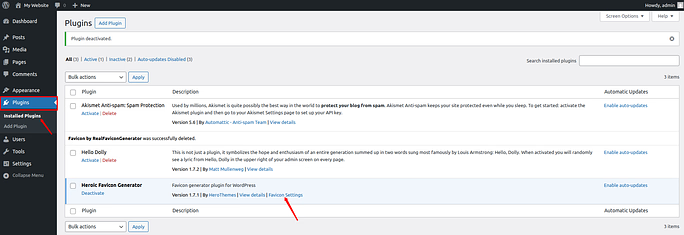
- Navigate to the Plugins section from the left sidebar and go to the Add Plugin option.
- Click on the Install Now button and activate the plugin. I’m using Heroic Favicon Generator here.
- Navigate to the Plugins >> Installed Plugins section from the left sidebar.
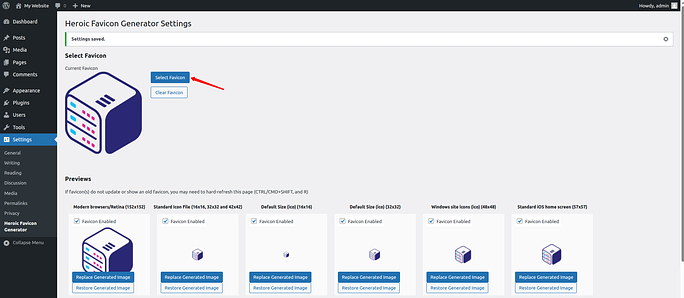
- Click on the Favicon Settings option for the plugin.
Plugins are especially useful if you want extra control over how your favicon appears across browsers, devices, and platforms.
Method 4: Manually Adding a Favicon
This method is suitable for users who are comfortable working with website files and basic HTML. It gives direct control but requires extra care.
Steps overview:
- Upload favicon to the root directory: Place your favicon image in the main folder of your website using a file manager or FTP.
- Add HTML code in the <head> section: Insert the favicon link inside your theme’s header file so browsers can detect it.
Example code:
<link rel="icon" href="https://yourwebsite.com/favicon.png" type="image/png">This method is not recommended for beginners because theme updates can overwrite or remove the added code.

How to Check If Your Favicon Is Working
Once you’ve added your favicon, it’s important to confirm that it appears correctly across browsers and devices.
After adding your favicon:
- Open your website in a new tab: Check if the favicon appears next to the site name in the browser tab.
- Clear browser cache: Remove stored data to ensure the browser loads the latest version of your site.
- Try opening the site in incognito mode: This helps verify the favicon without cached files.
- Check on mobile devices: Confirm the favicon displays properly on phones and tablets as well.
Sometimes, favicons may take a little time to appear due to browser or site caching, so a short wait is normal.
Common Favicon Issues and Fixes
If your favicon does not appear correctly, the issue is usually minor and easy to fix with a few quick checks.
Favicon not showing?
- Clear browser cache: Remove saved data so the browser loads the updated favicon.
- Clear site cache: Delete cached files from your website or caching plugin to apply recent changes.
- Check image size: Make sure the favicon image meets the recommended square size requirements.
- Wait a few hours: Browsers sometimes take time to refresh favicons due to caching delays.
Blurry favicon?
- Use a higher resolution image: A larger image ensures clarity when resized by the browser.
- Avoid JPG for logos: JPG files can lose quality, especially for small icons.
- Use PNG format: PNG images stay sharper and support transparent backgrounds.
Favicon Best Practices
Following simple design rules can help your favicon look clear, professional, and easy to recognize.
- Keep it simple: Minimal designs are easier to recognize at small sizes.
- Use brand colors: Consistent colors help strengthen brand identity.
- Avoid text-heavy designs: Small text becomes unreadable in favicon form.
- Test on multiple browsers: Checking across browsers ensures consistent display.
- A good favicon should be recognizable instantly, even at a quick glance.
SEO and Branding Benefits of a Favicon
Although a favicon does not directly affect search rankings, it plays an important role in user experience and brand perception.
- Improves user experience: Users can quickly identify your site among open tabs.
- Increases brand recall: Repeated exposure helps visitors remember your brand.
- Makes your site look trustworthy: A polished favicon adds professionalism and credibility.
Search engines value positive user behavior, and favicons quietly support that experience.
When Should You Update Your Favicon?
Updating your favicon keeps your website aligned with your current brand image and design style.
You should consider updating it when:
- You rebrand your business: A new brand identity deserves an updated favicon.
- You change your logo: Your favicon should reflect your latest logo design.
- Your current favicon looks outdated: Refreshing it helps maintain a modern appearance.
- Your site design changes: A new layout or color scheme may require a matching favicon.
Just like fashion, branding evolves over time, and your favicon should evolve with it.
Conclusion
Adding a favicon to your WordPress website may seem like a small task, but it has a surprisingly big impact. That tiny icon helps visitors recognize your site instantly, builds trust, and gives your website a polished, professional look. Whether you choose the built-in WordPress option, theme settings, a plugin, or a manual method, the process is simple and accessible for users at every skill level.
With tools like ServerAvatar, managing WordPress becomes even easier by removing server complexity and letting you focus on building and branding your site. Once your favicon is in place and working correctly, your website feels more complete, memorable, and ready to stand out in a crowded browser full of tabs.
FAQs
1. What is the ideal favicon size for a WordPress website?
The recommended favicon size for WordPress is 512 × 512 pixels, as it ensures clear display across browsers and devices.
2. Can I add a favicon to WordPress without using a plugin?
Yes, WordPress allows you to add a favicon easily using the built-in Site Icon option in the dashboard or the Customizer.
3. Why is my favicon not showing up immediately?
Favicons are often cached by browsers, so clearing the cache, using incognito mode, or waiting a few hours usually resolves the issue.
4. Is it okay to use my full logo as a favicon?
You can use your logo, but it should be simple, square, and readable at small sizes to avoid looking blurry or cluttered.
5. How often should I update my favicon?
You should update your favicon whenever you rebrand, change your logo, redesign your website, or feel the current icon looks outdated.
Stop Wasting Time on Servers. Start Building Instead.
You didn’t start your project to babysit servers. Let ServerAvatar handle deployment, monitoring, and backups — so you can focus on growth.
Deploy WordPress, Laravel, N8N, and more in minutes. No DevOps required. No command line. No stress.
Trusted by 10,000+ developers and growing.