
Have you ever wished for your own private cloud, where your files live safely, and you stay fully in control? Not Google Drive. Not Dropbox. Yours. That’s exactly what NextCloud offers, and with ServerAvatar, setting it up is no longer a scary technical process.
You already know exactly what you want, and I’ll walk you through every step to deploy using ServerAvatar, no wrong steps, no confusion.
Whether you’re a blogger, freelancer, small business owner, or just someone who values privacy, this guide is written for real people, not system admins. Let’s get started.
What Is NextCloud?
NextCloud is an open-source cloud storage platform that lets you store, sync, and share files securely. Unlike public cloud services, your data stays on your own server.
You can upload files, create folders, share links, collaborate on documents, and even sync across devices, all without handing over your data to third parties.
In simple words, NextCloud is like building your own Google Drive at home.
Why Choose NextCloud for File Storage
NextCloud is a great option for anyone who wants full control over their files without relying on third-party cloud providers. It focuses on privacy, flexibility, and transparency, making it suitable for both personal and business use.
- Full data ownership: Your files stay on your own server, so no third party can access or control them.
- Better privacy: You decide who can view, share, or modify your data at all times.
- No recurring storage fees: You only pay for your server, not monthly storage plans.
- Custom apps and integrations: Extend functionality with apps that fit your workflow.
- Open-source transparency: Anyone can review the code, ensuring trust and security.
If privacy matters to you, NextCloud is a solid choice.
What Is ServerAvatar?
ServerAvatar is a platform to simplify the hosting and management of servers and applications without deep technical knowledge. It simplifies the process of deploying and managing PHP and Node.js based web applications on servers.
Instead of manually installing software through command lines, ServerAvatar offers:
- One-click application installers for popular applications
- Security setup
- Easy server monitoring
- Clean, beginner-friendly dashboard
- Instant and Scheduled Backups
- Log monitoring
- AI Bot Blocker
- and many more features
It’s like having a smart control panel for your server.
Why Install NextCloud Using ServerAvatar
Installing NextCloud manually can be time-consuming and confusing, especially for beginners. ServerAvatar simplifies the entire process by automating setup and configuration in just a few clicks.
- One-click NextCloud application installation: Deploy NextCloud instantly without manual steps.
- Automatic database setup: Databases are created and configured for you automatically.
- Automatic SSL installation: Secure your NextCloud site with HTTPS by default.
- Secure configurations by default: Best security settings are applied during installation.
- No human error: Automation removes mistakes that often happen in manual setups.
In short, ServerAvatar saves time, effort, and frustration.
Prerequisites Before Installation
Before installing NextCloud, you only need a few basic things in place. No advanced technical skills or Linux expertise are required to get started.
- A ServerAvatar account: To deploy and manage your server and applications.
- A cloud server: Acts as the foundation where NextCloud will be installed.
- A domain (optional but recommended): Makes your NextCloud instance easier to access.
- Basic internet access and curiosity: Enough to follow along and explore the setup.
No advanced Linux knowledge needed.
Setting Up a Server in ServerAvatar
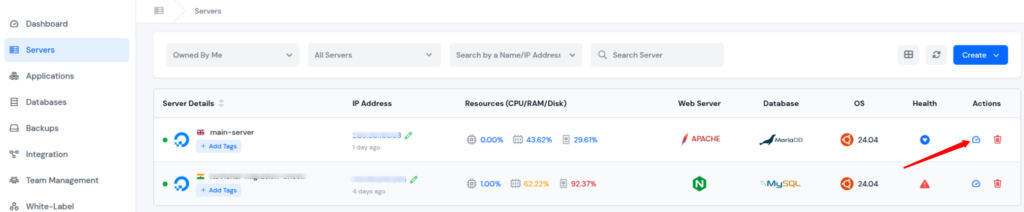
You can easily create a server directly from the ServerAvatar Dashboard by clicking on the Create button. ServerAvatar offers both options Managed server and Self managed server options to deploy your server.
- Managed Server: ServerAvatar handles server maintenance, updates, and core management for you.
- Self-Managed Server: You control the server while ServerAvatar helps with deployment and monitoring.
Select your preferred option and fill in the required details, such as server name, tech stack, database, etc., to deploy the server. ServerAvatar will automatically install all required server packages in the background.
You don’t need to touch a terminal, just wait a few minutes.
Deploy NextCloud Application
Once your server is ready:
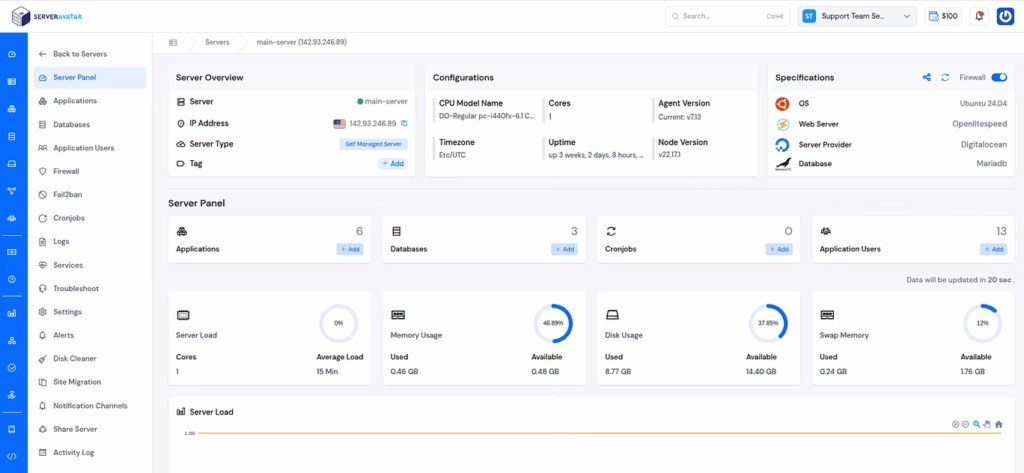
- Click on the server dashboard icon to go to the server panel.
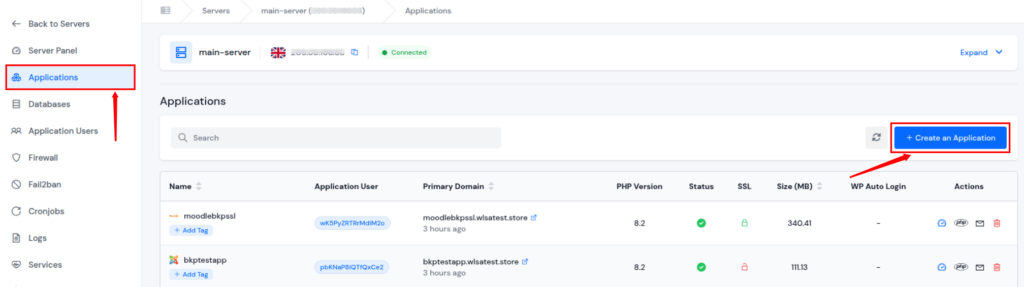
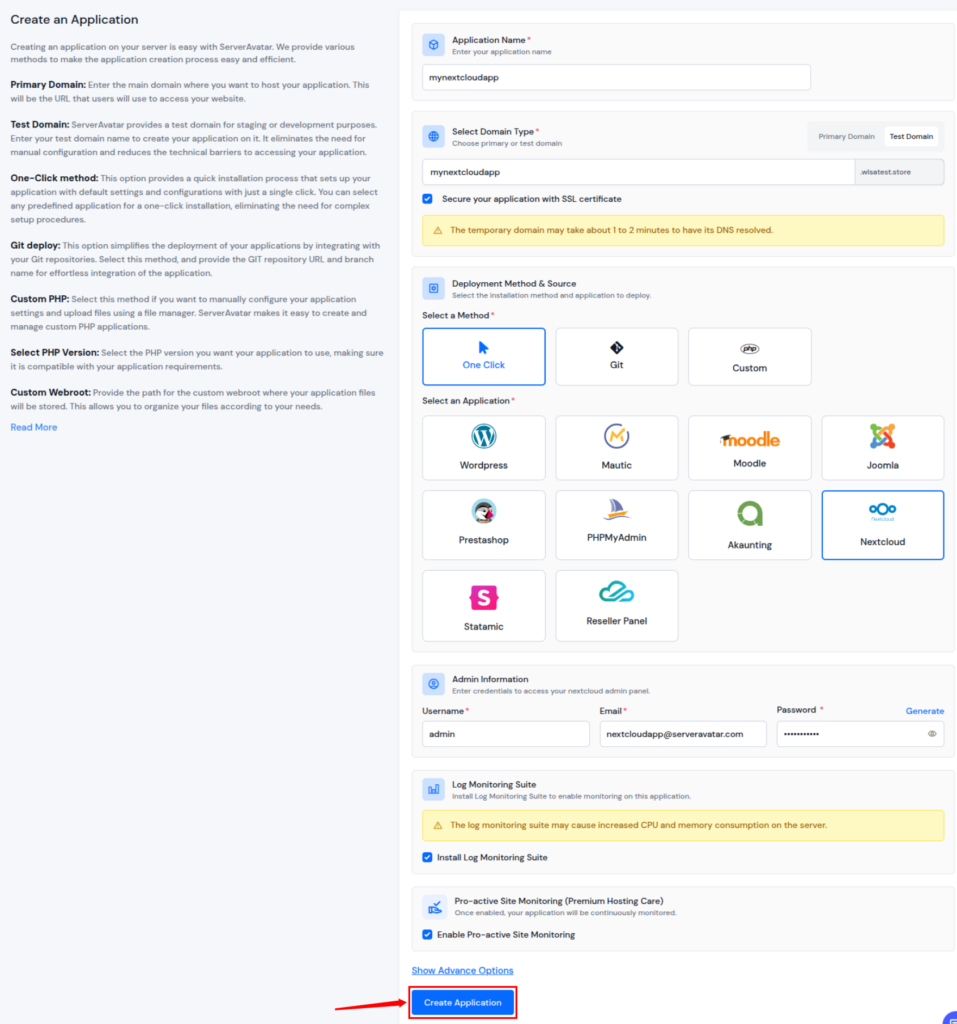
- Go to the Applications section, and click on the Create an Application button.
- Enter your preferred application name.
- Select Domain Type between:
- Primary Domain
- Test Domain (ServerAvatar provides a temporary domain for testing purposes)
- Enter your desired domain name.
- Select the checkbox to automatically install the SSL Certificate to secure your application. Please note that this is an optional step, you can also install the SSL Certificate later.
- Select One Click as a Deployment Method.
- Select Nextcloud as an application to install.
- Provide administrator credentials such as Username, Email ID, and Password.
- Select the checkbox to automatically install the SSL Certificate to secure your application. Please note that this is an optional step, you can also install the SSL Certificate later.
- Select the checkbox to automatically install the Log Monitoring Suite to track logs to help you detect errors, issues, and unusual activity early.
- Select the checkbox to enable Pro-active Site Monitoring to continuously monitor your site’s uptime and performance. Please note that this feature is only available with the Premium Hosting Care Plan.
- Click on the Create Application button. This is where the magic begins.
That’s it. ServerAvatar handles PHP, database creation, permissions, and background setup automatically.
Accessing Your NextCloud Dashboard
After installation completes:
- Visit your domain directly from the application panel of ServerAvatar Dashboard.
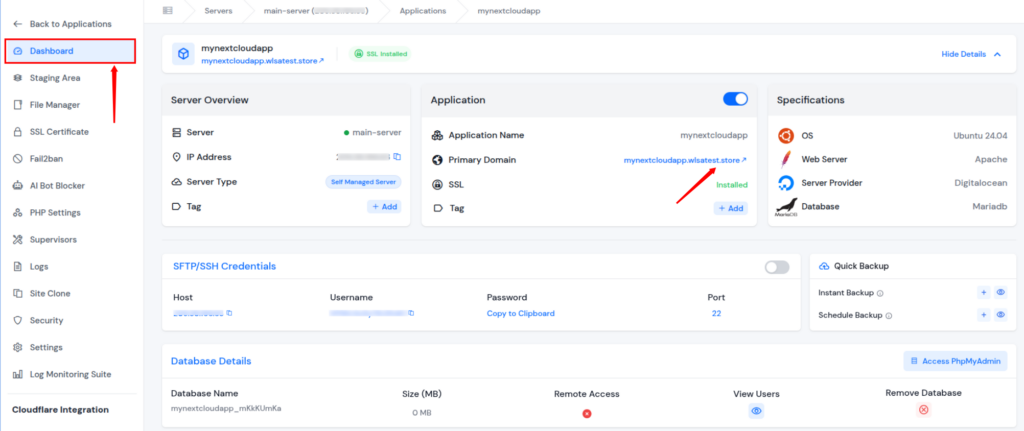
- You can see the login page of NextCloud, as attached below.
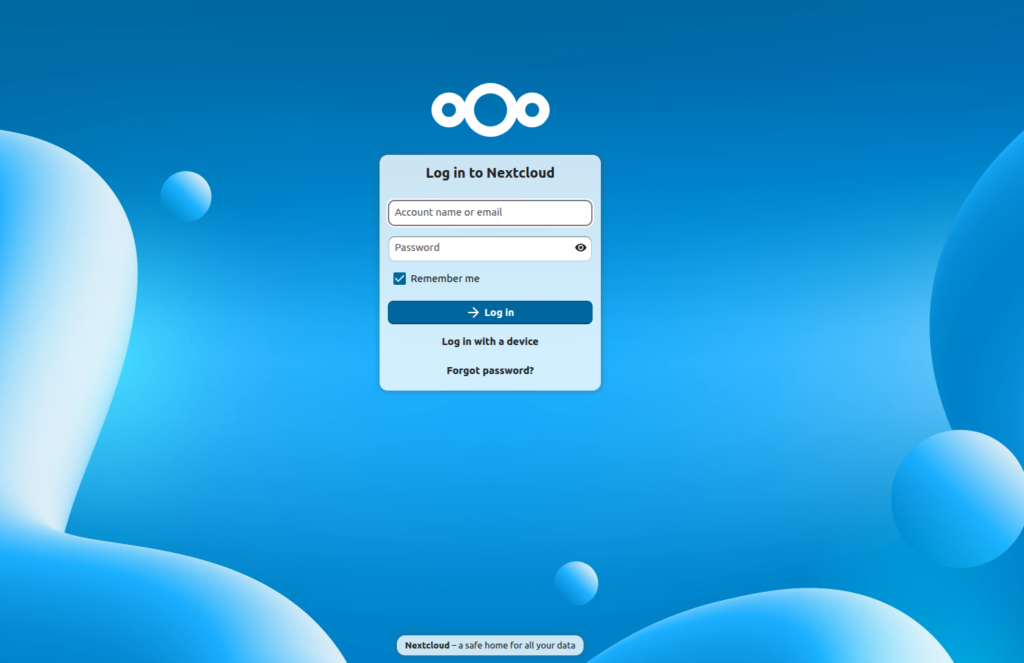
- Log in using admin credentials. You’ll land on the NextCloud dashboard, where you can upload files, create folders, and customize settings.
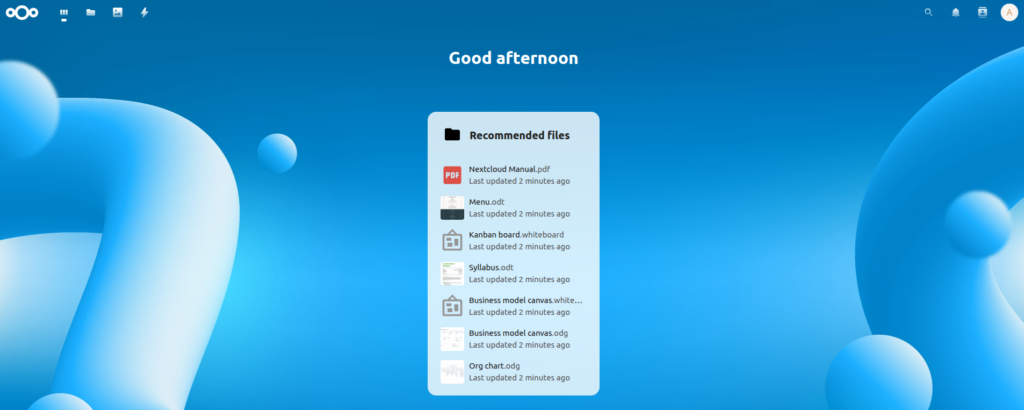
It feels just like a commercial cloud service, only better.
Securing Your NextCloud Application
Protecting your data is essential, especially when storing personal or business files. ServerAvatar offers built-in security tools that can be enabled directly from the dashboard.
- Enable SSL certificates: Encrypts data transferred between users and the server.
- Use firewall protection: Blocks unauthorized access and suspicious traffic.
- Use Fail2Ban protection: Prevents repeated login attempts and brute-force attacks.
- Enable 8G Firewall: Filters malicious requests before they reach your application.
- Enable AI Bot Blocker: Stops harmful bots from accessing your site.
- Set a strong admin password: Adds an extra layer of protection to your admin account.
Common Issues and How to Fix Them
Beginners may face small issues after installation, but most problems are easy to resolve. ServerAvatar provides tools that help fix these without needing external support.
- Page not loading: Check and verify your domain DNS settings.
- Slow uploads: Increase PHP memory limits from the server settings.
- Login errors: Reset the NextCloud admin password from the dashboard.
Most problems can be solved directly from ServerAvatar without technical support.

Is ServerAvatar + NextCloud the right choice for you?
This combination is ideal if you want a private cloud solution without complex setup or technical stress. It offers simplicity, control, and reliability in one package.
- Private cloud storage: Keep your data fully under your control.
- Easy setup: Install and manage NextCloud without manual commands.
- Minimal server setup headaches: ServerAvatar handles the heavy lifting.
- No command to deploy NextCloud application: Everything works through a clean UI.
- Full control over your data: You decide how and where your files are stored.
If these points matter to you, ServerAvatar and NextCloud are definitely worth choosing.
Conclusion
Setting up your own private cloud doesn’t have to be complicated or intimidating. With NextCloud, you get complete control over your data, and with ServerAvatar, you get a smooth, stress-free way to deploy and manage it. From one-click installation to built-in security and monitoring tools, ServerAvatar removes the technical barriers that usually come with self-hosted applications. If you value privacy, simplicity, and reliability, using NextCloud with ServerAvatar is a smart and future-proof choice for both personal and business needs.
FAQs
1. Do I need technical or Linux knowledge to install NextCloud using ServerAvatar?
ServerAvatar is designed for beginners and does not require command-line or advanced Linux knowledge.
2. Can I install NextCloud without a custom domain?
You can use ServerAvatar’s test domain for setup and testing, but a custom domain is recommended for long-term use.
3. Is my data secure when using NextCloud with ServerAvatar?
ServerAvatar provides SSL, firewall protection, Fail2Ban, and other security features to keep your data safe.
5. Is SSL mandatory for running NextCloud?
SSL is not mandatory, but it is strongly recommended to protect your data and user login information.