Linode is a reliable cloud hosting company with over 1 million customers and 11 data centers worldwide. It covers More than 196 countries, meaning customers can use Linode all over the globe. Linode mainly focuses on providing Linux-based cloud solutions that enable you to create and deploy the server through a web interface.
Along with that, Linode also allows users to extend their server capacity with the appropriate volume on demand. And backup their server on a daily, monthly, and weekly basis.
As a cloud service user or company owner, You know that creating and deploying a server isn’t just over. You also have to manage it thoroughly. Learning to manage a server can take lots of time and effort. But with ServerAvatar, you no longer need to worry about that.
ServerAvatar is an affordable server management solution that allows you to manage multiple servers on a single dashboard.
Let’s look at how to quickly connect and deployed a Linode server to host your website(or web application) with serverAvatar.
Choosing ServerAvatar to Set up your Linode Server
Linode provides LAMP and WordPress with one-click multiple apps to set up the server instantly. Although, why should you use ServerAvatar to set up your server?
Well, there are so many reasons to use ServerAvatar to set up the server:
- You can easily manage multiple servers( not only Linode but others) from a single ServerAvatar dashboard.
- You can easily manage multiple applications within the server using ServerAvatar.
- You can easily set up an SSL certificate to secure your website within the server.
- You can easily add firewall rules to protect the network against malware and Dos attacks.
- You can easily change the PHP version (7.0, 7.1, 7.2, 7.3, 7.4, 8.0) of each application in the server with/without changing the application on a different server.
- Easily access server logs to debug errors within the server.
- Quickly clone your web application from within or from one server to another.
- Easily use cron jobs to schedule your tasks with customized time intervals.
- Set up server notifications or alerts for health monitoring. For example, ServeAvatar will notify you if the server load exceeds your pre-set limit.
Still, there are lots and lots of features that help you easily manage your server with no downtime.
Let’s look at how to connect your Linode server with ServerAvatar. But, before that, If you don’t have a ServerAvatar account, please register by clicking here.
Connecting Your Linode Server to ServerAvatar
Linode offers $100 free credits using signup for the new costumes to help you get a quick start. You can access the link from here.
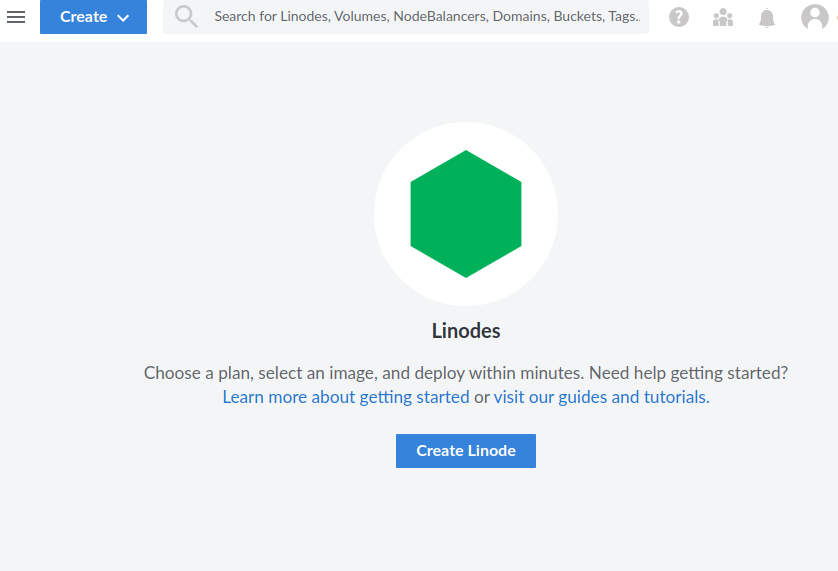
Create a Linode server
First, signup/login to your Linode dashboard and click on the Create Linode Button present on the screen.
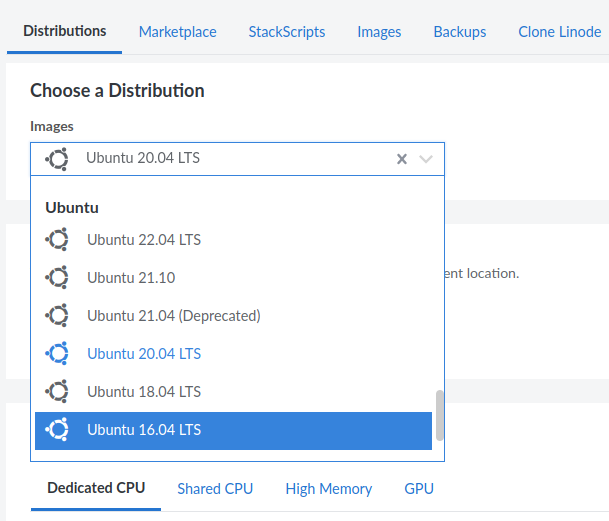
Choose OS image
Select your server’s operating system. ServerAvatar runs on 64-bit Ubuntu 18.04, 20.04, or 22.04. Choose the system from the options shown below.
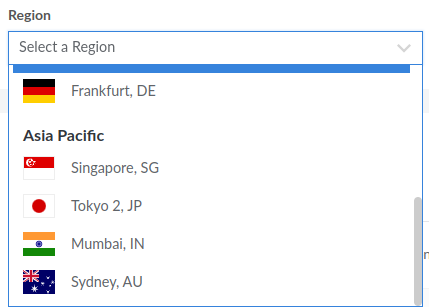
Select a Region
Select a region close to you or your users to reduce latency time.
Select a plan
Select a plan server plan that suits your requirements.
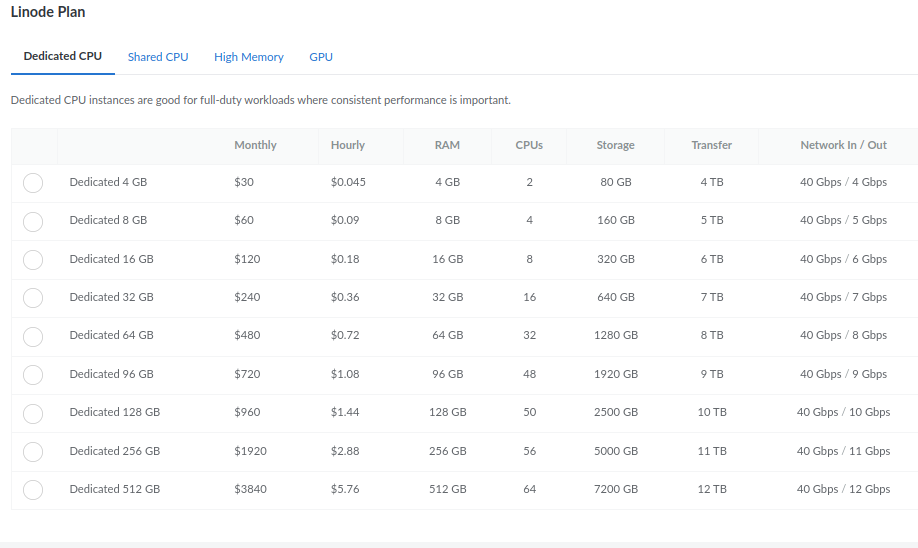
Linode offers four instance types: Shared CPU, Dedicated CPU, High Memory, and GPU( Graphics processing unit) instance.
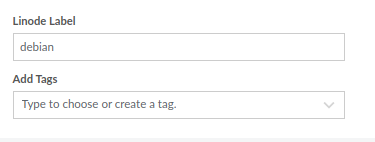
Give Linode Label & Tags
Give an appropriate label and tag to your server.
Set Root Password
Set a password that includes an uppercase letter, a number, and a special character.
Once you fill up, click on the Create Linode button. And that’s it. Your server is now ready to rock.
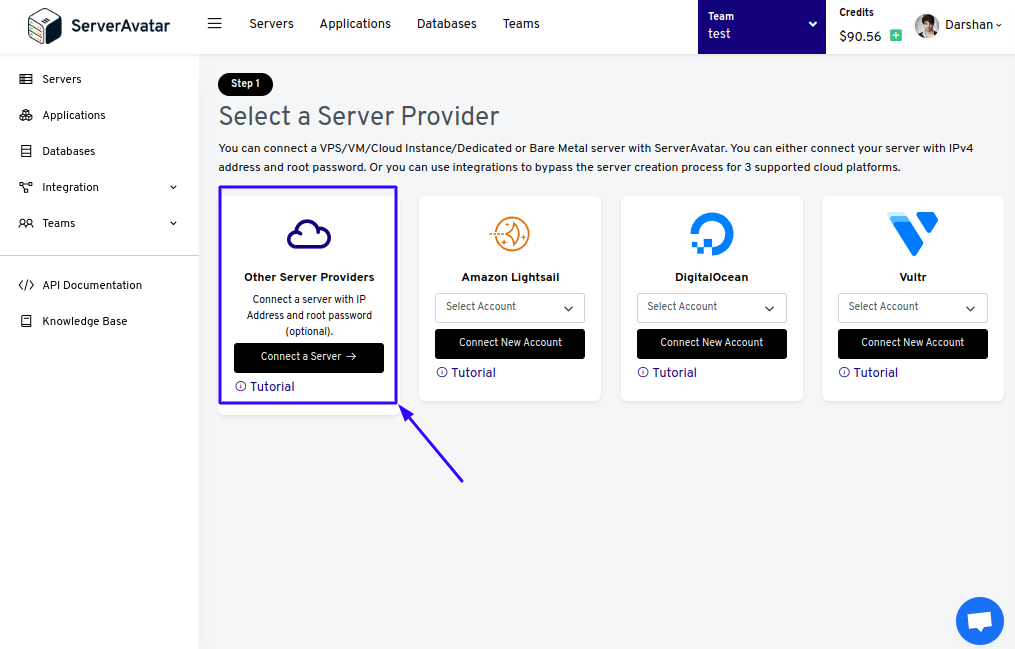
Connect a Linode server with ServerAvatar
Now go to the ServerAvatar and click on the Connect a server button. Connecting a server is a four-step procedure.
Step-1
In the first step, select a card shown in the image below to connect a server with an IP address and root password.
Step-2
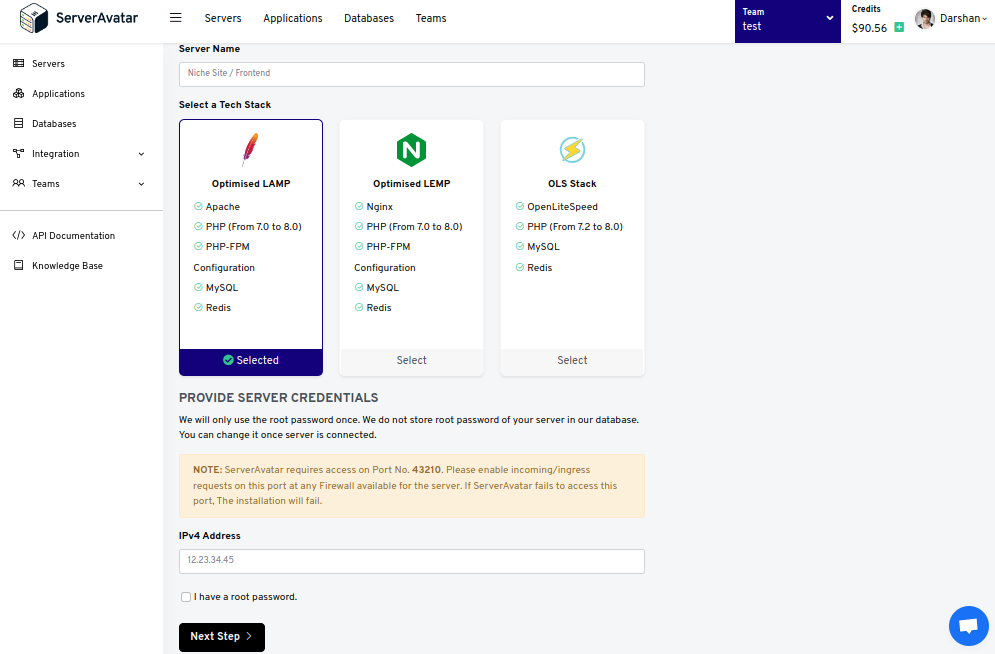
In step two, you need to fill up the server regarding information which includes:
- Server Name as per your choice
- Tech Stack from given three options( Optimized LAMP, Optimized LEMP, or OLS Stack)
- IP Address of your Linode server
- Root Password(if you have)
Click on the Next Step button after filling in the details.
Step-3
Here you need to Select a Management Plan for your server. Select an appropriate plan for your server.
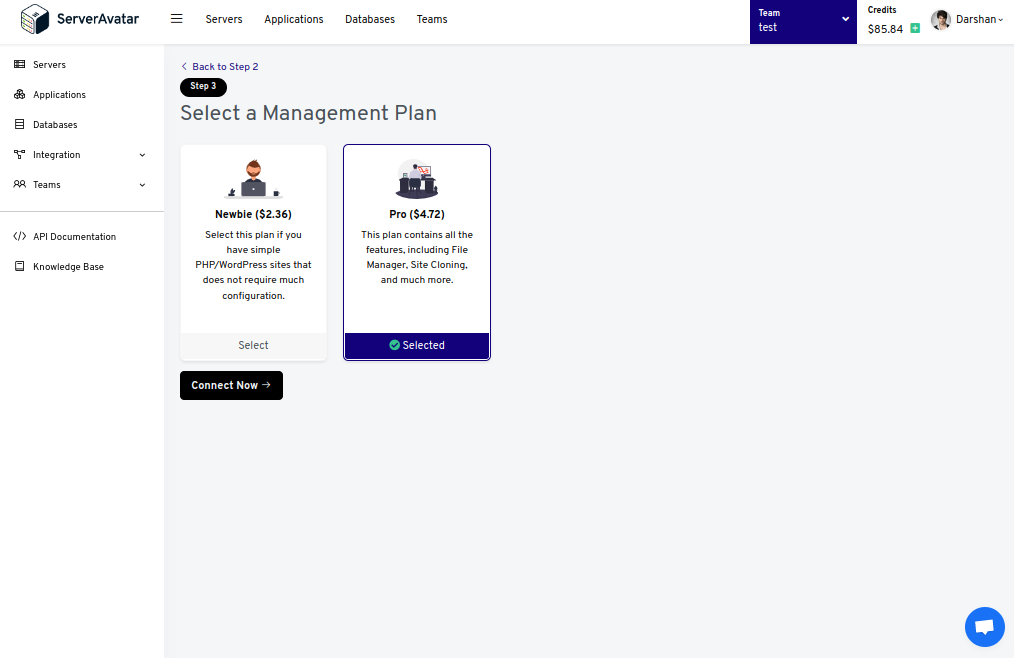
After selecting, click on the Connect Now button. ServerAvatar will set up your server in minutes.
Step 4(if you don’t have a Root Password)
If you don’t have a root password, Here is the link to Connect a server with IP address only or without root password.