
If you want to change how your website looks with a WordPress Child Theme? Well, you’re in the right place. Making a child theme is one of the smartest things you can do for your site because it keeps your changes safe when the parent theme gets updated.
Don’t worry if this sounds hard. We’ll walk through everything step by step. By the end, you’ll know exactly how to make your own child theme.
What is a WordPress Child Theme?
Think of a child theme like a copy of your main theme. Your main theme is called the “parent theme.” The child theme takes all the good stuff from the parent but lets you make changes without breaking anything.
Here’s how it works. When someone visits your site, WordPress first looks at your child theme. If it finds what it needs there, great! If not, it goes to the parent theme to get the rest.
It’s like having a backup plan. You can change colors, fonts, and even add new features. But your original theme stays safe and sound.
Why Do You Need a Child Theme?
Well, let me tell you what happens without one. You spend hours making your site look perfect. You change colors, add custom code, maybe even modify some files. Everything looks amazing.
Then boom! Your theme gets an update. All your hard work? Gone. Just like that.
Here’s why child themes are so important:
- Your changes stay safe when themes update
- You can experiment without fear
- Your site won’t break if something goes wrong
- You keep all the parent theme’s features
- Updates are much easier to handle
Trust me, you don’t want to lose hours of work because of a simple theme update.
When Should You Use a Child Theme?
You should make a child theme anytime you want to change your site’s look or add custom features. Here are some common times:
- Changing colors or fonts
- Adding custom CSS code
- Modifying template files
- Adding new functions to your site
- Making any permanent changes
Even if you’re just changing one small thing, it’s worth making a child theme. Better safe than sorry, right?
Things You Need Before Starting
Before we jump in, let’s make sure you have everything ready:
- Access to your website files (FTP or file manager)
- A text editor (like Notepad or TextEdit)
- Your parent theme already installed
- Basic knowledge of copying and pasting
That’s it! You don’t need to be a coding expert. We’ll keep everything simple and easy to follow.
How to Create a Child Theme (Manual Way)
The manual way gives you full control and helps you understand what’s happening.
If you’re using ServerAvatar, you can easily deploy a WordPress application in just a few steps.
What is ServerAvatar
ServerAvatar is a managed cloud hosting provider that makes it easy to deploy, manage, and monitor servers and applications without needing deep technical knowledge.
Unlike traditional control panels, it also lets you directly create and host servers from supported cloud providers like DigitalOcean, Vultr, and Hetzner (with Linode support coming soon).
Whether you’re managing a single site or multiple applications, ServerAvatar allows you to launch fully optimized WordPress applications in minutes, no manual setup or complex commands required.
Key Features of ServerAvatar:
- Deploy and manage servers directly from ServerAvatar
- One-click application installer for WordPress and multiple popular applications
- Automated server setup
- Manage multiple servers and applications from a single dashboard.
- Get built-in monitoring, backups, free automatic SSL with auto-renewal, firewall, fail2ban, and many more features to simplify your routine tasks.
- 24/7 support by our technical experts
- Affordable pricing with scalable plans
With ServerAvatar, you can set up a WordPress application effortlessly with one-click application installer. Whether you’re managing a single site or multiple applications, ServerAvatar allows you to launch fully optimized WordPress applications in minutes, no manual setup, no complicated commands.
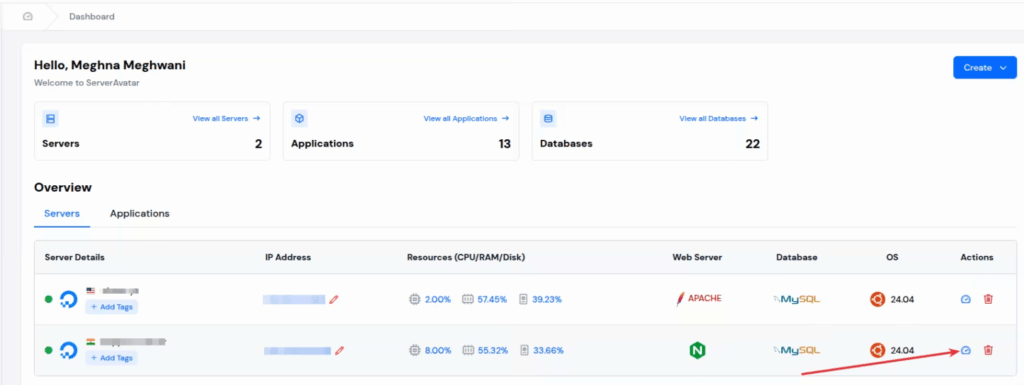
- Click on “Server Dashboard” icon for the server you want to host your WordPress application.
Once you’re inside your Server panel, click on “Applications” tab from the left side bar. Then click on “Create an Application” button.

Fill out the form for creating the application:
- Enter your application name
- Select the domain from primary and test domain (as ServerAvatar providing test domains to create application without your own domain)
- Enter the domain name
- Select the method as “One Click”

- Select the “WordPress” application from the given options
- Fill in the application details such as title, it’s username, email id, etc.
- Click on the “Create Application” button

That’s it, your application is created successfully. Now, you need to create a new folder for your child theme. Here’s how:
Step 1 – Go to File Location
- Open ServerAvatar File Manager
- Go to the /wp-content/themes/ folder
- Create a new folder with a name like your-theme-name-child
- Make sure the name is clear and easy to remember
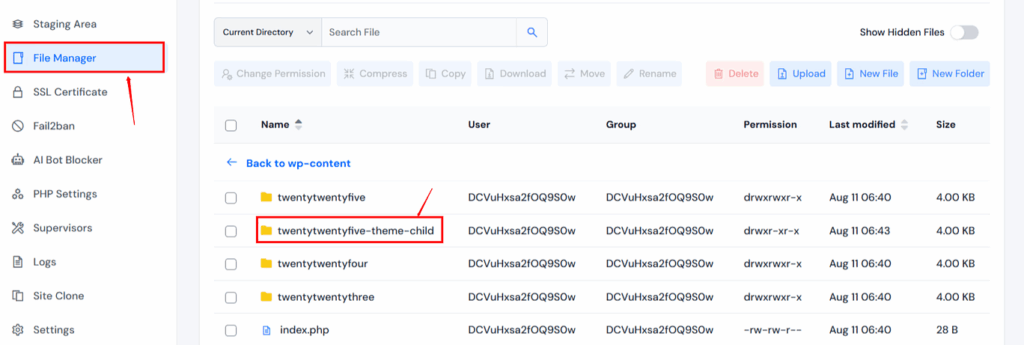
For example, if your parent theme is called “twentytwentyfive-theme,” name your folder “twentytwentyfive-theme-child.”
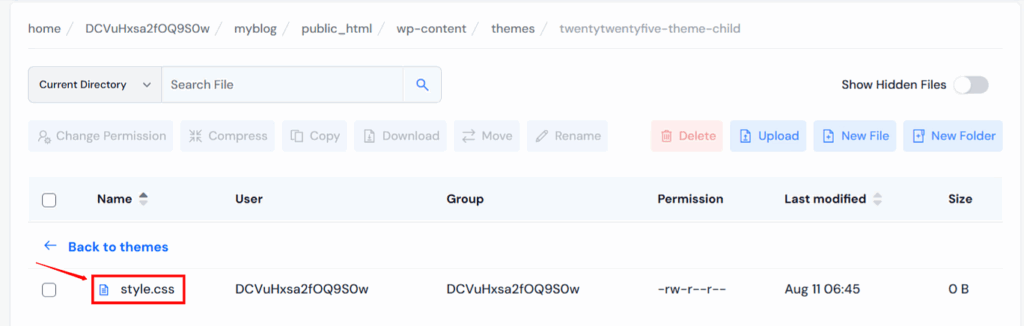
Step 2 – Create the Style File
Every child theme needs a style file. This tells WordPress it’s a child theme and connects it to the parent.
Create a new file called style.css in your child theme folder
/*
Theme Name: twentytwentyfive Child
Description: Child theme of Your Theme Name
Template: parent-theme-folder-name
Version: 1.0
*/
@import url("../parent-theme-folder/style.css");Replace “Your Theme Name” with your actual theme name. Replace “parent-theme-folder-name” with the exact folder name of your parent theme.
This code does two important things:
- It tells WordPress this is a child theme
- It loads all the styles from your parent theme
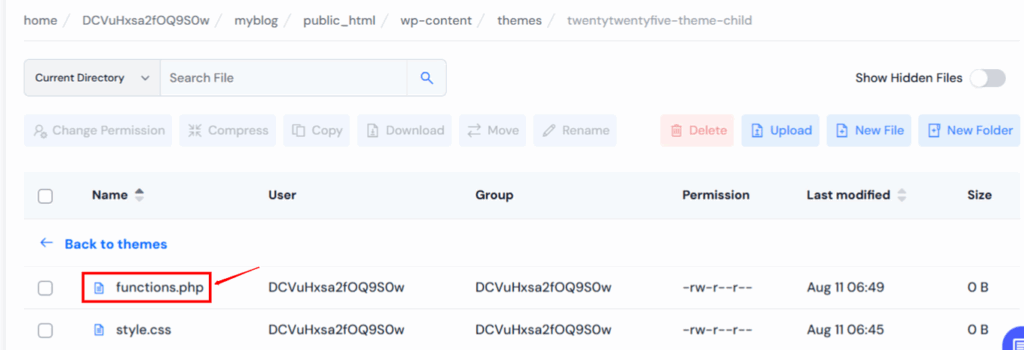
Step 3 – Create the Functions File
Next, create a file called functions.php. This file lets you add custom features to your site.
Add this code to start:
<?php
// Custom functions for your child theme
function child_theme_styles() {
   wp_enqueue_style('parent-style', get_template_directory_uri() . '/style.css');
    wp_enqueue_style('child-style', get_stylesheet_directory_uri() . '/style.css', array('parent-style'));
}
add_action('wp_enqueue_scripts', 'child_theme_styles');
?>This code makes sure both your parent and child theme styles load properly on your website.
Step 4 – Upload Your Child Theme
Now it’s time to put your child theme on your website:
- Save both files (style.css and functions.php)
- Upload them to your child theme folder
- Make sure they’re in the right place
- Check that the folder structure looks correct
Your folder should now have:
- /wp-content/themes/your-child-theme/style.css
- /wp-content/themes/your-child-theme/functions.php
Step 5 – Turn On Your Child Theme
Almost done! Now you need to activate your child theme:
- Go to your WordPress admin area
- Click on “Appearance” then “Themes”
- You should see your new child theme listed
- Click “Activate” on your child theme
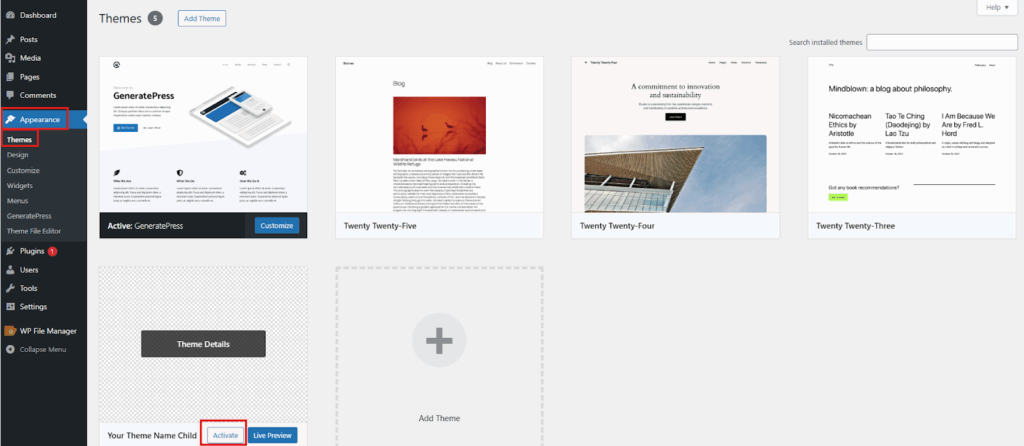
That’s it! Your child theme is now active and ready to use.

How to Create a Child Theme Using a Plugin
Popular Child Theme Plugins
Here are some good plugins that make child themes:
Popular Child Theme Plugins
Here are some good plugins that make child themes:
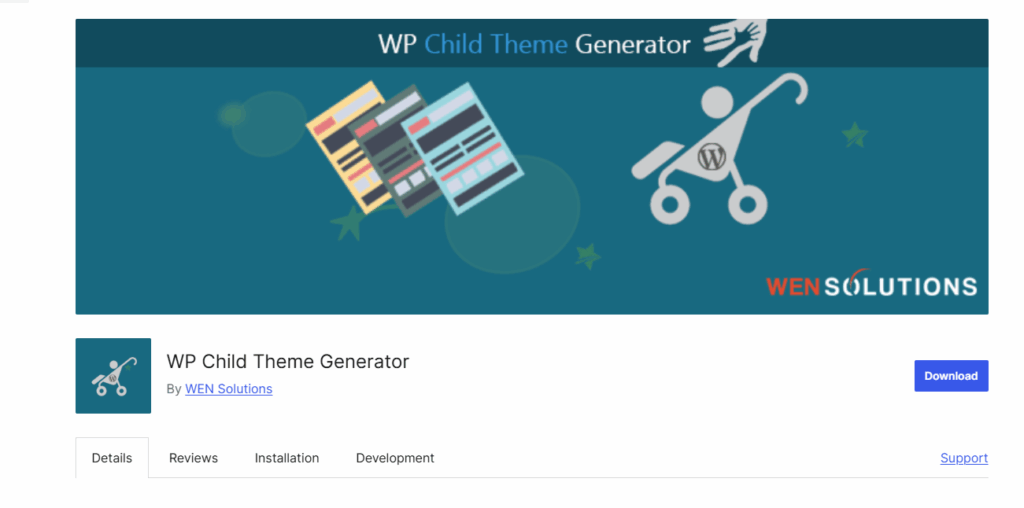
These plugins are free and easy to use. They handle all the technical stuff automatically.
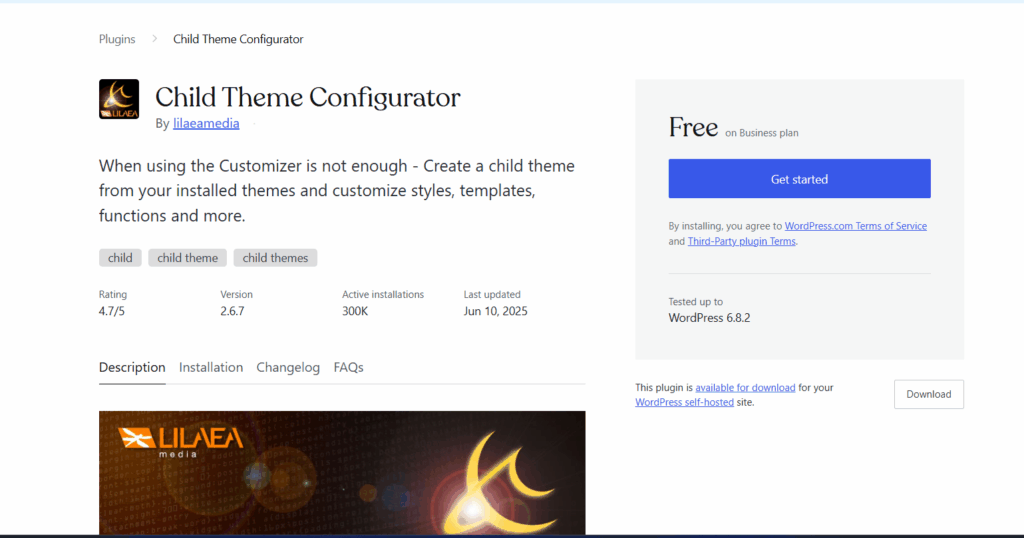
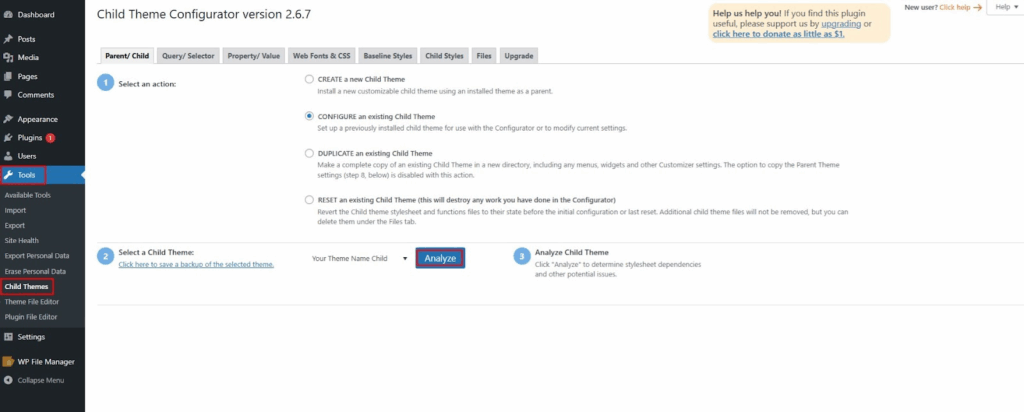
Using Child Theme Configurator Plugin
Let’s look at the most popular one – Child Theme Configurator:
- Install the plugin from your WordPress admin
- Go to “Tools” then “Child Themes”
- Select your parent theme from the dropdown
- Click “Analyze” to check for issues
Choose “Create New Child Theme”
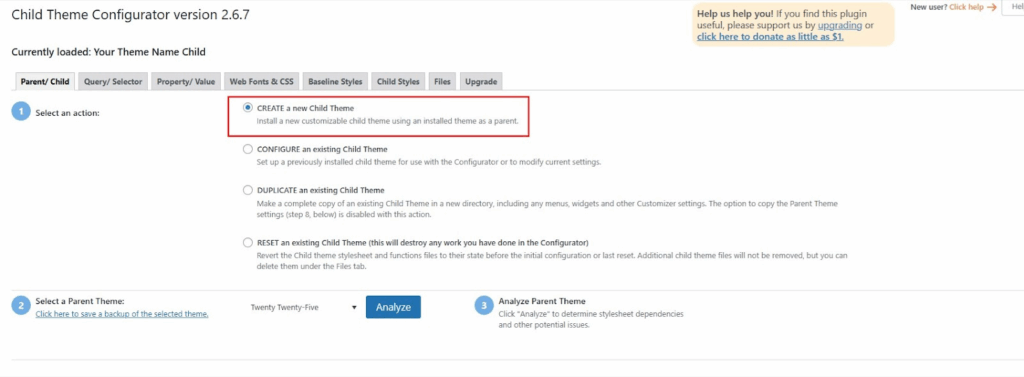
Give your child theme a name
Click “Create New Child Theme”
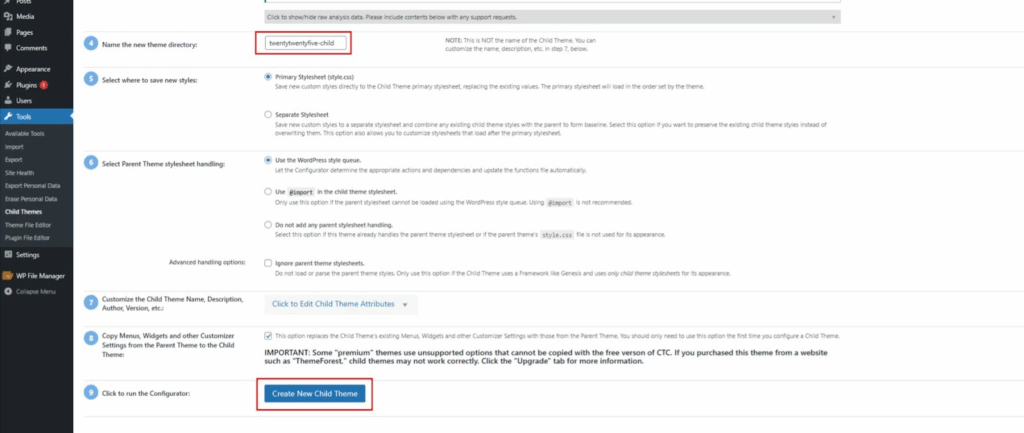
The plugin does everything automatically. It creates the files, adds the right code, and even activates the child theme for you.
How to Add Custom Code to Your Child Theme
Now comes the fun part – making changes to your site!
Adding CSS Code
Want to change how something looks? Add CSS code to your child theme’s style.css file.
For example, to change your site’s background color:
Just add your custom CSS at the bottom of the style.css file. Your changes will show up on your site right away.
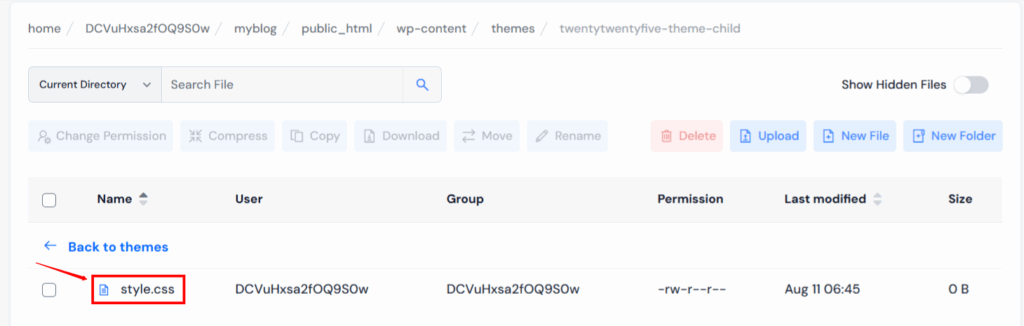
Go to your File Manager and navigate this path: – wp-content/themes/twentytwentyfive-child
Click on Style.css and open with editor Add code and click on save button
Add This Code:-
 body {
    background-color: #f0f0f0;
}
To change link colors:
css
a {
    color: #ff6600;
}Adding PHP Code
Want to add new features? Use the functions.php file in your child theme.
For example, to add a custom message to your footer:
Always test your PHP code carefully. One small mistake can break your site. But don’t worry – you can always remove the code if something goes wrong.

Go to your File Manager and navigate this path: – wp-content/themes/twentytwentyfive-child
Click on functions.php and open with editor Add code and click on save button
Add Code:-
function add_custom_footer_text() {
    echo '<p>Thanks for visiting our website!</p>';
}
add_action('wp_footer', 'add_custom_footer_text');Common Problems and How to Fix Them
Sometimes things don’t work perfectly. Here are the most common issues and how to fix them.
Child Theme Not Working
If your child theme isn’t working, check these things:
- Make sure the Template line in style.css matches your parent theme folder name exactly
- Check that both style.css and functions.php files are uploaded correctly
- Verify the child theme is activated in your WordPress admin
- Clear any caching plugins you might have
Styles Not Loading
If your site looks broken or styles aren’t loading:
- Check the @import line in your style.css file
- Make sure the parent theme path is correct
- Try adding the wp_enqueue_style function to your functions.php file
- Clear your browser cache and any caching plugins
Functions Not Working
If custom functions aren’t working:
- Check for syntax errors in your functions.php file
- Make sure you’re using the right WordPress hooks
- Test functions one at a time to find the problem
- Look at your site’s error logs for clues
Best Tips for Child Themes
Here are some pro tips to make your child theme experience even better:
- Always test changes on a staging site first
- Keep your custom code organized with comments
- Back up your child theme files regularly
- Don’t modify core WordPress files
- Use descriptive names for your functions
- Document what your custom code does
These simple tips will save you lots of headaches later on.
How to Update Your Parent Theme Safely
One of the best things about child themes is safe updates. Here’s how to do it:
- Back up your entire website first
- Update your parent theme as normal
- Check your site to make sure everything looks good
- If something breaks, you can easily fix it in your child theme
Your child theme files never get touched during parent theme updates. All your custom work stays safe.
What Happens When You Update WordPress
WordPress updates are different from theme updates. When WordPress itself updates:
- Your child theme stays exactly the same
- All your custom code remains untouched
- Your site continues to work normally
- No extra steps needed
WordPress updates are usually automatic and don’t affect your child theme at all.
Child Theme vs Parent Theme – What’s Different?
Let’s clear up any confusion about the differences:
Parent Theme:
- Contains all the main theme files
- Gets updated by the theme developer
- Provides the basic functionality
- Should never be modified directly
Child Theme:
- Contains only your custom changes
- Never gets updated automatically
- Inherits everything from the parent
- Safe to modify however you want
Think of it this way: the parent theme is like a house blueprint, and the child theme is like your personal decorations and modifications.
Conclusion
Creating a WordPress child theme might seem scary at first, but it’s really not that hard. We’ve covered everything you need to know – from making one manually to using plugins that do the work for you.
Remember, child themes protect your hard work. They keep your changes safe when themes update. They let you experiment without fear. And they make your WordPress life so much easier.
Whether you choose the manual method or use a plugin, the important thing is that you start using child themes. Your future self will thank you when theme updates don’t destroy hours of work.
So go ahead, create that child theme today. Start small, maybe just change a color or two. As you get more comfortable, you can add more advanced features. Before you know it, you’ll be a child theme pro!
FAQs
Do I need coding skills to create a child theme?
No, you don’t need advanced coding skills. Basic copy and paste is enough to get started.
Will my child theme slow down my website?
No, child themes don’t slow down your site. They work just like regular themes.
Can I use multiple child themes at once?
No, you can only have one active theme at a time, including child themes.
What happens if I delete my parent theme?
Your child theme will stop working because it depends on the parent theme files.
Can I make a child theme of a child theme?
It’s technically possible but not recommended. Keep things simple with just one level.