
Installing and configuring OpenClaw might sound technical at first, but trust me, it’s much simpler than it looks. Think of OpenClaw like a smart remote control for your server. Instead of memorizing dozens of commands, you get a clean interface that helps you manage things with ease.
Installing OpenClaw isn’t just about running a script and hoping for the best. It requires a properly structured environment, controlled permissions, secure server configuration, and careful handling of runtime variables. Every step in the setup process plays a crucial role. Skip one detail, and the entire configuration can behave unpredictably.
What Is OpenClaw?
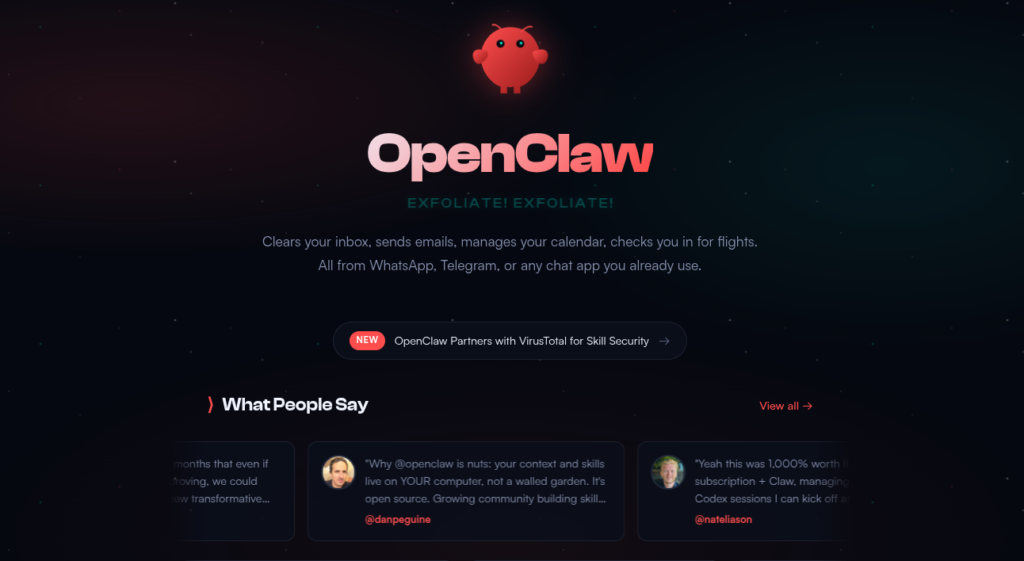
OpenClaw is a powerful AI-driven automation platform designed to integrate advanced AI capabilities with communication channels and digital workflows. When installed correctly, it acts as a bridge between AI models and user-facing platforms, allowing seamless interactions, automation handling, and centralized management through both CLI and Web UI interfaces.
Why Use OpenClaw?
People choose OpenClaw because it simplifies complex server and automation tasks into an experience that feels organized and approachable. Instead of working through confusing commands and scattered tools, OpenClaw brings everything together in one clear flow, helping users stay in control without feeling overwhelmed.
- Beginner-friendly interface: OpenClaw is designed to be easy to understand, even for users who are just getting started.
- Saves time and effort: Routine actions take fewer steps, allowing tasks to be completed faster and with less manual work.
- Reduces human errors: Clear prompts and guided actions help avoid common mistakes caused by guesswork.
- Makes server management less scary: OpenClaw turns intimidating server operations into manageable, predictable steps.
Why Proper Installation Matters
A proper installation ensures that OpenClaw runs smoothly without permission errors, broken services, or access issues. Skipping steps or changing configurations randomly can lead to unnecessary troubleshooting later. Following a clean setup path is like laying a strong foundation; it saves effort in the long run.
Prerequisites Before Installing OpenClaw
Before jumping into commands and configuration files, it’s important to understand what needs to be prepared.
Server Requirements:
- Operating System: Ubuntu 22.04 or 24.04
- CPU: 2 cores
- RAM: 4 GB
- Disk Space: 10 GB free
Software Requirements:
- Sudo (root) access
- Apache web server is installed and running
- Node.js v18+ installed
- Package Manager: npm or pnpm
- Database: SQLite
That’s all! There are no hidden requirements or additional tools needed.
What is ServerAvatar?
ServerAvatar is a platform to simplify the hosting and management of servers and applications. It simplifies the process of deploying and managing PHP and Node.js based web applications on servers. If you’re using ServerAvatar to manage your servers and applications, deploying and managing OpenClaw is incredibly simple.
Deploying a Server Using ServerAvatar
The first step is to deploy a server using ServerAvatar. This platform simplifies server provisioning and management, so you don’t have to deal with complex manual steps.
- Let’s log in to the ServerAvatar account first. Navigate to the Servers section, and click on the Create button, and select Server.
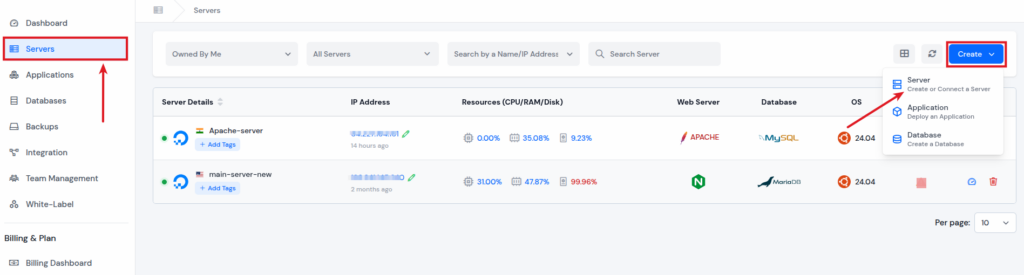
- You can directly deploy a server provided by ServerAvatar using the Managed Server feature.
Note: If you are using a managed server provided by ServerAvatar, you can contact the support team, and they will install OpenClaw for you.
- Alternatively, you can use ServerAvatar’s Self-Managed Server feature to connect your own custom server from any cloud provider.
- You can integrate your cloud provider account directly with ServerAvatar from the available options (Amazon Lightsail, DigitalOcean, Vultr, Linode, Hetzner) and create a server directly from the ServerAvatar Dashboard.
- Alternatively, you can connect your own custom server from any cloud provider using ServerAvatar’s custom server method (as I’m doing here).
- Enter your server name.
- Select Apache as a Tech Stack, and select your preferred Database.
- Enable the toggle button to install Node.js.
Please note that installing OpenClaw requires an Apache tech stack and Node.js to be set up on your server.
- Click on the Deploy Server button.

Create OpenClaw Application
Once your server is ready, the next step is installing OpenClaw.
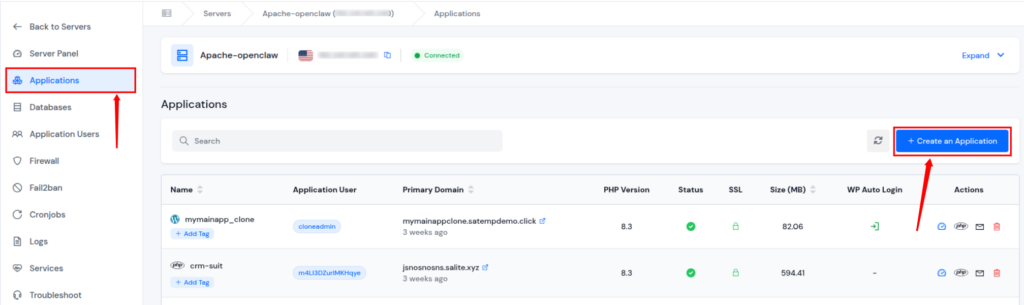
- Click on the server dashboard icon to navigate to the server panel.

- Go to the Applications section from the left sidebar, and click on the Create an Application button.
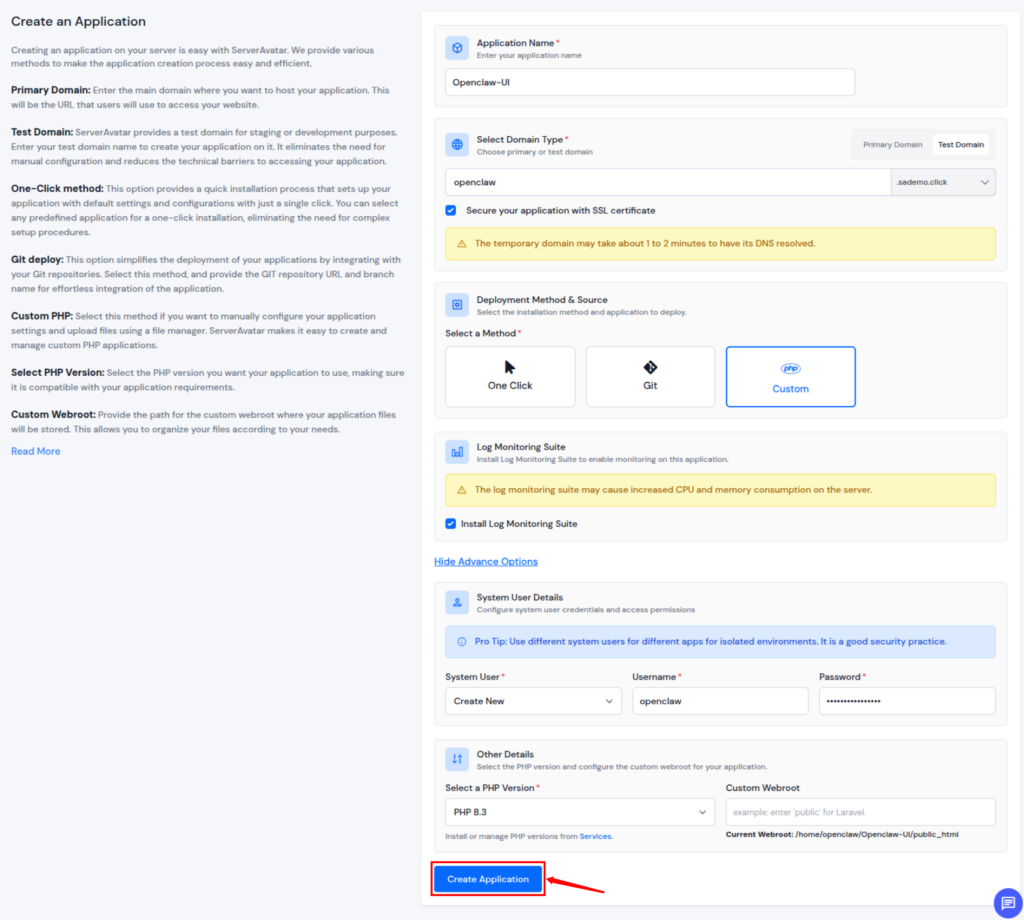
Enter the required details such as,
- Enter the application name.
- Select Domain Type between:
- Primary Domain
- Test Domain (ServerAvatar provides a temporary domain for testing purposes)
- Select the checkbox to automatically install the SSL Certificate to secure your application. Please note that this is an optional step; you can also install the SSL Certificate later.
- Select Custom as a Deployment Method.
- Select the checkbox to automatically install the Log Monitoring Suite to track logs to help you detect errors, issues, and unusual activity early.
- Click on the Show Advance Options, create a new username such as openclaw, and a password as per your preference.
- After filling out the details, click on the Create Application button.
- After creating the application, assign SFTP/SSH Access and sudo access to the application user you just created for OpenClaw.
- To do this, go to the Server Panel and select Application Users from the left sidebar.
- Enable SFTP/SSH Access and Sudo Access for the application user you created during the application setup.
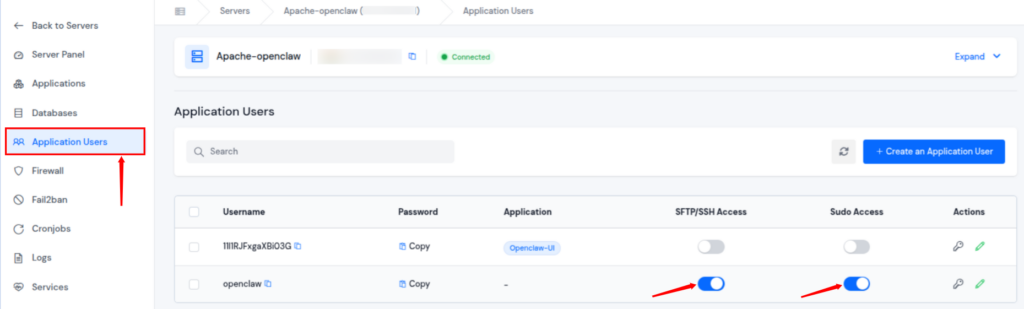
- Enable SFTP/SSH Access and Sudo Access for the application user you created during the application setup.
- Now, login to you server as a root user using ssh command.
ssh root@[ip address]- Enter your server’s IP address, and you’ll be prompted to enter your root password.
- After logging in as the root user, run the following command:
vim /etc/sudoers.d/applicationusername- Replace applicationusername in the above command with your OpenClaw application username.
- Add the following line to the file and save it:
Defaults:applicationuser !requiretty applicationuser ALL=(ALL) NOPASSWD: ALL- (This configuration is required for passwordless sudo access)
- Replace applicationusername in the above command with your OpenClaw application username.
- After that run the below command to avoid the D-bus issue
loginctl enable-linger applicationuser
systemctl start user@$(id -u applicationusername).service- Replace applicationusername in the above command with your OpenClaw application username.
Installing OpenClaw on the Server
Once the server and application user are ready, the next step is to install OpenClaw using the application user’s SSH access. This ensures OpenClaw runs in a controlled and secure environment instead of using the root account.
Step 1: Connect to the Server Using the OpenClaw User
- Start by connecting to your server via SSH using the OpenClaw application username.
ssh applicationusername@[ip address]- Replace applicationusername with your OpenClaw app user (for example, openclaw) and [server_ip] with your server’s IP address.
- When prompted, enter the password for the application user.
Logging in with the application user is important because OpenClaw stores its configuration and runtime files within this user’s environment.
Step 2: Set Up the Runtime Directory and Environment Variable
- OpenClaw relies on a runtime directory to manage background processes and user-level services. To avoid permission and session issues, this directory must be configured correctly.
- Run the following commands:
export XDG_RUNTIME_DIR=/run/user/$(id -u)
mkdir -p $XDG_RUNTIME_DIR
echo 'export XDG_RUNTIME_DIR=/run/user/$(id -u)' >> ~/.bashrcHere’s what this does:
- Defines the runtime directory for the current user session
- Creates the directory if it doesn’t already exist
- Ensures the setting persists across future logins
This step helps OpenClaw operate smoothly without interruptions.
Step 3: Install OpenClaw
- With the environment prepared, you can now install OpenClaw using the following installation command.
curl -fsSL https://openclaw.ai/install.sh | bash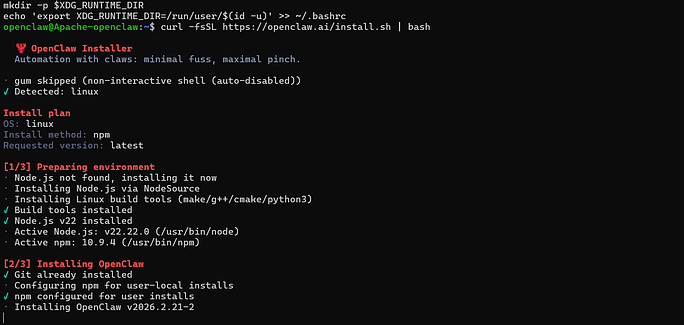
- The script will download and install OpenClaw along with all required dependencies.
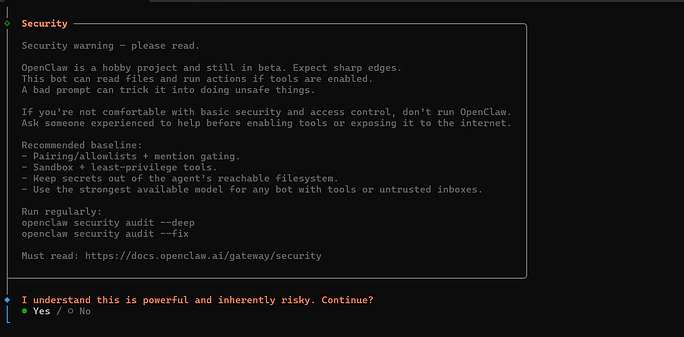
- When prompted for confirmation, select Yes to continue with the installation.
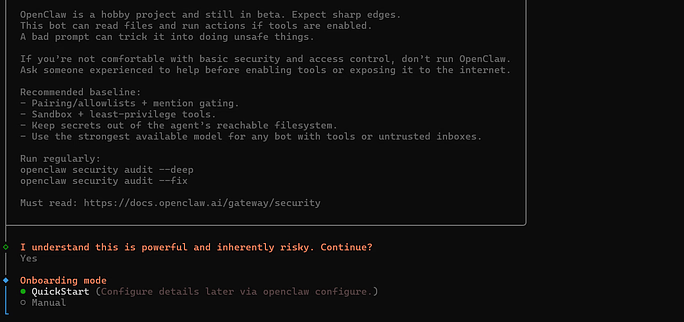
Step 4: Choose the Onboarding Mode
- Select Quickstart as an onboarding method during the installation process.
- This option provides a guided setup experience and is ideal for completing the initial configuration without manual adjustments.
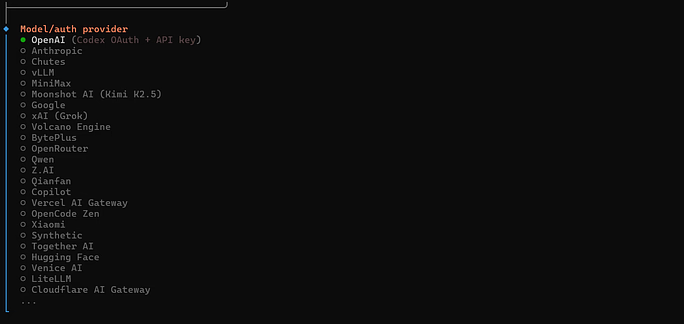
Step 5: Select the AI Model Provider
- Next, select the AI provider based on your requirement. As I’m selecting the OpenAI here.
- This selection determines which service OpenClaw will use to process AI requests.
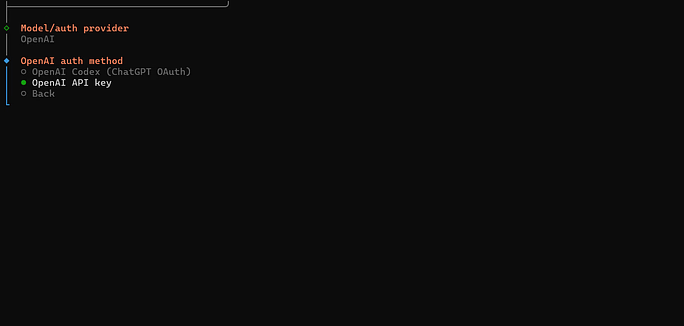
Step 6: Enter the OpenAI API Key
When prompted:
- Select OpenAI API Key
- Paste your API key carefully
- Confirm to proceed
Make sure the key is entered correctly, as this is required for OpenClaw to communicate with the AI model.
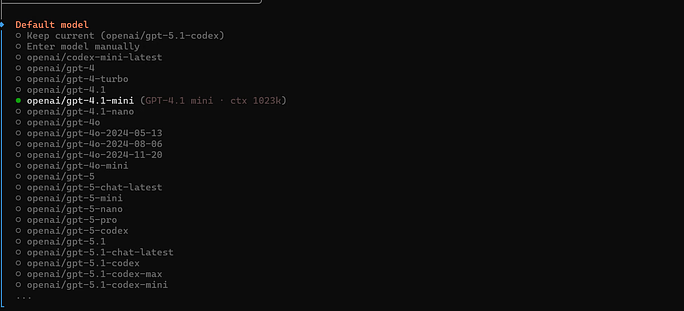
Step 7: Choose the Preferred Model
- After entering the API key, you’ll be asked to select a model. As I’m selecting Mini 4.1 as the OpenAI model.
- This defines how OpenClaw processes requests and responses.
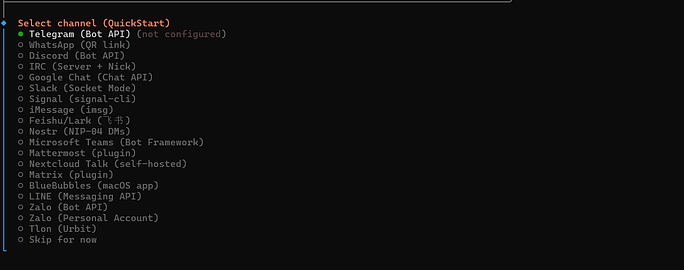
Step 8: Select the Communication Channel
- Now select your preferred channel through which OpenClaw will interact, as i’m selecting Telegram here.
- This allows OpenClaw to send and receive messages using a Telegram bot.
Step 9: Create a Telegram Bot
To connect OpenClaw with Telegram, you need a bot token from Telegram. Follow these steps:
- Open Telegram
- Search for @BotFather and start a chat
- Run the command /newbot (or /mybots)
- Follow the instructions and copy the generated token.
The token will look something like:
123456:ABCDEF...- Paste this token when OpenClaw asks for it.
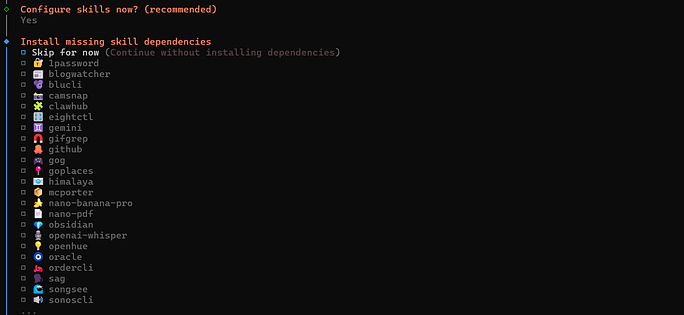
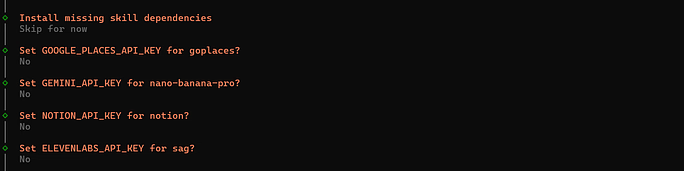
Step 10: Install Skills (Optional)
- OpenClaw will ask whether you want to install additional skills. If you do not need them at this stage, select Skip for now as I’m doing here.
- Skills can always be added later if required.
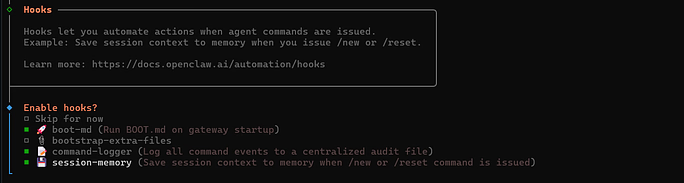
Step 11: Select Hooks
- You’ll then be prompted to select hooks. Hooks help OpenClaw integrate properly with the selected channel and environment.
Step 12: Fix the PATH Variable
- To ensure the openclaw command works correctly from anywhere in the terminal, update the PATH variable using the following command:
echo 'export PATH="/home/applicationusername/.npm-global/bin:$PATH"' >> ~/.bashrc source ~/.bas- Replace applicationusername in the above command with your OpenClaw application username.
- This step ensures the OpenClaw is always accessible without specifying its full path.
Getting the OpenClaw Web UI
After completing the OpenClaw CLI installation, the next step is to make the Web UI accessible through a browser.
Step 1: Enable Required Apache Modules
- Now, log in to the server as the root user and enable the Apache modules required for proxying and WebSocket communication.
- Run the following commands one by one:
a2enmod proxy
a2enmod proxy_http
a2enmod proxy_wstunnel
a2enmod rewrite
a2enmod headers
systemctl restart apache2These modules allow Apache to:
- Forward traffic to the OpenClaw service
- Handle WebSocket connections
- Rewrite requests correctly
- Add security-related HTTP headers
Restarting Apache ensures all enabled modules are loaded properly.
Step 2: Configure Apache Settings
- After enabling the modules, navigate to the Apache configuration directory and locate the conf/apache folder. Inside this folder, create or edit the file named proxy.conf.
- Add the following configuration to the file:
ProxyPreserveHost On
ProxyRequests Off
SSLProxyEngine On

# WebSocket Support (required)
RewriteEngine On
RewriteCond %{HTTP:Upgrade} =websocket [NC]
RewriteRule /(.*) ws://127.0.0.1:18789/$1 [P,L]

<Location />
    ProxyPass http://127.0.0.1:18789/
    ProxyPassReverse http://127.0.0.1:18789/
</Location>

# Optional security headers
Header always set X-Frame-Options SAMEORIGIN
Header always set X-Content-Type-Options nosniffAccessing the OpenClaw Web UI
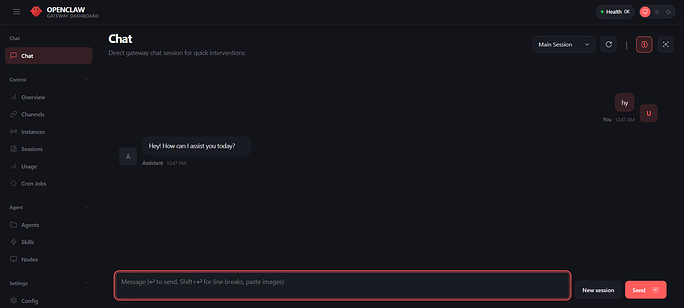
Once the Web UI environment is configured and Apache is running correctly, you can access the OpenClaw dashboard through your browser. This step links your browser session securely with the OpenClaw service running on the server.
Step 1: Access the Server as the OpenClaw User
- Start by connecting to your server using the openclaw application user via SSH.
- After logging in, run the following command:
openclaw dashboard- This command generates a secure, one-time authentication token for the Web UI session.
Step 2: Copy the Dashboard Token
- When the command runs, a token will be displayed in the terminal output. Carefully copy the highlighted token shown on the screen.
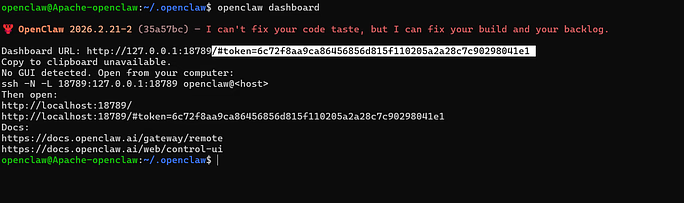
- This token is required to authenticate your browser and prevent unauthorized access to the dashboard.
Step 3: Open the Web UI in Your Browser
- Open your browser and enter your OpenClaw domain URL.
- Paste the copied token after the URL, exactly as shown in the below image.

- Once the token is added and the page loads, you will be redirected to the OpenClaw Web UI.
Approving Devices and Completing the Web UI Setup
- After successfully accessing the OpenClaw Web UI, the final step is to approve the device requesting access.
- Device approval ensures that only authorized sessions can interact with OpenClaw through the dashboard.
Step 1: List Pending Device Requests
- Log in to the server again using the openclaw application user.
- Run the following command:
openclaw devices list- This command displays all devices that are currently waiting for approval. Each request will appear with a unique Device ID, shown in the left column of the output.
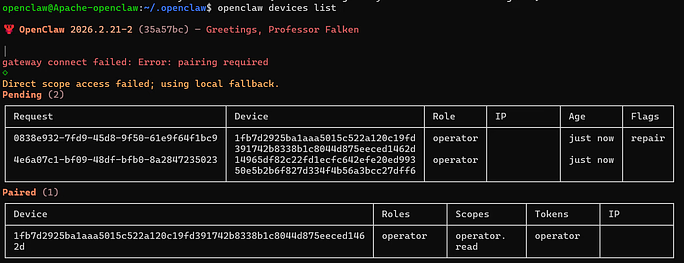
Step 2: Approve the Device
- From the list, identify the Device ID that corresponds to your current Web UI session.
- Copy that Device ID and approve it using the command below:
openclaw devices approve <ID>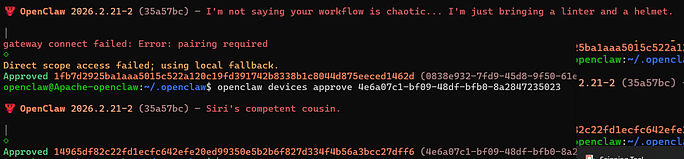
- Once approved, the device gains permission to communicate with OpenClaw, and the Web UI session becomes fully active.

Installation Completed with Web UI Access
After approving the device, the OpenClaw installation and Web UI setup are complete. You now have full access to the OpenClaw dashboard and can manage interactions directly through the browser.
At this stage, OpenClaw is fully installed, authenticated, and ready for use.
Note: If you need any custom configuration for OpenClaw, you can contact the ServerAvatar support team directly. Our team is available 24/7 to assist you with custom setup, configuration, and OpenClaw installation.
Final Checks Before You Start Using OpenClaw
Before wrapping up, it’s a good idea to quickly verify that everything is working as expected. Make sure the OpenClaw CLI responds correctly, the Web UI loads securely over HTTPS, and your device has been approved successfully.
If the dashboard opens without errors and interactions work smoothly, your setup is complete. At this stage, OpenClaw is ready to be used for managing workflows and interactions through both the command line and the web interface.
Conclusion
Installing and configuring OpenClaw may involve multiple steps, but when done in the right order, the process becomes straightforward and predictable. From preparing the server and setting permissions to enabling the Web UI and approving devices, each step plays a specific role in building a stable and secure setup. By following this structured approach, you ensure that OpenClaw runs reliably, stays secure, and delivers a smooth experience through both CLI and Web UI. Once everything is in place, OpenClaw becomes a powerful yet approachable tool that simplifies automation without adding unnecessary complexity.
FAQs
1. What is OpenClaw mainly used for?
OpenClaw is used to connect AI models with communication channels and workflows through a centralized CLI and Web UI.
2. What should I do if the OpenClaw dashboard does not load in the browser?
If the dashboard doesn’t load, check that Apache is running, required proxy modules are enabled, SSL is active, and the device has been approved from the server.
3. Can OpenClaw run without the Web UI?
OpenClaw can be used entirely through the command line if web-based access is not needed.
4. Why is passwordless sudo access required for the OpenClaw user?
Passwordless sudo allows OpenClaw to perform required system-level tasks without interruptions or permission errors.
5. What does device approval do in OpenClaw?
Device approval ensures that only authorized browser sessions can access and interact with the OpenClaw Web UI.