
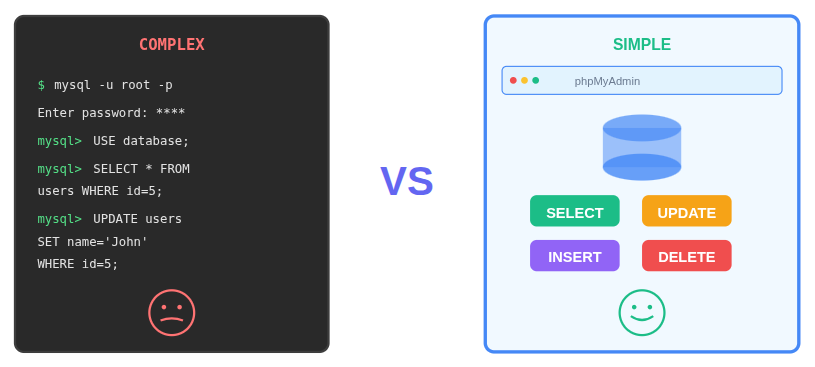
If you work with websites or databases, you may have heard the name phpMyAdmin more than once. It often sounds technical at first, but the truth is much simpler. Managing databases can feel confusing at first. Tables, users, permissions, and queries often look intimidating, especially if you are not from a technical background. This is where phpMyAdmin makes life easier. Instead of typing complex commands, you click buttons, fill forms, and see results instantly.
Installing phpMyAdmin does not have to feel confusing or intimidating. Many people assume it requires advanced technical knowledge, but that is not true. With the right steps and a calm approach, anyone can install it smoothly. In this guide, we will walk you through everything in a clear and simple way, so you always know what is happening and why it matters.
What Is phpMyAdmin
phpMyAdmin is a web-based application used to manage databases easily. Instead of typing commands manually, you interact with buttons, menus, and forms. This makes database management more visual and less stressful.
It works through a web browser, which means you do not need special software on your computer. Once installed on a server, it can be accessed from anywhere with proper permissions. This simplicity is one of the biggest reasons phpMyAdmin is so popular.
Key Features of phpMyAdmin
- Web-Based Interface: Manage databases directly through a web browser without installing additional software.
- User-Friendly Visual Controls: Use buttons, menus, and forms instead of writing manual SQL commands.
- Supports MySQL and MariaDB: Designed specifically to work seamlessly with MySQL and MariaDB databases.
- Easy Data Management: View, edit, and organize database tables in a structured, spreadsheet-like format.
- Remote Accessibility: Access phpMyAdmin from any device with a browser once it is installed on the server and proper permissions are set.
- Lightweight Setup: Runs smoothly as long as the server supports PHP and a database engine.
- Complete Database Control: Create databases, manage users, import and export data, and modify settings with ease.
- Beginner-Friendly: Simplifies complex database operations into manageable steps without requiring deep technical knowledge.
Why phpMyAdmin Is Widely Used
One reason phpMyAdmin stands out is its ease of use. It turns complex database tasks into simple actions. Creating tables, editing records, or importing data feels more like filling out a form than managing a system.
Another reason is accessibility. Since it runs in a browser, there is no steep learning curve. Even beginners can understand the layout quickly. It is like using a map instead of trying to remember every turn in your head.
Basic Requirements Before Installation
Before installing phpMyAdmin, a few basic components must already be available. These are not complicated, but they are essential.
You need a web server, PHP, and a database system installed. phpMyAdmin acts as a bridge between your browser and the database. Without these foundations, it has nothing to connect to. Checking these basics first helps avoid issues later.
Understanding How phpMyAdmin Works
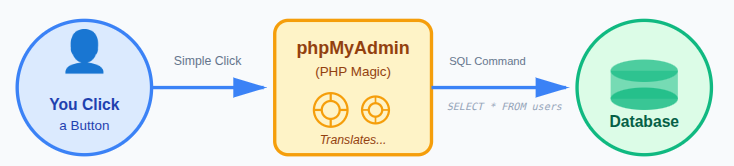
phpMyAdmin works by sending instructions from your browser to the database through PHP. When you click a button, phpMyAdmin translates that action into a command behind the scenes.
You do not see the technical part, and that is the beauty of it. It is like pressing an elevator button instead of climbing stairs. The heavy lifting happens quietly in the background.
Different Ways to Install phpMyAdmin
There is more than one way to install phpMyAdmin, and that is a good thing. Different environments for different approaches.
Some people install it using package managers, while others rely on hosting dashboards. Both methods aim for the same result. Choosing the right method depends on your setup and comfort level.
Install phpMyAdmin Easily Using ServerAvatar
Are you looking for a simple way to install phpMyAdmin without complex server commands or manual setups? The traditional way of installing phpMyAdmin can feel like solving a puzzle without the picture on the box.
What if I told you there’s a much easier way? With ServerAvatar, you can install phpMyAdmin in just a few clicks. Think of ServerAvatar as a helpful guide that does all the heavy lifting behind the scenes, like having a friendly assistant who already knows all the steps for you.
What is ServerAvatar?
ServerAvatar is a platform to simplify server and application hosting and management. Instead of manually installing components or connecting through SSH every time, ServerAvatar offers smooth automation and intuitive dashboards.
One of its standout features is the one-click application installer, not just for popular applications such as WordPress, Mautic, N8N, Uptime Kuma, etc., but also for phpMyAdmin.
Why Use ServerAvatar for phpMyAdmin?
Using ServerAvatar removes the mystery from installing phpMyAdmin. Think of it as having a reliable assistant that knows all the steps already; you just have to give the command.
Without worrying about dependencies or configuration files, you can have phpMyAdmin up and running in seconds. This is perfect whether you’re new to databases or just want to save time.
How ServerAvatar One-Click Installation Works
ServerAvatar’s one-click application installer handles everything automatically. Here’s what it does:
- Downloads phpMyAdmin automatically: ServerAvatar fetches the required phpMyAdmin files on its own, so you don’t need to download or upload anything manually.
- Sets up required dependencies: It takes care of configuring PHP and connecting the database in the background, removing the need for technical setup.
- Deploys phpMyAdmin to a domain: phpMyAdmin is launched as a ready-to-use web application and linked to your chosen domain or test domain instantly.
All without manual server commands. Just choose your settings and let ServerAvatar do the rest.
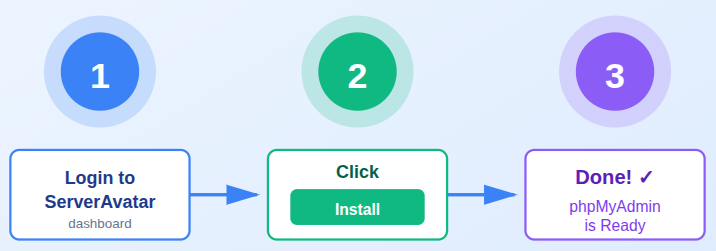
Step-by-Step: Installing phpMyAdmin via ServerAvatar
Installing phpMyAdmin with ServerAvatar is straightforward:
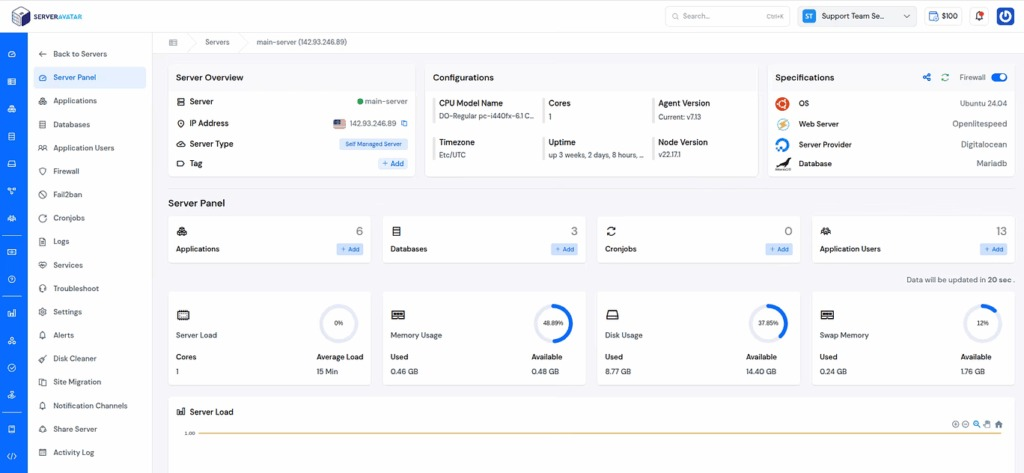
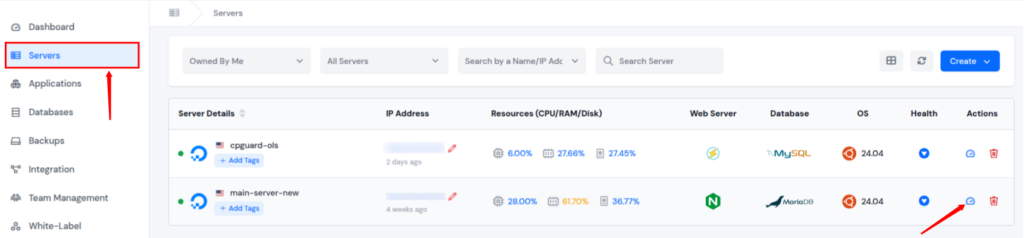
- Click on the Server Dashboard icon for the server where you want to install phpMyAdmin.
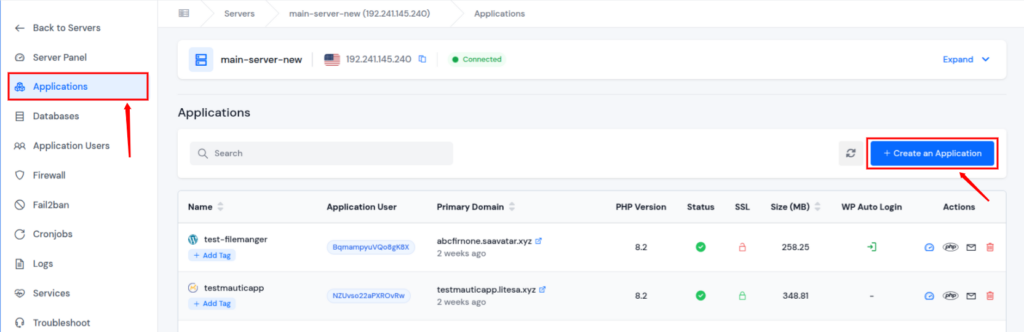
- Navigate to the Applications section from the left sidebar, and click on the Create an Application button.
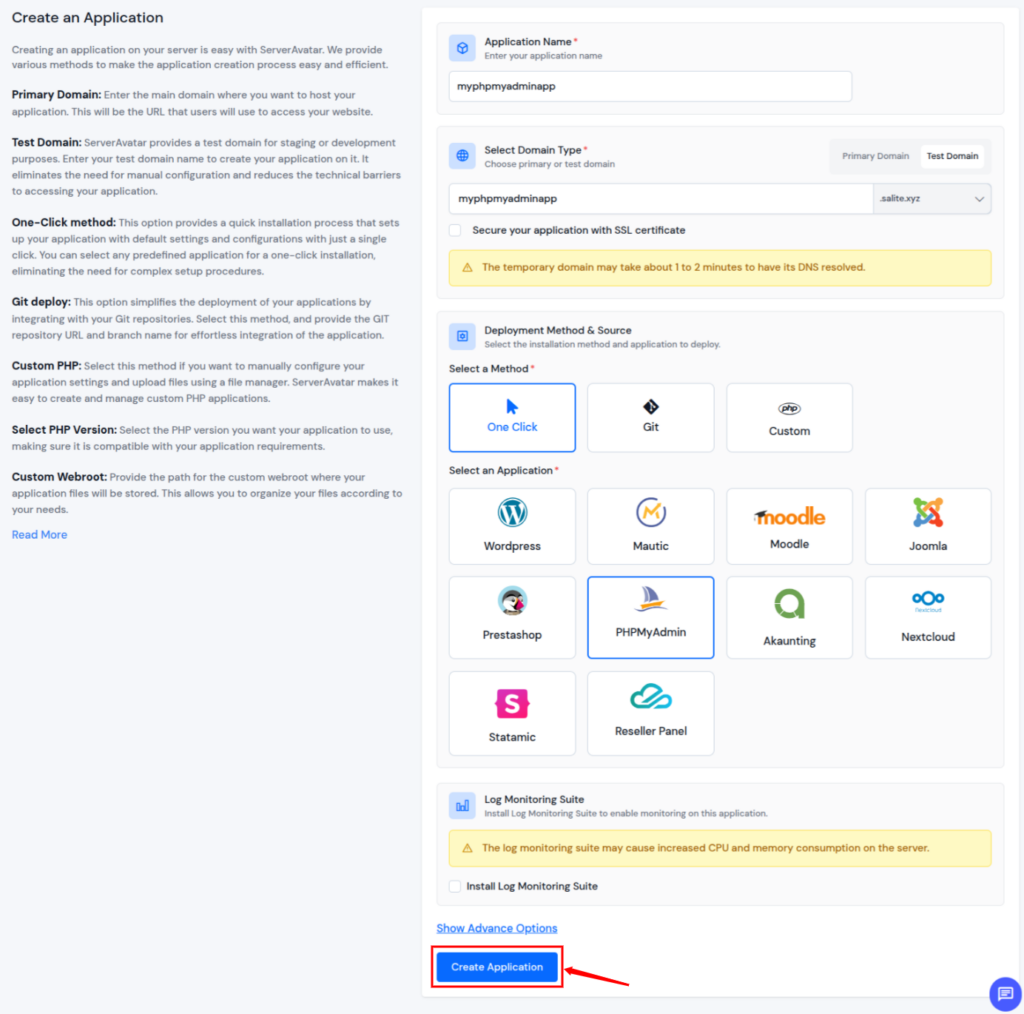
- Fill in the required details. Select the Deployment Method as a One Click, and Application as a PHPMyAdmin.
- Choose whether you want to use a primary domain or a test domain.
- In the Application method, choose One-click and then select phpMyAdmin. ServerAvatar will automatically download and install it with all required settings.
- Click on the Create Application button.
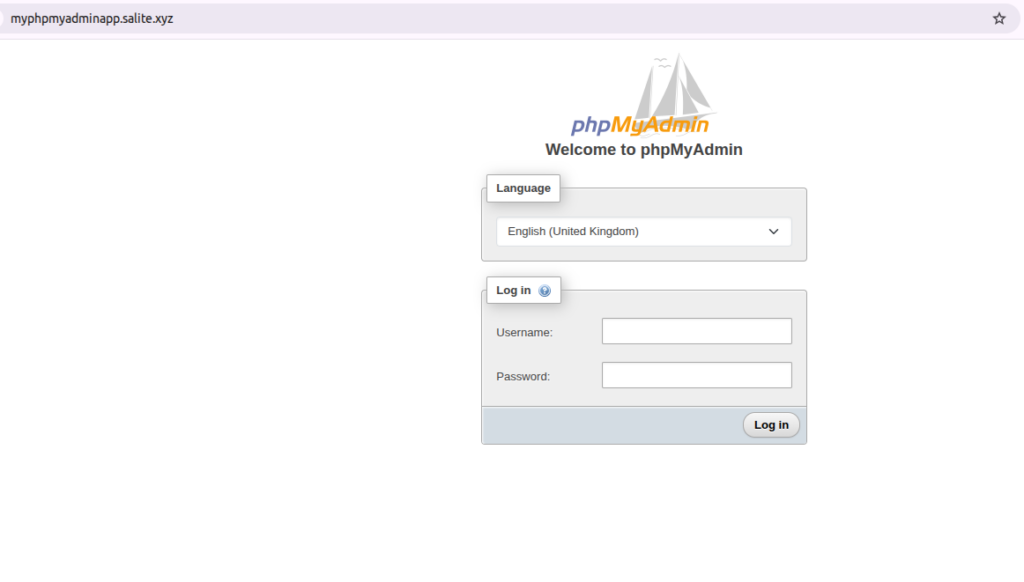
Accessing phpMyAdmin After Installation
Once phpMyAdmin is installed, you can access it easily with its domain.
Quick Access to phpMyAdmin with ServerAvatar
With ServerAvatar, installing phpMyAdmin separately is no longer necessary. The platform offers a built-in quick access feature that allows you to open phpMyAdmin instantly from multiple locations within the dashboard. This makes database management faster and more convenient, without dealing with extra installation steps.
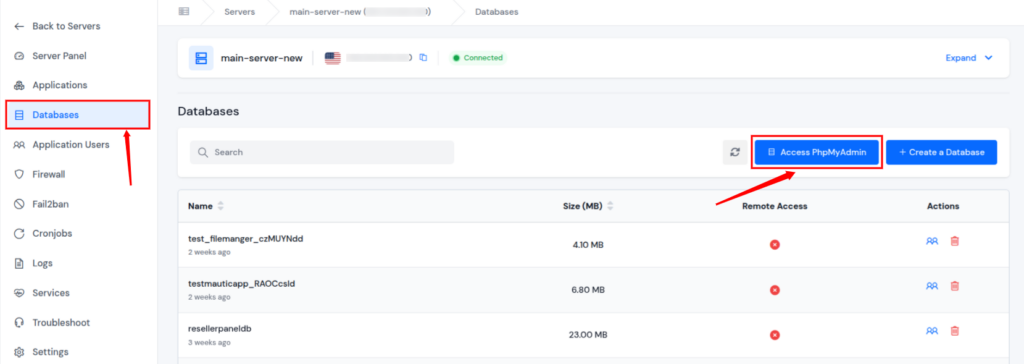
Access phpMyAdmin from the Databases Section
- From the Databases section, you can directly open phpMyAdmin by clicking on the Access phpMyAdmin option.
- This lets you manage your databases immediately, without setting up phpMyAdmin as a separate application.
Access phpMyAdmin from the Database Users Section
- ServerAvatar also provides quick access to phpMyAdmin from the Database Users section.
- This is especially useful when you want to manage database users, permissions, or related settings without switching between tools.
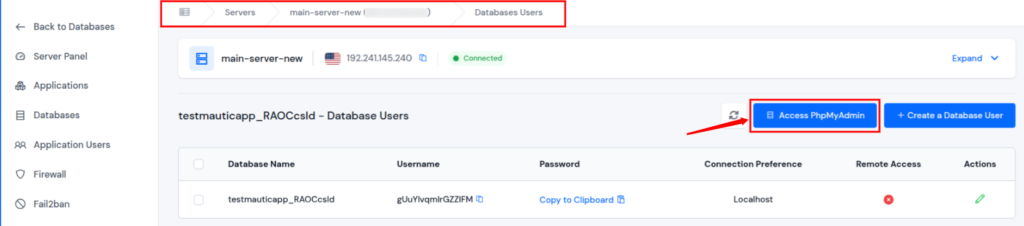
Once you click the Access phpMyAdmin button, it opens instantly in a new browser tab. There is no need to search through server files, configure paths, or perform manual installations. ServerAvatar simplifies the entire process, making phpMyAdmin readily available whenever you need it.
Access phpMyAdmin from the Application Panel
- For every application created on ServerAvatar, the Application Panel includes an option to open phpMyAdmin.
- This allows you to manage application-specific databases directly from the same dashboard.

Once you click the Access phpMyAdmin button, it opens instantly in a new browser tab. There is no need to search through server files, configure paths, or perform manual installations. ServerAvatar simplifies the entire process, making phpMyAdmin readily available whenever you need it.
phpMyAdmin Features You’ll Love
phpMyAdmin offers a range of helpful features:
- Run SQL queries visually: Execute SQL commands and view results in a clear, easy-to-read format.
- Import and export databases easily: Move database data in and out with just a few clicks, without complex steps.
- Edit tables and records smoothly: Update table structures and data directly through a simple interface.
- Manage users and permissions: Control database access by creating users and assigning the right privileges.
- Work faster with less effort: These features reduce manual work and make database management more comfortable.

Tips to Keep Your phpMyAdmin Safe
Because phpMyAdmin can manage your databases, security matters:
- Use strong, unique passwords: Create complex passwords for every database user to reduce the risk of unauthorized access.
- Restrict access by IP: Allow phpMyAdmin access only from trusted IP addresses whenever possible.
- Monitor access logs regularly: Reviewing logs helps you quickly spot unusual or unauthorized activity.
- Keep everything updated: Regular updates ensure you receive the latest security fixes and improvements.
- Stay consistent with security practices: Simple, regular security habits are more effective than one-time actions.
Common Mistakes to Avoid
Even with a one-click install, some things can trip you up:
- Incorrect domain assignment: Linking phpMyAdmin to the wrong domain can prevent it from loading properly.
- Ignoring access controls: Skipping security restrictions can leave your database exposed.
- Missing user permissions: Forgetting to assign proper permissions may block database access or actions.
- Rushing the setup process: A careful review during setup helps avoid issues later.
Troubleshooting Common Issues
If phpMyAdmin doesn’t open:
- Verify domain settings: Make sure phpMyAdmin is connected to the correct domain or application.
- Check ServerAvatar logs: Logs often reveal the cause of loading or access errors.
- Confirm database credentials: Incorrect usernames or passwords can prevent successful access.
- Be patient during checks: Most problems are simple and can be fixed with careful review.
- Contact Support: Our technical experts are available 24/7 to assist you with any issues you face.
Best Practices for Smooth Management
- Create backups before changes: Backups protect your data if something goes wrong.
- Maintain consistent naming: Clear and uniform names make applications and users easier to manage.
- Secure access details: Safely storing URLs and credentials helps prevent accidental exposure.
These tips make long-term use easier.
Conclusion
Managing databases does not have to be complicated or intimidating. phpMyAdmin simplifies database management by offering a visual, browser-based interface that replaces complex commands with clear actions. Whether it is creating tables, managing users, or handling data, everything becomes more approachable and less stressful.
With ServerAvatar, installing and accessing phpMyAdmin becomes even easier. The one-click installer and built-in quick access options remove the need for manual setup, technical configurations, or repeated installations. From deployment to daily usage, ServerAvatar streamlines the entire experience, allowing you to focus on managing your data confidently and efficiently instead of worrying about server-level complexity.
FAQs
1. What is phpMyAdmin mainly used for?
phpMyAdmin is used to manage MySQL and MariaDB databases through a web-based interface without writing complex commands.
2. Do I need technical knowledge to use phpMyAdmin?
No, phpMyAdmin is beginner-friendly and designed to simplify database tasks using visual menus and forms.
3. How does ServerAvatar make phpMyAdmin installation easier?
ServerAvatar provides a one-click installer that automatically downloads, configures, and deploys phpMyAdmin without manual steps.
4. Can I access phpMyAdmin without installing it separately on ServerAvatar?
Yes, ServerAvatar offers quick access to phpMyAdmin from the Databases section, Database Users section, and Application Panel.
5. Is phpMyAdmin safe to use with ServerAvatar?
Yes, when proper security practices like strong passwords, restricted access, and regular updates are followed, phpMyAdmin is safe to use with ServerAvatar.