
Have you ever wished your server could simply tap you on the shoulder and tell you when something important happens? Instead of constantly checking dashboards, logs, or panels? That’s exactly why the ability to integrate Slack as a notification channel for your server becomes so important.
Server management doesn’t have to feel overwhelming or technical, especially for beginners. With the right notification setup, you can stay informed without being glued to your screen. Slack keeps you informed without demanding constant attention.
This guide is designed for everyone, even if you’re new to ServerAvatar or Slack. We’ll walk through everything step by step, explain each concept clearly, and avoid unnecessary complexity.
What Is ServerAvatar?
ServerAvatar is a server and application hosting and management platform designed to make handling servers easier, cleaner, and more accessible. Instead of working directly with complex server commands, ServerAvatar provides a visual dashboard where you can manage server-related activities more comfortably.
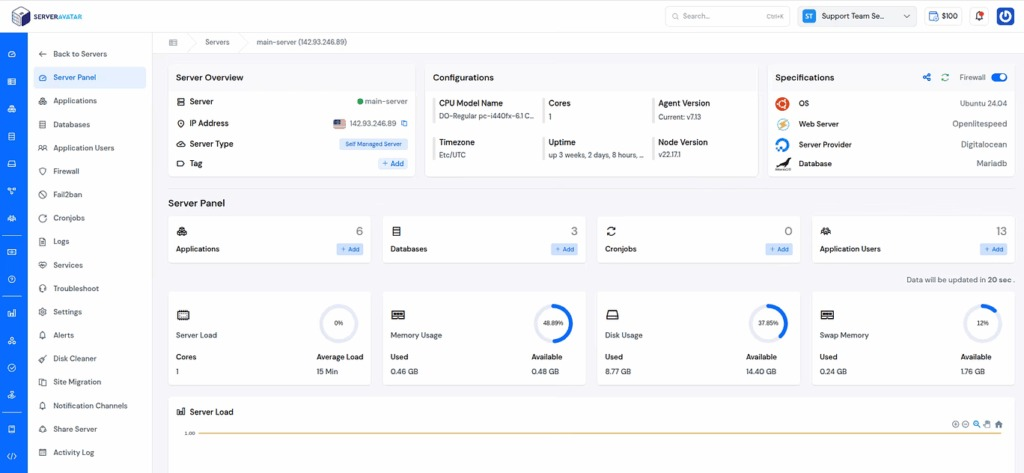
One of the features of ServerAvatar is its notification system. Notifications act as messengers that inform you whenever specific events occur within your server environment. These messages help you stay updated without manually monitoring every detail.
Understanding Notification Channels
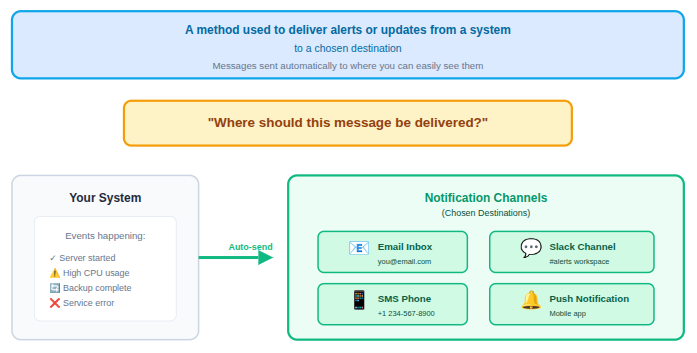
Think of notification channels as delivery routes. The message is the same, but the delivery method can change. ServerAvatar allows you to configure where notifications should be sent, and Slack is selected as one such route.
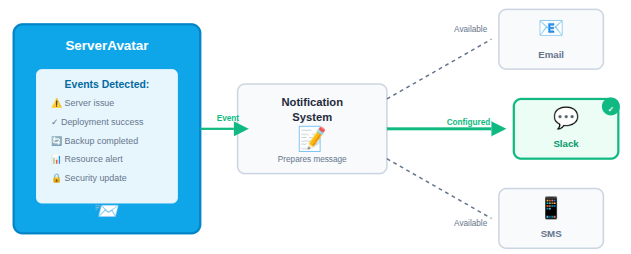
Once it is connected:
- ServerAvatar detects an event
- The notification system prepares a message
- The message is delivered to Slack via the configured channel
The integration does not change how ServerAvatar detects events. It only changes where the information appears.
Why This Matters
This setup keeps the system flexible. You can add Slack as a channel without affecting other notification methods. Everything works independently but stays organized under one system.
How Notification Channels Work?
ServerAvatar notifications are event-based. This means:
- An event happens
- A notification is triggered
- The message is sent to a selected channel
You get to decide where these notifications go from Slack, Discord, Telegram, and Pushover, as ServerAvatar provides these notification channels. Slack is one such channel, and it’s particularly popular.
Instead of being reactive, notifications help you stay aware. They quietly work in the background, making sure you’re never completely out of the loop.
What is Slack?
Slack is a digital communication tool designed to keep conversations organized and easy to follow. Instead of long message threads or scattered updates, Slack brings everything into one structured space where messages are grouped by topic.
At its core, Slack works using channels. A channel is like a dedicated room created for a specific purpose. Messages shared inside a channel stay visible to everyone who has access to it, making communication clear and consistent.
How Slack Works?
Slack follows a very straightforward flow:
- Messages are sent inside channels
- Channels keep conversations organized
- Updates appear instantly
- Information stays searchable
Rather than jumping between different tools, Slack acts as a single place where updates arrive and remain accessible.
Why Slack Works Well for Notifications:
Slack is well-suited for notifications because:
- Messages appear in real time
- Information stays organized in channels
- Alerts are easy to read and track
When ServerAvatar sends a notification to Slack, it appears as a message in a chosen channel. There’s no need to log in to ServerAvatar repeatedly just to check updates.
In simple words, Slack becomes a shared inbox for your server notifications.
Why Integrate Slack with ServerAvatar
Integrating Slack with ServerAvatar to get real-time alerts for your servers on Slack and allows notifications to flow naturally into a communication space that’s already designed for visibility and collaboration.
Key Benefits of Slack Integration with ServerAvatar
- Instant updates without opening the dashboard
- Centralized communication in one place
- Reduced manual monitoring
- Better awareness of server-related events
Instead of switching between tools, everything important comes to you. It’s like having your mail delivered to your desk rather than checking the mailbox every hour.
This integration doesn’t change how ServerAvatar works. It simply extends its notification system into Slack, making the experience smoother and more user-friendly.
How This Integration Helps?
For users of ServerAvatar, constantly checking a panel can feel confusing. Slack removes that pressure. Notifications arrive automatically, clearly labeled, and easy to understand.
Some key advantages include:
- Faster awareness of important updates
- Less manual checking of the ServerAvatar dashboard
- Clear, readable messages delivered in one place
- Better focus without distractions
Rather than reacting late, you stay informed at the right moment. It’s like having a quiet assistant who speaks up only when needed.
Prerequisites Before Setting Up Slack Integration
Before connecting Slack with ServerAvatar, a few basic requirements need to be in place. These are simple and don’t require advanced technical knowledge.
Make sure you have:
- An active ServerAvatar account
- Access to the ServerAvatar dashboard
- A Slack workspace
- Permission to manage Slack apps or integrations
These prerequisites ensure that you can create a connection between ServerAvatar and Slack without interruptions.
Skipping preparation can lead to confusion during setup. When everything is ready beforehand, the integration process feels smooth and straightforward.
Step-by-Step Guide to Integrate Slack with ServerAvatar
ServerAvatar lets you add Slack as a notification channel directly from the dashboard. This process does not require changing any server settings or accessing sensitive configurations. You’re simply defining where ServerAvatar should send alerts.
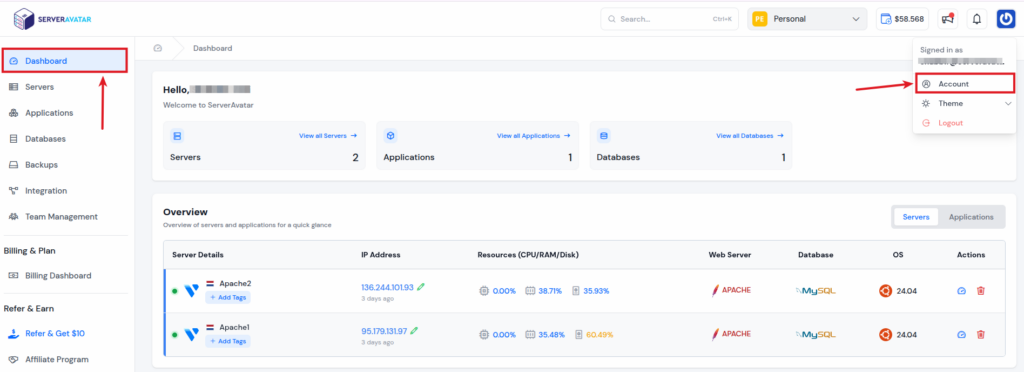
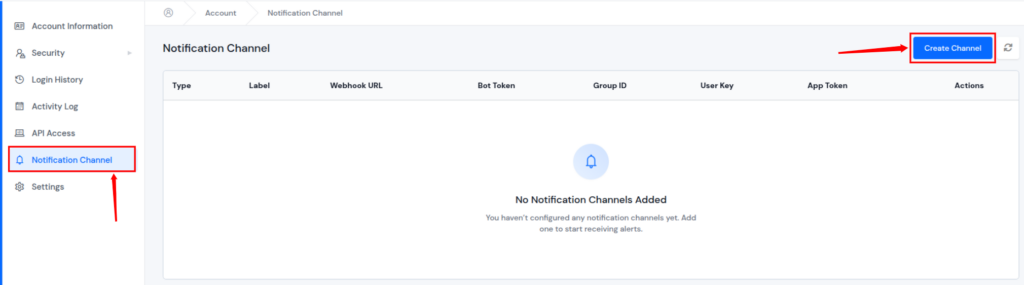
All notification channels are managed from the Account Settings section in the ServerAvatar dashboard. This is where you can configure different communication methods, including Slack.
- Let’s first log in to the ServerAvatar account and navigate to the Account Section from the top right corner.
- Navigate to the Notification Channel section. Click on the Create Channel button.
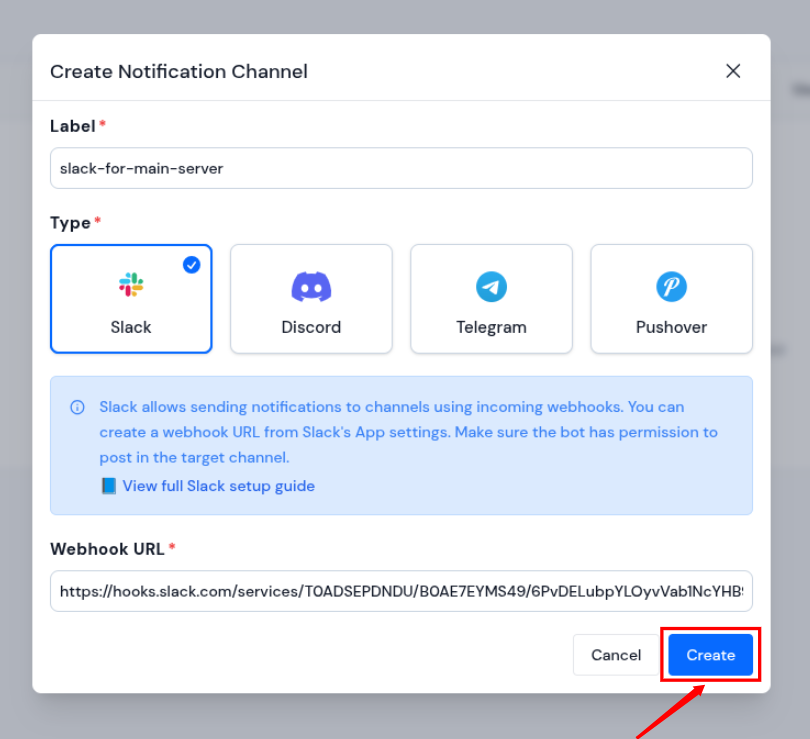
- Select Slack as the notification channel, and enter the Label for your Slack notification channel.
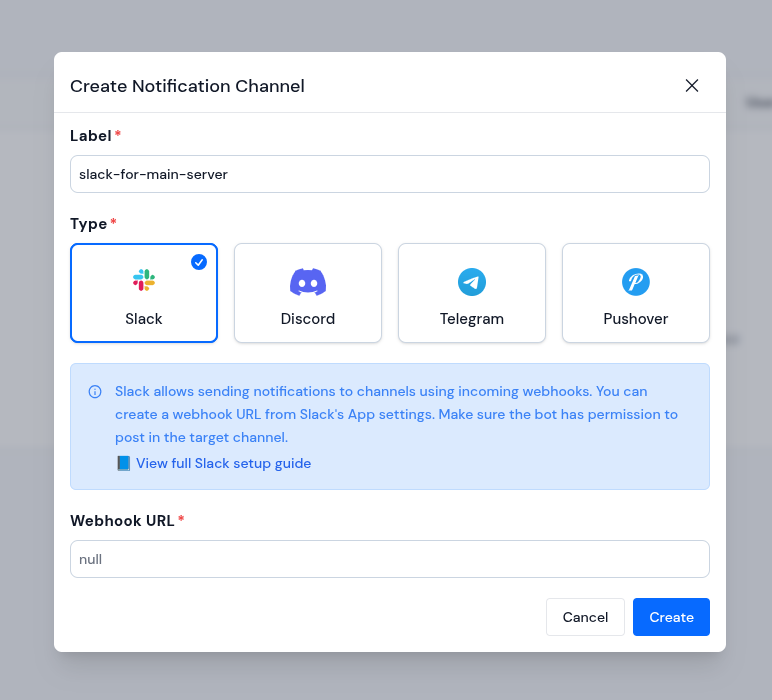
- Now, we need the Slack Webhook URL for Slack integration.
What Is a Webhook?
A webhook is like a mailing address for Slack. It tells ServerAvatar exactly where messages should be delivered.
Instead of sending notifications randomly, ServerAvatar uses this webhook URL to place messages into a specific Slack channel.
How ServerAvatar Uses Slack Webhooks
Here’s what happens behind the scenes:
- Slack provides a webhook URL
- You add this webhook to ServerAvatar
- ServerAvatar sends notifications to that URL
- Slack displays them as messages in a channel
That’s it. No extra configuration is required once the webhook is connected correctly.
Why Webhooks Are Important
Without a webhook, ServerAvatar wouldn’t know which Slack channel to use. The webhook ensures messages land in the right place every time, keeping communication neat and organized.
Creating a Slack Webhook
To get the Slack Webhook URL, follow the below steps:
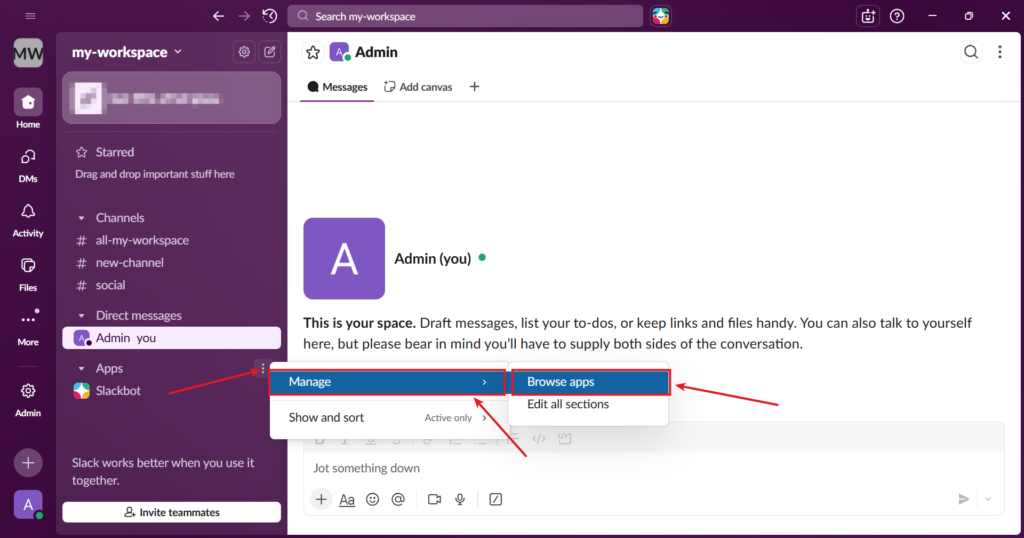
- Open your Slack application and click on the ‘three dots’ next to the Apps >> Manage >> Browse apps as shown in the below image.
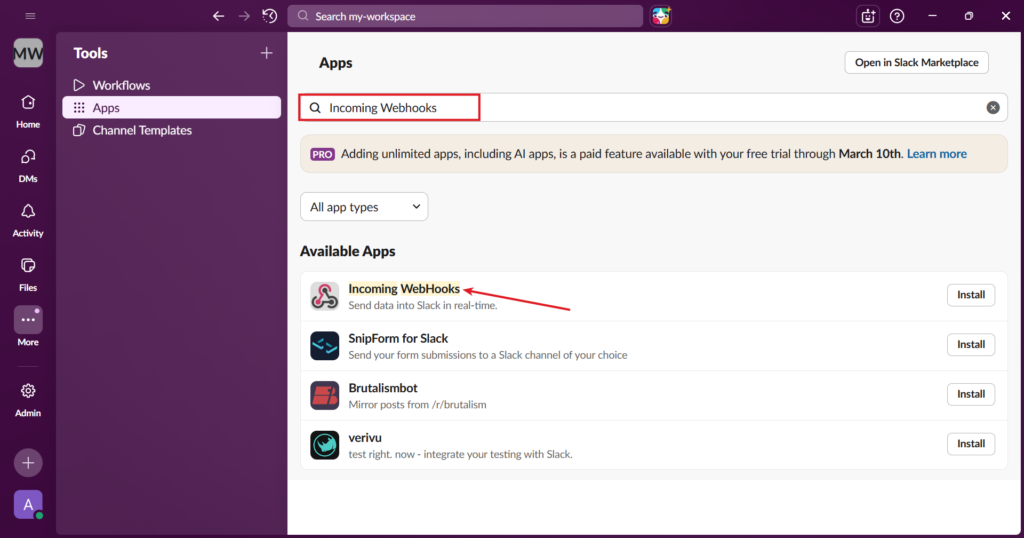
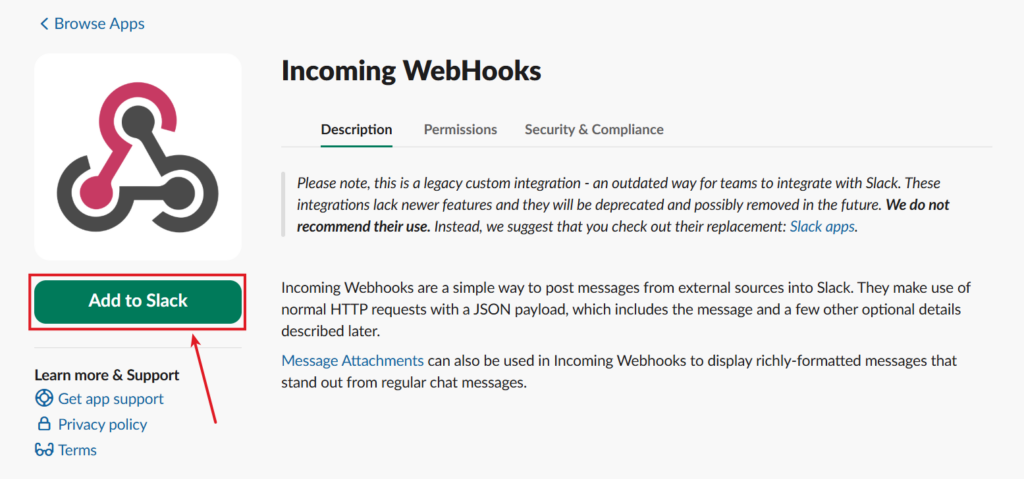
- Search for Incoming WebHooks in the searchbar and select it from the results.
- Click on Add to Slack button, and select the channel or direct message where you want notifications to appear.
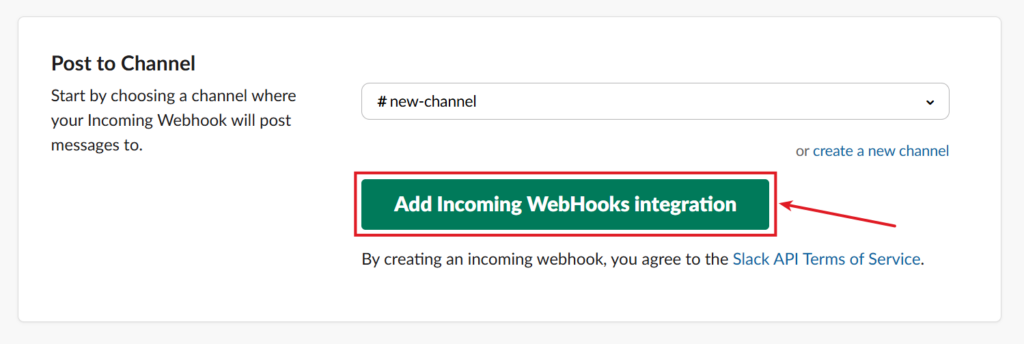
- You’ll be redirected to a page, select your channel from the dropdown, or create a new channel for ServerAvatar notifications. Click on the Add Incoming WebHooks Integration.
- Slack will generate a webhook URL for the selected channel. Copy this URL for use in ServerAvatar.
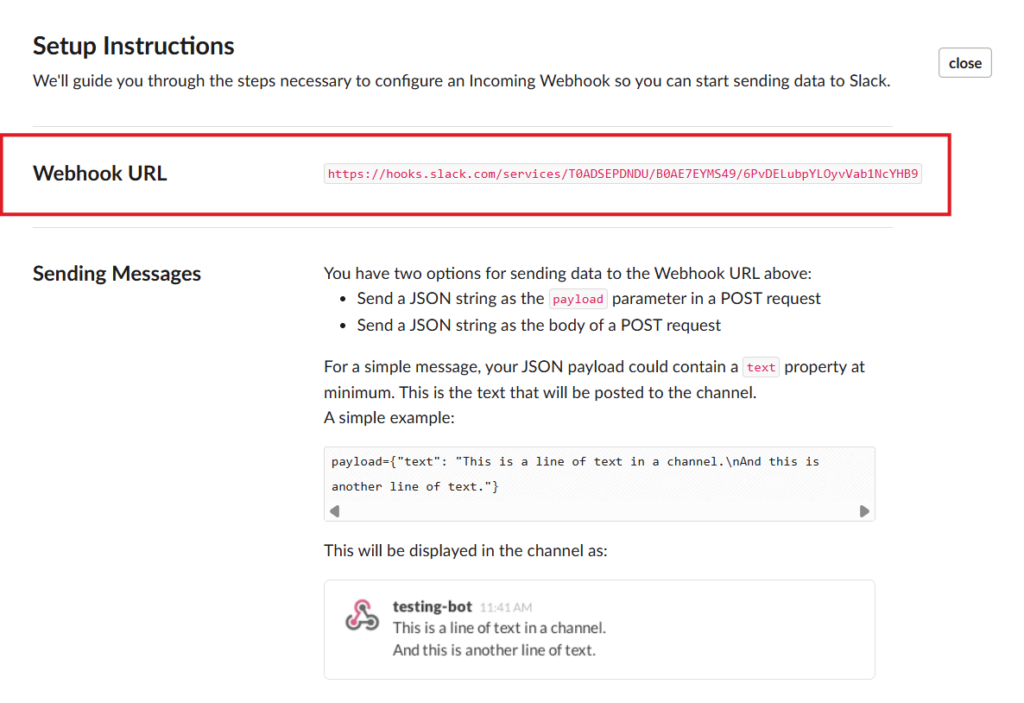
- Copy the Webhook URL and paste it into the generated pop-up of the notification channel in ServerAvatar.
- Click on the Create button.
- After adding the Slack notification channel, you can view the integrated notification channel displayed.
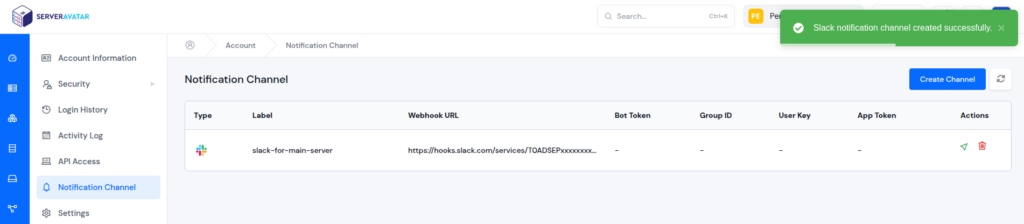
It’s important to understand that adding Slack as a notification channel from the Account Settings only enables notifications at the account level.
This means you will receive general account-related alerts, but server-specific activities will not be sent to Slack automatically.
How Account-Level Notifications Appear in Slack
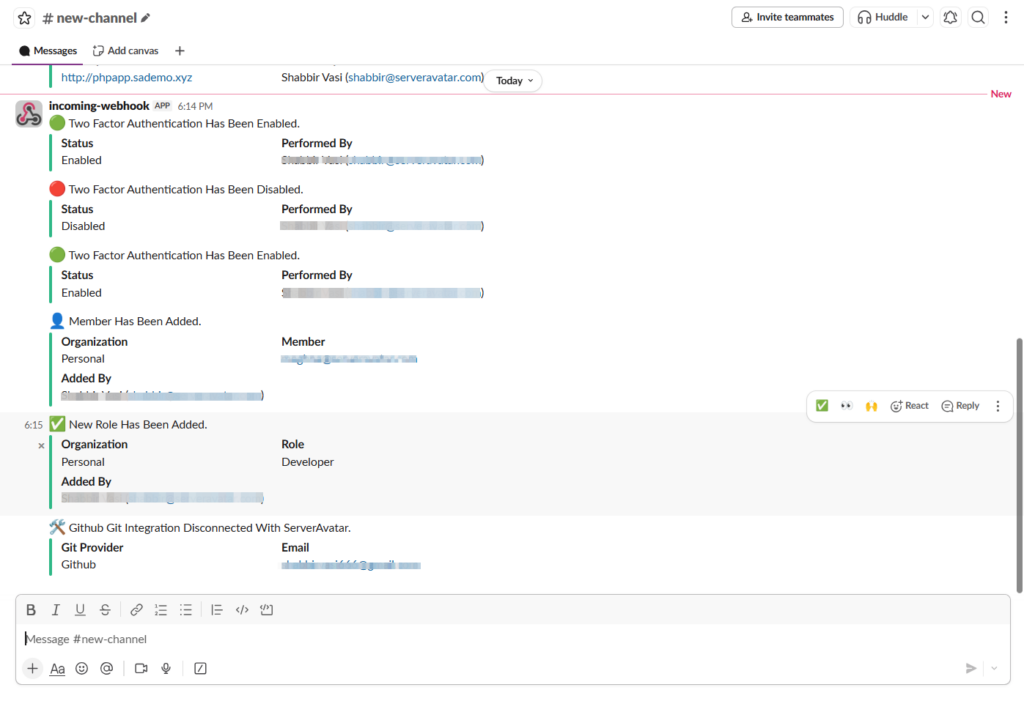
Once Slack is added as a notification channel at the account level, ServerAvatar starts sending account-related alerts directly to your selected Slack channel. These notifications keep you informed about important changes related to users, integrations, and organization settings.
Each alert is displayed as a clear, readable Slack message, making it easy to understand what action occurred and when it happened.
Examples of account-level notifications
To receive alerts related to the server and particular applications in the server, the notification channel must be attached to the server.
This step is commonly missed during setup, but without attaching the notification channel at the server level, Slack will not receive server activity alerts.

How to get Server-Level Notifications in Slack
Now, let’s attach the notification channel to the server to get all the server-level notifications.
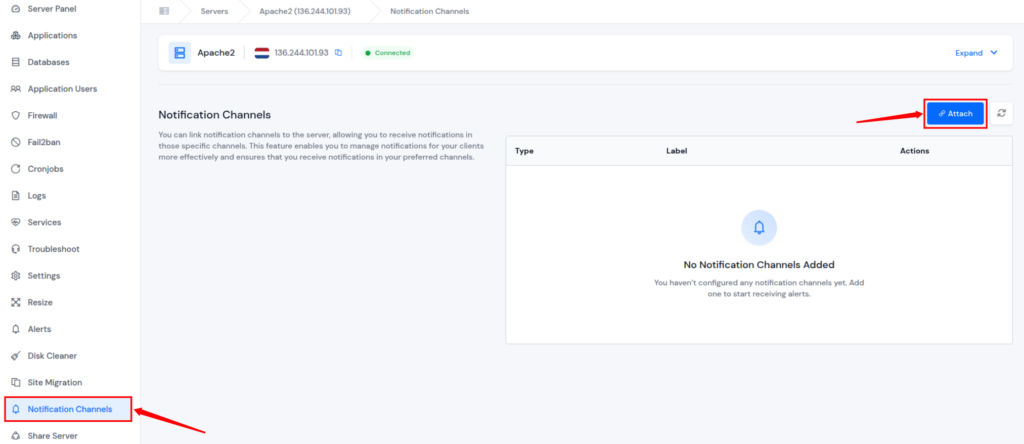
- Navigate to the server panel by clicking on the server dashboard icon.

- Go to the Notification Channels from the left sidebar and click on the Attach button.
- Select your created Notification Channel from the dropdown and click on the Attach button.
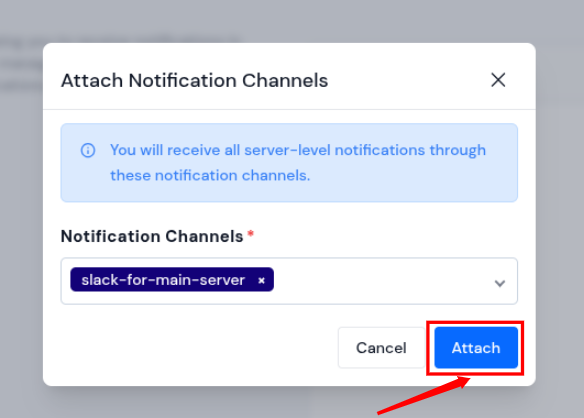
- You can see your notification channel listed, once your notification channel is connected to your server.

By integrating Slack with ServerAvatar and attaching the notification channel to your server, you get instant updates about server activities directly in your Slack channels.
This helps you keep track of your server easily without logging into ServerAvatar all the time.
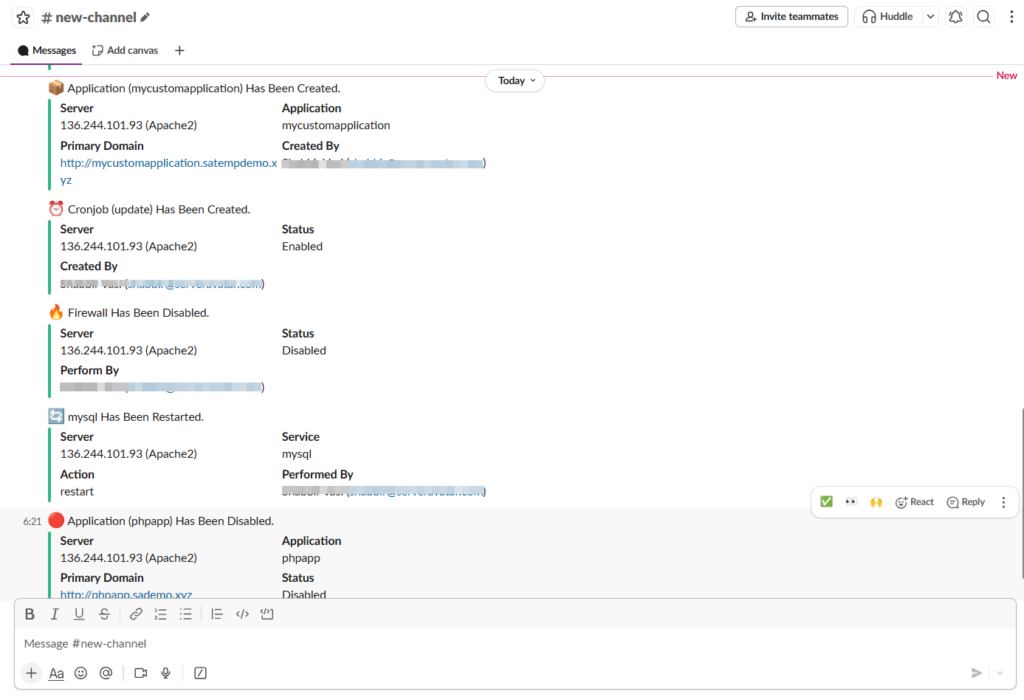
Examples of server-level notifications
Types of Alerts Sent to Slack via ServerAvatar
Once Slack is integrated with ServerAvatar and the notification channel is properly attached, the system can send a wide range of alerts directly to your Slack workspace. These alerts are grouped into account-level and server-level notifications to keep information structured and easy to understand.
Account-Level Alerts
Account-level alerts are triggered by activities related to your ServerAvatar account, integrations, and organization settings. These notifications are sent as soon as the Slack channel is added at the account level.
User-Level Alerts
These alerts help you stay informed about important security and account-related actions:
- Whitelist IP added
- Two-factor authentication (2FA) enabled or disabled
- Wallet credit added
Integration-Level Alerts
These notifications inform you when third-party services are connected or removed from your account:
- Cloud provider connected or removed
- Git provider connected or removed
- Storage provider connected or removed
Organization-Level Alerts
These alerts keep track of team and role management activities:
- Organization member added or removed
- Role created, updated, or deleted
Server-Level Alerts
Server-level alerts become active once the Slack notification channel is attached to a specific server. These notifications cover server operations, services, applications, and security-related events.
Server Alerts
These alerts focus on core server activities and system-level changes:
- Server created, deleted, or restarted
- Server IP changed
- Server shared
- Server metrics updates
- Disk usage checked
- Memory usage checked
- Server load checked
- Disk cleaned
- Swap updated
Cronjob Alerts
- Cronjob created, updated, or deleted
- Cronjob enabled or disabled
PHP & Configuration Alerts
- PHP extension installed or removed
- PHP-FPM configuration updated
Security Alerts
- Database root password updated
- Redis settings updated
- Fail2Ban enabled, disabled, or updated
Service Alerts
- Service started, stopped, restarted, or reloaded
- Service monitoring enabled, disabled, or updated
Firewall Alerts
- Firewall enabled or disabled
- Firewall rule created or deleted
Common Mistakes to Avoid During Setup
Even though Slack integration with ServerAvatar is straightforward, a few common mistakes can cause confusion. Being aware of them makes the setup smoother.
Mistakes to Watch Out For
- Using an incorrect webhook URL
- Forgetting to save changes after setup
- Not having proper Slack permissions
- Adding Slack at the account level, but forgetting to attach it to the server
Each of these issues is easy to avoid with a little attention. Taking your time during setup prevents unnecessary troubleshooting later.
Remember, slow and steady works better than rushed and reactive.
Security and Privacy Considerations
Whenever two platforms are connected, security naturally becomes a concern. The good news is that Slack integration with ServerAvatar is designed with safety in mind, as long as it’s configured correctly.
Keeping the Integration Secure
To maintain security:
- Keep webhook URLs private
- Avoid sharing notification channels publicly
Think of the webhook like a key. As long as it’s kept safe, the connection remains secure.
Integrating Slack with ServerAvatar is not about adding complexity. It’s about simplifying awareness.
Conclusion
Slack integration with ServerAvatar bridges the gap between server activity and everyday communication. It transforms notifications into clear, timely messages delivered exactly where attention already exists.
For beginners and non-technical users, this setup removes guesswork and reduces manual checking. Once configured, it quietly works in the background, keeping you informed without demanding effort. By following the steps outlined in this guide, anyone can set up Slack integration confidently and make server notifications feel simple, organized, and manageable.
FAQs
1. What is Slack integration with ServerAvatar?
Slack integration with ServerAvatar allows server notifications to be sent directly to a Slack channel, keeping updates visible and organized.
2. Do I need technical knowledge to integrate Slack with ServerAvatar?
No, the setup is beginner-friendly and does not require advanced technical skills.
3. Can I control which notifications are sent to Slack?
Yes, ServerAvatar allows you to select specific events for Slack notifications.
4. Is it safe to connect Slack with ServerAvatar?
Yes, as long as webhook URLs are kept secure and permissions are managed properly.
5. Can Slack integration be removed later?
Yes, Slack can be disabled or removed as a notification channel at any time without affecting server operations.