If your WordPress site feels sluggish, the LiteSpeed Cache Plugin can help, whether it takes forever to load or you’re getting poor performance scores from tools like PageSpeed Insights or GTmetrix, you’re in the right place. Speed is not just about user experience; it’s a critical SEO ranking factor, especially in 2025 where Core Web Vitals heavily influence how well your site performs in search.
One of the best ways to supercharge your WordPress site’s speed is by using the LiteSpeed Cache Plugin. And when you pair it with ServerAvatar, the powerful server management tool, setting up LiteSpeed Cache becomes much easier, even if you’re not a tech expert.
In this comprehensive, human-written guide, we’ll walk you through everything you need to know to set up LiteSpeed Cache Plugin for WordPress using ServerAvatar. Whether you’re running a WooCommerce store, blog, or business website, this step-by-step guide is all you need.
What is LiteSpeed Cache Plugin?
The LiteSpeed Cache Plugin (LSCache) is a powerful all-in-one site acceleration tool. It’s built to work best with LiteSpeed Web Server, but also supports OpenLiteSpeed, making it perfect for many server environments.
Here’s what it does:
- Full-page caching: Speeds up your website by serving pre-built pages to visitors.
- Image optimization with WebP support: Compresses images and converts them to WebP for faster loading.
- CSS/JS/HTML minification: Reduces file size by removing unnecessary characters from code.
- Database optimization: Cleans and optimizes your database for better performance.
- Browser caching: Stores website resources in visitors’ browsers to reduce load times.
- CDN integration (QUIC.cloud): Delivers content faster globally using a content delivery network.
- And much more
In short, it’s like turbocharging your WordPress website with just one plugin.
Why Use ServerAvatar for Setup?
If you’ve ever tried managing a server manually, you know how complex and overwhelming it can be. ServerAvatar simplifies everything, offering a beginner-friendly interface to manage your server, apps, and databases without needing to touch the command line.
Note:- When you select the OpenLiteSpeed (OLS) server while installing WordPress through ServerAvatar, you will see an option to automatically install the LiteSpeed Cache plugin, which is recommended for optimal performance.
Here’s why pairing ServerAvatar with LiteSpeed Cache is a smart move:
- One-click Application installation: Instantly set up the WordPress application with a single click.
- Auto SSL setup: Automatically secure your website with a free SSL certificate.
- LiteSpeed Cache plugin auto-install: Installs and configures the LiteSpeed Cache plugin automatically for optimal performance.
- Easy domain + app management: Effortlessly manage domains and web applications from a single dashboard.
- Built-in file manager and monitoring tools: Access files and monitor server performance directly from the panel.
Here We Go with ServerAvatar Panel
For a better understanding of how to set up your server and WordPress application in ServerAvatar, refer to this detailed guide.
Managed Server Setup:–https://serveravatar.com/docs/managed-server/installation
WordPress Application Steup:-https://serveravatar.com/docs/application/one-click-installer/wordpress
Step 1: Log in to Your WordPress Admin Panel
- Log in to your WordPress Admin panel
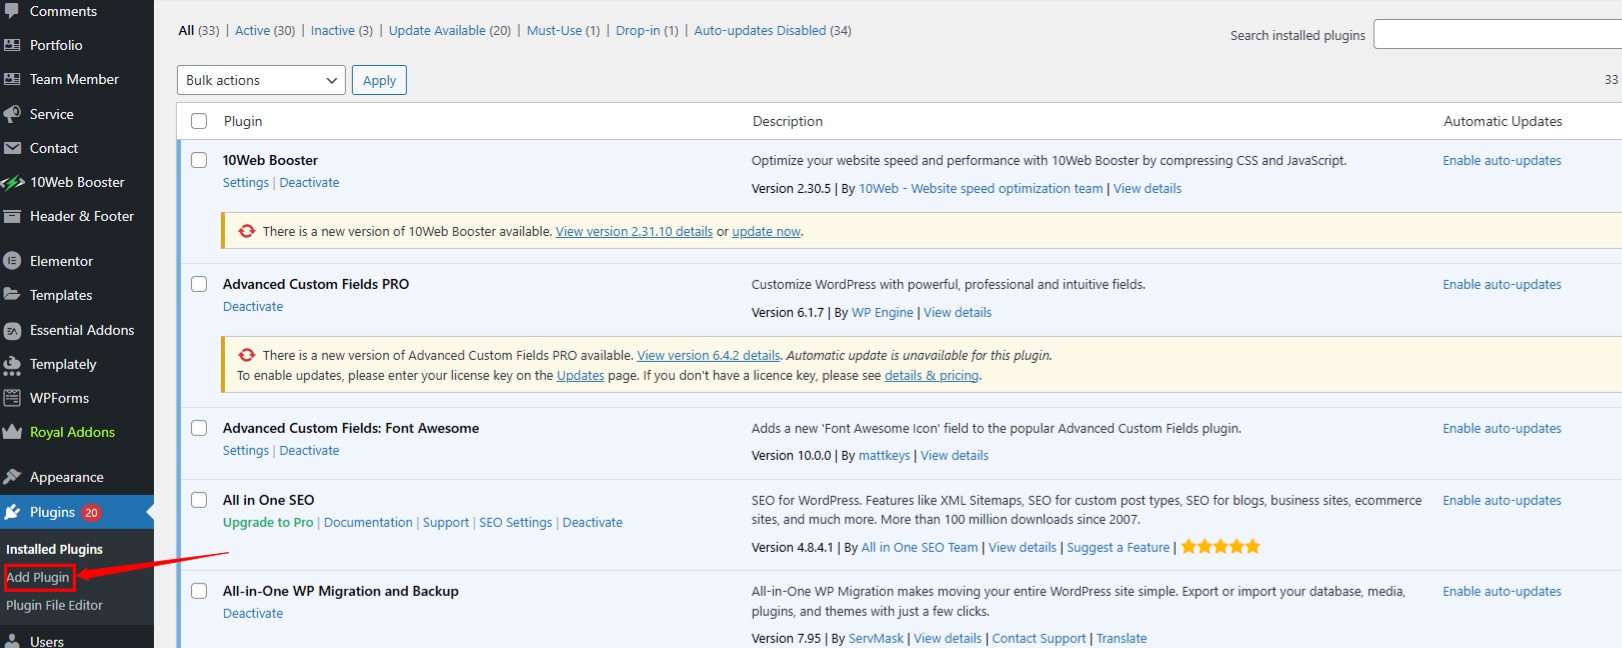
Step 2: Navigate to Plugins > Add New
- From the left sidebar, hover over Plugins, then click Add New.
Step 3: Search for “LiteSpeed Cache”
- In the search bar (top right), type: LiteSpeed Cache
- Look for the official plugin by LiteSpeed Technologies.
Step 4: Click “Install Now”
- Once you find it, click the blue Install Now button.

Step 5: Activate the Plugin
- After installation completes, click Activate.
- You’ll now see a new “LiteSpeed Cache” option in your WordPress sidebar.
Page Caching Settings
Step 6: Configure Cache Settings
- Navigate to: LiteSpeed Cache > Cache
- Turn ON the following:
- Enable Cache: Activates LiteSpeed’s full-page caching for faster load times.
- Cache Logged-in Users (optional): Caches pages for logged-in users to improve performance (use with caution).
- Cache Commenters: Caches pages for users who leave comments to enhance speed.
- Cache REST API: Caches WordPress REST API responses for better backend performance.
- Click Save Changes
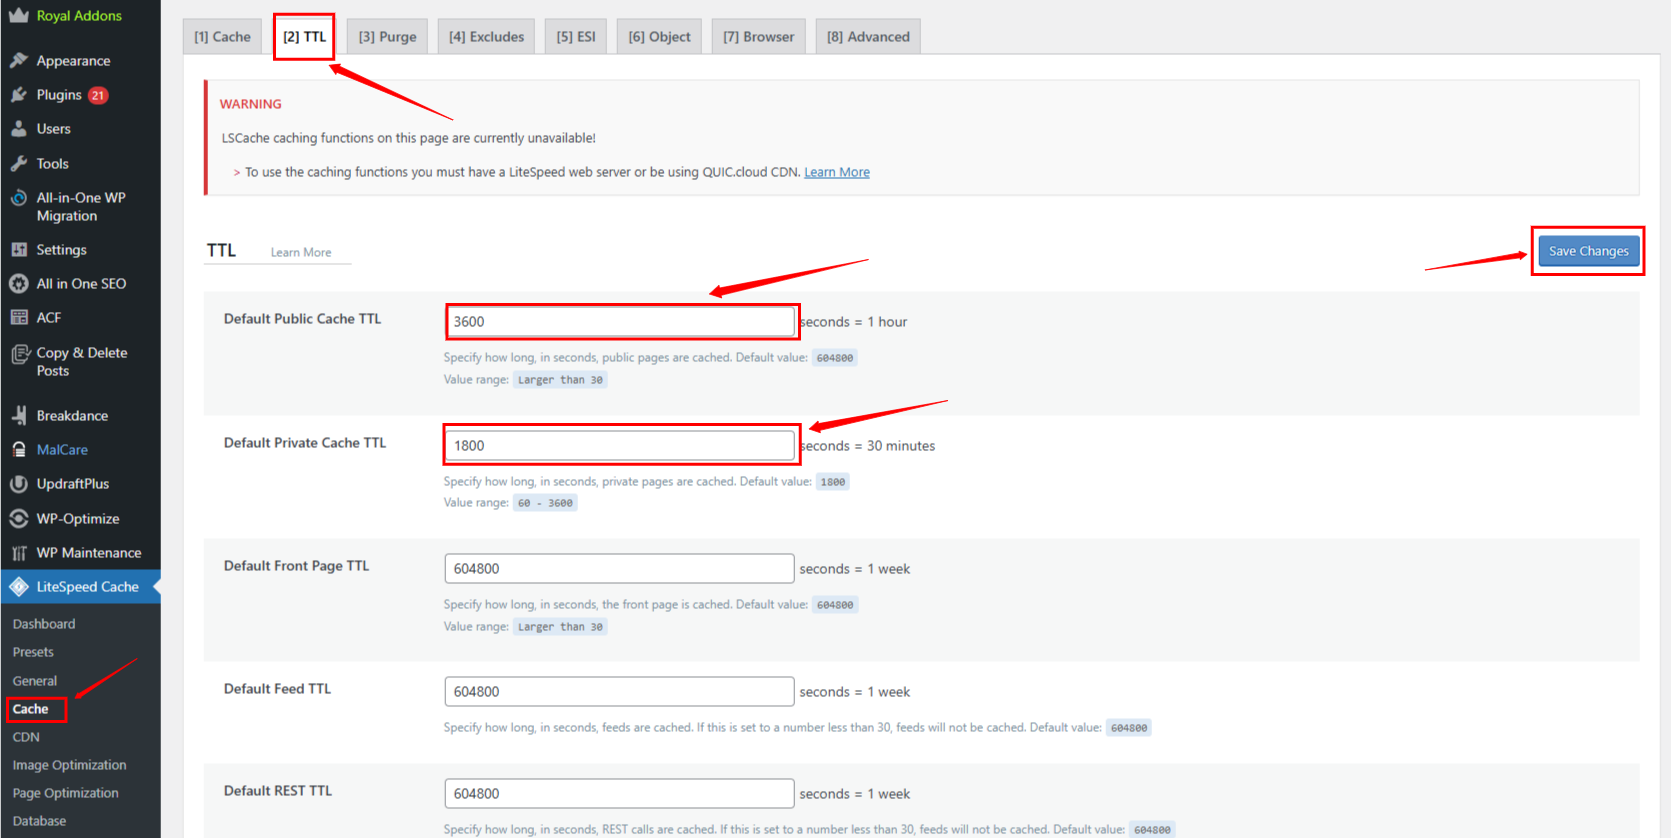
Step 7: Set Cache TTL (Time to Live)
- Go to: LiteSpeed Cache > Cache > TTL
- Recommended settings:
- Default Public Cache TTL: 3600
- Default Private Cache TTL: 1800
- Click Save Changes
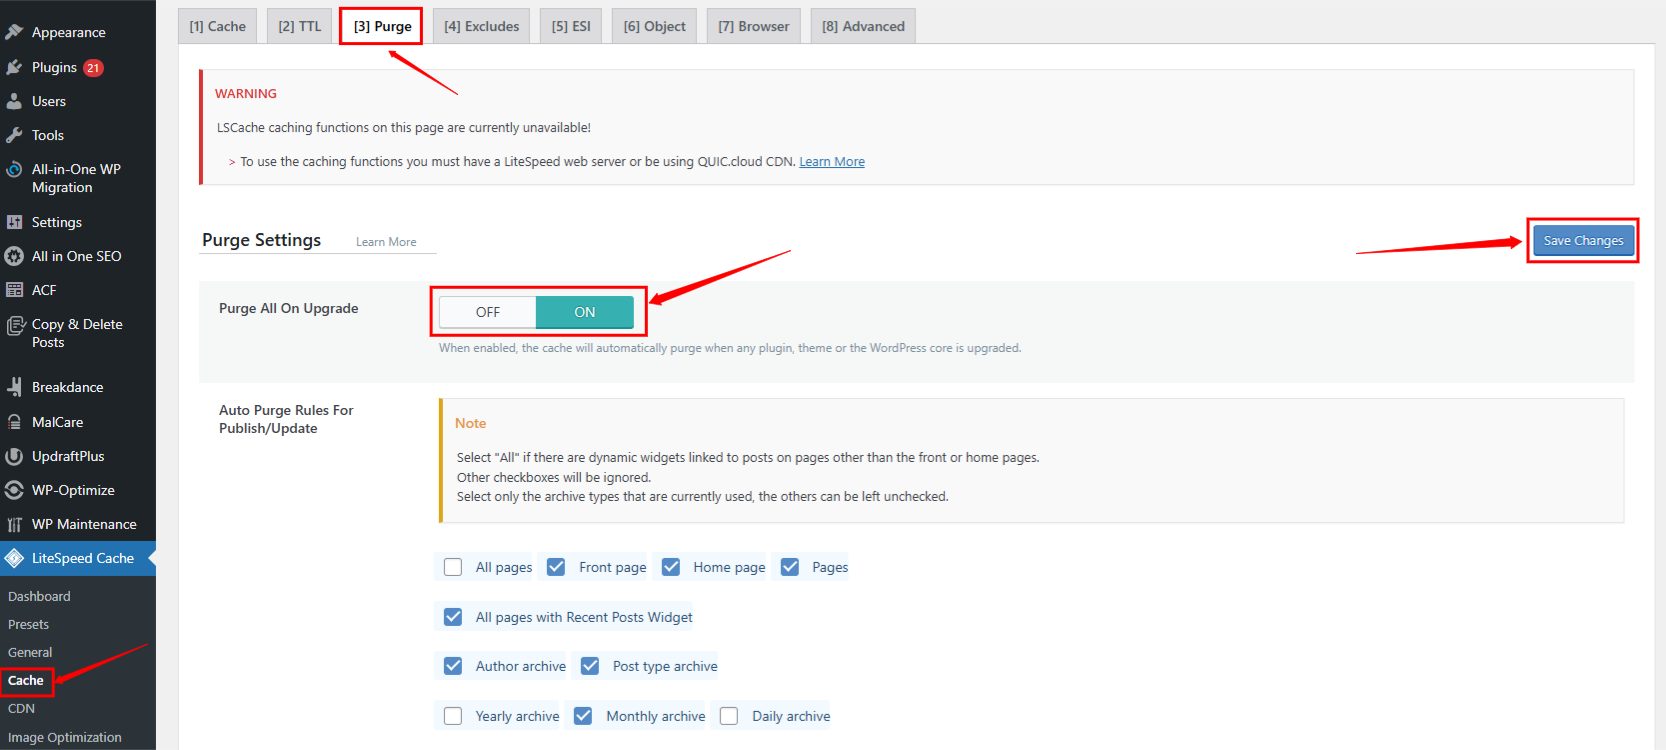
Step 8: Set Up Purge Rules
- Go to: LiteSpeed Cache > Cache > Purge
- Enable:
- Purge All On Plugin/Theme Update:
- Purge Post/Page on Update:
- Save changes.
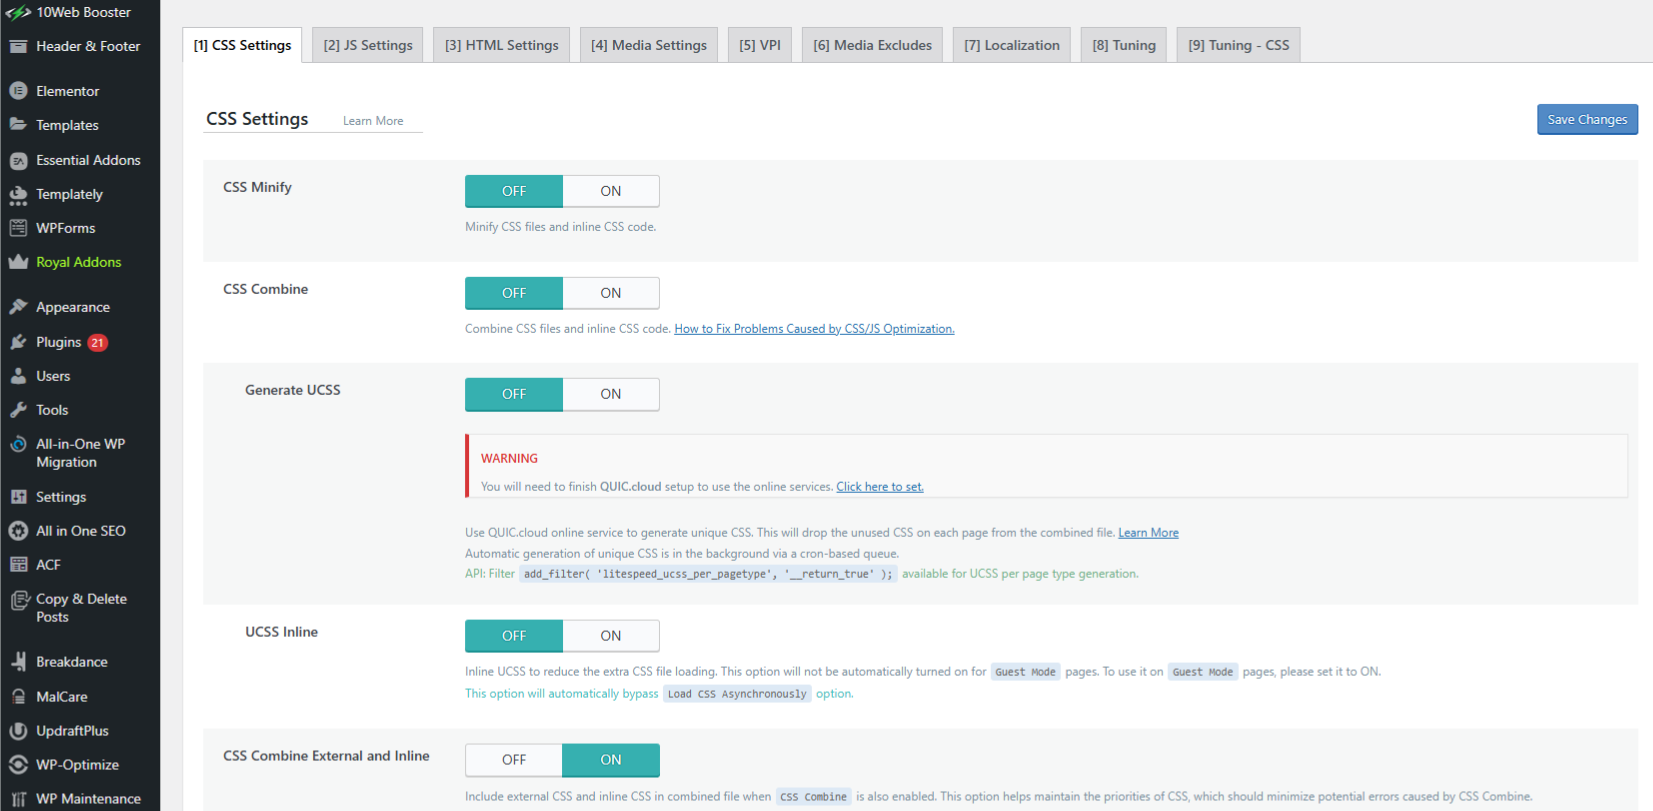
Step 9: Enable Optimization Features
- Go to: LiteSpeed Cache > Page Optimization
- Recommended settings:
- CSS Minify: Removes unnecessary spaces and comments from CSS to reduce file size and improve load time.
- JS Minify: Compresses JavaScript files by removing whitespace and comments for faster delivery.
- HTML Minify: Optimizes HTML by eliminating extra spaces and code comments for quicker page rendering.
- Load JS Deferred: Delays loading JavaScript until after page content is loaded to improve performance.
- DNS Prefetch: Preloads DNS for external domains (e.g., fonts.googleapis.com) to speed up external requests.
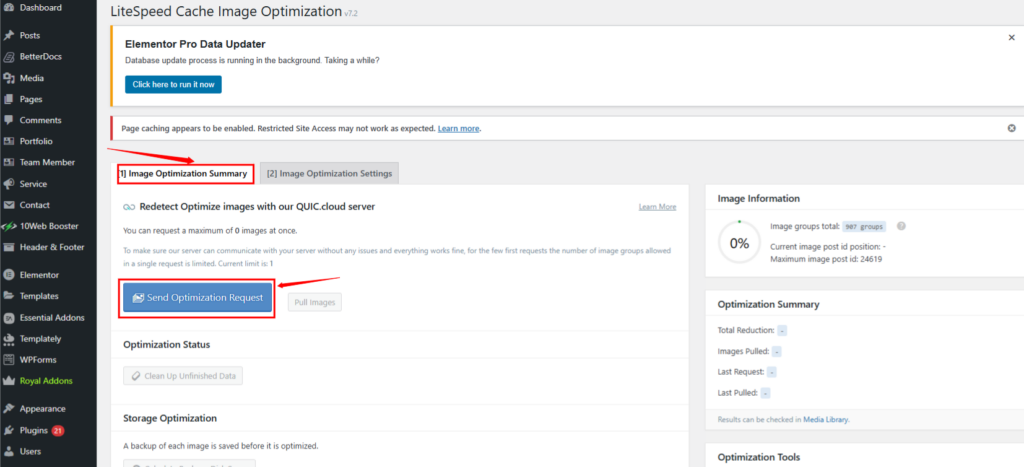
Step 11: Enable Image Optimization
- Go to: LiteSpeed Cache > Image Optimization
- Click Send for Optimization
- Enable:
- Auto Request Cron: Automatically sends new images for optimization without manual action.
- Optimize Original Images: Reduces file size of original images to improve loading speed without quality loss.
- Generate WebP Versions: Creates lightweight WebP image formats for better performance on supported browsers.
Step 10: (Optional) Connect to QUIC.cloud CDN
- If you want global CDN and better performance:
- Get your domain key
- Sign up at https://my.quic.cloud
- Add your domain and verify
- Update DNS settings if required
- In LSCache settings > CDN, enable CDN mapping

Step 11: Confirm LiteSpeed Cache is Working
- Open your website in incognito mode
- Use browser developer tools (Network tab)
- Refresh and check the response headers
- Look for:
- x-litespeed-cache: hit
- If you see this, caching is active!
Conclusion
Setting up the LiteSpeed Cache Plugin for WordPress using ServerAvatar isn’t just easy—it’s one of the smartest ways to drastically improve your website speed, SEO performance, and user experience.
With this step-by-step guide, you’ve:
- Installed and configured LiteSpeed Cache
- Leveraged OpenLiteSpeed + ServerAvatar
- Boosted speed scores and Core Web Vitals
- Set the stage for faster, smoother, more secure WordPress performance
Speed equals success, and you’ve just taken a major step forward.
Now go check your site’s speed—it should load like lightning! ⚡
If you found this guide helpful, don’t forget to bookmark it and share it with fellow WordPress users or web developers looking to optimize their sites using ServerAvatar and LiteSpeed.
FAQ
1. Do I need a LiteSpeed server to use LiteSpeed Cache plugin?
The plugin works best with LiteSpeed or OpenLiteSpeed servers. You can still install it on Apache or NGINX, but most advanced features like server-level caching will be disabled. If you’re using ServerAvatar with OpenLiteSpeed, you’re fully supported.
2. Will LiteSpeed Cache conflict with other caching plugins like WP Super Cache or W3 Total Cache?
Yes. You should not use multiple caching plugins at the same time. Before using LiteSpeed Cache, deactivate and uninstall any other caching or performance plugins to avoid conflicts.
3. How can I verify if LiteSpeed Cache is working on my site?
Open your website in incognito/private mode, use browser DevTools > Network, and refresh the page. Look for the response header:
x-litespeed-cache: hit
If you see it, your cache is working correctly.
4. Is LiteSpeed Cache plugin free to use?
Yes, the LiteSpeed Cache plugin is 100% free. Some advanced features like QUIC.cloud CDN offer free tiers, with optional paid upgrades for higher usage.
5. Does LiteSpeed Cache support WooCommerce and other eCommerce plugins?
Absolutely. It’s fully compatible with WooCommerce, Easy Digital Downloads, and more. Just make sure to exclude pages like Cart, Checkout, and My Account from caching to avoid issues.
Stop Wasting Time on Servers. Start Building Instead.
You didn’t start your project to babysit servers. Let ServerAvatar handle deployment, monitoring, and backups — so you can focus on growth.
Deploy WordPress, Laravel, N8N, and more in minutes. No DevOps required. No command line. No stress.
🚀 Try ServerAvatar Free – No Credit Card NeededTrusted by 10,000+ developers and growing.