
In today’s digital learning era, Learning Management Systems (LMS) have become essential tools for schools, universities, training institutes, and even businesses. Among the many LMS platforms available, Moodle stands out as one of the most popular, flexible, and widely used systems. However, running Moodle smoothly requires the right Moodle Hosting setup, something that many users find challenging.
With the right hosting environment, you can ensure that your online learning platform runs seamlessly, supports thousands of learners, and scales with your growth. In this article, we’ll walk you through everything you need to know about Moodle hosting, from its benefits and setup to how ServerAvatar makes deploying and managing Moodle easier than ever.
ServerAvatar is a platform to simplify the hosting and management of servers and applications. It simplifies the process of deploying and managing PHP and Node.js-based web applications on servers.
Moodle hosting refers to hosting services specifically optimized for running the Moodle LMS. Since Moodle is an open-source platform, you can technically install it on any server. However, a standard hosting setup may not provide the performance, security, or scalability that Moodle requires, especially when you have hundreds or thousands of active learners.
Why Choosing the Right Moodle Hosting Matters
Hosting isn’t just about keeping your website online, it’s about ensuring performance, reliability, and growth. If your Moodle site is slow or frequently down, learners may lose interest, and instructors will face frustration.
Some of the key reasons to invest in the right Moodle hosting include:
- Performance: Fast-loading pages ensure students can access courses without delays.
- Scalability: Hosting environment grow with your business.
- Security: Sensitive data such as student information, assignments, and grades remain protected.
- Ease of management: The less time you spend managing servers, the more you can focus on teaching and training.
If you want to deploy Moodle without dealing with complicated server management, ServerAvatar makes the process incredibly easy. It provides everything you need to launch, secure, and manage your LMS without requiring advanced technical knowledge.
Here’s how ServerAvatar stands out for Moodle hosting:
- Managed Servers: With Managed Servers, you don’t need a cloud provider account. You can directly deploy a server and Moodle application with a one-click installer from ServerAvatar’s dashboard.
- Self-Managed Server Addon: If you already have a VPS and want to connect your own server with ServerAvatar, you can easily connect your own servers from any cloud provider with ServerAvatar with the self-managed server add-on and deploy Moodle with a one-click application installer.
- One-Click Installer: Instead of going through lengthy installation steps, Moodle can be installed instantly with ServerAvatar’s one-click application installer option.
- Automatic SSL Installation: ServerAvatar provides free automatic SSL certificates with auto-renewal, ensuring that your Moodle site is always secure without manual intervention.
With these features, ServerAvatar eliminates the pain points of server and Moodle setup and gives you a stable and secure environment.
Step-by-Step: How to Deploy Moodle with ServerAvatar
Setting up Moodle manually can feel overwhelming, configuring servers, installing dependencies, and modifying settings isn’t easy, especially if you’re not a sysadmin. ServerAvatar solves this problem with ease.
With its one-click application installer, you can deploy Moodle on your server without worrying about complicated setup steps. All necessary configurations are handled automatically, so you can focus on customizing your LMS and creating impactful courses instead of troubleshooting server errors.
Deploying Moodle with ServerAvatar is simple and takes only a few steps:
Step 1: Deploy Your Server
- Navigate to the ‘Servers’ section from the left-hand sidebar, select your preferred cloud provider.
- This is the managed server hosting option to create a server directly with the ServerAvatar dashboard on top cloud provider account, such as DigitalOcean, Vultr, Hetzner, (Linode coming soon), without a cloud provider account.
- Fillup the required details as per your requirements.
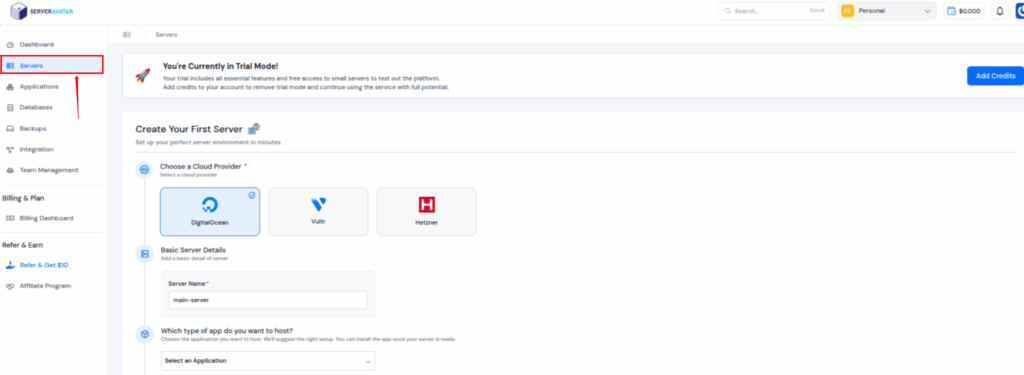
- Click on the ‘Deploy Server’ button.
- If you want to connect your own server to ServerAvatar from any cloud provider. You can do it by simply purchasing the Self-Managed server add-on.
- Navigate to the Billing Dashboard >> Self Managed servers section from the left-hand sidebar.
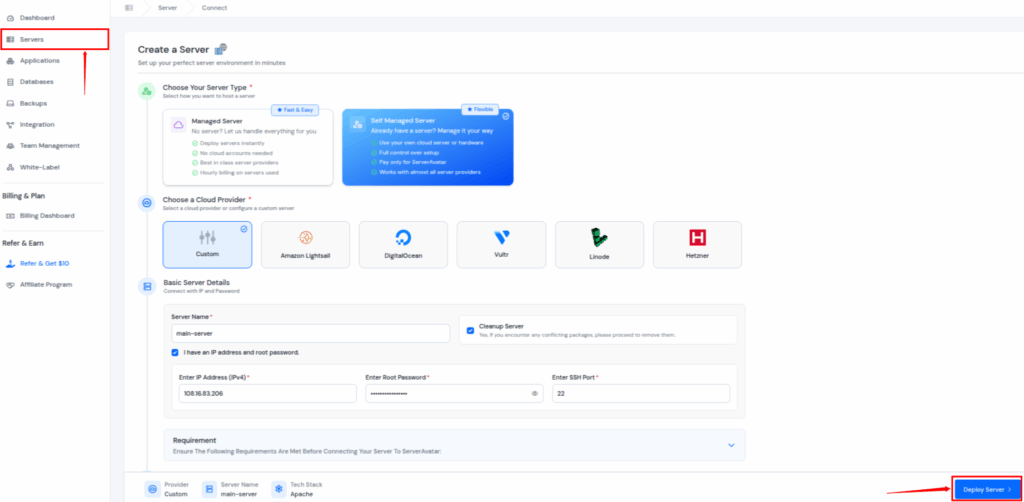
- After purchasing the add-on, you can connect your server to ServerAvatar by navigating to the Server section from the left-hand sidebar, and Create Server >> Self Managed Server.
- Select your preferred option and fill in the required details, and click on the Deploy Server button.
Step 2: Deploy Moodle with One-Click Application Installer
- Once your server is deployed, you can easily create a Moodle application using a one-click application installer.
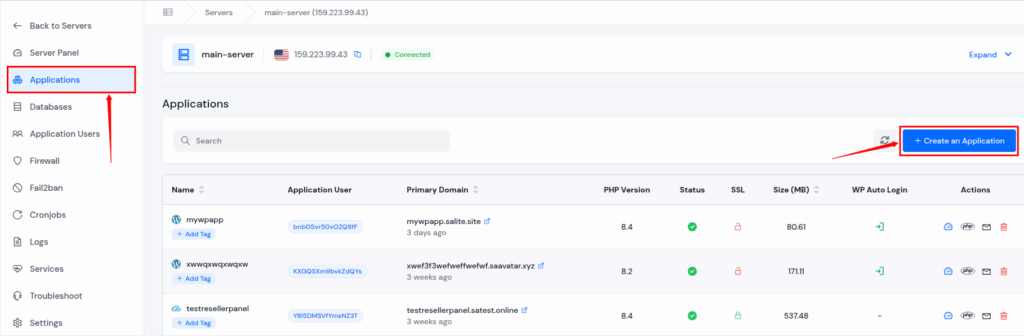
- Navigate to the server panel by clicking on the dashboard icon next to the server on which you want to create the Moodle application.
- Navigate to the Applications section from the left-hand sidebar, and click on the Create an Application button.
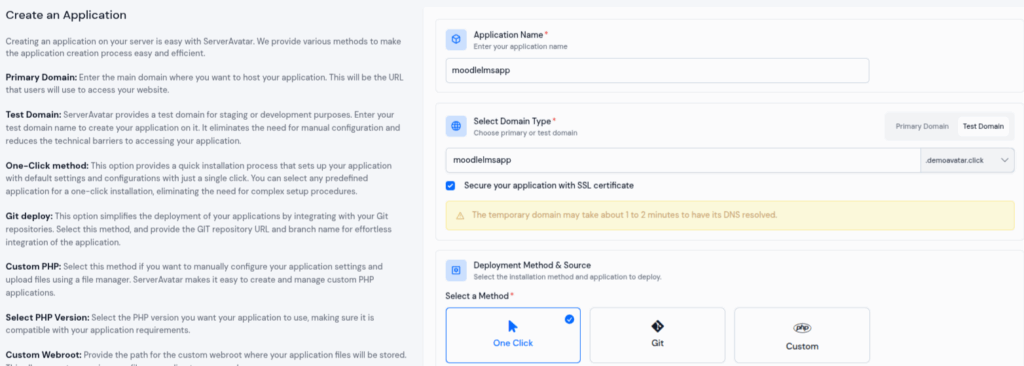
Fill out the form for creating the application:
- Enter your application name
- Select the domain from the primary and test domain (as ServerAvatar providing test domains to create application without your own domain)
- Enter the domain name
- You can unselect the checkbox of “Secure your application with SSL certificate”, to manually install the SSL Certificate later.
- By selecting the checkbox, the SSL Certificate will automatically be installed after the application gets installed.
- Select the method as “One Click”
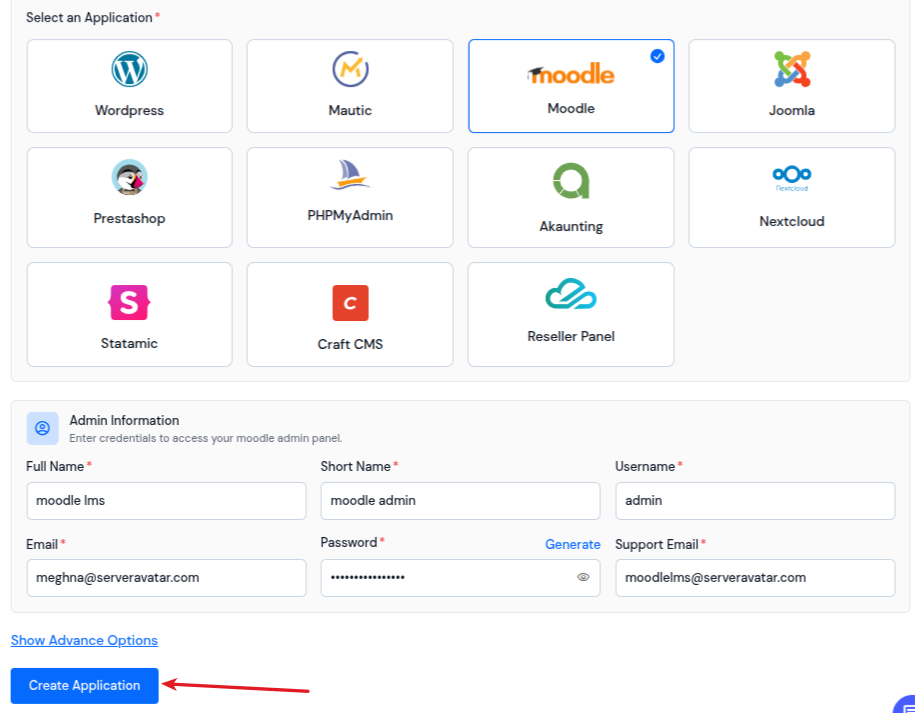
- Select the “Moodle” application from the given options.
- Fill out the application-related details, such as Full Name, Short Name, Username, Email, Password, etc.
- After filling out the details, click on the “Create Application” button.
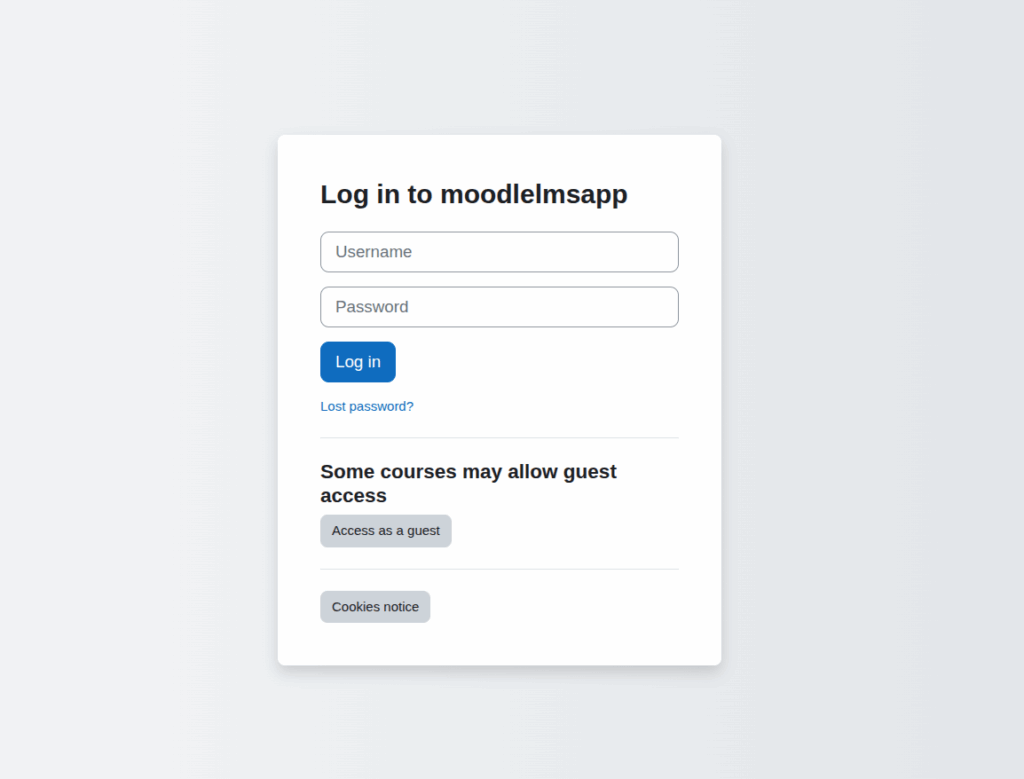
That’s it, your application is created successfully. You can check it by opening the application URL provided to you.
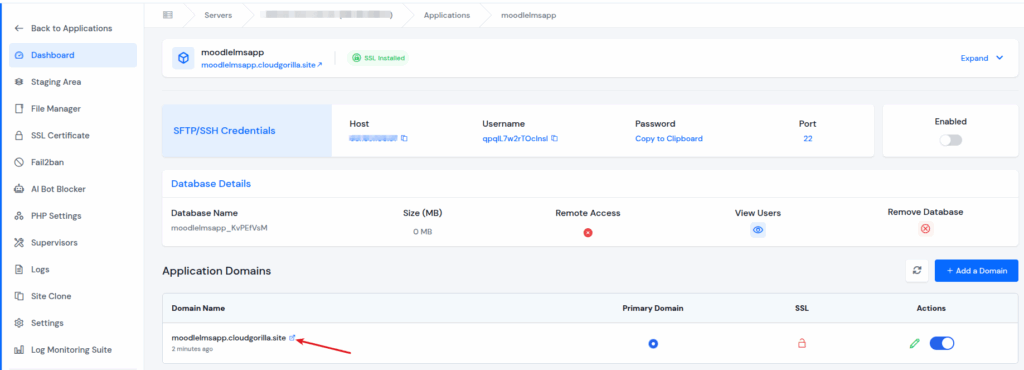
You can see the application home page, while opening the URL.
Step 3: Secure with an SSL Certificate:
- Once your application is installed, let’s secure it with SSL certificates. If you have already selected the checkbox of “Secure your application with SSL certificate” while creating the application, an SSL Certificate is automatically installed for your application.
- Let’s now see how to install an SSL Certificate for your application:
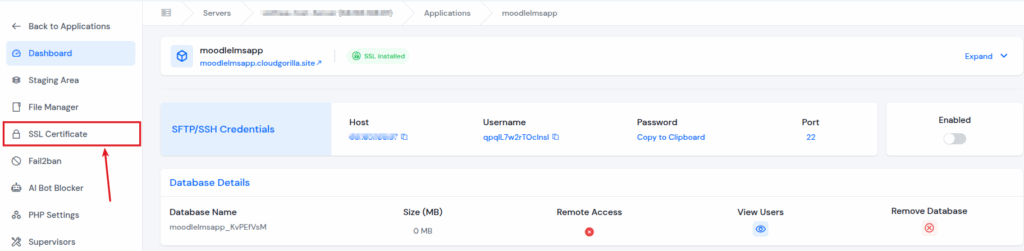
- Navigate to the application panel by clicking on the application dashboard icon next to your application name.
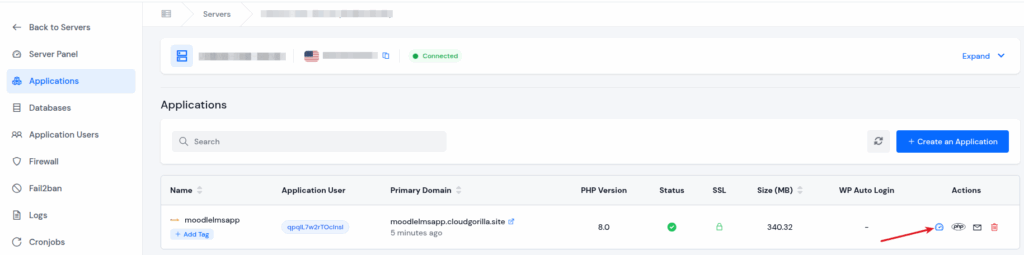
- Click on the SSL Certificate section from the left-hand side bar of the application panel.
- You will see two options to install SSL.
By clicking on the ‘Automatic Installation’ option, the SSL certificate will be automatically installed and auto-renewed, so there is no need to worry about installation or certificate renewal.
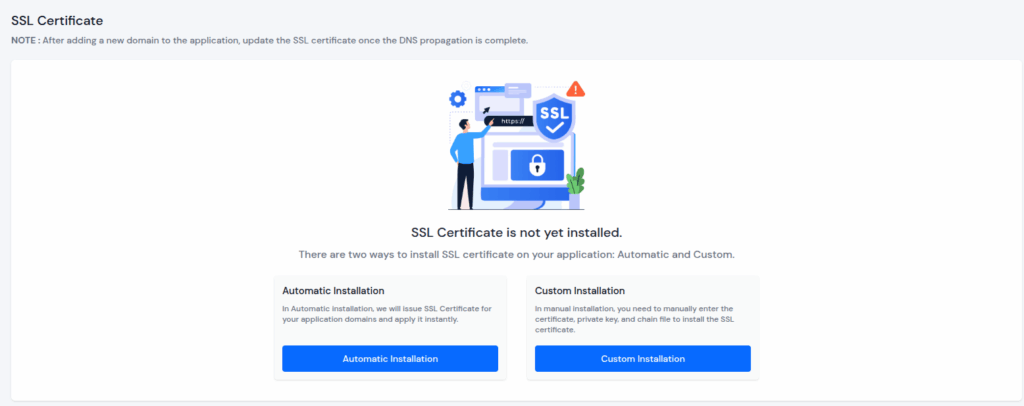
If you already have an SSL Certificate, you need to click on ‘Custom Installation‘, and enter the SSL Certificate, Private Key, and the Chain File that is optional, and your SSL Certificate will be installed.
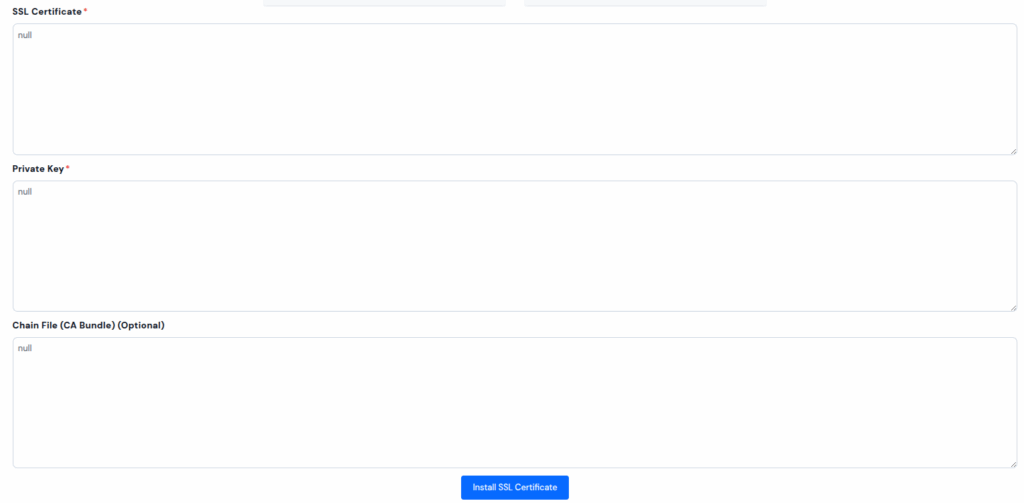
That’s it! Your Moodle application is ready with an SSL Certificate.

Benefits of Hosting Moodle with ServerAvatar
Here’s why ServerAvatar is the best platform for Moodle hosting:
- Time-Saving Deployment: No need to spend hours on configuring servers manually.
- Beginner-Friendly: Even if you don’t have technical expertise, you can manage everything easily with its user-friendly dashboard.
- Advanced Server Management: For users, features like log monitoring, cron job management, staging area, fail2ban, and file manager are available.
- Reliable Security: Automatic SSL, firewall, fail2ban, isolated environment, and security updates keep your server and application secure.
- Cost-Effective: It offers powerful hosting and management features at very affordable prices. By combining low-cost VPS with ServerAvatar, you get a fully managed setup for a fraction of traditional hosting costs.
Managed vs. Self-Managed Moodle Hosting
ServerAvatar gives you flexibility by offering both hosting models:
- Managed Servers: Perfect for those who don’t want to deal with a separate cloud provider. Everything from deployment to management is handled directly within ServerAvatar’s infrastructure.
If you don’t want the hassle of signing up with a cloud provider separately, ServerAvatar offers Managed Servers. These servers are provisioned and maintained directly by ServerAvatar, currently available with providers like DigitalOcean, Vultr, Hetzner (Linode coming soon). You simply choose your plan, and everything, from server provisioning to monitoring, is taken care of. - Self-Managed Server Addon: Ideal if you already have a VPS and want to connect it to ServerAvatar. This gives you more control and flexibility, while still enjoying all the automation and ease of use.
Already have a VPS with a provider of your choice? No problem! With the Self-Managed Add-On, you can connect your own server to ServerAvatar and enjoy the same powerful features, including one-click installations, monitoring, and automatic updates. This way, you retain full control over your infrastructure while benefiting from ServerAvatar’s management tools.
Both options allow you to run Moodle effortlessly.
Why Choose ServerAvatar for Moodle Hosting?
Here’s what makes ServerAvatar the perfect choice for your Moodle hosting:
- One-Click Moodle Installation: Skip the technical setup.
- Managed & Self-Managed server Options: Flexibility to fit your needs.
- Automatic SSL: Always keep your LMS secure.
- Performance Monitoring: Track server health and prevent downtime.
- User-Friendly Dashboard: Manage servers, applications, and databases without command-line struggles.
With ServerAvatar, you get the performance of a dedicated sysadmin, but without the extra cost and complexity.
FAQs
1. Do I need technical knowledge to host Moodle with ServerAvatar?
Not at all. With ServerAvatar’s one-click installer, you can deploy Moodle without any technical expertise. The platform takes care of all server configurations and setup steps for you.
2. Can I use my existing VPS to host Moodle with ServerAvatar?
Yes! With the Self-Managed Server Add-On, you can connect your existing VPS from any cloud provider to ServerAvatar and deploy Moodle easily.
3. What if I don’t want to create an account with a cloud provider?
You can go for Managed Servers offered by ServerAvatar. These allow you to create and manage a server directly from the ServerAvatar dashboard without needing a cloud provider account.
4. How secure is Moodle hosting on ServerAvatar?
ServerAvatar ensures reliable security with features like firewalls, automatic SSL, fail2ban, and isolated environments. Your Moodle site and student data remain protected at all times.
5. Is ServerAvatar cost-effective compared to traditional Moodle hosting?
Absolutely. By combining affordable VPS hosting with ServerAvatar’s management tools, you get a fully managed Moodle setup at a fraction of the cost of traditional hosting solutions.
Conclusion
Moodle hosting doesn’t have to be complicated. With ServerAvatar, you can skip the technical headaches and focus on what truly matters, creating an engaging and effective learning experience for your students. Whether you want the simplicity of Managed Servers or the flexibility of the Self-Managed Server Add-On, ServerAvatar has you covered. From one-click Moodle installation and automatic SSL certificates to advanced security and monitoring tools, everything is designed to make your LMS deployment smooth, secure, and cost-effective.
If you’re ready to take your Moodle platform to the next level, ServerAvatar is the ultimate solution for hassle-free hosting and management.