ServerAvatar has an automatic SSL setup installation or one-click SSL setup installation. When you click on “Automatic Installation” in the SSL section of the Application management panel, ServerAvatar will issue an SSL certificate for your website. It usually takes a minute to install an SSL certifciate this way.
ServerAvatar issues an SSL certificate for your site from Let’s Encrypt. It uses the file verification process. And it is a very stable solution. With a condition, If you are not using Cloudflare, or not using cloudflare with proxy.
For a Cloudflare user, This is an issue. The reason is, You can manage your SSL certificates in Cloudflare too. And all the traffic of your site passes through the cloudflare network. Where many things are already managed, like SSL and redirections.
For us, It was an issue because if a customer is using proxy, The domain did not resolve to the server’s IP address. That was solved with integrations.
The major issue was, If you are using Full or Full Strict SSL in Cloudflare, It will communicate with the server on HTTPS protocol only. The result of this was failed SSL certificate issues and renewals.
But It’s not the case anymore!
There is a simple solution for this problem. This solution allows you to:
- Use Cloudflare Proxy
- No Automatic Renewal issues
- Use Full or Full Strict SSL
Or all at the same time. It allows you to use all the features and protection of Cloudflare with full potential. It is actualy a better and more stable solution.
If you are using Cloudflare, You can simply follow the steps given below. I recommend that.
Step 1: Generate SSL Certificate for Origin Server
The first step is to generate an SSL certificate for the actual server that hosts your site (Origin server). Cloudflare knows and trusts this certificate. After installing this SSL certificate, Cloudflare can communicate securely with the origin server over HTTPS protocol.
And, This SSL certificate usually has a long expiry date. Let’s say 15 years.
It means that there will be no SSL certificate renewal event happening for 15 years on your server. In case if you are using a Let’s encrypt certificate, You have to renew the SSL certificate every 3 months.
If you are a ServerAvatar user, ServerAvatar manages SSL renewals for you automatically. It’s still a problem if you are using Automatic SSL Setup installation with Cloudflare SSL due to the conflicts.
Let’s see how to create an SSL certificate for origin Server.
Step 1: Login to your Cloudflare Dashboard.
Step 2: Click on the site name for which you want to create an SSL certificate.
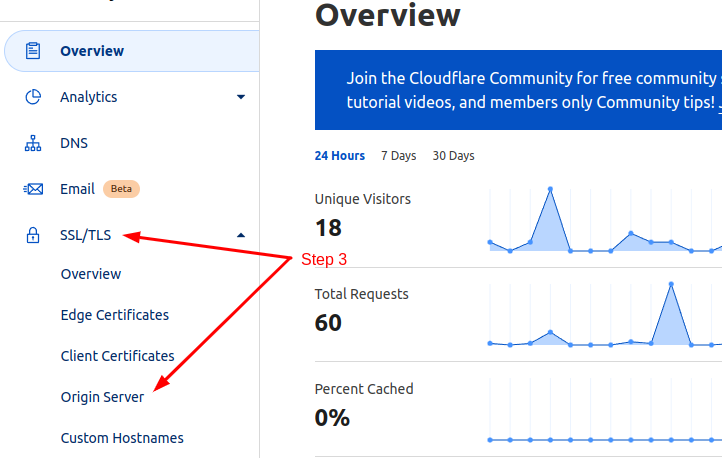
Step 3: In the left sidebar, find SSL/TLS -> Origin Server option and click on it.
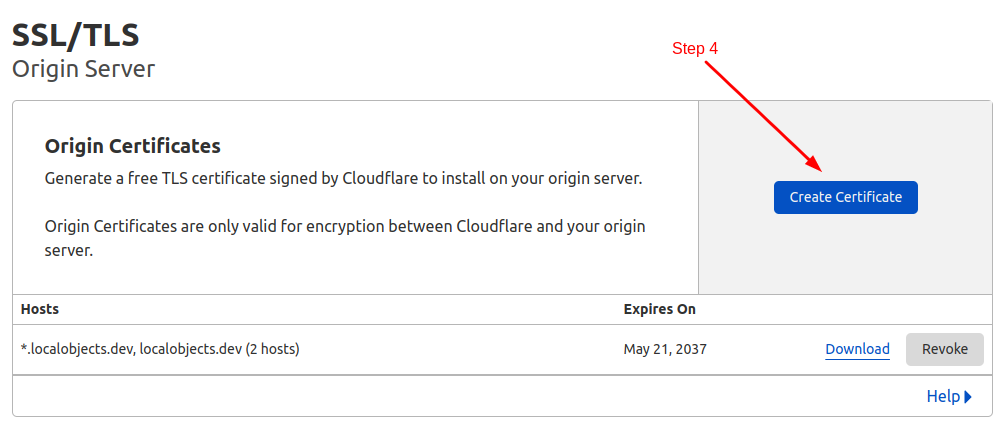
Step 4: In the “Origin Certificates” section, Find Create Certificate button and click.
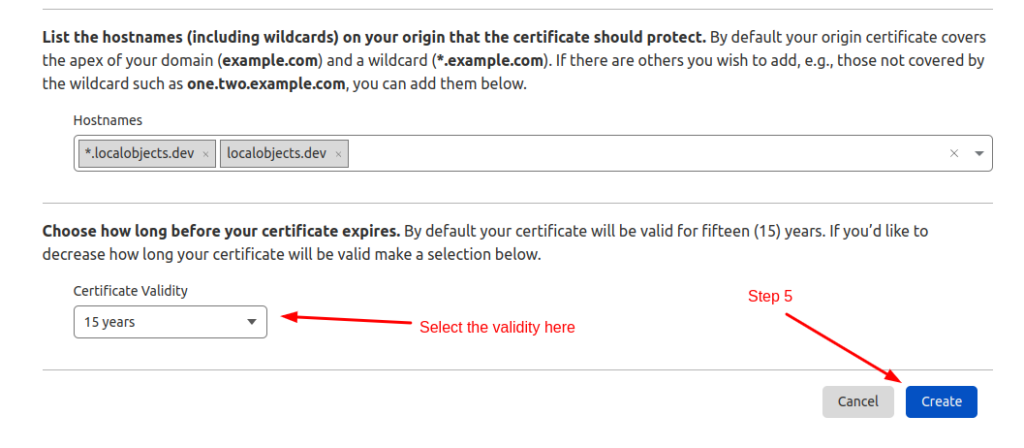
Step 5: Select the details and click on the Create button.
It will instantly create an SSL certificate for the origin server. It will provide you the SSL certificate and the private key.
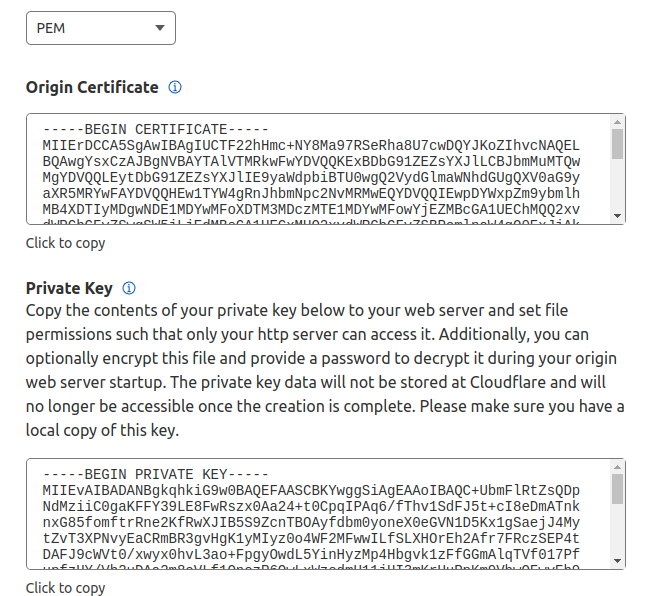
Save both, We will install it on ServerAvatar.
Note: Cloudflare allows you to select certificate validity from 7 days to 15 years. Once expired, You would have to update certificate files manually
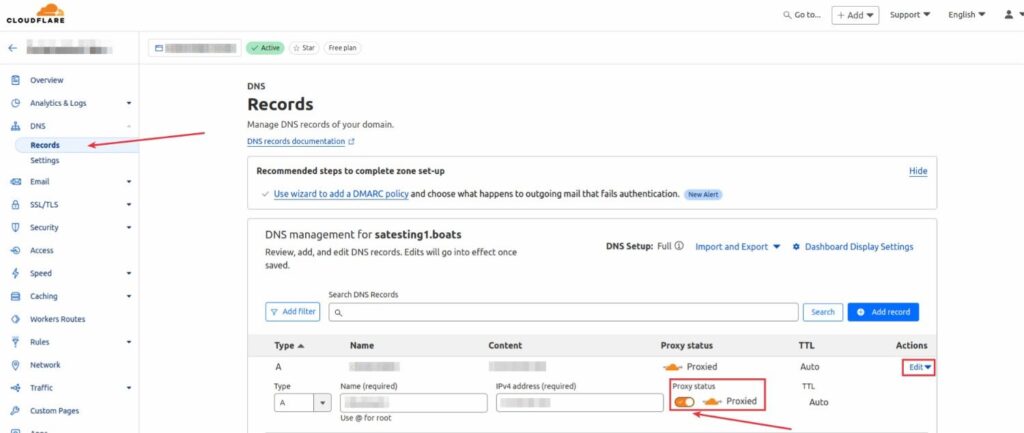
Domain DNS proxy should be enabled if you are using cloudflare SSL
Follow the steps below to enable Domain DNS proxy:
Step 1: Login to your CloudFlare account, select your domain and navigate to the Records option in DNS section.
Step 2: Click on Edit and enable the Proxy status for your Domain as shown in the image below.
SSL/TLS encryption mode should be FULL OR FULL-strict:
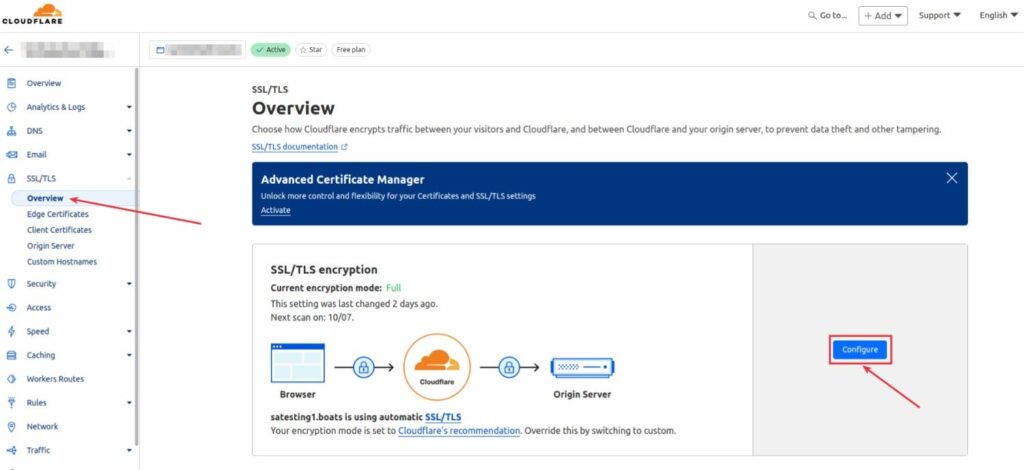
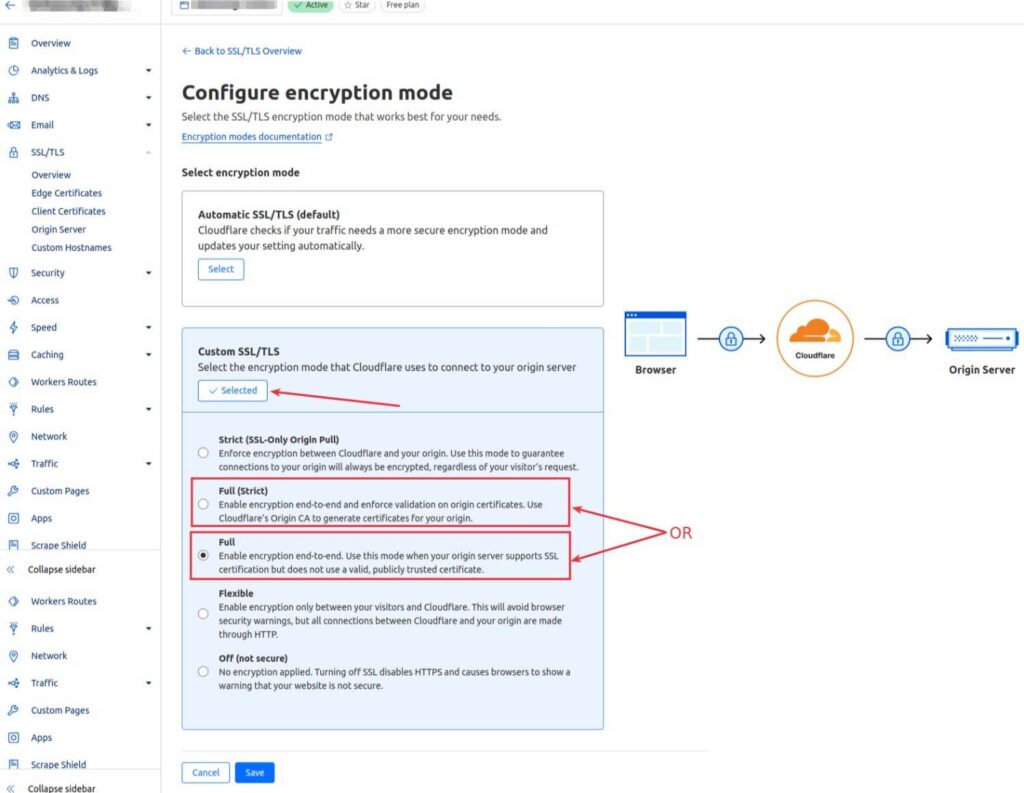
By following the steps below, you can select the SSL/TLS encryption mode as FULL OR FULL-Strict that Cloudflare uses to connect to your origin server.
Step 1: Select the Overview option in the SSL/TLS Section and click on the Configure option as shown in the image.
Step 2: After navigating to the Configure option, click on the Select button under the Custom SSL/TLS and select the SSL/TLS encryption mode that best suits your needs, either Full or Full (Strict).
Step 3: Click on Save.
Step 2: Update SSL Certificate in ServerAvatar
With the automatic installation, ServerAvatar also allows you to install a custom SSL certificate. So, If you have an SSL certificate from any other reputed company, You can use the same method.
Step 1: Access the application list. You can access the global list from dashboard or from the server panel.
Step 2: Click on the application name to navigate to the application dashboard.

Step 3: Find and click on the “SSL Certificate” section from the left sidebar.
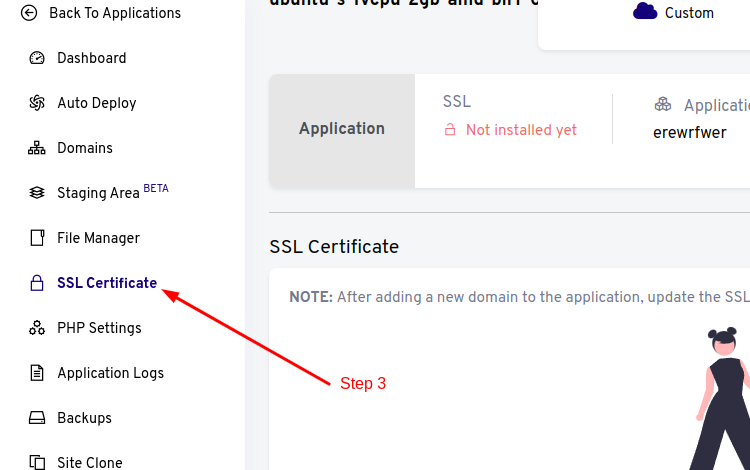
Step 4: If you currently have Automatic SSL setup installed, Uninstall it.
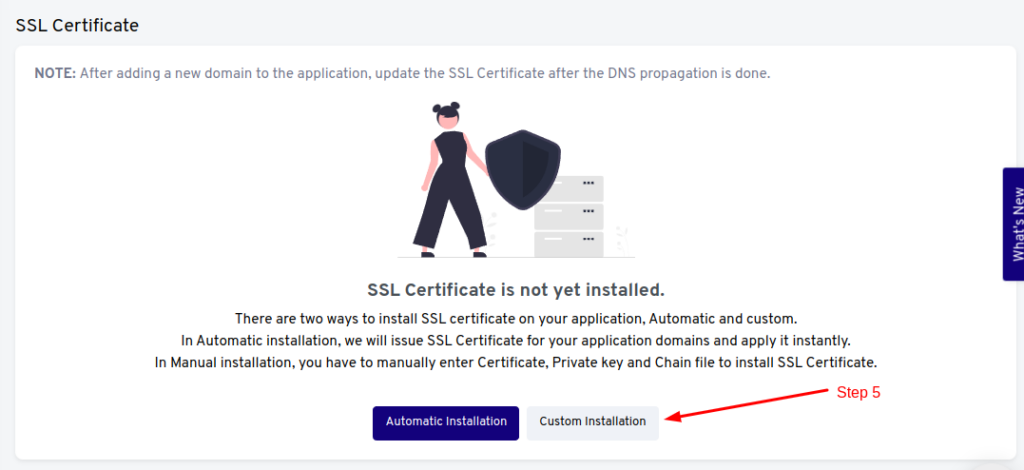
Step 5:Click on the “Custom Installation” to set up a custom SSL certificate with SSL Setup..
Step 6: Fill up the Certificate file content and Private key content in the form.
Step 7: Click on the Install SSL Certificate button.
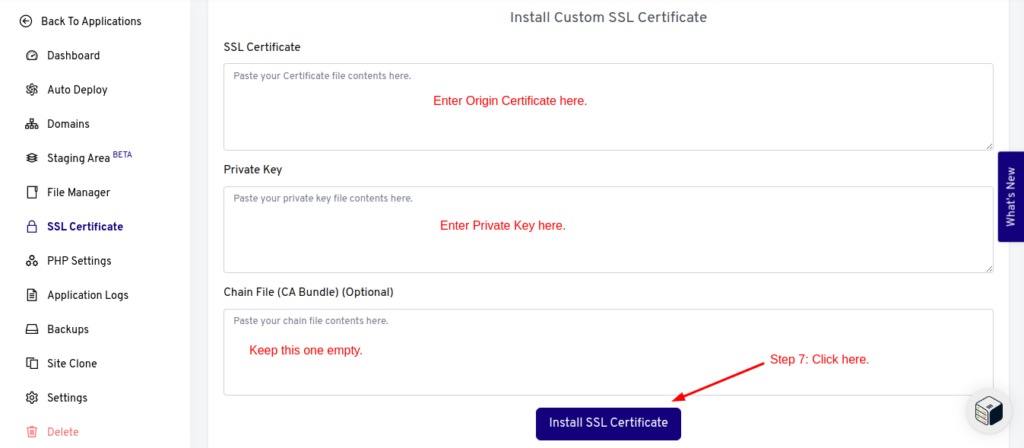
It will instantly install the Cloudflare SSL certificate for you and complete your SSL Setup. That’s all!
Now you can go crazy over the Cloudflare features without worrying about any instability on the server side. There will be no 3-month renewal processes running on your server. If you have 5 websites on a server, The risk of downtime for all those 5 sites goes down drastically with this method because there are less volatile actions happening on the server.
I recommend you to follow this method if you are using Cloudflare.
