Running an online store can feel a lot like managing a busy supermarket, customers walk in, browse products, and head to checkout. If your store rebuilds the “aisle” every time someone looks at a product, pages slow down, and customers leave. WooCommerce caching helps avoid that by saving ready-made versions of pages so visitors see them instantly.
The result? Faster pages, happier customers, and better SEO.
In this guide, you’ll learn exactly how to set up WooCommerce caching in WordPress, step by step.
What is Caching?
Caching is like keeping a shortcut to your favorite website pages. Instead of rebuilding a page from scratch every time someone visits, caching saves a ready-made version that loads instantly. Caching stores temporary copies of your webpages, images, scripts, or database results. When a visitor returns or visits another page, the cached version loads instead of forcing WordPress to do all the heavy lifting again.
It reduces the workload, speeds things up, and keeps everything running smoothly. For sites like WooCommerce that handle product pages, categories, and images, caching becomes a powerful tool to improve speed, user experience, and conversions.
Introduction to WooCommerce Caching
If you’ve ever wondered why your store slows down as you add more products, customers, or plugins, caching is the missing puzzle piece. WooCommerce runs database-heavy operations, and caching helps lighten the load. In this article, we’ll break down exactly how to set it up properly.
How WooCommerceCaching Works in WordPress
Caching is like taking a picture of your webpage and showing that picture to visitors instead of rebuilding the page each time.
Here’s what caching reduces:
Database queries
PHP execution
Server processing time
In short, your store feels quicker and more responsive, even during high-traffic moments. Caching essentially removes the repeated heavy lifting from WordPress by serving pre-built pages, making your store more responsive even during peak hours.
Why WooCommerceCaching Is Tricky
Unlike a regular blog, an eCommerce website deals with constantly changing information such as:
Cart totals
Inventory updates
Dynamic user sessions
Personalized content
If caching is done incorrectly, customers may see:
Old cart contents
Incorrect stock levels
Outdated pricing
That’s why WooCommerce caching requires special rules.
Types of Caching You Need for WooCommerce
To optimize your store fully, focus on four major caching layers:
1. Page Caching Page caching saves pre-generated HTML versions of your pages, making product, category, and blog pages load significantly faster.
2. Object Caching Object caching stores frequent database query results, improving dynamic processes like cart updates, filters, and stock checks.
3. Browser Caching Browser caching allows a user’s device to store images, CSS, JS, and fonts locally so they load instantly on repeat visits.
4. CDN Caching A CDN stores your static assets (images, CSS, JS) on global servers, delivering them from the location closest to each visitor.
Each layer contributes to a smoother shopping experience.
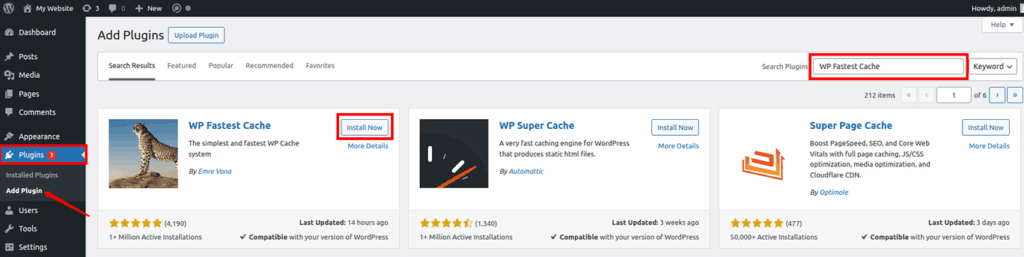
Choosing the Right WooCommerce Caching Plugin
Not all caching plugins are WooCommerce-friendly. The best ones are:
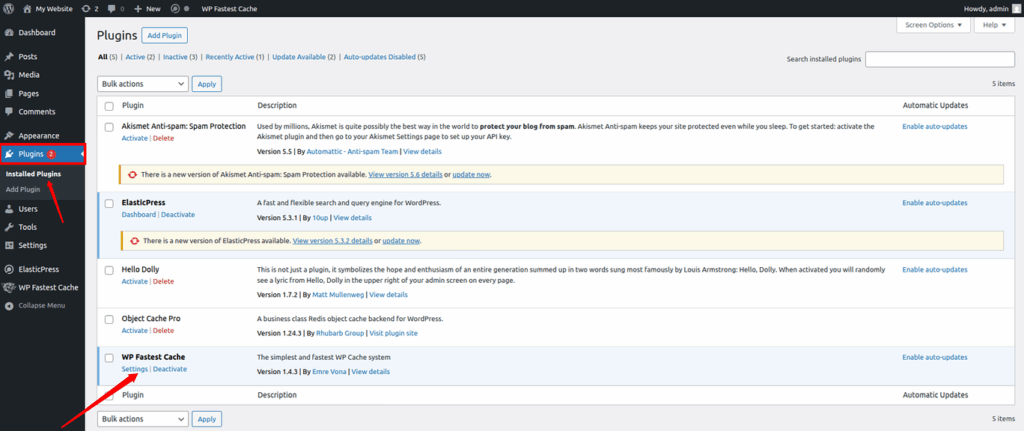
1. WP Fastest Cache WP Fastest Cache is a lightweight and easy-to-use caching plugin known for its simplicity and effectiveness. It supports minification, browser caching, and automatic cache clearing for WooCommerce pages. It’s a great choice if you want a fast setup without sacrificing performance.
2. LiteSpeed Cache LiteSpeed Cache is a free, powerful caching plugin designed to work best on LiteSpeed servers. It offers advanced features like image optimization, QUIC.cloud CDN, and WooCommerce-aware caching rules.
3. W3 Total Cache W3 Total Cache is a highly flexible plugin with every type of caching option you can think of. It’s powerful but requires proper configuration, making it better suited for experienced users.
4. WP Super Cache WP Super Cache is simple, stable, and ideal for beginners. It generates static HTML files for your site and serves them quickly to users, helping improve performance with minimal setup.
Choose a plugin based on your hosting environment and comfort level.
How to Install WordPress for a WooCommerce Store
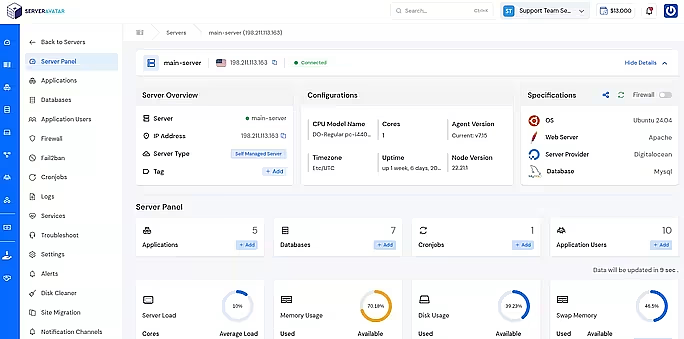
If you’re planning to run a WooCommerce store without any hassles, the first step is setting up WordPress on a reliable server. ServerAvatar makes this process incredibly smooth, even if you’re not very technical. It takes care of the heavy lifting, so you can focus on building your affiliate sites rather than fighting with server commands.
What is ServerAvatar?
ServerAvatar is a platform to simplify the hosting and management of servers and applications. It simplifies the process of deploying and managing PHP and Node.js based web applications on servers.
You can easily set up WordPress in just a few minutes using ServerAvatar’s one-click application installer. With ServerAvatar’s one-click application installer, you can easily install WordPress, Mautic, N8N, Uptime Kuma, and many more popular applications within a few minutes.
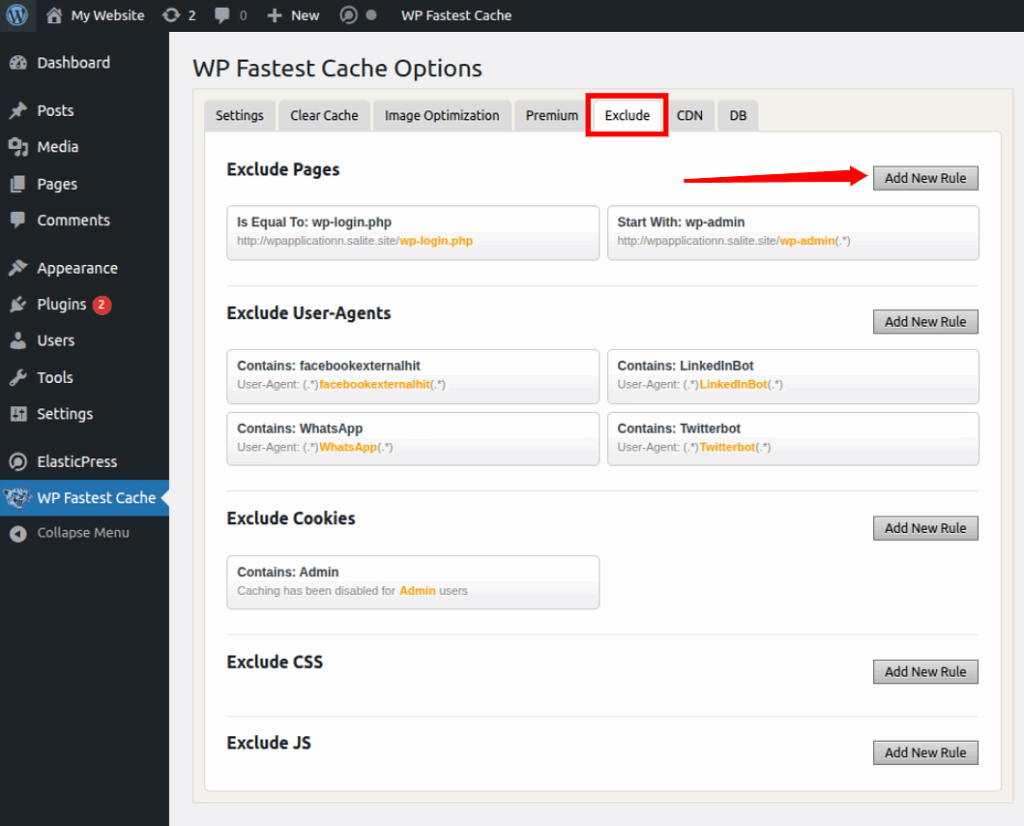
From the Exclude pages section, click on the Add New Rule, and add these paths to the Exclude Pages list.
/cart/
/checkout/
/my-account/
(If you use language subfolders, add variants, e.g., /en/cart/)
Save changes.
Why: These pages change per user. Caching them can break checkout or show outdated cart totals.
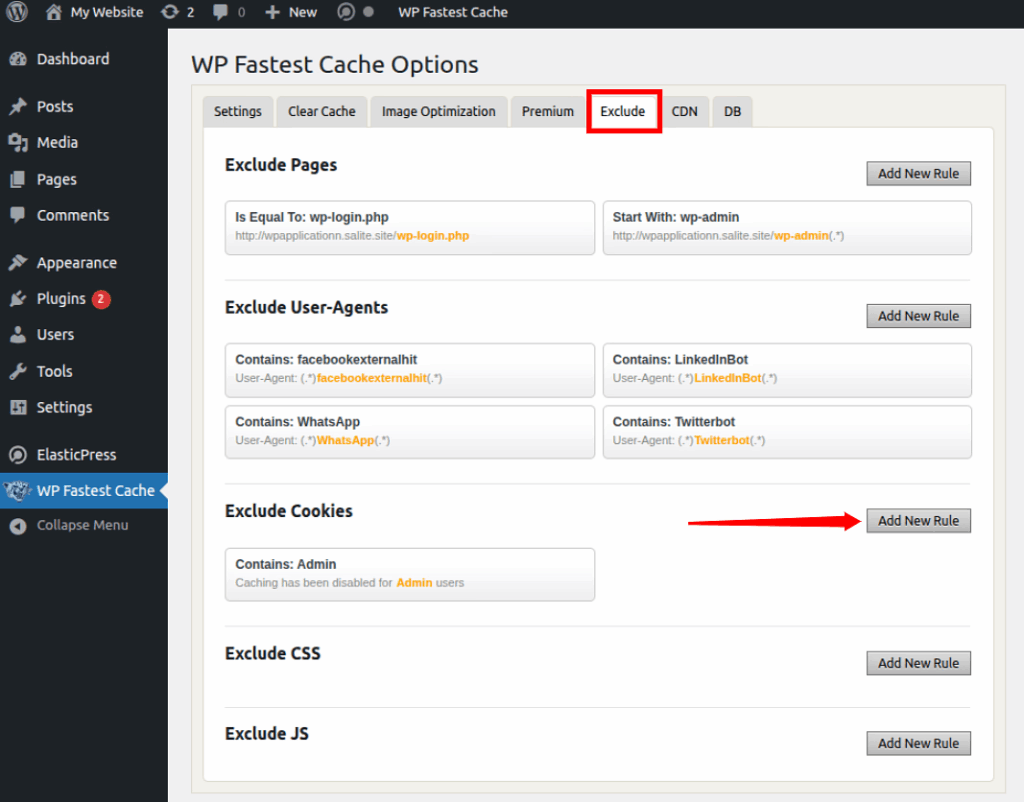
5. Exclude WooCommerce cookies & query strings
From the Exclude Cookies section, click on the Add New Rule, and add the cookies mentioned below:
woocommerce_items_in_cart
woocommerce_cart_hash
wp_woocommerce_session_
Why: These cookies indicate user-specific cart/session data and must not be cached.
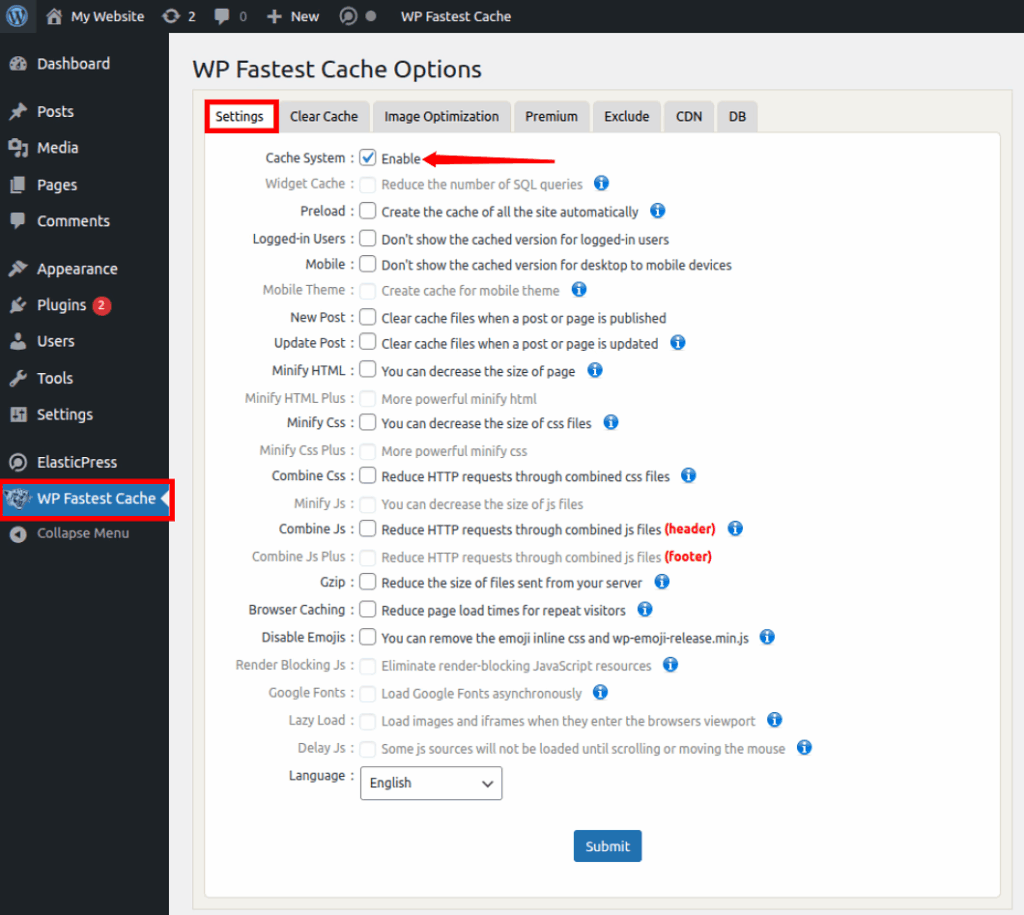
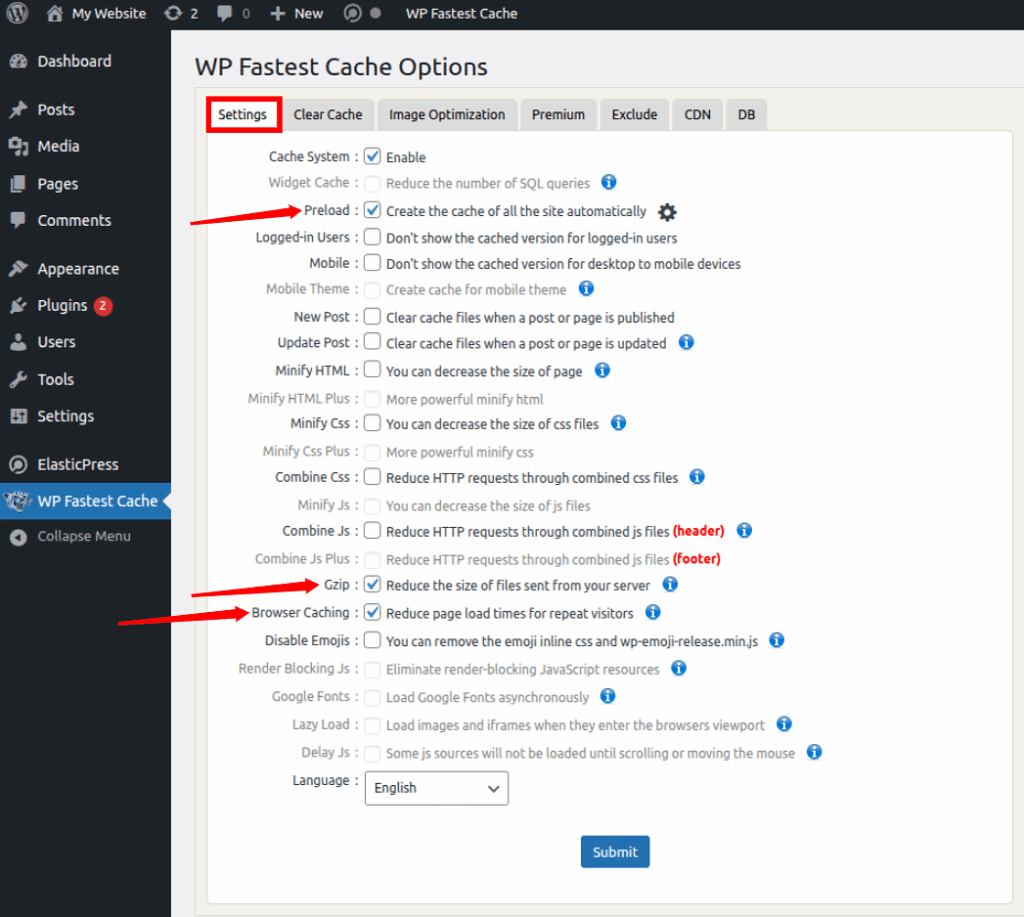
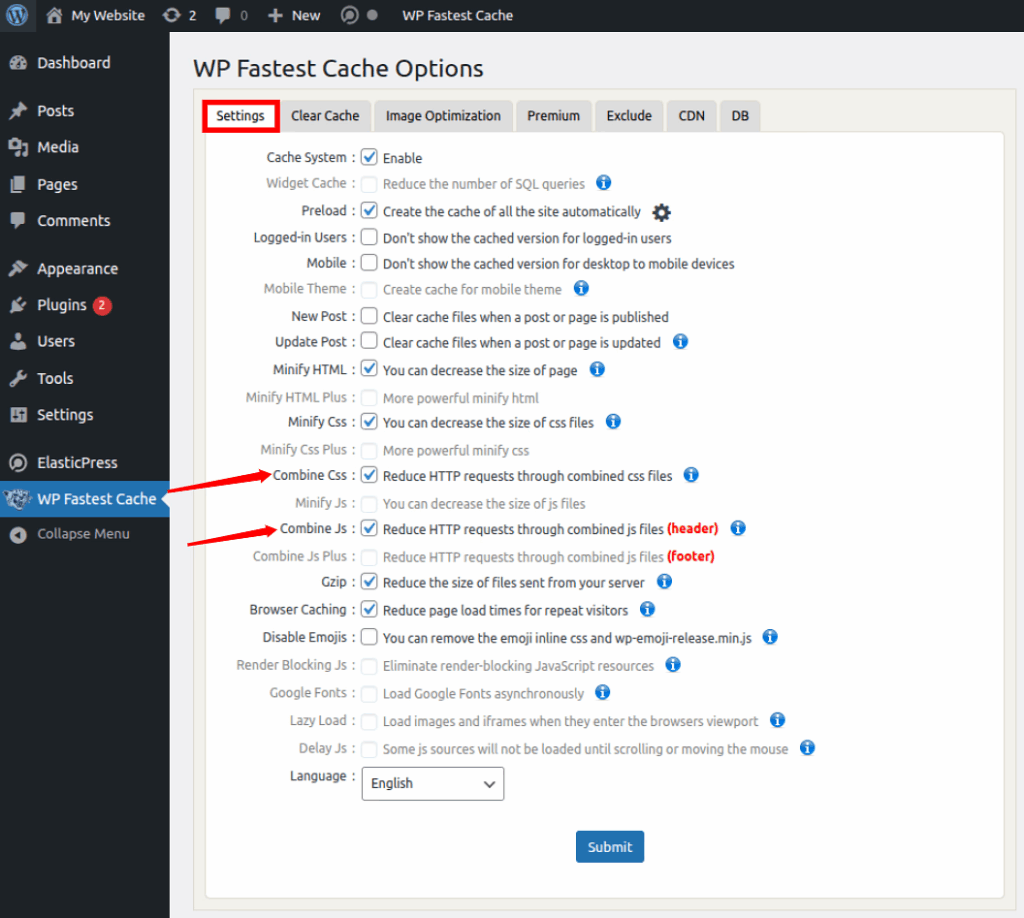
6. Enable Browser Caching
WP Fastest Cache adds cache headers automatically in .htaccess. On the Settings tab, enable:
Preload: helps warm the cache.
Gzip Compression: reduces file sizes.
Browser Caching: toggle it ON.
Click on the Submit Button.
Why: Returning visitors load images and CSS instantly from their browser.
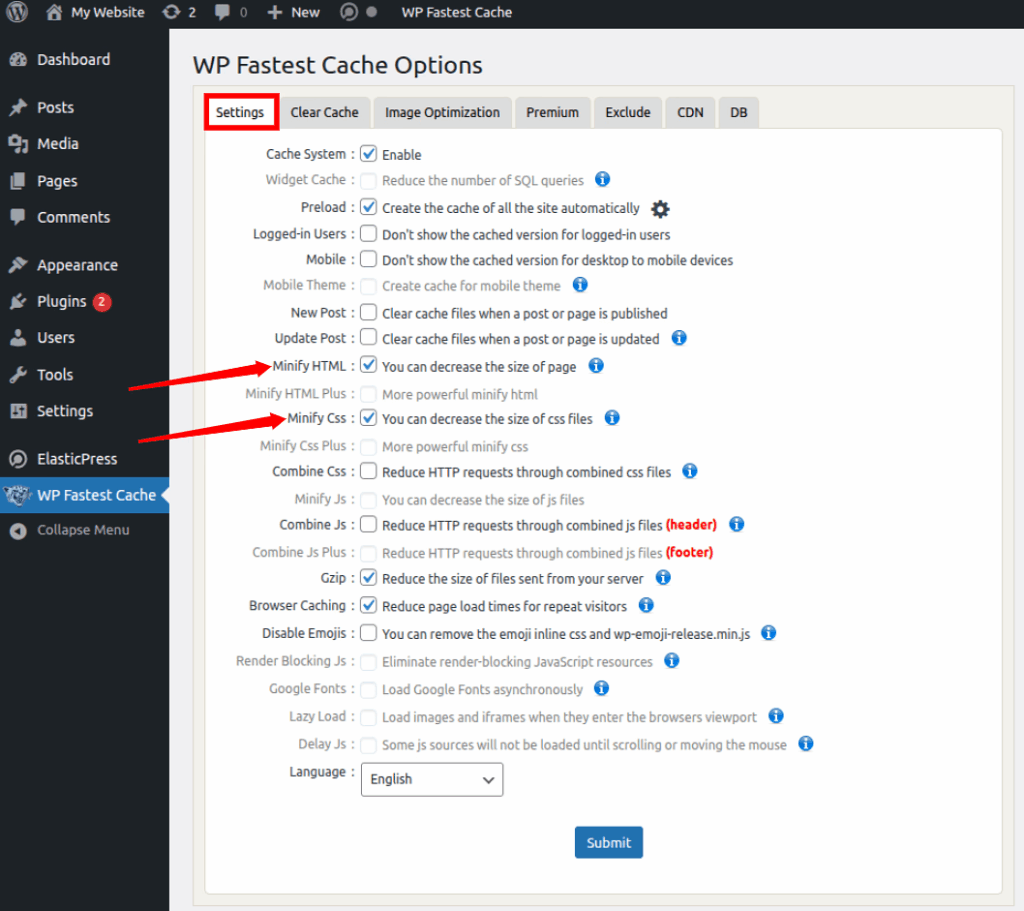
7. Enable Minify / Combine (careful)
Go to the Settings section.
If you want to minify CSS and JS, turn on:
Minify HTML (safe)
Minify CSS (test site after enabling)
Use Combine CSS/JS only if your theme works well, test after enabling.
Tip: If something breaks, disable minification and re-enable one-by-one.
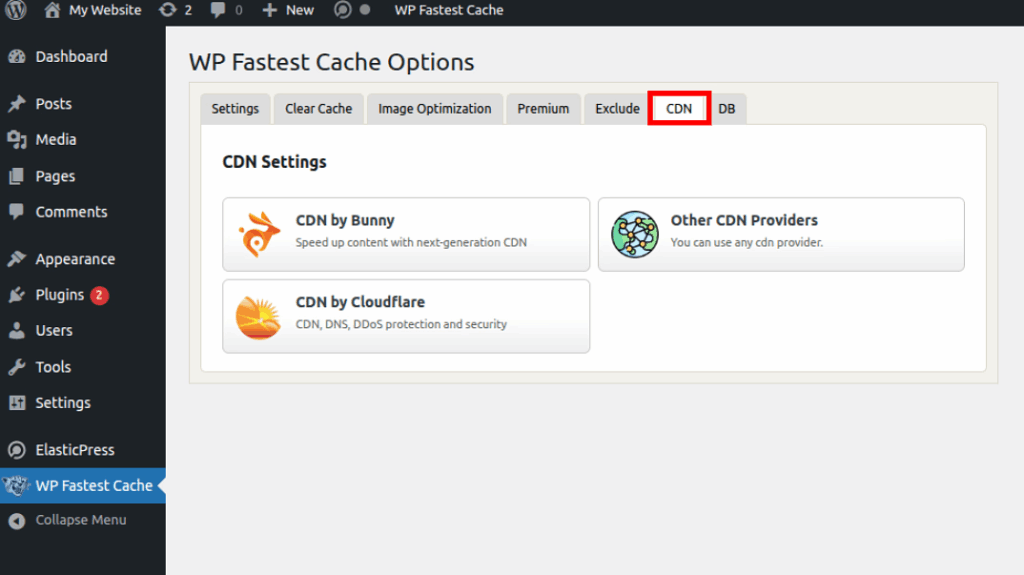
8. CDN Integration (optional)
If using Cloudflare, BunnyCDN, KeyCDN:
WP Fastest Cache supports CDN integration.
If you are using a CDN (Cloudflare, BunnyCDN, KeyCDN), enter the required CDN details and enable Replace site’s static files with CDN URL.
Please note it is completely optional.
You can use the official Cloudflare plugin or API for auto-cache purging.
9. Object Caching (Redis – external step)
WP Fastest Cache free version does not provide object caching, set up Redis via your host or use the Redis Object Cache plugin separately.
Steps (high level):
Confirm host supports Redis.
Install Redis Object Cache plugin.
Connect and enable object cache from the plugin.
Why: It significantly speeds up product lookups, filters, stock updates, and dynamic WooCommerce actions.
10. Test the important flows
Use a private/incognito window and test:
Load a product page (should load fast).
Add to cart, the cart should update immediately.
Go to checkout and complete a test order (or preview payment page).
Run speed checks (GTmetrix / PageSpeed).
If you see stale data, click Delete Cache and re-test.
ServerAvatar: The Easy Way to Speed Up Your WooCommerce Store
If you’re running WooCommerce on a VPS, you already know how tricky server management can get. Caching, PHP settings, database tweaks, it’s a lot, right? That’s exactly where ServerAvatar makes life easier.
ServerAvatar takes care of all the heavy lifting for you. It sets up performance-boosting features automatically, like Redis caching, and server-level optimizations that WooCommerce really needs. No technical skills required.
With ServerAvatar, you get:
Set up Redis at the server level
Automatic server performance
Real-time monitoring
Easy PHP settings
Automatic and free SSL setup
Built-in monitoring and logs
A clean file manager editor
In short, ServerAvatar helps your WooCommerce store load faster, run smoother, and stay stable, even during high-traffic moments, without you having to understand the complex technical side of servers.
Troubleshooting Common WooCommerce Caching Issues
1. Mini-cart not updating?
Make sure /cart/ and /checkout/ are excluded
Clear cache
2. Site breaks after minification?
Turn off CSS/JS minification
Enable one by one to find the issue
3. Images/layout break?
Disable Lazy Load
Check theme compatibility
Common WooCommerce Caching Mistakes to Avoid
Even small mistakes can break WooCommerce functionality.
Best Practices for WooCommerce CachingOptimization
A fast WooCommerce site needs more than caching.
Choose fast hosting (NVMe or SSD servers)
Avoid heavy or bloated plugins
Use WebP images
Clean your database weekly
Monitor performance regularly
Quick Tips
Always back up your site before major performance changes.
Make changes on a staging site if possible.
After plugin updates or theme changes, clear the cache and re-test.
Use a combination of plugin tools and external checks (PageSpeed, GTmetrix) for accurate testing.
FAQs
1. Should I cache the WooCommerce cart and checkout pages?
No. These pages must never be cached because they contain dynamic and user-specific data. Caching them can break the checkout process and show outdated cart items.
2. Do I need a CDN for WooCommerce caching?
A CDN isn’t mandatory but highly recommended. It speeds up delivery of images, CSS, and JS files globally. Cloudflare, BunnyCDN, and KeyCDN work great with WooCommerce.
3. Does caching affect stock updates or product prices?
Not if configured correctly. Make sure dynamic pages (cart, checkout, account) and WooCommerce cookies are excluded. Also enable object caching like Redis for accurate stock and session handling.
4. Is WP Fastest Cache enough for WooCommerce?
Yes, especially for beginners. It handles page caching, browser caching, Gzip, and exclusions very well. For advanced sites, you can pair it with Redis for object caching.
5. How do I know if caching is working correctly?
Test your store in incognito mode. Check if product pages load instantly, cart updates correctly, and checkout works smoothly. Also run a speed test on GTmetrix or PageSpeed Insights.
Conclusion
Speed is everything when it comes to running a successful WooCommerce store. With so many dynamic elements, cart updates, stock changes, and personalized user sessions, your site needs a smart caching setup that accelerates performance without breaking essential functions. By using the right caching plugin, excluding sensitive WooCommerce pages, enabling browser caching, and combining it with object caching like Redis, you can dramatically boost your site’s speed, user experience, and conversions.
Pair this with a well-optimized server using tools like ServerAvatar, and your WooCommerce store will feel smoother, load faster, and stay stable even during traffic spikes. Follow the steps in this guide, test each feature, and your store will be ready to deliver a lightning-fast shopping experience.
Deploy your first application in 10 minutes, Risk Free!
Learn how ServerAvatar simplifies server management with intuitive dashboards and automated processes.